rhel 6.9环境
目标 linux / centos / redhat系统 同时安装oracle 10.2.0.4 和11.2.0.4
tip1:使用不同用户安装
tip2: 10.2.0.4通过安装10.2.0.1,打补丁升级
tip3: 11.2.0.4 安装包可以直接安装11.2.0.4版本,也可在已安装了11.2.0.1的基础上升级 (选项 升级/安装)
tip4: oracle 10 版本 oracle已关闭下载,可尝试使用迅雷下载之前的oracle官方链接。
rhel7 系关闭防火墙


systemctl disable firewalld.service
systemctl stop firewalld
swap扩容
swap扩容

dd if=/dev/zero of=/var/swapfile bs=1M count=15024

mkswap /var/swapfile
swapon /var/swapfile
vi /etc/fstab
mount -a
/var/swapfile          swap   swap  defaults 0 0
rhel yum更换
rpm -qa|grep yum|xargs rpm -e --nodeps
rpm -qa | grep subscription-manager-* | xargs rpm -e

wget -c http://mirrors.163.com/centos/6/os/x86_64/Packages/yum-3.2.29-81.el6.centos.noarch.rpm
wget -c http://mirrors.163.com/centos/6/os/x86_64/Packages/yum-metadata-parser-1.1.2-16.el6.x86_64.rpm
wget -c http://mirrors.163.com/centos/6/os/x86_64/Packages/python-iniparse-0.3.1-2.1.el6.noarch.rpm
wget -c http://mirrors.163.com/centos/6/os/x86_64/Packages/yum-plugin-fastestmirror-1.1.30-41.el6.noarch.rpm


rpm -ivh python-iniparse-0.3.1-2.1.el6.noarch.rpm
rpm -ivh yum-metadata-parser-1.1.2-16.el6.x86_64.rpm
rpm -ivh yum-3.2.29-81.el6.centos.noarch.rpm yum-plugin-fastestmirror-1.1.30-41.el6.noarch.rpm

cd /etc/yum.repos.d/
mkdir ori
mv rhel-source.repo ori/
wget -c http://mirrors.163.com/.help/CentOS6-Base-163.repo
sed -i 's/$releasever/6.9/g' CentOS6-Base-163.repo
sed -i 's/$basearch/x86_64/g' CentOS6-Base-163.repo
yum clean all
yum makecache
10g
图形测试
yum install xclock
依赖包
yum -y install binutilscompat-libstdc++-33 compat-libstdc++-33.i686 elfutils-libelfelfutils-libelf-devel gcc gcc-c++ glibc glibc.i686 glibc-common glibc-develglibc-devel.i686 glibc-headers ksh libaio libaio.i686 libaio-devellibaio-devel.i686 libgcc libgcc.i686 libstdc++ libstdc++.i686 libstdc++-develmake sysstat

yum install libXp libXt.i686 libXtst.i686
yum -y install automake
yum -y install binutils-devel
yum -y install bison
yum -y install cpp
yum -y install dos2unix
yum -y install ftp
yum -y install gcc
yum -y install gcc-c++
yum -y install lrzsz
yum -y install python-devel
yum -y install compat-db
yum -y install compat-db42
yum -y install compat-db43
yum -y install compat-gcc-34
yum -y install compat-gcc-34-c++
yum -y install compatlibstdc++-33
yum -y install glibc-*
yum -y install glibc-*.i686
yum -y install libXpm-*.i686
yum -y install libXp.so.6
yum -y install libXt.so.6
yum -y install libXtst.so.6
yum -y install libgcc_s.so.1
yum -y install ksh
yum -y install libXp
yum -y install libaio-devel
yum -y install numactl
yum -y install numactl-devel
yum -y install unixODBC
yum -y install glibc-devel.i686
yum install compat-libstdc*
11g
yum install -y binutils* compat-libstdc* elfutils-libelf* gcc* glibc* ksh* libaio* libgcc* libstdc* make* sysstat* libXp* glibc-kernheaders
yum -y install binutils compat-libcap1 compat-libstdc++-33 compat-libstdc++-33*.i686 elfutils-libelf-devel gcc gcc-c++ glibc*.i686 glibc glibc-devel glibc-devel*.i686 pdksh libgcc*.i686 libgcc libstdc++ libstdc++*.i686 libstdc++-devel libstdc++-devel*.i686 libaio libaio*.i686 libaio-devel libaio-devel*.i686 make sysstat unixODBC unixODBC*.i686 unixODBC-devel unixODBCdevel*.i686 libXp
sysctrl.conf
#### need by oracle

kernel.shmmni= 4096
kernel.sem= 250 32000 100 128
#net.ipv4.ip_local_port_range= 1024 65000
net.ipv4.ip_local_port_range= 9000 65000
net.core.rmem_default=4194304
net.core.rmem_max=4194304
net.core.wmem_default=262144
net.core.wmem_max=1048586


# need by 11g
fs.file-max = 6815744
fs.aio-max-nr = 1048576
vi /etc/security/limits.conf
oracle10g soft nproc 2047
oracle10g hard nproc 16384
oracle10g soft nofile 1024
oracle10g hard nofile 65536


oracle11g soft nproc 2047
oracle11g hard nproc 16384
oracle11g soft nofile 1024
oracle11g hard nofile 65536
# vi/etc/pam.d/login
session required /lib/security/pam_limits.so

session required pam_limits.so
/etc/profile
if [ $USER = "oracle10g" ]; then
ulimit -u16384 -n 65536

fi


if [ $USER = "oracle11g" ]; then
ulimit -u16384 -n 65536

fi
修改版本号
vim /etc/redhat-release
redhat 4
用户
groupadd oinstall
groupadd dba
useradd -g oinstall -G dba oracle10g
useradd -g oinstall -G dba oracle11g
权限设置 修改:目录10g 11g
mkdir -p /opt/app/oracle10g
mkdir -p /opt/app/oracle11g
chown -R oracle10g:oinstall /opt/app/oracle10g
chown -R oracle11g:oinstall /opt/app/oracle11g
chmod -R 775 /opt/app/oracle11g
chmod -R 775 /opt/app/oracle10g
不同用户环境变量 cd /home/oracle10g 与11g
编辑 .bash_profile
export TMP=/tmp;

export TMPDIR=$TMP;

export ORACLE_BASE=/opt/app/oracle10g;

export ORACLE_HOME=$ORACLE_BASE/product/10.2.0/db_1;

export ORACLE_SID=orcl;

export ORACLE_TERM=xterm;

export PATH=/usr/sbin:$PATH;

export PATH=$ORACLE_HOME/bin:$PATH;

export LD_LIBRARY_PATH=$ORACLE_HOME/lib:/lib:/usr/lib;

export CLASSPATH=$ORACLE_HOME/JRE:$ORACLE_HOME/jlib:$ORACLE_HOME/rdbms/jlib;
11g环境
export TMP=/tmp;

export TMPDIR=$TMP;

export ORACLE_BASE=/opt/app/oracle11g;

export ORACLE_HOME=$ORACLE_BASE/product/11.2.0/db_1;

export ORACLE_SID=another-orcl; # 编辑为和10g不同sid

export ORACLE_TERM=xterm;

export PATH=/usr/sbin:$PATH;

export PATH=$ORACLE_HOME/bin:$PATH;

export LD_LIBRARY_PATH=$ORACLE_HOME/lib:/lib:/usr/lib;

export CLASSPATH=$ORACLE_HOME/JRE:$ORACLE_HOME/jlib:$ORACLE_HOME/rdbms/jlib;
### 权限,待编辑
#gunzip 10201_database_linux_x86_64.cpio.gz
#cpio -idmv < 10201_database_linux_x86_64.cpio

生成database的文件夹移动到 相关目录下
/opt/app/oracle10g/database

#chown -R oracle10g:oinstall /opt/app/oracle10g/database
## oracle10g对应用户安装10g
略
###
oracle10g对应用户 安装10g补丁包。解压到任意目录
chmod 777 runInstaller
chmod 777 install/.oui
chmod 777 install/unzip
./runInstaller -ignoreSysPrereqs
问题
图形界面转发x11问题
处理: 使用oracle安装用户登录,不要用root后su - oracle
问题
DBCA图形转发问题
转发方式,oracle10g dbca最后一步点finish后无反应,直接在server上无异常
oracle11g 无此问题
问题
安装检查dhcp问题
处理: 编辑/etc/hosts 绑定localhost
问题 84%报错
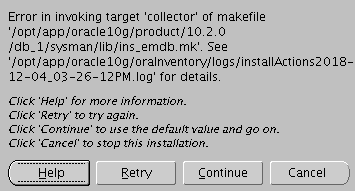
参考https://blog.csdn.net/zhang123456456/article/details/78056997 是bug可以点跳过
问题 dbca时 unable to create shared memory segment
sysctl.conf添加
vm.hugetlb_shm_group = 501
问题 安装补丁 系统平台检测不通过(10g软件可以通过,补丁包无法通过。。)
./runInstaller -ignoreSysPrereqs
oracle10g用户
使用dbca 建库, netca 建listener
客户端建name
############
part2 11g 11.2.0.4 只下载1of7 和2of7就可以
解压缩注意1of7 和2of7 分别要解压
准备略。包准备参数准备,依赖包也可以试试先装再准备(在10G基础上)
使用不同用户oracle11g专用用户安装软件,并配置listenener
##
安装完成后10g和11g同时可以启动
启动10g
SQL> startup
map size mismatch; abort
: Success
map size mismatch; abort
: Success
map size mismatch; abort
: Success
map size mismatch; abort
: Success
ORACLE instance started.

Total System Global Area 1610612736 bytes
Fixed Size                  2182600 bytes
Variable Size             396145208 bytes
Database Buffers         1207959552 bytes
Redo Buffers                4325376 bytes
Database mounted.
map size mismatch; abort
: Success
map size mismatch; abort
: Success
map size mismatch; abort
: Protocol not available
map size mismatch; abort
: Protocol not available
Database opened.
SQL>
启动11g
SQL*Plus: Release 11.2.0.4.0 Production on Fri Jul 13 19:02:59 2018

Copyright (c) 1982, 2013, Oracle.  All rights reserved.


Connected to:
Oracle Database 11g Enterprise Edition Release 11.2.0.4.0 - 64bit Production
With the Partitioning, OLAP, Data Mining and Real Application Testing options

SQL> startup
ORA-01081: cannot start already-running ORACLE - shut it down first
SQL>
SQL>
SQL> shutdown immediate
Database closed.
Database dismounted.
ORACLE instance shut down.
SQL> startup
ORACLE instance started.

Total System Global Area 7399116800 bytes
Fixed Size                  2267584 bytes
Variable Size            3942647360 bytes
Database Buffers         3439329280 bytes
Redo Buffers               14872576 bytes
Database mounted.
Database opened.
SQL>
进程
502       4102  3238  0 19:02 pts/3    00:00:00 sqlplus   as sysdba
501       4111     1  0 19:03 ?        00:00:00 ora_pmon_orcl10g
501       4113     1  0 19:03 ?        00:00:00 ora_psp0_orcl10g
501       4115     1  0 19:03 ?        00:00:00 ora_mman_orcl10g
501       4118     1  0 19:03 ?        00:00:00 ora_dbw0_orcl10g
501       4120     1  0 19:03 ?        00:00:00 ora_dbw1_orcl10g
501       4122     1  0 19:03 ?        00:00:00 ora_lgwr_orcl10g
501       4124     1  0 19:03 ?        00:00:00 ora_ckpt_orcl10g
501       4126     1  0 19:03 ?        00:00:00 ora_smon_orcl10g
501       4128     1  0 19:03 ?        00:00:00 ora_reco_orcl10g
501       4130     1  0 19:03 ?        00:00:00 ora_cjq0_orcl10g
501       4132     1  0 19:03 ?        00:00:00 ora_mmon_orcl10g
501       4134     1  0 19:03 ?        00:00:00 ora_mmnl_orcl10g
501       4136     1  0 19:03 ?        00:00:00 ora_d000_orcl10g
501       4138     1  0 19:03 ?        00:00:00 ora_s000_orcl10g
501       4143  3186  0 19:03 ?        00:00:00 oracleorcl10g (DESCRIPTION=(LOCAL=YES)(ADDRESS=(PROTOCOL=beq)))
501       4147     1  0 19:03 ?        00:00:00 ora_qmnc_orcl10g
502       4153     1  0 19:03 ?        00:00:00 ora_pmon_orcl11g
502       4155     1  0 19:03 ?        00:00:00 ora_psp0_orcl11g
502       4157     1  0 19:03 ?        00:00:01 ora_vktm_orcl11g
502       4161     1  0 19:03 ?        00:00:00 ora_gen0_orcl11g
502       4163     1  0 19:03 ?        00:00:00 ora_diag_orcl11g
502       4165     1  0 19:03 ?        00:00:00 ora_dbrm_orcl11g
502       4167     1  0 19:03 ?        00:00:00 ora_dia0_orcl11g
502       4169     1  0 19:03 ?        00:00:00 ora_mman_orcl11g
502       4171     1  0 19:03 ?        00:00:00 ora_dbw0_orcl11g
502       4173     1  0 19:03 ?        00:00:00 ora_dbw1_orcl11g
502       4175     1  0 19:03 ?        00:00:00 ora_lgwr_orcl11g
502       4177     1  0 19:03 ?        00:00:00 ora_ckpt_orcl11g
502       4179     1  0 19:03 ?        00:00:00 ora_smon_orcl11g
502       4181     1  0 19:03 ?        00:00:00 ora_reco_orcl11g
502       4183     1  0 19:03 ?        00:00:00 ora_mmon_orcl11g
502       4185     1  0 19:03 ?        00:00:00 ora_mmnl_orcl11g
502       4187     1  0 19:03 ?        00:00:00 ora_d000_orcl11g
502       4189     1  0 19:03 ?        00:00:00 ora_s000_orcl11g
502       4195  4102  0 19:03 ?        00:00:00 oracleorcl11g (DESCRIPTION=(LOCAL=YES)(ADDRESS=(PROTOCOL=beq)))
501       4199     1  0 19:03 ?        00:00:00 ora_q000_orcl10g
502       4201     1  0 19:03 ?        00:00:00 ora_qmnc_orcl11g
502       4217     1  0 19:04 ?        00:00:00 ora_cjq0_orcl11g
502       4219     1  0 19:04 ?        00:00:00 ora_q000_orcl11g
502       4221     1  0 19:04 ?        00:00:00 ora_q001_orcl11g
501       4224     1  0 19:04 ?        00:00:00 ora_q001_orcl10g
root      4228  3080  0 19:06 pts/0    00:00:00 ps -ef
#### 监听配置
netca
netmgr
由于需要监听不同端口。
alter system set local_listener="(address = (protocol = tcp)(host = somehostname)(port = 1234))";
alter system set local_listener="(address = (protocol = tcp)(host = somehostname)(port = 2234))";
show parameter local_listener
然后重新启动监听
lsnrctl status
调试命令alter system register;
10g 11g 的listener可以只配置listener即可,会动态找到port对应的实例。
LISTENERXXXNAME =
(DESCRIPTION =
(ADDRESS = (PROTOCOL = TCP)(HOST =somehostname)(PORT = 1234))
)
便用rlwrap
# rpm -ivh http://download.fedoraproject.org/pub/epel/6/x86_64/epel-release-6-8.noarch.rpm

# rpm --import /etc/pki/rpm-gpg/RPM-GPG-KEY-EPEL-6


# yum install rlwrap readline readline-devel


###############3
####
编辑 .bash_profile
alias sqlplus='rlwrap sqlplus'
alias rman='rlwrap rman'
part2 rman
sql>create tablespace rmancat_tbs datafile '/opt/app/oracle10g/oradata/rmancat_tbs01.dbf' size 100M autoextend on next 100M maxsize 15G;
create user rman identified by abc1234 default tablespace rmancat_tbs
temporary tablespace temp;
alter user rman quota unlimited on rmancat_tbs;
grant connect,resource,recovery_catalog_owner to rman;
创建catalog方式rman
rman操作
系统$ rman catalog rman/abc1234@rmancatalog 或者 rman catalog rman/abc1234
rman>create catalog tablespace rmancat_tbs;
完成创建
###target端
配置catalog的tnsname
cat $ORACLE_HOME/network/admin/tnsnames.ora
ORCL10GTEST_192.168.42.131 =
  (DESCRIPTION =
    (ADDRESS_LIST =
      (ADDRESS = (PROTOCOL = TCP)(HOST = 192.168.42.131)(PORT = 1621))
    )
    (CONNECT_DATA =
      (SERVICE_NAME = orcl10gtest)
    )
  )
target注册到catalog
[oracle10g@oracletest2 admin]$
[oracle10g@oracletest2 admin]$ rman target sys/abc1234  catalog rman/abc1234@ORCL10GTEST_192.168.42.131

Recovery Manager: Release 10.2.0.4.0 - Production on Tue Jul 24 14:48:27 2018

Copyright (c) 1982, 2007, Oracle.  All rights reserved.

connected to target database: ORCL10GT (DBID=880224647)
connected to recovery catalog database

RMAN>

RMAN> register database;

database registered in recovery catalog
starting full resync of recovery catalog
full resync complete

RMAN>

RMAN>
part3 rman 参考
#####
参考
RMAN 备份与恢复 实例
http://www.cndba.cn/Dave/article/1073
Oracle Rman 命令详解(List report backup configure)
http://blog.csdn.net/tianlesoftware/archive/2009/12/13/4976998.aspx
注意,当使用rman nocatalog恢复时,数据库必须是处于“mount”状态的。而Oracle startup mount的前提条件是control必须存在。因此,你必须在恢复datafile之前先恢复controlfile。 使用rman catalog方式时,可以startup nomount然后restore controlfile;但使用rman nocatalog时,必须先用文件方式恢复controlfile。
下面对比一下rman nocatalog和rman catalog的恢复时的步骤,以便建立正确的备份策略(以下的恢复都是在online状态下的备份):
rman nocatalog恢复:
1) 建立oracle运行环境(包括init或sp文件)
2) 文件方式恢复controlfile到init文件指定的位置
3) startup mount
4) rman,恢复datafile
5) alter database open resetlogs
rman catalog恢复:
1) 建立oracle运行环境(包括init或sp文件)
2) rman ,restore controfile
3) alter database mount
4) rman, restore datafile
5) alter database open resetlogs
可以看出,rman nocatalog备份时,必须用文件方式备份controlfile。