源码可以以上传github https://github.com/ingxx/ssm_first
最近把用IDEA把SSM框架整合一遍遇到了不少坑,在这里写出来
这里maven我使用的是自己下载的3.5.3版本,使用IDEA自带的MAVEN也可以。MAVEN的使用不再赘述。

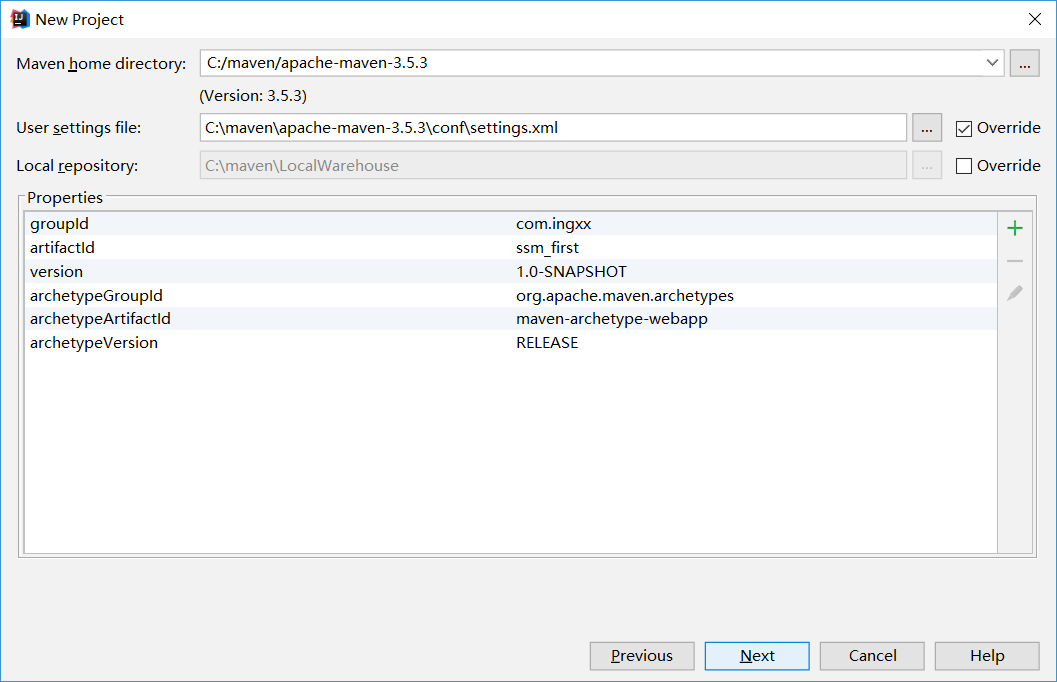
新建maven项目使用wbapp模板 NEXT

GroupId填组织名称,artifactId填项目名称 下一步
这里我的MAVEN是自己下的如果使用默认则不需要配置,如果网络不好,请查找资料更改仓库为阿里的仓库。

Finish即可
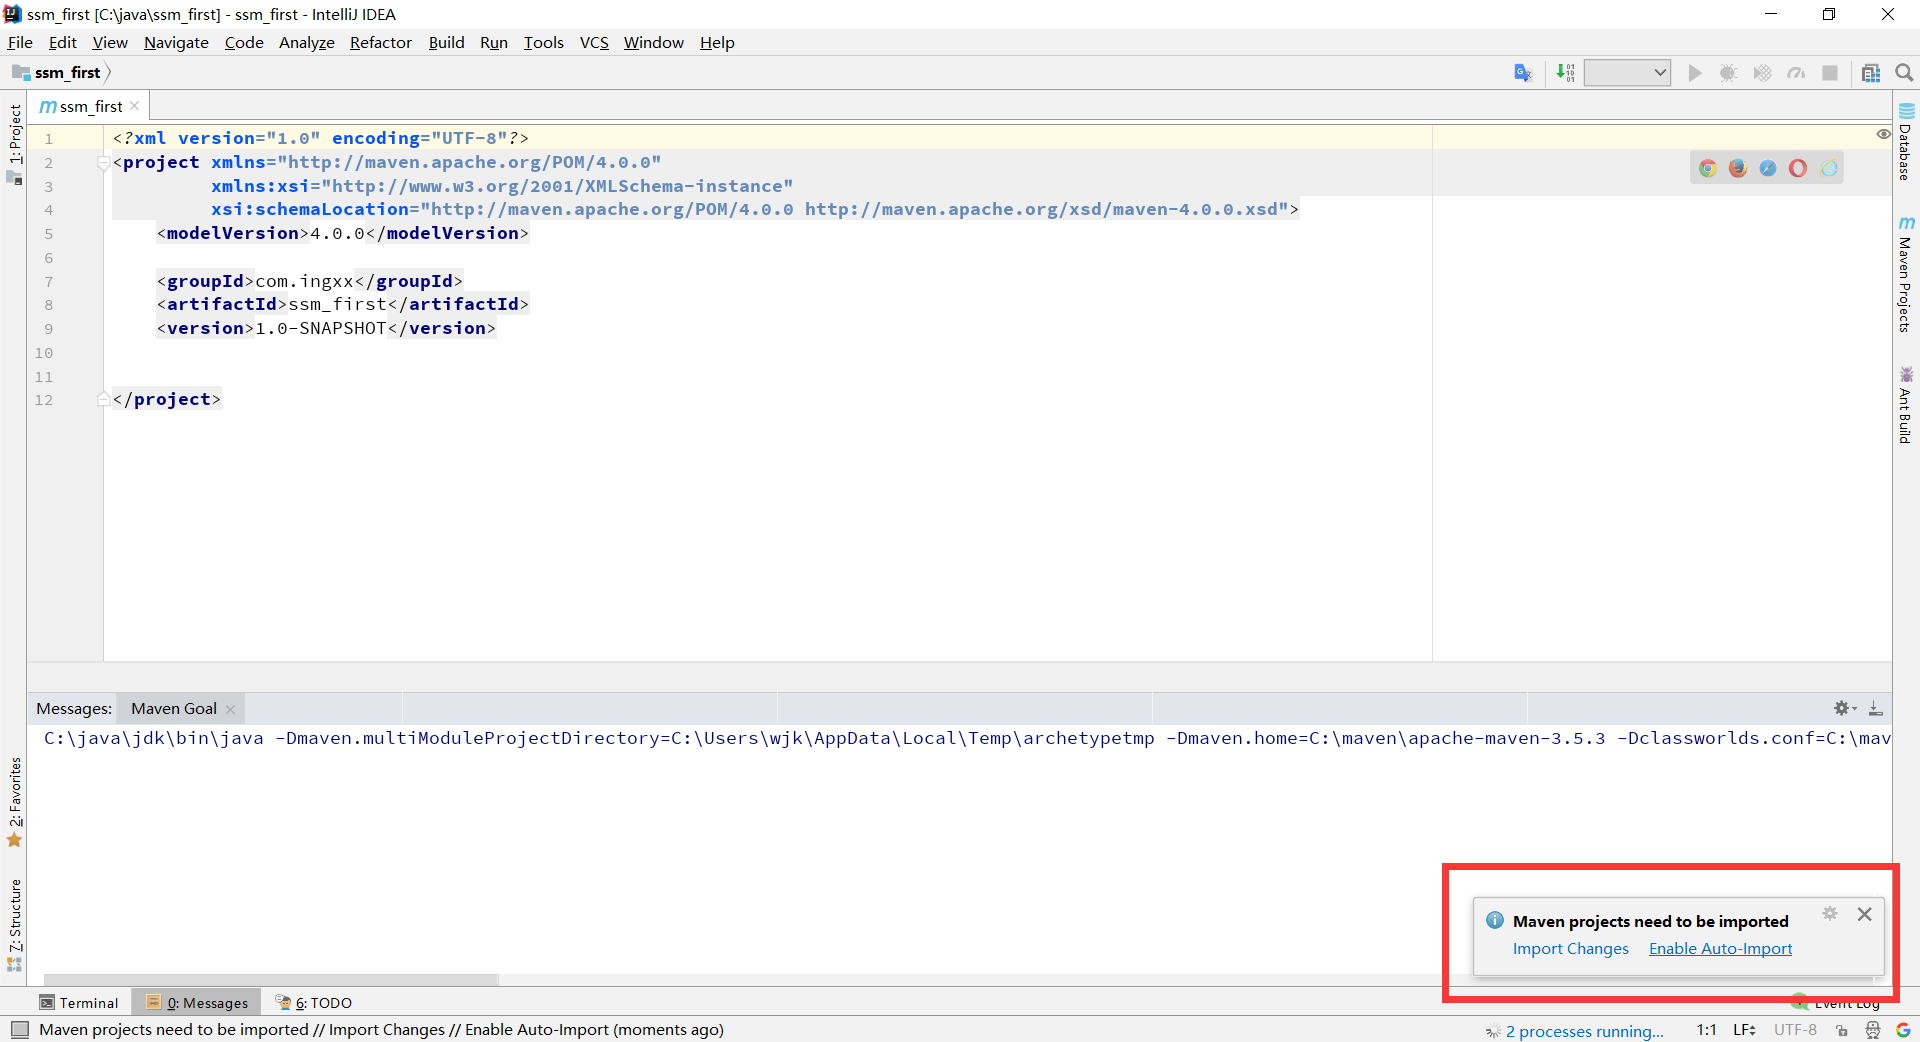
这里选enable-auto-import
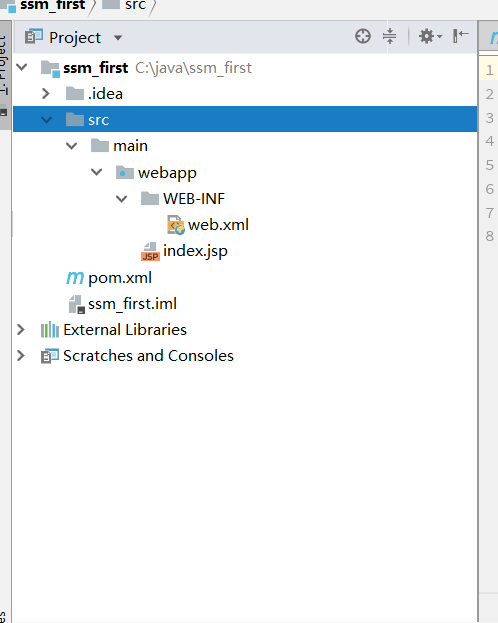
此时项目结构如图所示

建立如上结构
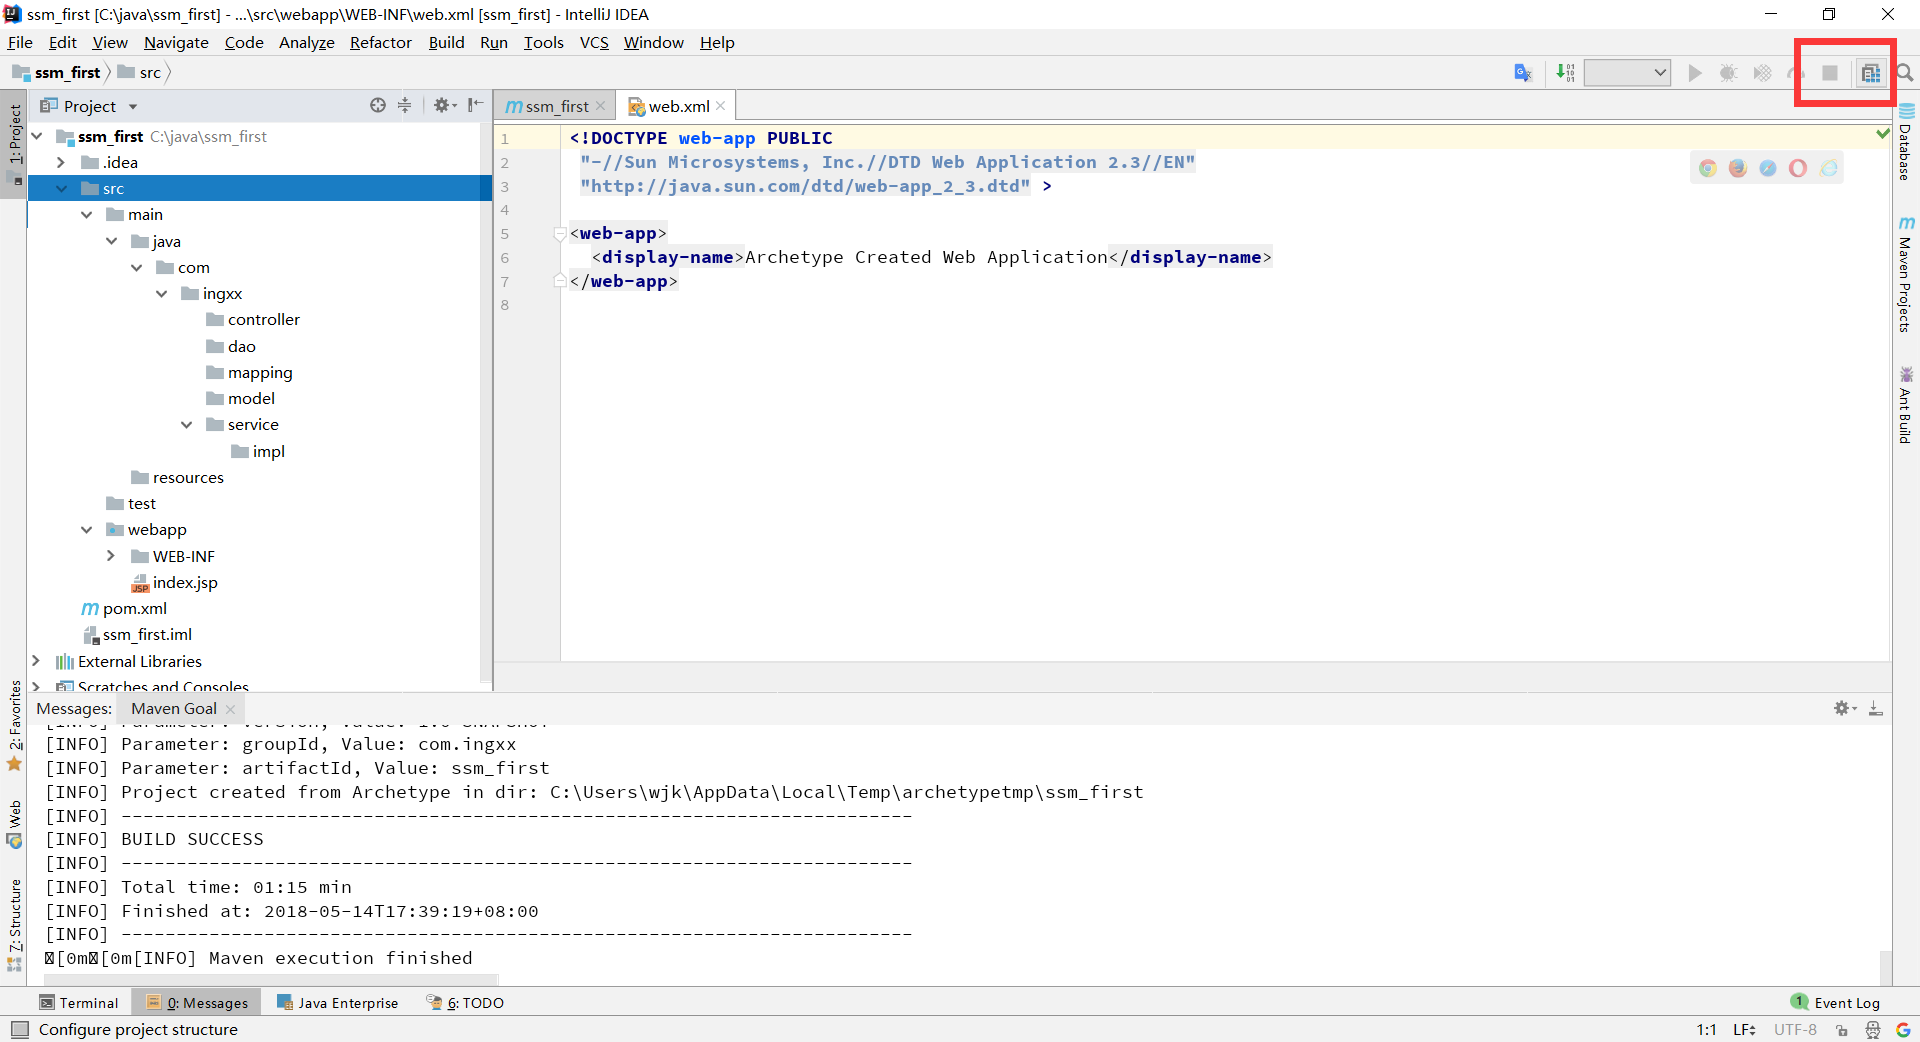
点击这个图标进行配置
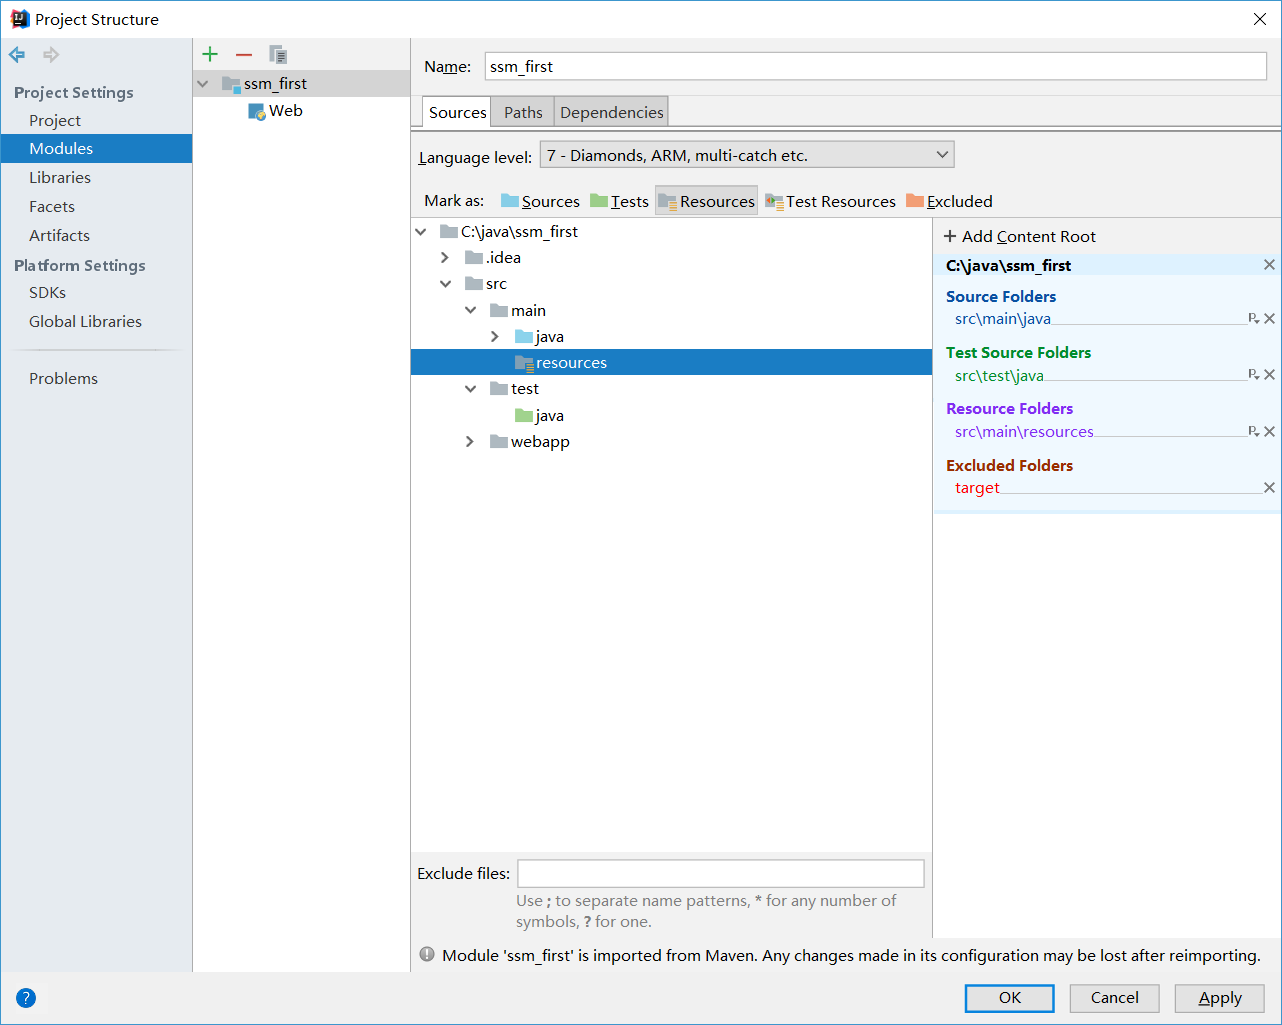
设置IDEA识别目录
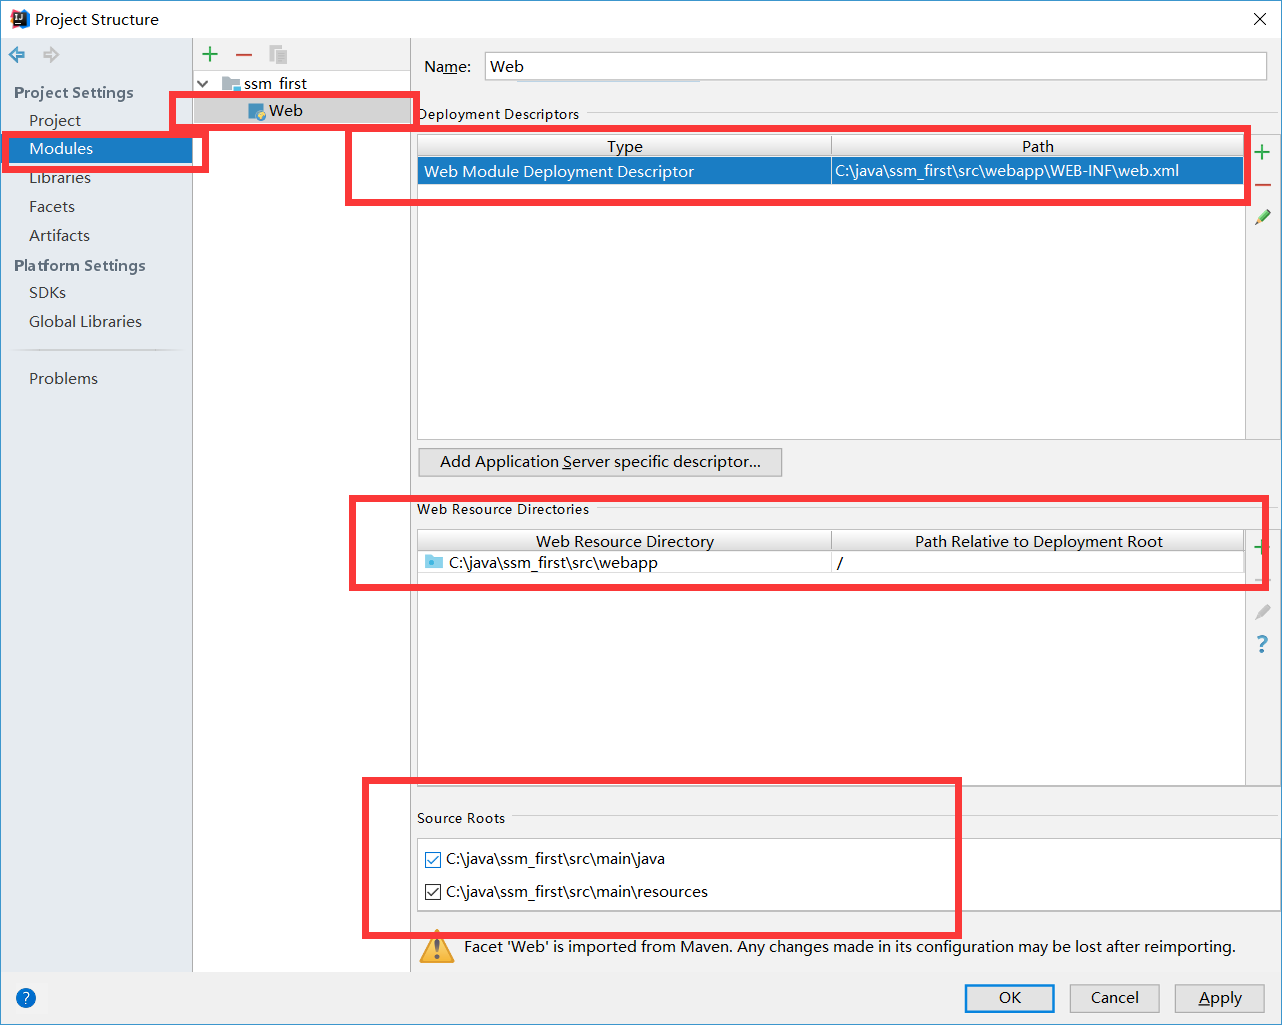
设置web.xml目录和网站根目录等
打开pom.xml文件在properties节点添加版本信息
        <!--srping版本-->
        <spring.version>4.3.14.RELEASE</spring.version>
        <!--mybatis版本-->
        <mybatis.version>3.4.0</mybatis.version>
在dependencies节点下添加依赖 注释已有解释不再赘述
       <dependency>
            <groupId>junit</groupId>
            <artifactId>junit</artifactId>
            <version>4.11</version>
            <scope>test</scope>
        </dependency>

        <!-- mybatis核心包 -->
        <dependency>
            <groupId>org.mybatis</groupId>
            <artifactId>mybatis</artifactId>
            <version>${mybatis.version}</version>
        </dependency>
        <!-- mybatis/spring包 -->
       <dependency>
            <groupId>org.mybatis</groupId>
            <artifactId>mybatis-spring</artifactId>
            <version>1.3.0</version>
        </dependency>


        <!--spring单元测试依赖 -->
        <dependency>
            <groupId>org.springframework</groupId>
            <artifactId>spring-test</artifactId>
            <version>${spring.version}</version>
            <scope>test</scope>
        </dependency>

        <!-- springMVC核心包 -->
        <dependency>
            <groupId>org.springframework</groupId>
            <artifactId>spring-webmvc</artifactId>
            <version>${spring.version}</version>
        </dependency>

        <!-- spring核心包 -->
        <dependency>
            <groupId>org.springframework</groupId>
            <artifactId>spring-core</artifactId>
            <version>${spring.version}</version>
        </dependency>

        <dependency>
            <groupId>org.springframework</groupId>
            <artifactId>spring-beans</artifactId>
            <version>${spring.version}</version>
        </dependency>

        <dependency>
            <groupId>org.springframework</groupId>
            <artifactId>spring-context</artifactId>
            <version>${spring.version}</version>
        </dependency>

        <dependency>
            <groupId>org.springframework</groupId>
            <artifactId>spring-context-support</artifactId>
            <version>${spring.version}</version>
        </dependency>

        <dependency>
            <groupId>org.springframework</groupId>
            <artifactId>spring-tx</artifactId>
            <version>${spring.version}</version>
        </dependency>

        <dependency>
            <groupId>org.springframework</groupId>
            <artifactId>spring-web</artifactId>
            <version>${spring.version}</version>
        </dependency>

        <dependency>
            <groupId>org.springframework</groupId>
            <artifactId>spring-jdbc</artifactId>
            <version>${spring.version}</version>
        </dependency>

        <dependency>
            <groupId>javax.servlet</groupId>
            <artifactId>javax.servlet-api</artifactId>
            <version>3.0.1</version>
            <scope>provided</scope>
        </dependency>

        <dependency>
            <groupId>javax.servlet.jsp</groupId>
            <artifactId>jsp-api</artifactId>
            <version>2.2</version>
            <scope>provided</scope>
        </dependency>
        <!--mysql数据库链接包-->
        <dependency>
            <groupId>mysql</groupId>
            <artifactId>mysql-connector-java</artifactId>
            <version>5.1.30</version>
        </dependency>

        <!--阿里数据源-->
        <dependency>
            <groupId>com.alibaba</groupId>
            <artifactId>druid</artifactId>
            <version>1.1.9</version>
        </dependency>

        <!-- JSTL标签类 -->
        <dependency>
            <groupId>jstl</groupId>
            <artifactId>jstl</artifactId>
            <version>1.2</version>
        </dependency>
        <!-- 日志文件管理包 -->
        <dependency>
            <groupId>log4j</groupId>
            <artifactId>log4j</artifactId>
            <version>1.2.17</version>
        </dependency>

        <!-- 上传组件包 -->
        <dependency>
            <groupId>commons-fileupload</groupId>
            <artifactId>commons-fileupload</artifactId>
            <version>1.3.1</version>
        </dependency>
        <dependency>
            <groupId>commons-io</groupId>
            <artifactId>commons-io</artifactId>
            <version>2.4</version>
        </dependency>
        <dependency>
            <groupId>commons-codec</groupId>
            <artifactId>commons-codec</artifactId>
            <version>1.9</version>
        </dependency>
由于mybatis映射文件不在资源目录下所以在build节点下添加如下配置
        <resources>
            <resource>
                <directory>src/main/java</directory>
                <includes>
                    <include>**/*.properties</include>
                    <include>**/*.xml</include>
                </includes>
                <filtering>false</filtering>
            </resource>
            <resource>
                <directory>src/main/resources</directory>
                <includes>
                    <include>**/*.properties</include>
                    <include>**/*.xml</include>
                </includes>
                <filtering>false</filtering>
            </resource>
        </resources>
接着在resources下新建jdbc.properties配置文件
jdbc.driver=com.mysql.jdbc.Driver
jdbc.url=jdbc:mysql://localhost:3306/test?useUnicode=true&characterEncoding=utf-8
jdbc.username=root
jdbc.password=
#定义初始连接数
jdbc.initialSize=0
#定义最大连接数
jdbc.maxActive=20
#定义最长等待时间
jdbc.maxWait=60000
然后在resources新建applicationContext.xml spring核心配置文件 也可以叫spring-server.xml这样加web.xml加载时可以用spring-*加载
<?xml version="1.0" encoding="UTF-8"?>
<beans xmlns="http://www.springframework.org/schema/beans"
       xmlns:xsi="http://www.w3.org/2001/XMLSchema-instance"
       xmlns:context="http://www.springframework.org/schema/context" xmlns:tx="http://www.springframework.org/schema/tx"
       xsi:schemaLocation="http://www.springframework.org/schema/beans http://www.springframework.org/schema/beans/spring-beans.xsd http://www.springframework.org/schema/context http://www.springframework.org/schema/context/spring-context.xsd http://www.springframework.org/schema/tx http://www.springframework.org/schema/tx/spring-tx.xsd">

    <context:component-scan base-package="com.ingxx.service"/>
    <!--加载配置文件-->
    <context:property-placeholder location="classpath:jdbc.properties"/>

    <!--配置数据源-->
    <bean id="dataSource" class="com.alibaba.druid.pool.DruidDataSource">
        <property name="driverClassName" value="${jdbc.driver}"/>
        <property name="url" value="${jdbc.url}"/>
        <property name="username" value="${jdbc.username}"/>
        <property name="password" value="${jdbc.password}"/>
        <property name="initialSize" value="${jdbc.initialSize}"/>
        <property name="maxActive" value="${jdbc.maxActive}"/>
        <property name="maxWait" value="${jdbc.maxWait}"/>
    </bean>

    <!--配置session工厂-->
    <bean id="sessionFactory" class="org.mybatis.spring.SqlSessionFactoryBean">
        <property name="dataSource" ref="dataSource"/>
        <!--加载mybatis配置文件-->
        <property name="configLocation" value="classpath:mybatis-config.xml"/>
        <!--加载mapper配置文件-->
        <property name="mapperLocations" value="classpath*:com/ingxx/mapping/*.xml"/>
    </bean>

    <!--mybatis动态代理设置 自动扫描dao接口并添加到spring -->
    <bean class="org.mybatis.spring.mapper.MapperScannerConfigurer">
        <property name="sqlSessionFactoryBeanName" value="sessionFactory"/>
        <!--扫描dao接口生成实现-->
        <property name="basePackage" value="com.ingxx.dao"/>
    </bean>

    <!--配置事务管理器-->
    <bean id="transactionManager" class="org.springframework.jdbc.datasource.DataSourceTransactionManager">
        <property name="dataSource" ref="dataSource"/>
    </bean>

    <!--事物注解-->
    <tx:annotation-driven/>
</beans>
接着在resources下新建mybatis-config.xml mybatis配置文件因为spinrg配置了动态代理扫描所以不需要配置什么配置
<?xml version="1.0" encoding="UTF-8" ?>
<!DOCTYPE configuration
        PUBLIC "-//mybatis.org//DTD Config 3.0//EN"
        "http://mybatis.org/dtd/mybatis-3-config.dtd">
<configuration>
    <!--设置别名-->
    <!--<typeAliases>-->
        <!--<package name="com.ingxx.dao"/>-->
    <!--</typeAliases>-->
</configuration>
接着在resources下新建spring-mvc.xml spring mvc配置文件 这是一个基本的配置文件没有配置POST乱码问题 可以自己添加
<?xml version="1.0" encoding="UTF-8"?>
<beans xmlns="http://www.springframework.org/schema/beans"
       xmlns:xsi="http://www.w3.org/2001/XMLSchema-instance" xmlns:mvc="http://www.springframework.org/schema/mvc"
       xmlns:context="http://www.springframework.org/schema/context"
       xsi:schemaLocation="http://www.springframework.org/schema/beans http://www.springframework.org/schema/beans/spring-beans.xsd http://www.springframework.org/schema/mvc http://www.springframework.org/schema/mvc/spring-mvc.xsd http://www.springframework.org/schema/context http://www.springframework.org/schema/context/spring-context.xsd">
    <!--扫描控制层标签 如果扫描全部 事物无法使用-->
    <context:component-scan base-package="com.ingxx.controller"/>
    <!--开始注解,相当于更改了映射器和适配器-->
    <mvc:annotation-driven/>

    <!--配置页面视图-->
    <bean class="org.springframework.web.servlet.view.InternalResourceViewResolver">
        <property name="prefix" value="/WEB-INF/jsp/"/>
        <property name="suffix" value=".jsp"/>
    </bean>
</beans>
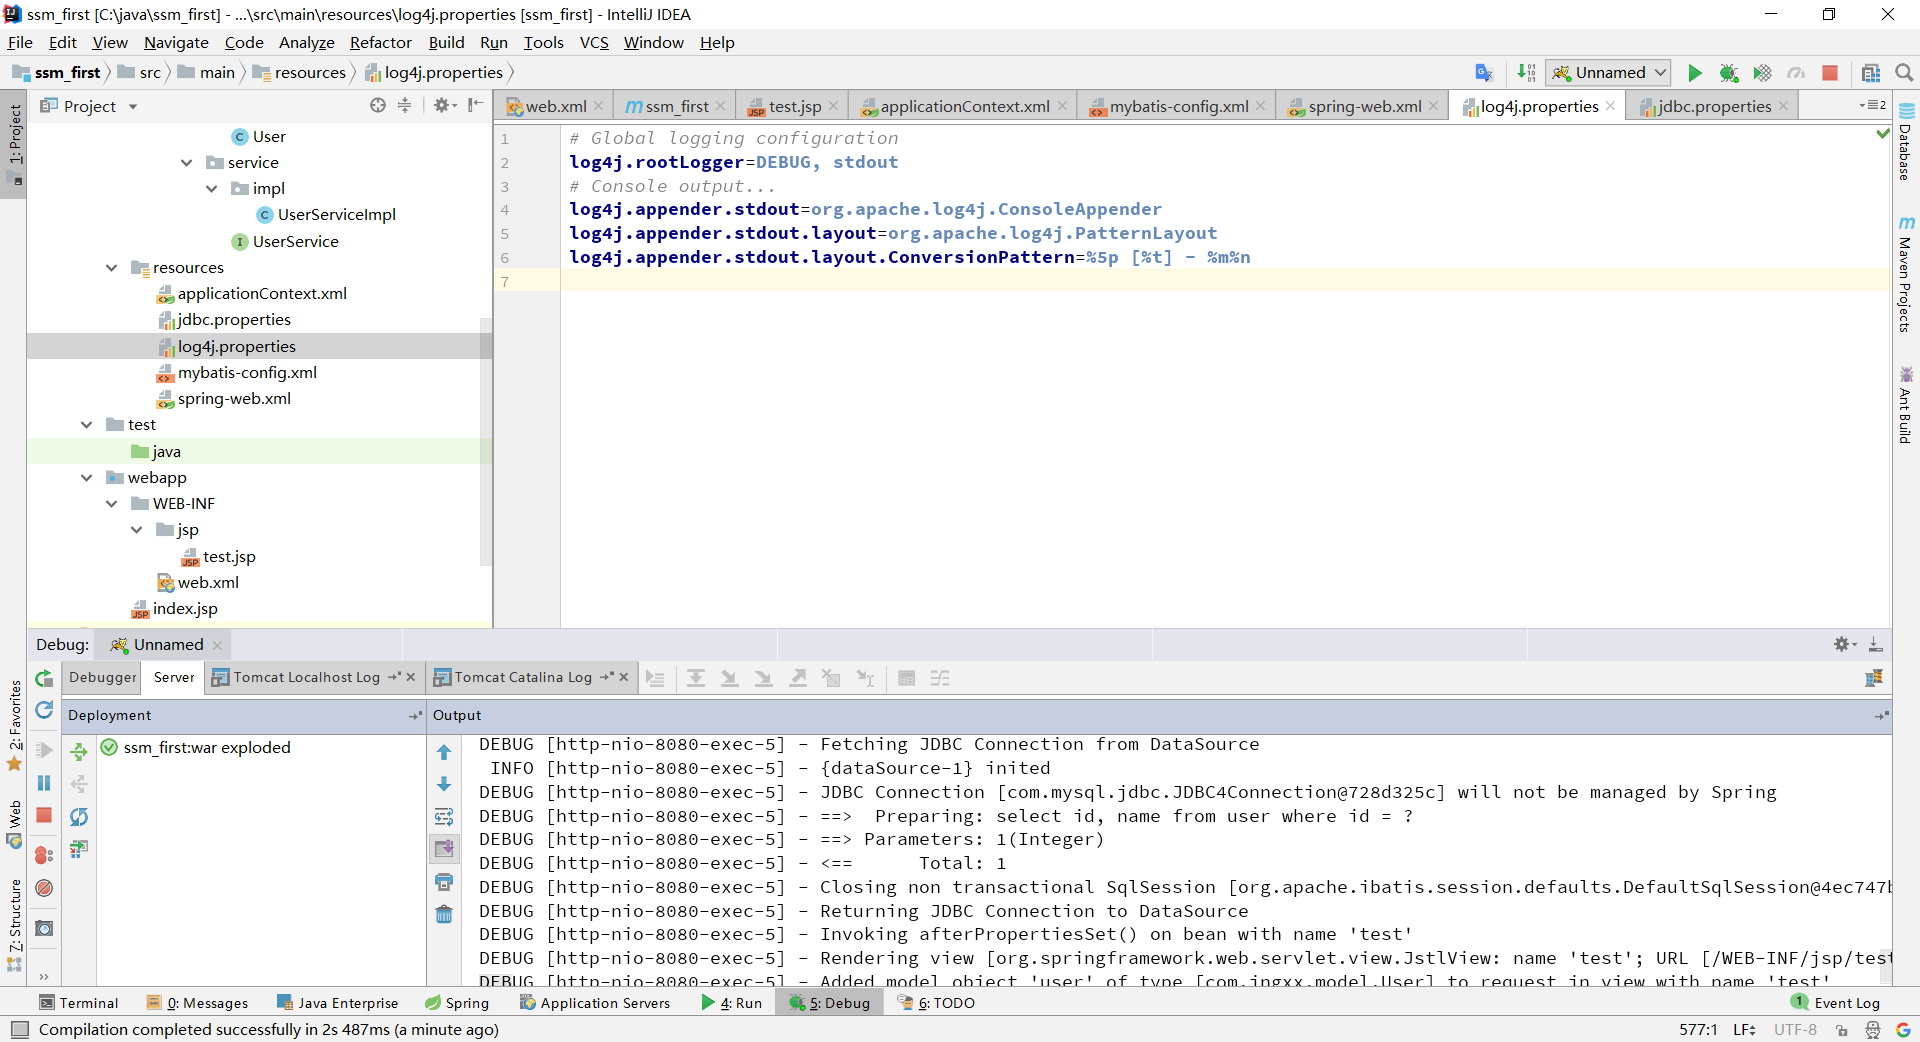
然后再resources下添加log4j.properties文件
# Global logging configuration
log4j.rootLogger=DEBUG, stdout
# Console output...
log4j.appender.stdout=org.apache.log4j.ConsoleAppender
log4j.appender.stdout.layout=org.apache.log4j.PatternLayout
log4j.appender.stdout.layout.ConversionPattern=%5p [%t] - %m%n
接着配置web.xml
<!DOCTYPE web-app PUBLIC
        "-//Sun Microsystems, Inc.//DTD Web Application 2.3//EN"
        "http://java.sun.com/dtd/web-app_2_3.dtd" >

<web-app xmlns="http://xmlns.jcp.org/xml/ns/javaee" xmlns:xsi="http://www.w3.org/2001/XMLSchema-instance"
         xsi:schemaLocation="http://xmlns.jcp.org/xml/ns/javaee
                      http://xmlns.jcp.org/xml/ns/javaee/web-app_3_1.xsd"
         version="3.1" metadata-complete="true">
    <display-name>Archetype Created Web Application</display-name>

    <!--加载spring配置文件到上下文如果在前端控制器配置可以不用写-->
    <context-param>
        <param-name>contextConfigLocation</param-name>
        <param-value>classpath:applicationContext.xml</param-value>
    </context-param>
    <!--加载spring上下文监听器,如果在前端控制器配置可以不用写-->
    <listener>
        <listener-class>org.springframework.web.context.ContextLoaderListener</listener-class>
    </listener>
    <!--加载前端控制器-->
    <servlet>
        <servlet-name>springmvc</servlet-name>
        <servlet-class>org.springframework.web.servlet.DispatcherServlet</servlet-class>
        <init-param>
            <!--加载配置文件到上下文,如果使用spring-*.xml则不用配置context-param和spring监听器-->
            <param-name>contextConfigLocation</param-name>
            <param-value>classpath:spring-web.xml</param-value>
        </init-param>
        <load-on-startup>1</load-on-startup>
    </servlet>
    <servlet-mapping>
        <servlet-name>springmvc</servlet-name>
        <!--
        * 拦截所有jsp js png等等
        *.action 拦截以action结尾的请求
        /拦截所有请求除了jsp-->
        <url-pattern>/</url-pattern>
    </servlet-mapping>
</web-app>
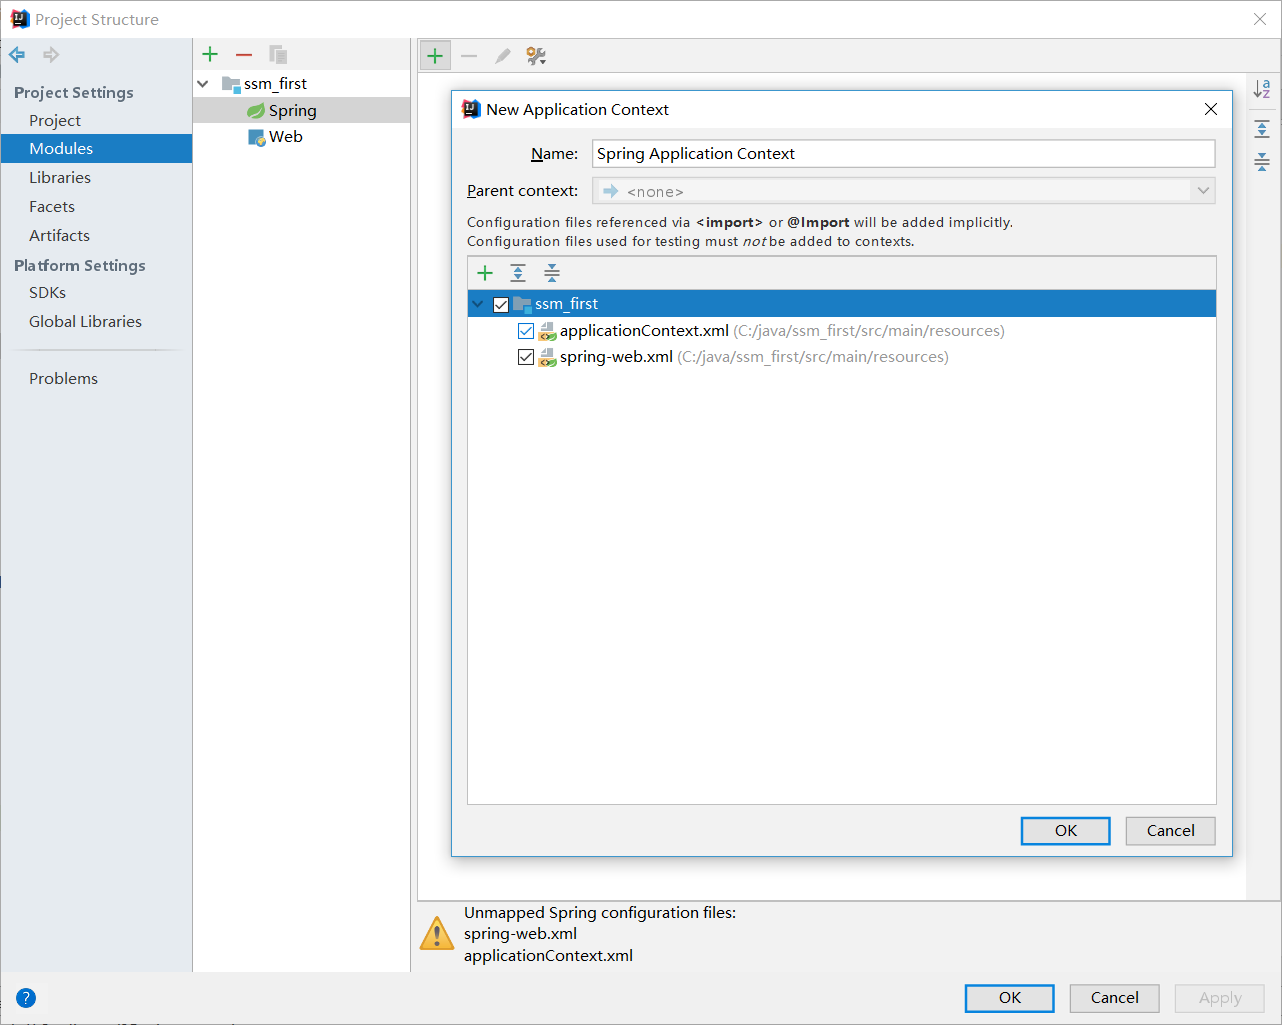
让idea加载配置文件
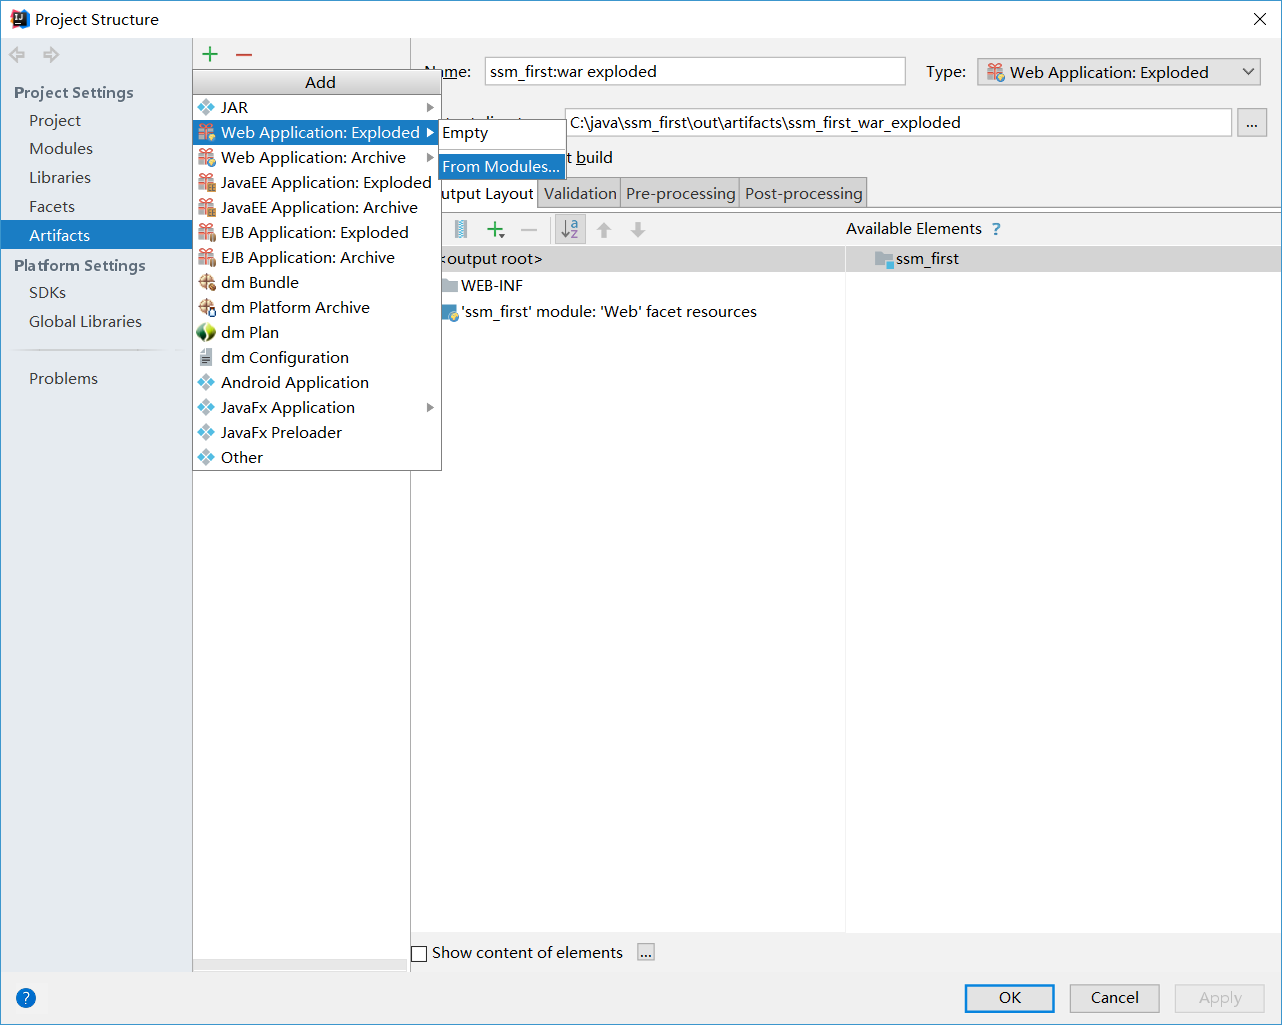
添加发布设置
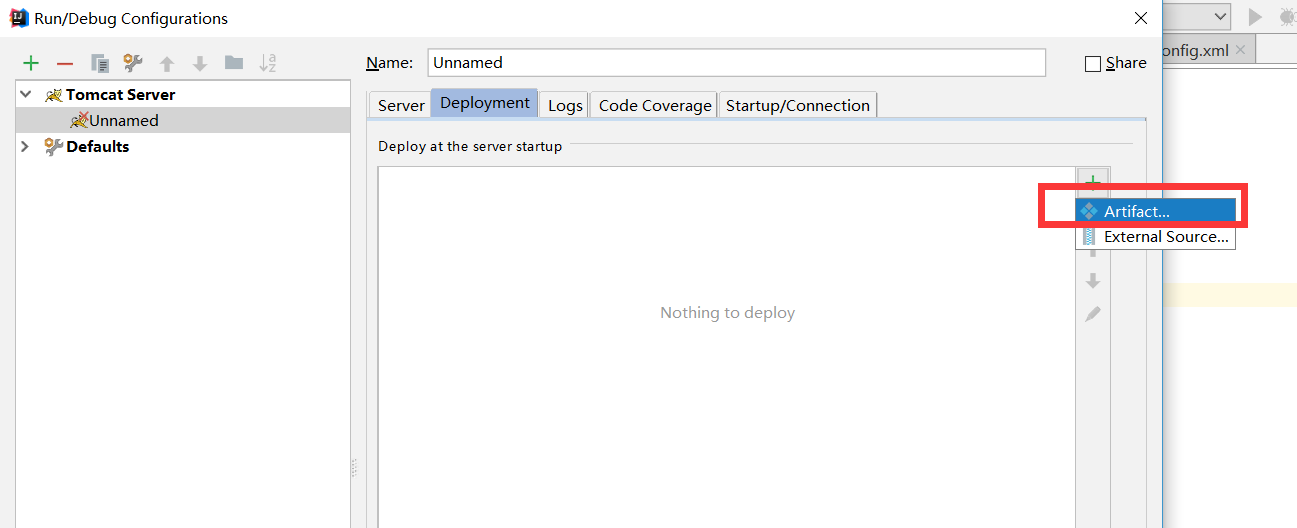
配置TOMCAT
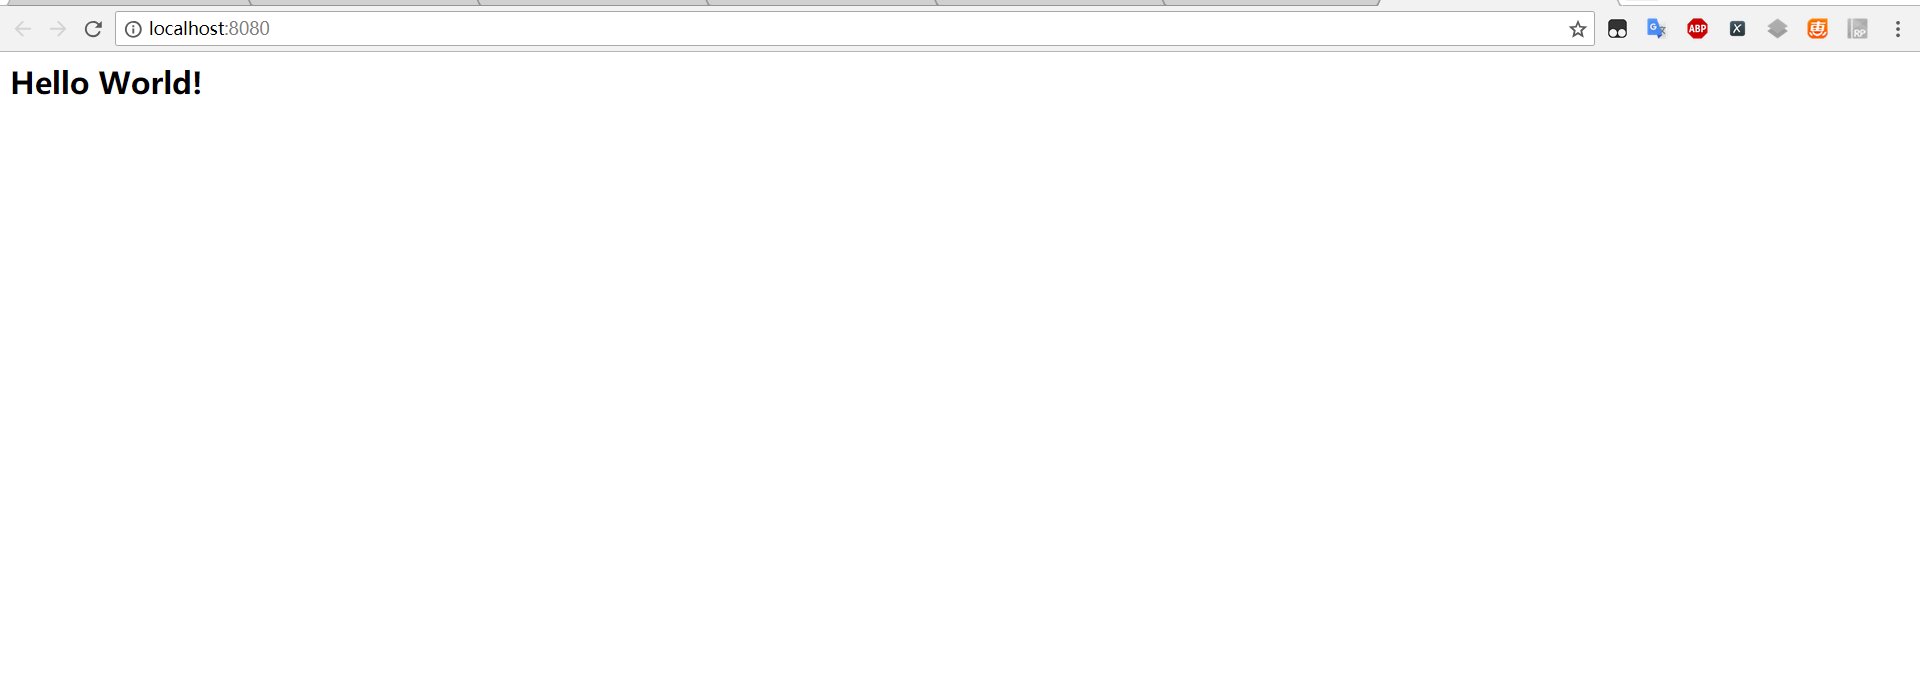
这时整合就完成了,后期需要什么功能可以自己添加
如果不能使用请重新配置环境