一、lvgl简介
LVGL是一个开源图形库,用于创建和开发嵌入式系统GUI,它具有易于使用的图形元素、漂亮的视觉效果和低内存占用等特性。
官方地址:
本文主要分享:如何在QtCreaotr下创建lvgl的开发环境,以及运行一个官方例子。
目前lvgl正在以火箭般的速度进行迭代开发,如下图所示:
二、在QtCreator下创建lvgl的开发环境
QtCreator是Qt官方开发的一个集成开发环境,用于开发基于Qt C++框架的软件。同样的,lvgl也可以在QtCreaotr中进行lvgl相关程序的设计、工程的编译和构建。
创建环境时需要准备一下:
(1)安装QtCreator ------笔者的为QtCeeator 4.14.2
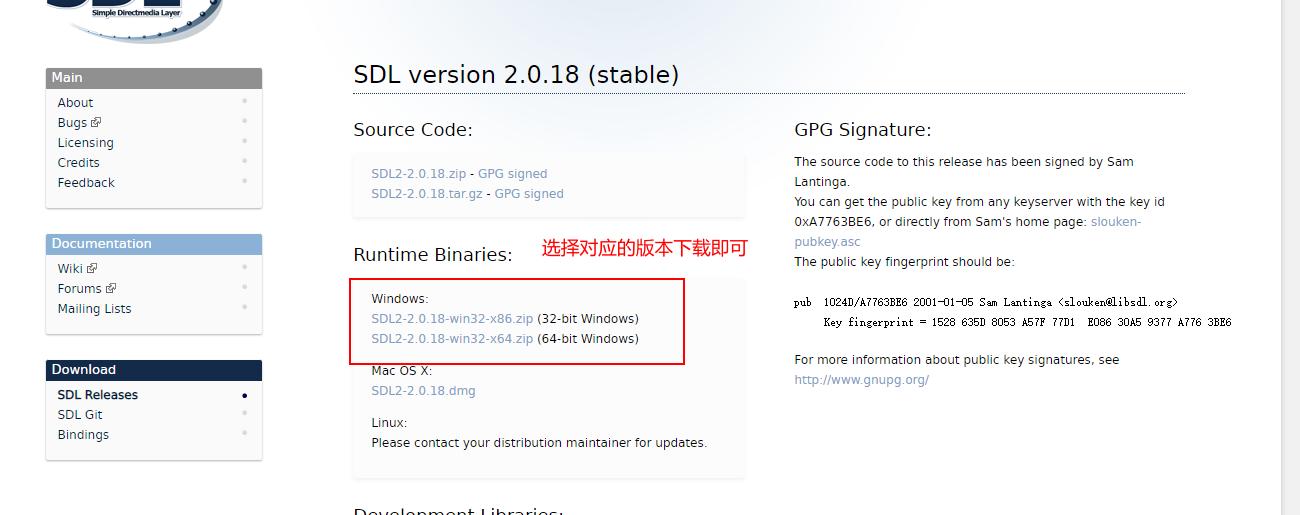
(2)获取SDL2 ------url地址如下:
https://www.libsdl.org/download-2.0.php
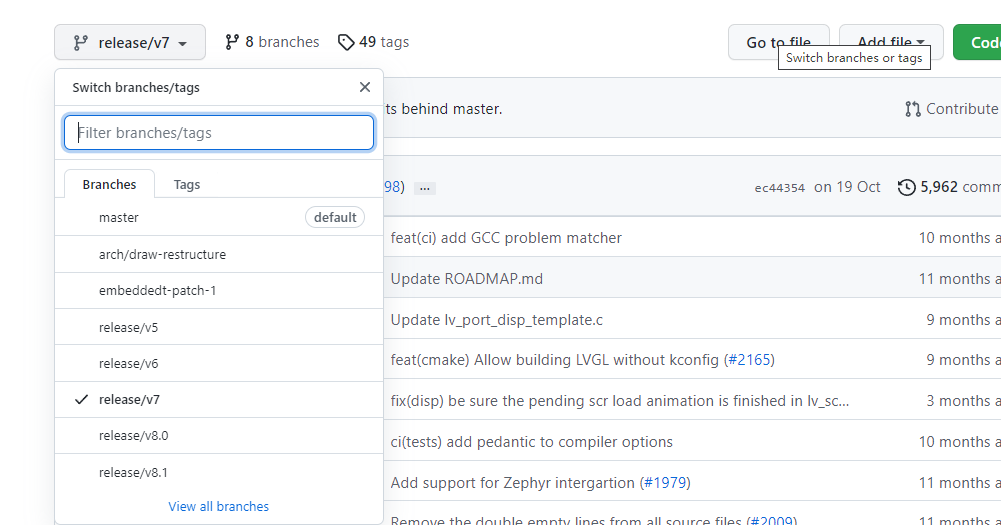
(3)获取lvgl源码 ------ url地址如下:
https://github.com/lvgl/lvgl
这里笔者选择的release/v7
(2-1)在QtCreator中创建工程
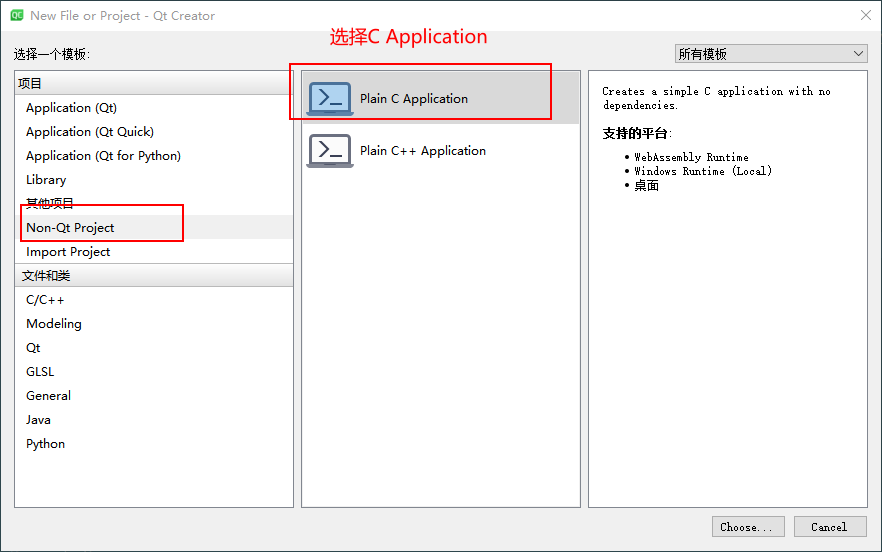
生成工程如下:
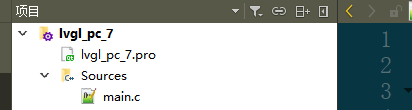
(2-2)向工程中添加lvgl源码
现在在QtCreator中创建了一个lvgl_pc_7项目,接下来将介绍如何将lvgl添加到该工程下。
-
将下载的lvgl安装包解压后,将目录src(lvgl的源码目录)、example(lvgl的一些使用例子)目录、lv_conf_template.h和lvgl.h文件拷贝到lvgl_pc_7目录下。
-
将文件lv_conf_template.h重命名为lv_conf.h,并将文件中内容打开(代码开始行处将0替换为1,使能该宏下的代码)
-
下载lv_drivers,url地址:https://github.com/lvgl/lv_drivers
(这里注意笔者下载的v7版本的),然后将其拷贝到lvgl_pc_7目录下。 -
下载lvgl的官方演示示例,url地址:https://github.com/lvgl/lv_demos/tree/release/v7
(这里笔者同样下载的v7版本的),然后将其拷贝到lvgl_pc_7目录下。 -
将SDL2目录也同样拷贝到lvgl_pc_7目录下。
-
根据其目录下
xxx_template.h的模板文件重新复制,然后对其内容进行配置。(注意:对于lv_drivers和lv_demos以及lvgl源码目录下都有详细使用步骤) -
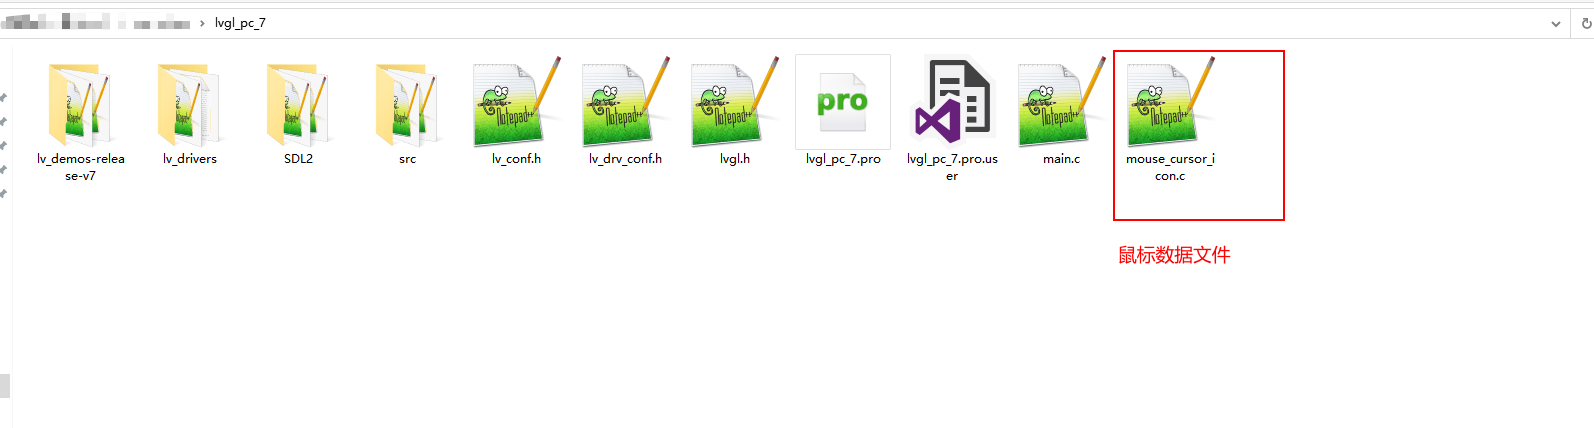
完成后,目录结构如下图所示:
-
向QtCreator添加源码:
(1)添加lvgl的源码
(2)添加lv_drivers相关文件:
display目录下的文件monitor.h/.c ;
indev目录下mouse.h/.c  mousewheel.h/.c keyboard.h/.c
(3)添加演示示例文件:
这里以lv_demo_widgets.h为例,故lv_demo_widgets.h/.c文件添加到工程中
(4)添加鼠标数据文件mouse_cursor_icon.c
完成后,QtCreaotr中项目结构图如下:

(注1)在创建工程中,可能由于源码目录的移动或者删除,有些源码文件中会出现错误头文件引入路径。此时,只需要将其正确引用即可解决。
(注2)在使用lv_demos演示模块源码或者lv_drivers时可能需要配置相应的宏定义,以便开启由该宏定义管控的代码。
(2-3)创建应用
然后就是main.c这个软件主框架了。这里就直接上一份代码:
#include <stdlib.h>
#include <unistd.h>
#define SDL_MAIN_HANDLED
#include <SDL2/SDL.h>

#include "lvgl.h"
#include "lv_drivers/display/monitor.h"
#include "lv_drivers/indev/mouse.h"
#include "lv_drivers/indev/mousewheel.h"
#include "lv_drivers/indev/keyboard.h"
#include "lv_demos-release-v7/src/lv_demo_widgets/lv_demo_widgets.h"

static void hal_init(void);
static int tick_thread(void * data);
static void memory_monitor(lv_task_t * param);

int main(int argc, char ** argv)
{
    (void) argc;    /*Unused*/
    (void) argv;    /*Unused*/

    /* 初始化 LittlevGL */
    lv_init();

    /* 初始化 the HAL (display, input devices, tick) for LittlevGL */
    hal_init();

    /* 此处创建应用 */
    lv_demo_widgets();

    while(1) {
        lv_task_handler();
        usleep(5 * 1000);
    }
}

/**
 * 初始化Littlev graphics library 硬件抽象层
 */
static void hal_init(void)
{
    /* Use the 'monitor' driver which creates window on PC's monitor to simulate a display*/
    monitor_init();

    /*Create a display buffer*/
    static lv_disp_buf_t disp_buf1;
    static lv_color_t buf1_1[480*10];
    lv_disp_buf_init(&disp_buf1, buf1_1, NULL, 480*10);

    /*Create a display*/
    lv_disp_drv_t disp_drv;
    lv_disp_drv_init(&disp_drv);                 /*Basic initialization*/
    disp_drv.buffer = &disp_buf1;
    disp_drv.flush_cb = monitor_flush;    /*Used when `LV_VDB_SIZE != 0` in lv_conf.h (buffered drawing)*/

    lv_disp_drv_register(&disp_drv);

    /* Add the mouse as input device
     * Use the 'mouse' driver which reads the PC's mouse*/
    mouse_init();
    lv_indev_drv_t indev_drv;
    lv_indev_drv_init(&indev_drv);          /*Basic initialization*/
    indev_drv.type = LV_INDEV_TYPE_POINTER;
    indev_drv.read_cb = mouse_read;         /*This function will be called periodically (by the library) to get the mouse position and state*/
    lv_indev_t * mouse_indev = lv_indev_drv_register(&indev_drv);

    /*Set a cursor for the mouse*/
    LV_IMG_DECLARE(mouse_cursor_icon); /*Declare the image file.*/
    /*Create an image object for the cursor */
    lv_obj_t * cursor_obj =  lv_img_create(lv_disp_get_scr_act(NULL), NULL);
    lv_img_set_src(cursor_obj, &mouse_cursor_icon);/*Set the image source*/
    lv_indev_set_cursor(mouse_indev, cursor_obj);/*Connect the image  object to the driver*/

    /* Create an SDL thread to do this*/
    SDL_CreateThread(tick_thread, "tick", NULL);
}

/**
 * A task to measure the elapsed time for LittlevGL
 * @param data unused
 * @return never return
 */
static int tick_thread(void * data)
{
    (void)data;

    while(1) {
        SDL_Delay(5);   /*Sleep for 5 millisecond*/
        lv_tick_inc(5); /*Tell LittelvGL that 5 milliseconds were elapsed*/
    }

    return 0;
}
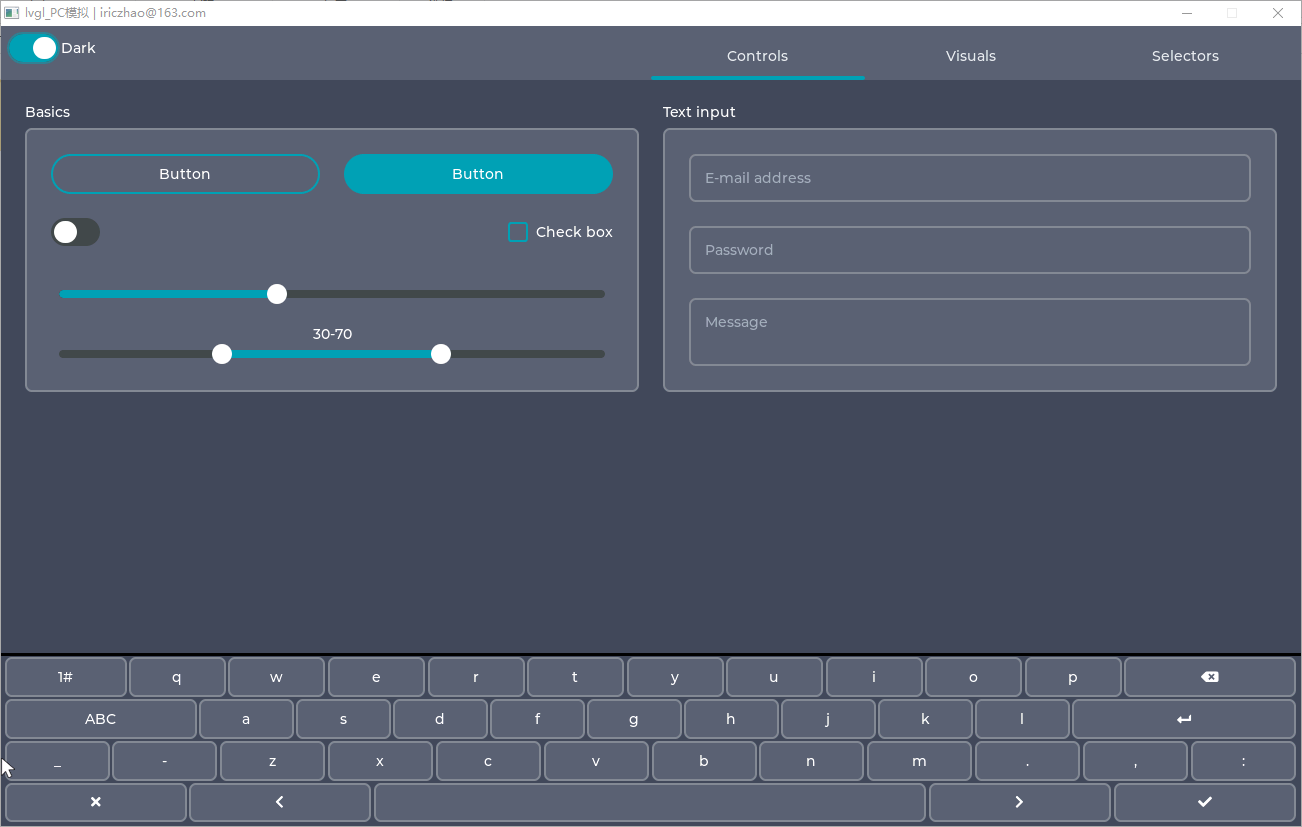
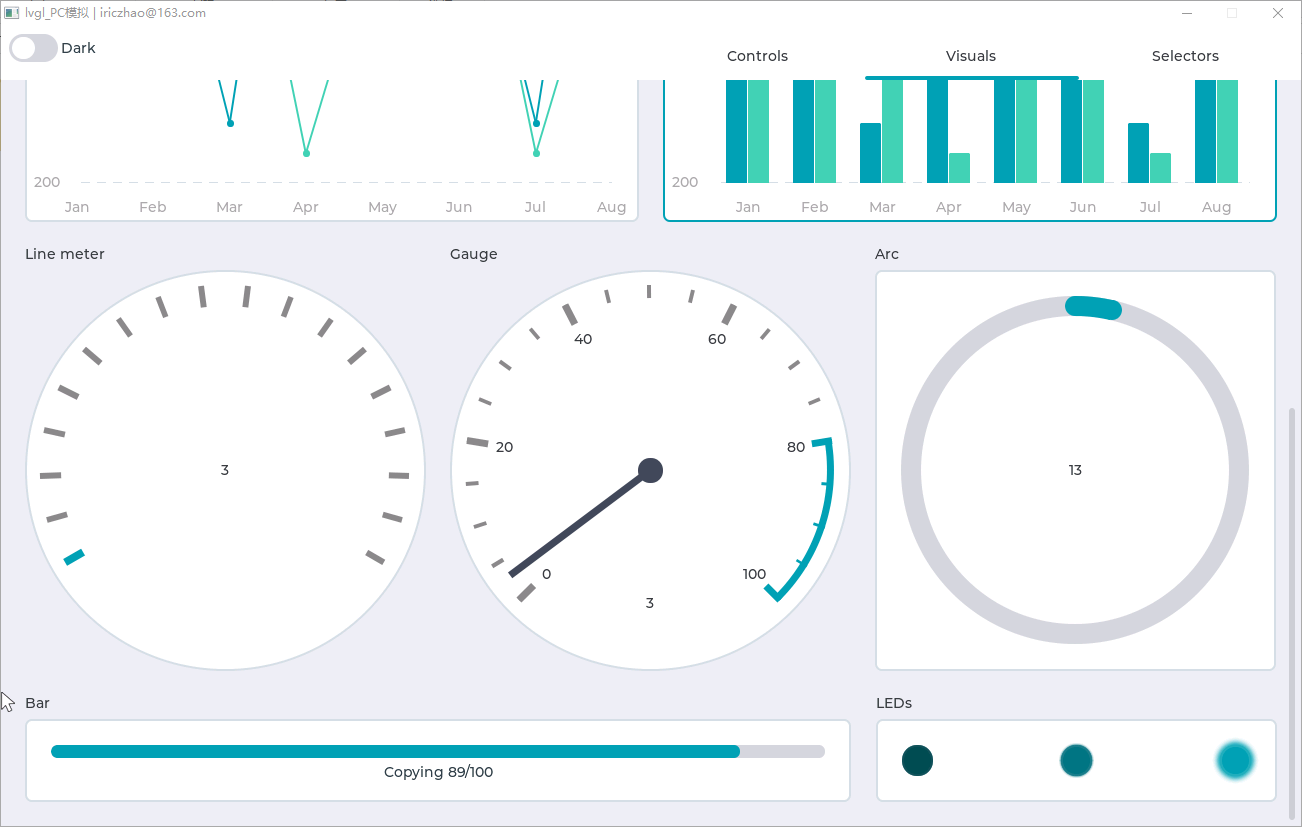
三、运行效果演示
四、注意事项
总而言之,目标就是在QtCreaotr这个IDE下进行lvgl的开发,并使用SDL2来进行PC上实际运行仿真。可以有直观的效果,同时也能在没有具体硬件平台的情况下,进行软件的开发和调试。
在这个过程中,重要的还是需要将lvgl源码、lv_drivers和lv_demos三个部分集成在一起,需要保证三个源码包的发布版本一致,不然可能会出现不同版本间接口不统一,或者lvgl源码文件重构后,无法编译通过。哈哈......