安装步骤
1.安装mysql数据库
安装msyql5.7
wget  http://dev.mysql.com/get/mysql57-community-release-el7-10.noarch.rpm

yum -y install mysql57-community-release-el7-10.noarch.rpm

yum -y install mysql-community-server
eifangwei100/java/article/details/102611519
启动数据库
systemctl start mysqld.service

systemctl status mysqld.service
查看数据库初始密码
[root@localhost opt]# grep 'password' /var/log/mysqld.log
2020-06-08T07:30:55.369972Z 1 [Note] A temporary password is generated for root@localhost: ssiP,lSHs9gA
[root@localhost opt]#
登录mysql数据库修改初始密码
[root@localhost opt]# mysql -uroot -p
Enter password:
Welcome to the MySQL monitor.  Commands end with ; or g.
Your MySQL connection id is 2
Server version: 5.7.30

Copyright (c) 2000, 2020, Oracle and/or its affiliates. All rights reserved.

Oracle is a registered trademark of Oracle Corporation and/or its
affiliates. Other names may be trademarks of their respective
owners.

Type 'help;' or 'h' for help. Type 'c' to clear the current input statement.


mysql> ALTER USER 'root'@'localhost' IDENTIFIED BY 'Test@1234';
Query OK, 0 rows affected (0.00 sec)

mysql>
注:mysql5.7默认对密码复杂度有要求
mysql> grant all privileges on *.* to 'root'@'%' identified by 'Test@1234';
Query OK, 0 rows affected, 1 warning (0.00 sec)

mysql> flush privileges;
Query OK, 0 rows affected (0.00 sec)

mysql>
mysql>
mysql> select user,host from mysql.user;
+---------------+-----------+
| user          | host      |
+---------------+-----------+
| root          | %         |
| zabbix        | %         |
| mysql.session | localhost |
| mysql.sys     | localhost |
| root          | localhost |
+---------------+-----------+
5 rows in set (0.01 sec)

mysql>
2.安装zabbix
由于zabbix官方网站在国内下载比较慢,而且yum安装用zabbix官方源经常安装失败,我们使用阿里的镜像站。
[root@localhost ~]# cd /etc/yum.repos.d/
[root@localhost yum.repos.d]# ll
总用量 24
-rw-r--r--. 1 root root  659 5月  27 13:45 1
-rw-r--r--. 1 root root 1572 6月   8 11:57 CentOS7-Base-163.repo
-rw-r--r--. 1 root root 2523 6月   8 11:56 Centos-7.repo
-rw-r--r--. 1 root root  664 6月   8 12:19 epel-7.repo
-rw-r--r--. 1 root root  951 10月  3 2017 epel.repo
-rw-r--r--. 1 root root 1050 10月  3 2017 epel-testing.repo
drwxr-xr-x. 2 root root  212 6月   8 11:56 repo_bak

[root@localhost yum.repos.d]# rpm -Uvh https://mirrors.aliyun.com/zabbix/zabbix/4.4/rhel/7/x86_64/zabbix-release-4.4-1.el7.noarch.rpm
获取https://mirrors.aliyun.com/zabbix/zabbix/4.4/rhel/7/x86_64/zabbix-release-4.4-1.el7.noarch.rpm
准备中...                          ################################# [100%]
正在升级/安装...
   1:zabbix-release-4.4-1.el7         ################################# [100%]
[root@localhost yum.repos.d]# ll
总用量 28
-rw-r--r--. 1 root root  659 5月  27 13:45 1
-rw-r--r--. 1 root root 1572 6月   8 11:57 CentOS7-Base-163.repo
-rw-r--r--. 1 root root 2523 6月   8 11:56 Centos-7.repo
-rw-r--r--. 1 root root  664 6月   8 12:19 epel-7.repo
-rw-r--r--. 1 root root  951 10月  3 2017 epel.repo
-rw-r--r--. 1 root root 1050 10月  3 2017 epel-testing.repo
drwxr-xr-x. 2 root root  212 6月   8 11:56 repo_bak
-rw-r--r--. 1 root root  633 10月  7 2019 zabbix.repo
[root@localhost yum.repos.d]#
下载安装后/etc/yum.repo目录下会生成zabbix.repo文件,修改zabbix.repo文件。
[root@localhost ~]# vim /etc/yum.repos.d/zabbix.repo

[zabbix]
name=Zabbix Official Repository - $basearch
baseurl=https://mirrors.aliyun.com/zabbix/zabbix/4.4/rhel/7/$basearch/
enabled=1
gpgcheck=1
gpgkey=file:///etc/pki/rpm-gpg/RPM-GPG-KEY-ZABBIX-A14FE591

[zabbix-debuginfo]
name=Zabbix Official Repository debuginfo - $basearch
baseurl=https://mirrors.aliyun.com/zabbix/zabbix/4.4/rhel/7/$basearch/debuginfo/
enabled=0
gpgkey=file:///etc/pki/rpm-gpg/RPM-GPG-KEY-ZABBIX-A14FE591
gpgcheck=1

[zabbix-non-supported]
name=Zabbix Official Repository non-supported - $basearch
baseurl=https://mirrors.aliyun.com/zabbix/zabbix/4.4/rhel/7/x86_64/
enabled=1
gpgkey=file:///etc/pki/rpm-gpg/RPM-GPG-KEY-ZABBIX
gpgcheck=1
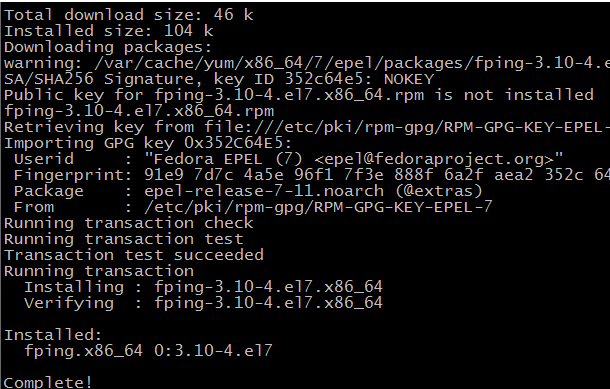
安装fping,以免出错
yum install -y epel-release

yum install -y iksemel fping libiksemel
安装zabbix-server、agent和apache
yum -y install zabbix-server-mysql zabbix-web-mysql zabbix-apache-conf zabbix-age
3.配置zabbix
创建初始数据库
mysql> create database zabbix character set utf8 collate utf8_bin;
Query OK, 1 row affected (0.00 sec)

mysql> grant all privileges on zabbix.* to zabbix@'%' identified by 'Zabbix@2019';
Query OK, 0 rows affected, 1 warning (0.00 sec)
mysql> flush privileges;
Query OK, 0 rows affected (0.00 sec)
导入初始架构和数据,系统将提示您输入新创建的密码:
1、首先将zabbix server的sql语句传到mysql 服务器上
[root@localhost yum.repos.d]# ls /usr/share/doc/zabbix-server-mysql-4.4.9/
AUTHORS  ChangeLog  COPYING  create.sql.gz  NEWS  README
[root@localhost yum.repos.d]# pwd
/etc/yum.repos.d
[root@localhost yum.repos.d]# scp /usr/share/doc/zabbix-server-mysql-4.4.9/create.sql.gz root@192.168.1.185:/opt/
The authenticity of host '192.168.1.185 (192.168.1.185)' can't be established.
ECDSA key fingerprint is SHA256:0wj6SflMkPSY6ZdgoSp0esX6XoJ8dB9YCG8PeyC/urQ.
ECDSA key fingerprint is MD5:cc:3c:dc:69:a8:67:9e:c0:78:8e:98:5e:ea:8a:e2:f3.
Are you sure you want to continue connecting (yes/no)? yes
Warning: Permanently added '192.168.1.185' (ECDSA) to the list of known hosts.
root@192.168.1.185's password:
create.sql.gz                                                                                                                100% 1442KB  13.0MB/s   00:00
[root@localhost yum.repos.d]#
2、导入
[root@localhost opt]# ll
总用量 1472
-rw-r--r--. 1 root root 1476578 6月   8 15:30 create.sql.gz
-rw-r--r--. 1 root root   25548 6月   8 15:16 mysql57-community-release-el7-10.noarch.rpm
drwxr-xr-x. 6 root root      56 5月  12 16:04 python3
[root@localhost opt]# zcat create.sql.gz | mysql -uzabbix -p zabbix
Enter password:
[root@localhost opt]#
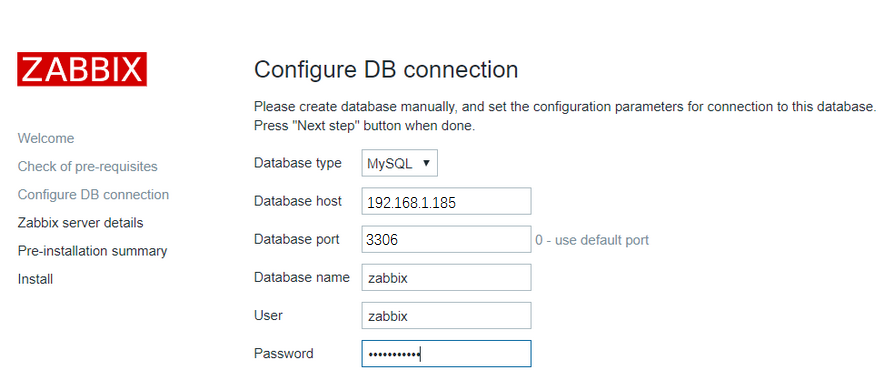
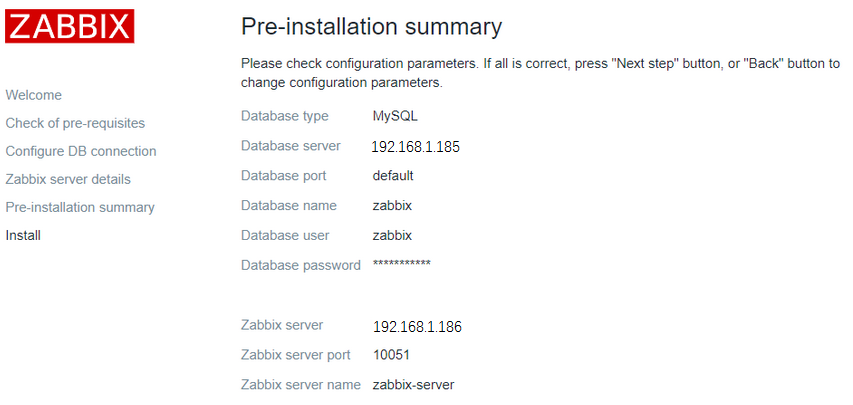
为Zabbix server配置数据库,编辑配置文件 /etc/zabbix/zabbix_server.conf
[root@localhost yum.repos.d]#  grep -n '^'[a-Z] /etc/zabbix/zabbix_server.conf
12:ListenPort=10051
38:LogFile=/var/log/zabbix/zabbix_server.log
49:LogFileSize=0
72:PidFile=/var/run/zabbix/zabbix_server.pid
82:SocketDir=/var/run/zabbix
91:DBHost=192.168.1.185
100:DBName=zabbix
116:DBUser=zabbix
124:DBPassword=Zabbix@2019
139:DBPort=3306
356:SNMPTrapperFile=/var/log/snmptrap/snmptrap.log
473:Timeout=4
516:AlertScriptsPath=/usr/lib/zabbix/alertscripts
527:ExternalScripts=/usr/lib/zabbix/externalscripts
563:LogSlowQueries=3000
678:StatsAllowedIP=127.0.0.1
[root@localhost yum.repos.d]#
配置PHP上海时区,编辑配置文件 /etc/httpd/conf.d/zabbix.conf
vim /etc/httpd/conf.d/zabbix.conf

php_value date.timezone Asia/Shanghai
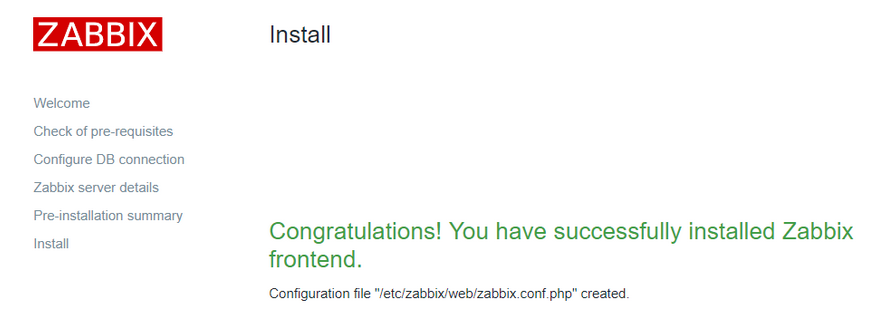
启动Zabbix server和agent进程并设置开机启动
systemctl start zabbix-server zabbix-agent httpd

systemctl enable zabbix-server zabbix-agent httpd
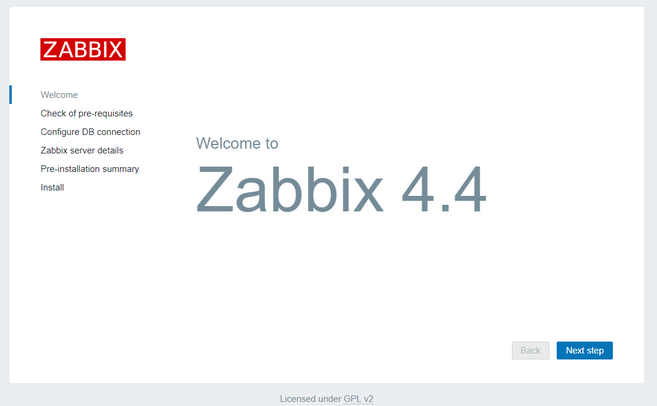
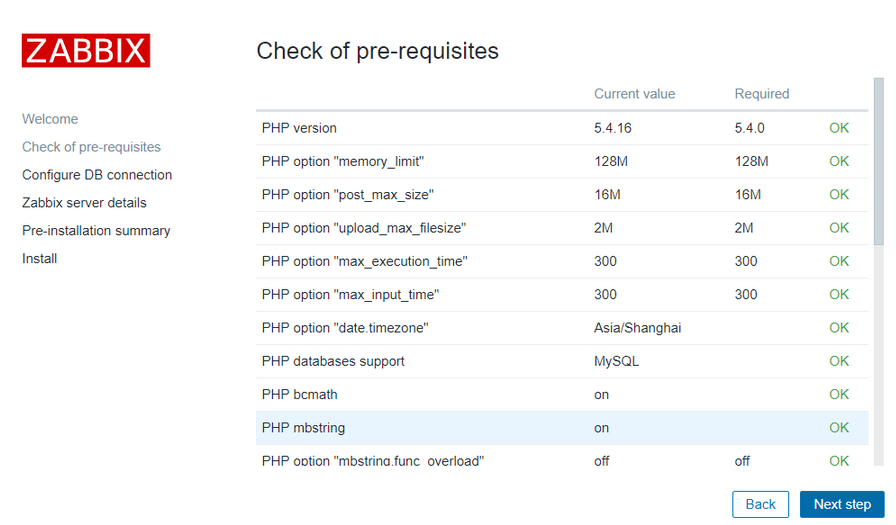
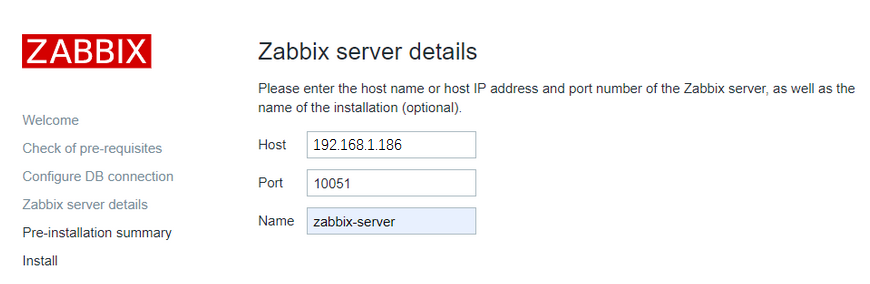
登录并配置zabbix前端,注意配置zabbix数据库密码,其他全部下一步即可
http://192.168.1.186/zabbix
再连接数据库之前确保,zabbix server上的selinux、防火墙等关闭,否则会提示连接错误
具体信息可以查看:
【tail -f /var/log/zabbix/zabbix_server.log 和 /var/log/messages 】
登录zabbix页面,默认用户为Admin,密码为zabbix,用yum安装zabbix的路径是http://x.x.x.x/zabbix/
