/*
@author:Isadora
@time:2021/7/17
*/
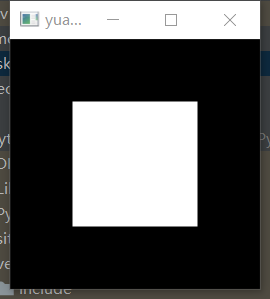
轮廓检测01:使用numpy生成图像
 1 import cv2
 2 import numpy as np
 3
 4 #生成200*200的黑色空白图像
 5 img = np.zeros((200,200), dtype=np.uint8)
 6 img[50:150, 50:150] = 255
 7
 8 #阈值分割
 9 ret, thresh = cv2.threshold(img, 127, 255, 0)
10
11 #寻找轮廓函数
12 contours, hierarchy = cv2.findContours(thresh, cv2.RETR_TREE, cv2.CHAIN_APPROX_SIMPLE)
13
14 #颜色空间转换
15 color = cv2.cvtColor(img, cv2.COLOR_GRAY2BGR)
16
17 #绘制轮廓
18 img = cv2.drawContours(color, contours, -1, (0,255,0), 2)
19 cv2.imshow("contours", color)
20 cv2.waitKey()
21 cv2.destroyAllWindows()
原图:
效果图: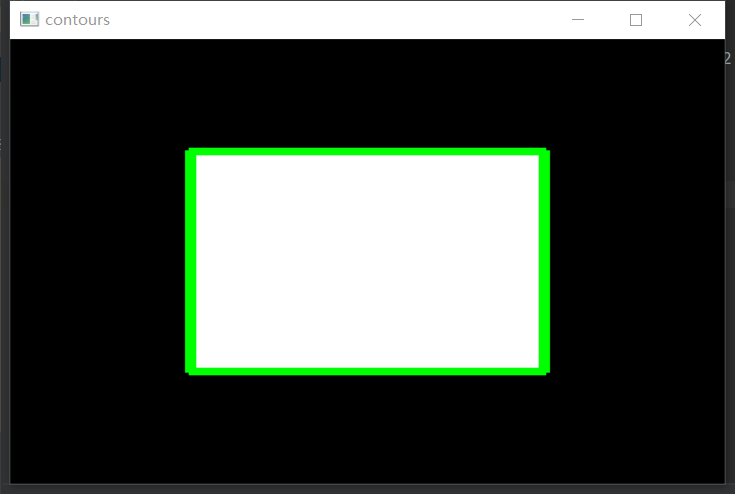
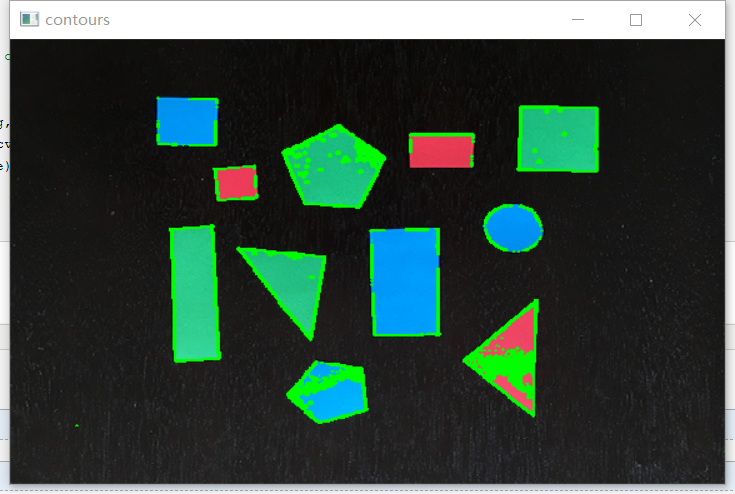
轮廓检测2:输入图像
 1 import cv2
 2 import numpy as np
 3
 4 #生成200*200的黑色图像
 5 # img = np.zeros((200,200), dtype=np.uint8)
 6 # img[50:150, 50:150] = 255
 7 #获取图像
 8 img = cv2.imread("C:/Users/15212/Desktop/python/example_shapes.png")
 9 gray = cv2.cvtColor(img, cv2.COLOR_BGR2GRAY)
10
11 #阈值分割
12 ret, thresh = cv2.threshold(gray, 127, 255, 0)
13
14 #寻找轮廓函数
15 contours, hierarchy = cv2.findContours(thresh, cv2.RETR_TREE, cv2.CHAIN_APPROX_SIMPLE)
16
17 #颜色空间转换
18 # color = cv2.cvtColor(img, cv2.COLOR_GRAY2BGR)
19
20 #绘制轮廓
21 image = cv2.drawContours(img, contours, -1, (0,255,0), 2)
22 cv2.namedWindow("contours",cv2.WINDOW_NORMAL)
23 cv2.imshow("contours", image)
24 cv2.waitKey()
25 cv2.destroyAllWindows()
效果图:
总结1与2的区别:
1的处理步骤:
生成图像→阈值分割→寻找轮廓函数→颜色空间转换→绘制轮廓
2的处理步骤:
获取图像→颜色空间转换→阈值分割→寻找轮廓→绘制轮廓