如何有顺序的搭建一个Spring的web项目
一、新建一个简单的maven,war工程
eclipse下如有报错,右键 Deployment 单击 Generate 生成web.xml后可解决报错
二、引入Spring的web依赖
        <dependency>
            <groupId>org.springframework</groupId>
            <artifactId>spring-webmvc</artifactId>
            <version>5.0.9.RELEASE</version>
        </dependency>
版本根据情况选择
三、编写 web.xml 文件
<?xml version="1.0" encoding="UTF-8"?>
<web-app xmlns:xsi="http://www.w3.org/2001/XMLSchema-instance"
    xmlns="http://java.sun.com/xml/ns/javaee"
    xsi:schemaLocation="http://java.sun.com/xml/ns/javaee http://java.sun.com/xml/ns/javaee/web-app_2_5.xsd"
    version="2.5">
    <!-- 第一步:输入ContextLoaderListener后根据代码提示快捷键直接生成下面区域配置 -->
    <!-- needed for ContextLoaderListener -->
    <context-param>
        <param-name>contextConfigLocation</param-name>
        <!-- 第二步:配置配置文件及其所在路径如下 -->
        <param-value>classpath:applicationContext.xml</param-value>
    </context-param>
    <!-- Bootstraps the root web application context before servlet initialization -->
    <listener>
        <listener-class>org.springframework.web.context.ContextLoaderListener</listener-class>
    </listener>
    <!-- ----------------------至此均为第一步生成 ---------------------->
</web-app>
四、创建配置文件
1)拷贝配置文件第二步中您所配置的文件名称(applicationContext.xml)
2)在resources(即classpath根目录下)右键选择 New -> other... 输入bean
选择上方选项创建配置文件
五、配置SpringMVC
在web.xml中 输入 DispatcherServlet 快捷生成配置信息
<?xml version="1.0" encoding="UTF-8"?>
<web-app xmlns:xsi="http://www.w3.org/2001/XMLSchema-instance"
    xmlns="http://java.sun.com/xml/ns/javaee"
    xsi:schemaLocation="http://java.sun.com/xml/ns/javaee http://java.sun.com/xml/ns/javaee/web-app_2_5.xsd"
    version="2.5">
    <!-- 第一步:输入ContextLoaderListener后根据代码提示快捷键直接生成下面区域配置 -->
    <!-- needed for ContextLoaderListener -->
    <context-param>
        <param-name>contextConfigLocation</param-name>
        <!-- 第二步:配置配置文件及其所在路径如下 -->
        <param-value>classpath:applicationContext.xml</param-value>
    </context-param>
    <!-- Bootstraps the root web application context before servlet initialization -->
    <listener>
        <listener-class>org.springframework.web.context.ContextLoaderListener</listener-class>
    </listener>
    <!-- 至此均为第一步生成-->

    <!-- 配置DispatcherServlet -->
    <!-- The front controller of this Spring Web application, responsible for handling all application requests -->
    <servlet>
        <servlet-name>spring</servlet-name>
        <servlet-class>org.springframework.web.servlet.DispatcherServlet</servlet-class>
        <!-- 删除没必要的 -->
        <load-on-startup>1</load-on-startup>
    </servlet>

    <!-- Map all requests to the DispatcherServlet for handling -->
    <servlet-mapping>
        <servlet-name>spring</servlet-name>
        <url-pattern>/</url-pattern>
    </servlet-mapping>
</web-app>
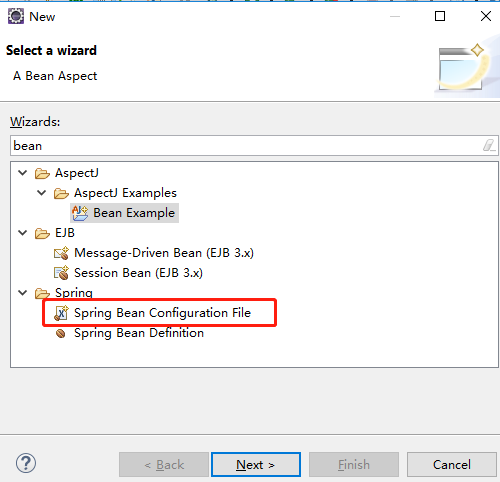
六、创建配置文件
用相同的步骤创建一个spring的xml文件
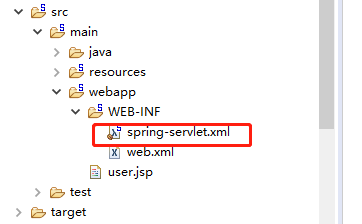
注意这里文件的命名跟 DispatchServlet配置中的 (sevlet-name)-servlet.xml 组成
<?xml version="1.0" encoding="UTF-8"?>
<beans xmlns="http://www.springframework.org/schema/beans"
    xmlns:xsi="http://www.w3.org/2001/XMLSchema-instance"
    xmlns:mvc="http://www.springframework.org/schema/mvc"
    xmlns:context="http://www.springframework.org/schema/context"
    xsi:schemaLocation="http://www.springframework.org/schema/mvc http://www.springframework.org/schema/mvc/spring-mvc-4.3.xsd
        http://www.springframework.org/schema/beans http://www.springframework.org/schema/beans/spring-beans.xsd
        http://www.springframework.org/schema/context http://www.springframework.org/schema/context/spring-context-4.3.xsd">


    <context:component-scan base-package="cn.taosir.shiro"></context:component-scan>

    <bean class="org.springframework.web.servlet.view.InternalResourceViewResolver">
        <property name="prefix" value="/"></property>
        <property name="suffix" value=".jsp"></property>
    </bean>

    <mvc:annotation-driven></mvc:annotation-driven>
    <mvc:default-servlet-handler/>
</beans>
然后创建相应的 cn.taosir.shiro 包
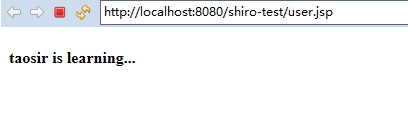
七、验证是否成功
创建一个jsp
<%@ page language="java" contentType="text/html; charset=UTF-8"
    pageEncoding="UTF-8"%>
<!DOCTYPE html PUBLIC "-//W3C//DTD HTML 4.01 Transitional//EN" "http://www.w3.org/TR/html4/loose.dtd">
<html>
<head>
<meta http-equiv="Content-Type" content="text/html; charset=UTF-8">
<title>Insert title here</title>
</head>
<body>
    <h4>taosir is learning...</h4>
</body>
</html>
配置启动tomcat服务器