1. 什么是注解
Java 注解(Annotation)又称 Java 标注,是 JDK5.0 引入的一种注释机制。注解其实就是一种标记,常常用于代替冗余复杂的配置,它本身并不起任何作用,可以说有它没它都不影响程序的正常运行,注解的作用在于「注解的处理程序」,注解处理程序通过捕获被注解标记的代码然后进行一些处理,这就是注解工作的方式。
Java 语言中的类、方法、变量、参数和包等都可以被标注。
Java自定义注解一般使用场景为:自定义注解+拦截器或者AOP。
1.1 注解的使用场景
- 登录拦截
- AOP日志
- JSR303自定义校验
...
2. 注解的定义
注解也是一种类的类型,他使用的修饰符为 @interface。其中的每一个方法实际上是声明了一个配置参数。
在定义注解时,不能继承其他的注解或接口。
  public @interface MyAnnotation {
  }
接着我们就可以在类或者方法上作用我们刚刚新建的注解。
  @MyAnnotation
  public class test {
     @MyTestAnnotation
     public static void main(String[] args){
     }
  }
3. 内置的注解
Java 定义了一套注解,共有 7 个,3 个在 java.lang 中,剩下 4 个在 java.lang.annotation 中。
作用于代码的注解:
  @Override         - 检查该方法是否是重写方法。如果发现其父类,或者是引用的接口中并没有该方法时,会报编译错误。
  @Deprecated       - 标记过时方法。如果使用该方法,会报编译警告。
  @SuppressWarnings - 指示编译器去忽略注解中声明的警告。
元注解:【作用在其他注解的注解,方便我们使用注解实现想要的功能。】
  @Retention  - 标识这个注解怎么保存,是只在代码中,还是编入class文件中,或者是在运行时可以通过反射访问。
  @Documented - 标记这些注解是否包含在用户文档中。
  @Target     - 标记这个注解应该是哪种 Java 成员。
  @Inherited  - 标记这个注解是继承于哪个注解类(默认 注解并没有继承于任何子类)
从 Java 7 开始,额外添加了 3 个注解:
  @SafeVarargs         - Java 7 开始支持,忽略任何使用参数为泛型变量的方法或构造函数调用产生的警告。
  @FunctionalInterface - Java 8 开始支持,标识一个匿名函数或函数式接口。
  @Repeatable          - Java 8 开始支持,标识某注解可以在同一个声明上使用多次。
3.1 元注解————@Retention
@Retention表示注解存在阶段是保留在源码(编译期),字节码(类加载)或者运行期(JVM中运行)。
在@Retention注解中使用枚举RetentionPolicy来表示注解保留时期。
  @Retention(RetentionPolicy.CLASS), 默认的保留策略,注解会在class字节码文件中存在,但运行时无法获得。
  @Retention(RetentionPolicy.SOURCE),注解仅存在于源码中,在class字节码文件中不包含。
  @Retention(RetentionPolicy.RUNTIME), 注解会在class字节码文件中存在,在运行时可以通过反射获取到。
如果我们是自定义注解,我们自定义注解如果只存着源码中或者字节码文件中就无法发挥作用,而在运行期间能获取到注解才能实现我们目的,所以自定义注解中肯定是使用 @Retention(RetentionPolicy.RUNTIME)!!
  @Retention(RetentionPolicy.RUNTIME)
  public @interface MyAnnotation {

  }
3.2 元注解————@Target
@Target元注解表示我们的注解作用的范围,可以是类,方法,方法参数变量等。
在@Target注解中使用枚举类ElementType表达作用类型。
  @Target(ElementType.TYPE) 作用接口、类、枚举、注解
  @Target(ElementType.FIELD) 作用属性字段、枚举的常量
  @Target(ElementType.METHOD) 作用方法
  @Target(ElementType.PARAMETER) 作用方法参数
  @Target(ElementType.CONSTRUCTOR) 作用构造函数
  @Target(ElementType.LOCAL_VARIABLE)作用局部变量
  @Target(ElementType.ANNOTATION_TYPE)作用于注解(@Retention注解中就使用该属性)
  @Target(ElementType.PACKAGE) 作用于包
  @Target(ElementType.TYPE_PARAMETER) 作用于类型泛型,即泛型方法、泛型类、泛型接口 (jdk1.8加入)
  @Target(ElementType.TYPE_USE) 类型使用.可以用于标注任意类型除了 class (jdk1.8加入)
  一般比较常用的是ElementType.TYPE类型
  @Retention(RetentionPolicy.RUNTIME)
  @Target(ElementType.TYPE)
  public @interface MyAnnotation {

  }
3.3 元注解————@Documented
@Document表示将注解中的元素包含到 Javadoc 中去。
3.4 元注解————@Inherited
如果被这个注解标记了,被标记的类、接口会继承父类、接口的上面的注解。
/**自定义注解*/
@Documented
@Inherited
@Retention(RetentionPolicy.RUNTIME)
@Target(ElementType.TYPE)
public @interface MyTestAnnotation {
}
/**父类标注自定义注解*/
@MyTestAnnotation
public class Father {
}
/**子类*/
public class Son extends Father {
}
/**测试子类获取父类自定义注解*/
public class test {
   public static void main(String[] args){

      //获取Son的class对象
       Class<Son> sonClass = Son.class;
      // 获取Son类上的注解MyTestAnnotation可以执行成功
      MyTestAnnotation annotation = sonClass.getAnnotation(MyTestAnnotation.class);
   }
}
3.5 元注解————@Repeatable
@Repeatable表示被这个元注解修饰的注解可以同时作用一个对象多次,但是每次作用注解又可以代表不同的含义。
/**一个人喜欢玩游戏,他喜欢玩英雄联盟,绝地求生,极品飞车,尘埃4等,则我们需要定义一个人的注解,他属性代表喜欢玩游戏集合,一个游戏注解,游戏属性代表游戏名称*/
/**玩家注解*/
@Documented
@Retention(RetentionPolicy.RUNTIME)
@Target(ElementType.TYPE)
public @interface People {
    Game[] value() ;
}
/**游戏注解*/
@Repeatable(People.class)
@Retention(RetentionPolicy.RUNTIME)
@Target(ElementType.TYPE)
public @interface Game {
    String value() default "";
}
/**玩游戏类*/
@Game(value = "LOL")
@Game(value = "PUBG")
@Game(value = "NFS")
@Game(value = "Dirt4")
public class PlayGame {
}
4. 注解的属性
注解的属性其实和类中定义的变量有异曲同工之处。
注解中的变量都是成员变量(属性),变量名就是使用注解括号中对应的参数名。变量返回值就是注解括号中对应参数类型。
【推荐】如果只有一个参数成员,最好把参数名称设为"value",后加小括号。
可以通过default来声明参数的默认值。
注解中没有方法的。
4.1 注解属性类型
  1.基本数据类型
  2.String
  3.枚举类型
  4.注解类型
  5.Class类型
  6.以上类型的一维数组类型
4.2 为注解属性赋值
  @Documented
  @Inherited
  @Retention(RetentionPolicy.RUNTIME)
  @Target(ElementType.TYPE)
  public @interface MyTestAnnotation {
      String name() default "mao";
      int age() default 18;
  }

  @MyTestAnnotation(name = "father",age = 50)
  public class Father {
  }
列子:
/**
 * 水果颜色注解
 * @author peida
 *
 */
@Target(ElementType.FIELD)
@Retention(RetentionPolicy.RUNTIME)
@Documented
public @interface FruitColor {
    /**
     * 颜色枚举
     * @author peida
     *
     */
    public enum Color{ BULE,RED,GREEN};

    /**
     * 颜色属性
     * @return
     */
    Color fruitColor() default Color.GREEN;

}

public class Apple {

    @FruitColor(fruitColor=Color.RED)
    private String appleColor;

}
如果注解又多个属性,则可以在注解括号中用“,”号隔开分别给对应的属性赋值。
5. 解析注解
如何提取注解的属性,这才是使用注解的关键,获取属性的值才是使用注解的目的。
反射相关的类Class, Method, Field都实现了AnnotationElement接口。
Annotaion接口是所有Annotation类型的父接口。除此之外,Java在java.lang.reflect 包下新增了AnnotatedElement接口,该接口是所有程序元素(Class、Method和Constructor)的父接口。当程序通过反射获取了某个类的AnnotatedElement对象之后,程序就可以调用AnnotatedElement对象的如下几个方法来访问Annotation信息。
 /**是否存在对应 Annotation 对象*/
  public boolean isAnnotationPresent(Class<? extends Annotation> annotationClass) {
        return GenericDeclaration.super.isAnnotationPresent(annotationClass);
    }

 /**获取 Annotation 对象*/
    public <A extends Annotation> A getAnnotation(Class<A> annotationClass) {
        Objects.requireNonNull(annotationClass);

        return (A) annotationData().annotations.get(annotationClass);
    }
 /**获取所有 Annotation 对象数组*/
 public Annotation[] getAnnotations() {
        return AnnotationParser.toArray(annotationData().annotations);
    }
我们来获取一下注解属性,在获取之前我们自定义的注解必须使用元注解@Retention(RetentionPolicy.RUNTIME)。
public class test {
   public static void main(String[] args) throws NoSuchMethodException {

        /**
         * 获取类注解   属性
         */
        Class<Father> fatherClass = Father.class;
        boolean flag = fatherClass.isAnnotationPresent(MyTestAnnotation.class);
        if(flag){
            MyTestAnnotation annotation = fatherClass.getAnnotation(MyTestAnnotation.class);
            System.out.println(annotation.name());
            System.out.println(annotation.age());
        }

        /**
         * 获取方法注解   属性
         */
        try {
            Field age = fatherClass.getDeclaredField("age");
            boolean flag = age.isAnnotationPresent(Age.class);
            if(flag){
                Age annotation = age.getAnnotation(Age.class);
                System.out.println(annotation.value());
            }

            Method play = PlayGame.class.getDeclaredMethod("play");
            if (play!=null){
                People annotation2 = play.getAnnotation(People.class);
                Game[] value = annotation2.value();
                for (Game game : value) {
                    System.out.println(game.value());
                }
            }
        } catch (NoSuchFieldException e) {
            e.printStackTrace();
        }
    }
}
例子:
/***********注解声明***************/
/**
 * 水果名称注解
 * @author peida
 *
 */
@Target(ElementType.FIELD)
@Retention(RetentionPolicy.RUNTIME)
@Documented
public @interface FruitName {
    String value() default "";
}

/**
 * 水果颜色注解
 * @author peida
 *
 */
@Target(ElementType.FIELD)
@Retention(RetentionPolicy.RUNTIME)
@Documented
public @interface FruitColor {
    /**
     * 颜色枚举
     * @author peida
     *
     */
    public enum Color{ BULE,RED,GREEN};

    /**
     * 颜色属性
     * @return
     */
    Color fruitColor() default Color.GREEN;

}

/**
 * 水果供应者注解
 * @author peida
 *
 */
@Target(ElementType.FIELD)
@Retention(RetentionPolicy.RUNTIME)
@Documented
public @interface FruitProvider {
    /**
     * 供应商编号
     * @return
     */
    public int id() default -1;

    /**
     * 供应商名称
     * @return
     */
    public String name() default "";

    /**
     * 供应商地址
     * @return
     */
    public String address() default "";
}

/***********注解使用***************/

public class Apple {

    @FruitName("Apple")
    private String appleName;

    @FruitColor(fruitColor=Color.RED)
    private String appleColor;

    @FruitProvider(id=1,name="陕西红富士集团",address="陕西省西安市延安路89号红富士大厦")
    private String appleProvider;

    public void setAppleColor(String appleColor) {
        this.appleColor = appleColor;
    }
    public String getAppleColor() {
        return appleColor;
    }

    public void setAppleName(String appleName) {
        this.appleName = appleName;
    }
    public String getAppleName() {
        return appleName;
    }

    public void setAppleProvider(String appleProvider) {
        this.appleProvider = appleProvider;
    }
    public String getAppleProvider() {
        return appleProvider;
    }

    public void displayName(){
        System.out.println("水果的名字是:苹果");
    }
}

/***********注解处理器***************/

public class FruitInfoUtil {
    public static void getFruitInfo(Class<?> clazz){

        String strFruitName=" 水果名称:";
        String strFruitColor=" 水果颜色:";
        String strFruitProvicer="供应商信息:";

        Field[] fields = clazz.getDeclaredFields();

        for(Field field :fields){
            if(field.isAnnotationPresent(FruitName.class)){
                FruitName fruitName = (FruitName) field.getAnnotation(FruitName.class);
                strFruitName=strFruitName+fruitName.value();
                System.out.println(strFruitName);
            }
            else if(field.isAnnotationPresent(FruitColor.class)){
                FruitColor fruitColor= (FruitColor) field.getAnnotation(FruitColor.class);
                strFruitColor=strFruitColor+fruitColor.fruitColor().toString();
                System.out.println(strFruitColor);
            }
            else if(field.isAnnotationPresent(FruitProvider.class)){
                FruitProvider fruitProvider= (FruitProvider) field.getAnnotation(FruitProvider.class);
                strFruitProvicer=" 供应商编号:"+fruitProvider.id()+" 供应商名称:"+fruitProvider.name()+" 供应商地址:"+fruitProvider.address();
                System.out.println(strFruitProvicer);
            }
        }
    }
}

/***********输出结果***************/
public class FruitRun {

    /**
     * @param args
     */
    public static void main(String[] args) {

        FruitInfoUtil.getFruitInfo(Apple.class);

    }

}

====================================
 水果名称:Apple
 水果颜色:RED
 供应商编号:1 供应商名称:陕西红富士集团 供应商地址:陕西省西安市延安路89号红富士大厦
6. 自定义注解+拦截器 实现登录校验
我们使用springboot拦截器实现这样一个功能,如果方法上加了@LoginRequired,则提示用户该接口需要登录才能访问,否则不需要登录。
6.1 先定义一个注解
@Target(ElementType.FIELD)
@Retention(RetentionPolicy.RUNTIME)
public @interface MyField {
    String description();
    int length();
}
6.2 然后写两个简单的接口,访问sourceA,sourceB资源
@RestController
public class IndexController {
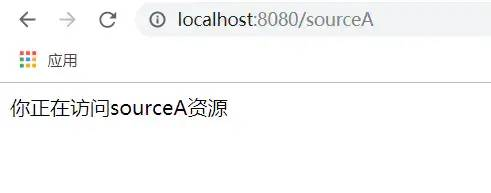
@GetMapping("/sourceA")
public String sourceA(){
return "你正在访问sourceA资源";
}
@GetMapping("/sourceB")
public String sourceB(){
return "你正在访问sourceB资源";
}
}
没添加拦截器之前成功访问:

实现spring的HandlerInterceptor 类先实现拦截器,但不拦截,只是简单打印日志,如下:
public class SourceAccessInterceptor implements HandlerInterceptor {
    @Override
    public boolean preHandle(HttpServletRequest request, HttpServletResponse response, Object handler) throws Exception {
        System.out.println("进入拦截器了");
        return true;
    }

    @Override
    public void postHandle(HttpServletRequest request, HttpServletResponse response, Object handler, ModelAndView modelAndView) throws Exception {

    }

    @Override
    public void afterCompletion(HttpServletRequest request, HttpServletResponse response, Object handler, Exception ex) throws Exception {

    }
}
实现spring类WebMvcConfigurer,创建配置类把拦截器添加到拦截器链中。
@Configuration
public class InterceptorTrainConfigurer implements WebMvcConfigurer {
    @Override
    public void addInterceptors(InterceptorRegistry registry) {
        registry.addInterceptor(new SourceAccessInterceptor()).addPathPatterns("/**");
    }
}
拦截成功如下:

6.3 在sourceB方法上添加我们的登录注解@LoginRequired
@RestController
public class IndexController {

    @GetMapping("/sourceA")
    public String sourceA(){
        return "你正在访问sourceA资源";
    }

    @LoginRequired
    @GetMapping("/sourceB")
    public String sourceB(){
        return "你正在访问sourceB资源";
    }

}
简单实现登录拦截逻辑:
@Override
public boolean preHandle(HttpServletRequest request, HttpServletResponse response, Object handler) throws Exception {
System.out.println("进入拦截器了");
// 反射获取方法上的LoginRequred注解
HandlerMethod handlerMethod = (HandlerMethod)handler;
LoginRequired loginRequired = handlerMethod.getMethod().getAnnotation(LoginRequired.class);
if(loginRequired == null){
return true;
}
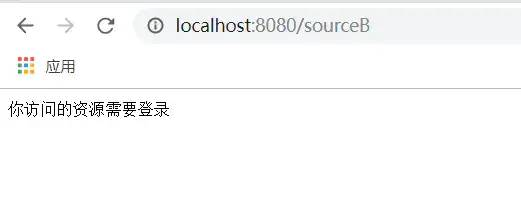
// 有LoginRequired注解说明需要登录,提示用户登录
response.setContentType("application/json; charset=utf-8");
response.getWriter().print("你访问的资源需要登录");
return false;
}
运行成功,访问sourceB时需要登录了,访问sourceA则不用登录。
7. 自定义注解+AOP 实现日志打印
7.1 先导入切面需要的依赖包
<dependency>
      <groupId>org.springframework.boot</groupId>
     <artifactId>spring-boot-starter-aop</artifactId>
</dependency>
7.2 定义一个注解@MyLog
@Target(ElementType.METHOD)
@Retention(RetentionPolicy.RUNTIME)
public @interface MyLog {

}
7.3 定义一个切面类,见如下代码注释理解:
@Aspect // 1.表明这是一个切面类
@Component
public class MyLogAspect {
// 2. PointCut表示这是一个切点,@annotation表示这个切点切到一个注解上,后面带该注解的全类名
// 切面最主要的就是切点,所有的故事都围绕切点发生
// logPointCut()代表切点名称
@Pointcut("@annotation(me.zebin.demo.annotationdemo.aoplog.MyLog)")
public void logPointCut(){};
// 3. 环绕通知
@Around("logPointCut()")
public void logAround(ProceedingJoinPoint joinPoint){
// 获取方法名称
String methodName = joinPoint.getSignature().getName();
// 获取入参
Object[] param = joinPoint.getArgs();
StringBuilder sb = new StringBuilder();
for(Object o : param){
sb.append(o + "; ");
}
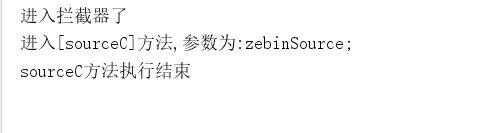
System.out.println("进入[" + methodName + "]方法,参数为:" + sb.toString());
// 继续执行方法
try {
joinPoint.proceed();
} catch (Throwable throwable) {
throwable.printStackTrace();
}
System.out.println(methodName + "方法执行结束");
}
}
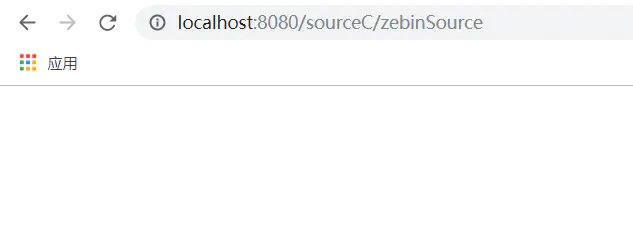
7.4 在步骤二中的IndexController写一个sourceC进行测试,加上我们的自定义注解:
    @MyLog
    @GetMapping("/sourceC/{source_name}")
    public String sourceC(@PathVariable("source_name") String sourceName){
        return "你正在访问sourceC资源";
    }
启动springboot web项目,输入访问地址: