一、安装环境配置
1、在控制节点给受控主机配置本地仓库文件
[root@ansible ~]# vim /etc/yum.repos.d/dvd.repo
[AppStream]
name=appstream
baseurl=file:///mnt/AppStream
gpgcheck=0
enabled=1

[baseOS]
name=baseos
baseurl=file:///mnt/BaseOS
gpgcheck=0
enabled=1
2、配置变量
 //在/etc/ansible/roles目录下创建vars.yaml文件
[root@ansible ~]# cd /etc/ansible/roles/
[root@ansible roles]# vim vars.yaml
[root@ansible roles]# cat vars.yaml
client_ip: 192.168.121.81
client_ip_80: port_80
client_ip_81: port_81
3、配置虚拟主机模板
 //先在控制节点安装httpd
[root@ansible ~]# yum install -y httpd

 //配置vhost.conf
[root@ansible ~]# cp /usr/share/doc/httpd/httpd-vhosts.conf /etc/ansible/roles/httpd-vhosts.conf.j2
[root@ansible ~]# vim /etc/ansible/roles/httpd-vhosts.conf.j2
..........
<VirtualHost {{ client_ip }}:80>
    DocumentRoot "/var/www/html/{{ client_ip_80 }}"
    ErrorLog "/var/log/httpd/{{ client_ip_80 }}-error_log"
    CustomLog "/var/log/httpd/{{ client_ip_80 }}-access_log" common
</VirtualHost>

listen 81
<VirtualHost {{ client_ip }}:81>
    DocumentRoot "/var/www/html/{{ client_ip_81 }}"
    ErrorLog "/var/log/httpd/{{ client_ip_81 }}-error_log"
    CustomLog "/var/log/httpd/{{ client_ip_81 }}-access_log" common
</VirtualHost>
4、配置playbook信息
[root@ansible ~]# vim /etc/ansible/roles/vhosts.yaml
---
- name: Install httpd
  hosts: 192.168.121.81
  vars_files: /etc/ansible/roles/vars.yaml
  tasks:
    - name: copy dvd.repo
      copy:
        src: /etc/yum.repos.d/dvd.repo
        dest: /etc/yum.repos.d/dvd.repo

    - name: mount sr0
      mount:
        src: /dev/sr0
        path: /mnt
        state: present
        fstype: iso9660

    - name: yum makecache
      shell: yum makecache

    - name: isntall httpd service
      yum:
        name: httpd
        state: installed

    - name: start httpd service
      service:
        name: httpd
        state: started
        enabled: yes

    - name: copy vhosts.conf
      template:
        src: /etc/ansible/roles/httpd-vhosts.conf.j2
        dest: /etc/httpd/conf.d/httpd-vhosts.conf

    - name: create dir1
      shell:
        mkdir /var/www/html/{{ client_ip_80 }}

    - name: create dir2
      shell:
        mkdir /var/www/html/{{ client_ip_81 }}

    - name: create file1
      shell:
        echo "this host port is 80" > /var/www/html/{{ client_ip_80 }}/index.html

    - name: create file2
      shell:
        echo "this host port is 81" > /var/www/html/{{ client_ip_81 }}/index.html

    - name: restart httpd service
      service:
        name: httpd
        state: reloaded

    - name: pass 80 port
      firewalld:
         port: 80/tcp
         state: enabled
         permanent: no

    - name: pass 81 port
      firewalld:
         port: 81/tcp
         state: enabled
         permanent: no
二、执行playbook
1、执行/etc/ansible/roles/vhosts.yaml文件
[root@ansible ~]# ansible-playbook /etc/ansible/roles/vhosts.yaml

PLAY [Install httpd] ******************************************************************************************************************************************************

TASK [Gathering Facts] ****************************************************************************************************************************************************
ok: [192.168.121.81]

TASK [copy dvd.repo] ******************************************************************************************************************************************************
ok: [192.168.121.81]

TASK [mount sr0] **********************************************************************************************************************************************************
ok: [192.168.121.81]
..........
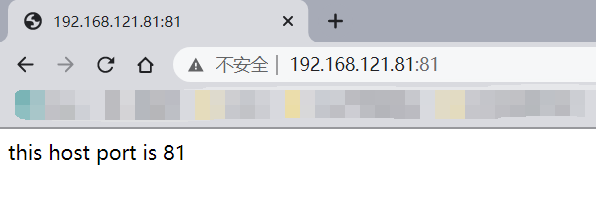
2、检验

