MySQL有三个版本:二进制,源码包,RPM。
下面讲讲二进制包的安装过程
下载地址:
http://dev.mysql.com/downloads/mysql/
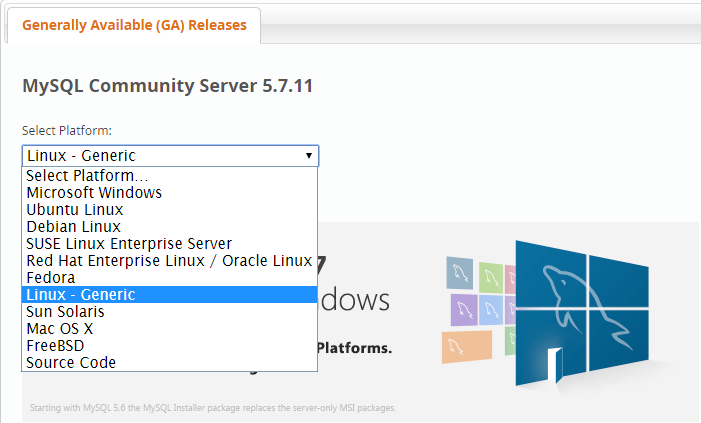
选择Linux-Generic
我这里选择的是mysql-5.6.28-linux-glibc2.5-x86_64.tar.gz
解压后,里面有个文件INSTALL-BINARY,其实给出了二进制包的部署过程
shell> groupadd mysql
shell> useradd -r -g mysql -s /bin/false mysql
shell> cd /usr/local
shell> tar zxvf /path/to/mysql-VERSION-OS.tar.gz
shell> ln -s full-path-to-mysql-VERSION-OS mysql
shell> cd mysql
shell> chown -R mysql .
shell> chgrp -R mysql .
shell> scripts/mysql_install_db --user=mysql
shell> chown -R root .
shell> chown -R mysql data
shell> bin/mysqld_safe --user=mysql &
# Next command is optional
shell> cp support-files/mysql.server /etc/init.d/mysql.server
相对于实际生产环境的部署,上面在初始化数据库的过程中少了一步-即指定配置文件,如果配置文件确认了,数据目录,日志目录都确认了,MySQL二进制版本的部署还是相当容易的一件事情。
下面写了一个脚本,基于后面提供的配置文件,执行格式如下:
sh 4.sh /root/mysql-5.6.28-linux-glibc2.5-x86_64.tar.gz /mysql3306 3306
其中 4.sh是脚本,/root/mysql-5.6.28-linux-glibc2.5-x86_64.tar.gz是二进制包的绝对路径,/mysql3306是basedir,3306是需设置的端口,
利用该脚本,只需要预先定义好配置文件,就可进行MySQL数据库的快速部署以及一台服务器上多个实例的部署。
#!/bin/bash
#需传入三个参数,第一个是mysql二进制压缩包的路径(绝对路径),譬如/root/mysql-5.6.28-linux-glibc2.5-x86_64.tar.gz,
#第二个是mysql的basedir,即需要创建在哪个目录下,第三个是设置的端口号
filename=$1
basedir=$2
port=$3

groupadd mysql
useradd -r -g mysql -s /bin/false mysql
cd /usr/local
tar zxvf $filename
#file是获取mysql二进制包的名称,譬如mysql-5.6.28-linux-glibc2.5-x86_64.tar.gz
#dir是mysql压缩包的路径,不含包名本身,譬如/root,因为后续的配置文件my.cnf也是放到这个路径下
file=`basename $filename`
dir=`dirname $filename`

#获取解压后的名字,即mysql-5.6.28-linux-glibc2.5-x86_64
after_tar_file=${file:0:-7}
#将二进制包改名为 mysql+端口号,这样也便于后续的区分
mv $after_tar_file mysql"$port"
cd mysql"$port"

#将原始的配置文件(需和mysql压缩包放到同层目录下,在本例中是/root/my.cnf)copy到解压并改名后的mysql二进制目录下,修改为my+端口号.cnf
cp $dir/my.cnf ./my"$port".cnf
user_cnf=my"$port".cnf
#下面主要是将原始配置文件中的路径修改为自己设定的路径,即传入的第二个参数
#整个的挑战在于传入的路径带有"/",在sed替换时会有问题,所有用了一个取巧的思路,即先将"/"替换为"|",进行sed替换,然后再将文件中的"|"修改回"/"
basedir_new=${basedir///|}
sed -i "s//project/class2/$basedir_new/g"  $user_cnf
sed -i "s/|///g" $user_cnf

#设置server_id,取当前的秒值
server_id=`date +%s`
sed -i /^server_id/s/.*/server_id="$server_id"/ $user_cnf
#设置端口号
sed -i /^port/s/.*/port="$port"/ $user_cnf

#创建必要的目录并修改权限
mkdir -p "$basedir"/mysql/{run,data,share,log,tmp}

chown -R mysql $basedir
chgrp -R mysql $basedir

#下面这个是非必要的,具体看后面的总结
cp share/english/errmsg.sys "$basedir"/mysql/share/

#初始化时--force也是非必要的,具体可见后面的总结
scripts/mysql_install_db --user=mysql --defaults-file="$user_cnf" --force
bin/mysqld_safe --defaults-file="$user_cnf" --user=mysql &
下面给出了配置文件的一个参考,大家可根据实际情况进行相应的修改
[mysqld_safe]
pid-file=/project/class2/mysql/run/mysqld.pid

[mysql]
port=3306
prompt=\u@\d \r:\m:\s>
default-character-set=utf8
no-auto-rehash

[client]
port=3306
socket=/project/class2/mysql/run/mysql.sock

[mysqld]
#dir
basedir=/project/class2/mysql
datadir=/project/class2/mysql/data
tmpdir=/tmp
lc_messages_dir=/project/class2/mysql/share
log-error=/project/class2/mysql/log/alert.log
slow_query_log_file=/project/class2/mysql/log/slow.log
general_log_file=/project/class2/mysql/log/general.log
socket=/project/class2/mysql/run/mysql.sock

#innodb
innodb_data_home_dir=/project/class2/mysql/data
innodb_log_group_home_dir=/project/class2/mysql/data
innodb_data_file_path=ibdata1:2G;ibdata2:16M:autoextend
innodb_buffer_pool_size=10G
innodb_buffer_pool_instances=4
innodb_log_files_in_group=2
innodb_log_file_size=1G
innodb_log_buffer_size=200M
innodb_flush_log_at_trx_commit=1
innodb_additional_mem_pool_size=20M
innodb_max_dirty_pages_pct=60
innodb_io_capacity=1000
innodb_thread_concurrency=16
innodb_read_io_threads=8
innodb_write_io_threads=8
innodb_open_files=60000
innodb_file_format=Barracuda
innodb_file_per_table=1
innodb_flush_method=O_DIRECT
innodb_change_buffering=inserts
innodb_adaptive_flushing=1
innodb_old_blocks_time=1000
innodb_stats_on_metadata=0
innodb_read_ahead=0
innodb_use_native_aio=0
innodb_lock_wait_timeout=5
innodb_rollback_on_timeout=0
innodb_purge_threads=1
innodb_strict_mode=1
transaction-isolation=READ-COMMITTED

#myisam
key_buffer=64M
myisam_sort_buffer_size=64M
concurrent_insert=2
delayed_insert_timeout=300

#replication
master-info-file=/project/class2/mysql/log/master.info
relay-log=/project/class2/mysql/log/relaylog
relay_log_info_file=/project/class2/mysql/log/relay-log.info
relay-log-index=/project/class2/mysql/log/mysqld-relay-bin.index
slave_load_tmpdir=/project/class2/mysql/tmp
slave_type_conversions="ALL_NON_LOSSY"
slave_net_timeout=4
skip-slave-start
sync_master_info=1000
sync_relay_log_info=1000

#binlog
log-bin=/project/class2/mysql/log/mysql-bin
server_id=2552763370
binlog_cache_size=32K
max_binlog_cache_size=2G
max_binlog_size=500M
binlog-format=ROW
sync_binlog=1000
log-slave-updates=1
expire_logs_days=0

#server
default-storage-engine=INNODB
character-set-server=utf8
lower_case_table_names=1
skip-external-locking
open_files_limit=65536
safe-user-create
local-infile=1
#sqlmod="STRICT_ALL_TABLES,NO_ZERO_IN_DATE,NO_ZERO_DATE"

log_slow_admin_statements=1
log_warnings=1
long_query_time=1
slow_query_log=1
general_log=0

query_cache_type=0
query_cache_limit=1M
query_cache_min_res_unit=1K

table_definition_cache=65536

thread_stack=512K
thread_cache_size=256
read_rnd_buffer_size=128K
sort_buffer_size=256K
join_buffer_size=128K
read_buffer_size=128K

port=3306
skip-name-resolve
skip-ssl
max_connections=4500
max_user_connections=4000
max_connect_errors=65536
max_allowed_packet=128M
connect_timeout=8
net_read_timeout=30
net_write_timeout=60
back_log=1024
总结:
在初始化的过程中,如果报以下错误:
FATAL ERROR: Neither host 'keepalived02' nor 'localhost' could be looked up with
/mysql3306/mysql/bin/resolveip
Please configure the 'hostname' command to return a correct
hostname.
If you want to solve this at a later stage, restart this script
with the --force option
但是在bash终端上执行hostname命令又确实有值返回,可加--force参数,如下所示:
scripts/mysql_install_db --user=mysql --defaults-file="$user_cnf" --force
如果报以下错误:
[ERROR] Can't find messagefile '/mysql3306/mysql/share/errmsg.sys'
可将二进制版本中share/english/errmsg.sys文件COPY到/mysql3306/mysql/share/下。
--------------------------------------
后续:这两个错误的原因都是因为basedir修改了,它默认是在二进制包中查找的。