开发环境
macOS Sierra 10.12、Xcode 8.0,如下图所示:
总体思路
1、建立空白的storyboard用于呈现列表
2、实现自定义单个单元格(继承自:UICollectionViewCell)
3、将列表(UICollectionView)注册到页面(StoryBoard)中,同时将单元格注册到列表中
4、运行查看效果
1、建立StoryBoard
本项目集成了 Tab Bar 和 Navigation Bar,整个项目(main.storyboard)试图如下所示:
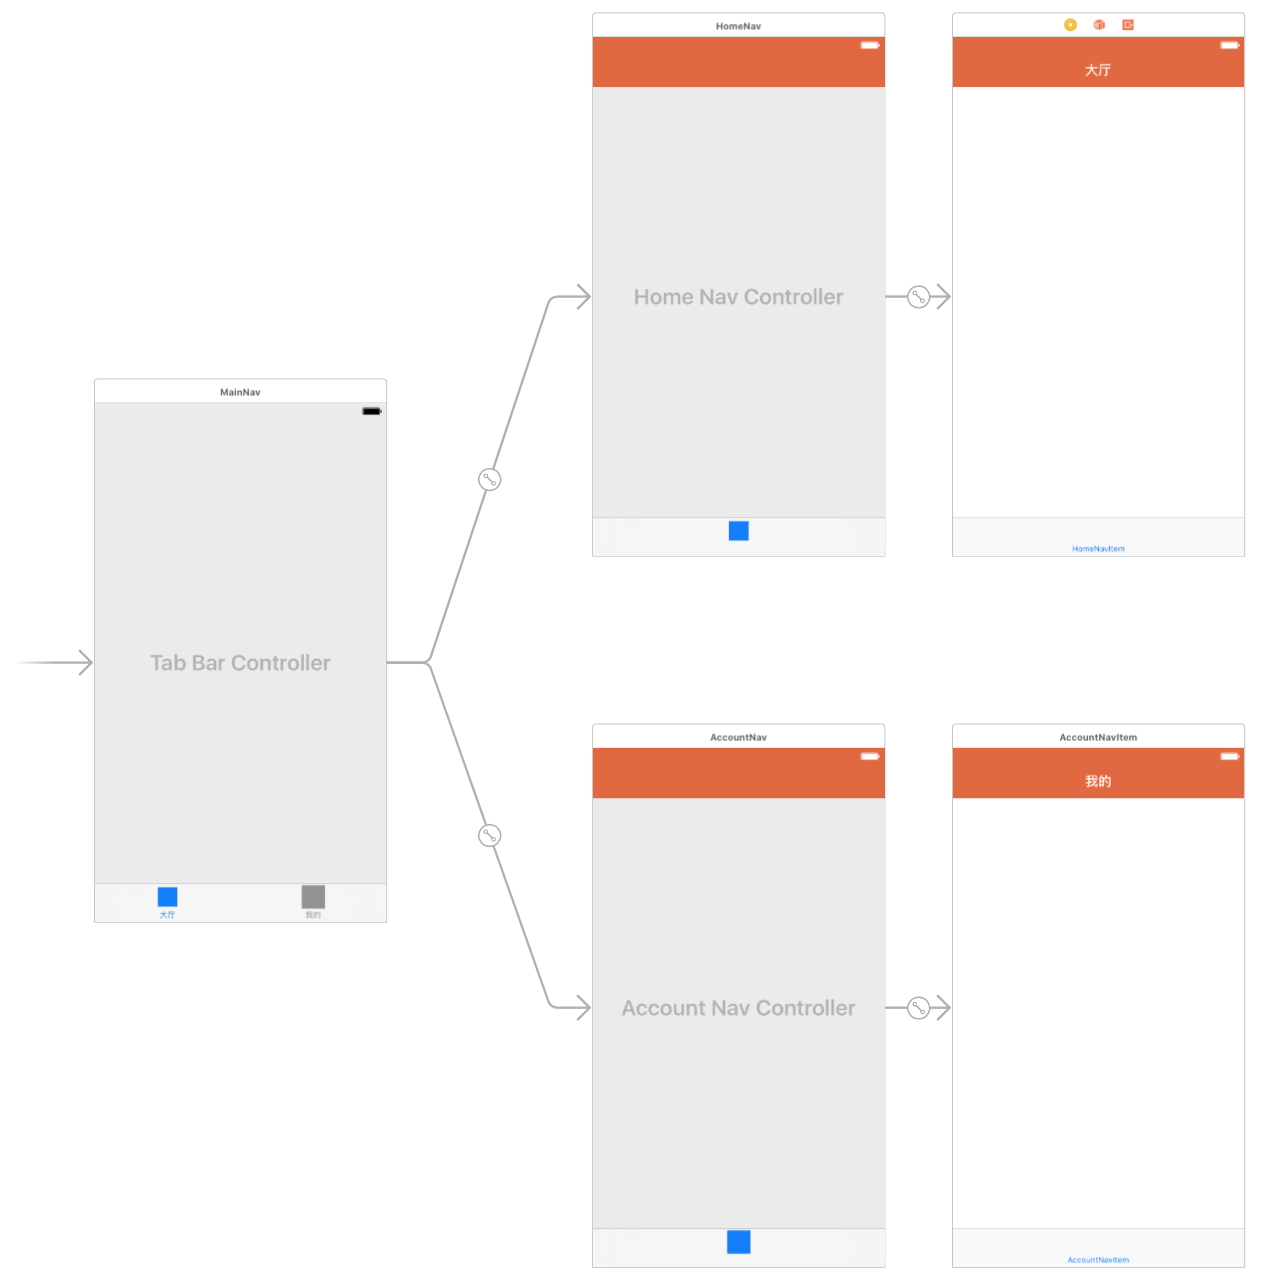
这里在大厅页面(HomeNavItem Scene)呈现列表,如下图所示:

创建 HomeNavItemController.swift,作为上述页面的后台代码,关联方式如上图右上角 Custom Class 所示。
至此,界面端的工作就全部完毕了。
2、自定义单个单元格(HomeCollectionViewCell.swift),代码如下所示:
import UIKit;

class HomeCollectionViewCell: UICollectionViewCell {

    var title: UILabel?;   // 单元格中的内容,如需其它控件,可自行添加

    override init(frame: CGRect) {
        super.init(frame: frame);

        // 将 title 注册到单元格
        title = UILabel(frame: CGRect(x: 30, y: 0,  UIScreen.main.bounds.width, height: 50));
        title?.textColor = UIColor.black;
        self.addSubview(title!);

        self.backgroundColor = UIColor.blue;   // 设置整个单元格背景颜色,测试单元格大小
    }

    required init?(coder aDecoder: NSCoder) {
        fatalError("Cell 初始化失败");
    }
}
3、将列表注册到页面中(HomeNavItemController.swift),同时,将单个单元格注册到列表中,代码如下所示:
 1 import UIKit;
 2
 3 class HomeNavItemController: UIViewController, UICollectionViewDataSource, UICollectionViewDelegate, UICollectionViewDelegateFlowLayout {
 4
 5     var colView: UICollectionView?;   // 创建一个列表
 6
 7     // 加载界面
 8     override func viewDidLoad() {
 9         super.viewDidLoad();
10
11         let layout = UICollectionViewFlowLayout();
12
13         colView = UICollectionView(frame: CGRect.init(x: 0, y: 0,  UIScreen.main.bounds.width, height: self.view.bounds.height), collectionViewLayout: layout);
14
15         colView?.register(HomeCollectionViewCell.self, forCellWithReuseIdentifier: "colCell")
16
17         colView?.delegate = self;
18         colView?.dataSource = self;
19         colView?.backgroundColor = UIColor.white;
20
21         layout.itemSize = CGSize( 375, height: 300);
22
23         self.view.addSubview(colView!);
24     }
25
26     override func didReceiveMemoryWarning() {
27         super.didReceiveMemoryWarning();
28     }
29
30     // Cell 数量
31     func collectionView(_ collectionView: UICollectionView, numberOfItemsInSection section: Int) -> Int {
32         return 10;
33     }
34
35     // Cell 具体内容
36     func collectionView(_ collectionView: UICollectionView, cellForItemAt indexPath: IndexPath) -> UICollectionViewCell {
37         let cell = collectionView.dequeueReusableCell(withReuseIdentifier: "colCell", for: indexPath) as! HomeCollectionViewCell;
38         cell.title!.text = "这里是内容:(indexPath.row)";
39         return cell;
40     }
41 }
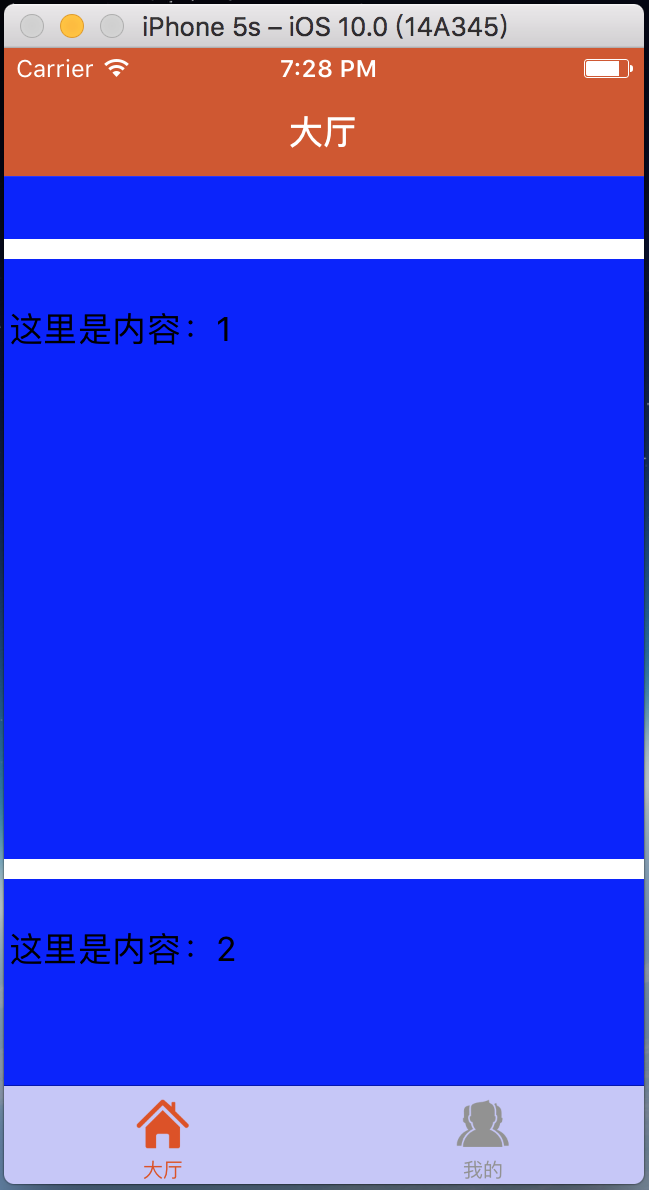
4、运行查看效果,如下图所示:
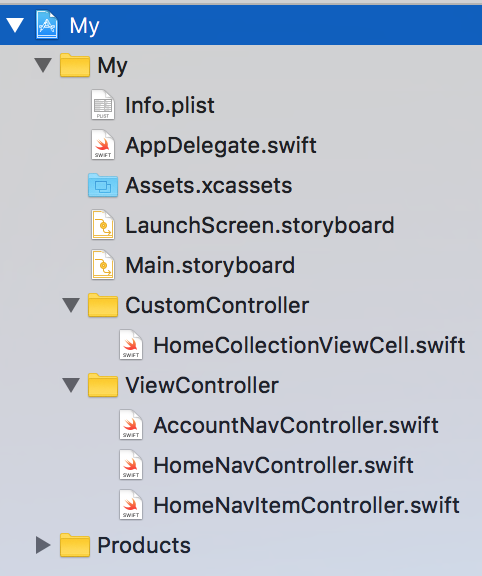
最后,插一句,整个项目的结构图如下所示:
特别说明:页面中务必继承UICollectionViewDataSource, UICollectionViewDelegate, UICollectionViewDelegateFlowLayout