1、先在pom文件中添加下面代码段
<!-- 热部署 -->
    <dependency>
      <groupId>org.springframework.boot</groupId>
      <artifactId>spring-boot-devtools</artifactId>
      <optional>true</optional>
      <scope>true</scope>
    </dependency>

----------------------------------------------------


<build>
    <plugins>
      <plugin>
        <groupId>org.springframework.boot</groupId>
        <artifactId>spring-boot-maven-plugin</artifactId>
        <configuration>
          <!-- 没有该配置,devtools 不生效 -->
          <fork>true</fork>
          <addResources>true</addResources>
        </configuration>
      </plugin>
    </plugins>
  </build>
2、需要修改idea中的两个配置,来开启idea自动编译功能
1 - Enable Automake from the compiler
PRESS: CTRL + SHIFT + A
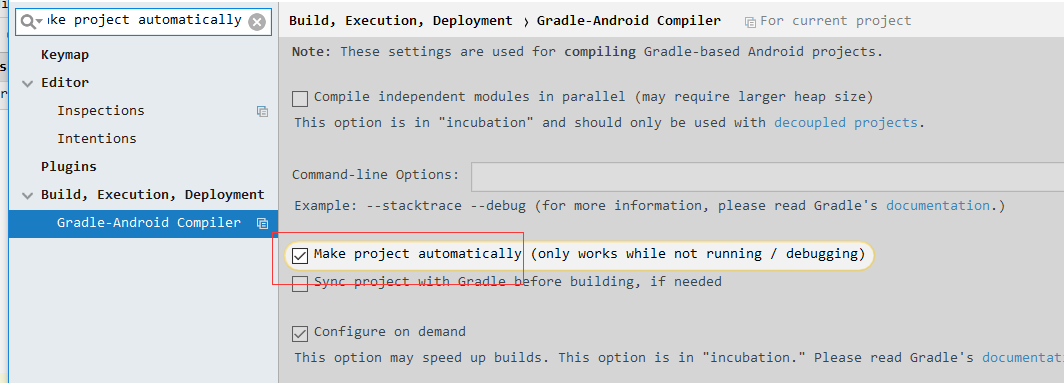
TYPE: make project automatically
PRESS: Enter
Enable Make Project automatically feature
2 - Enable Automake when the application is running
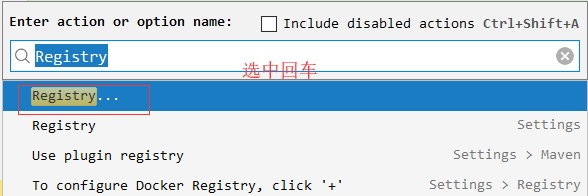
PRESS: CTRL + SHIFT + A
TYPE: Registry
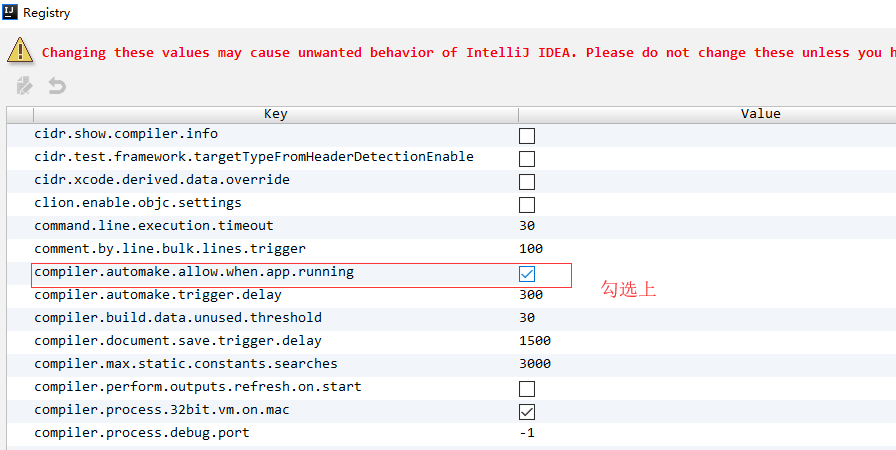
Find the key compiler.automake.allow.when.app.running and enable it
意思是
1、CTRL + SHIFT + A --> 查找make project automatically --> 选中


2、CTRL + SHIFT + A --> 查找Registry --> 找到并勾选compiler.automake.allow.when.app.running


如果不想做上面这两部勾选,不想让idea开启自动编译部署,那么手动按Ctrl+F9也是可以的,开启这两项在添加springboot应用时,会找不到主类,需要去掉勾选后才能好用,所以idea是不建议开启这两项的,除非springboot已经运行好了,不然建议去掉勾选后再进行添加