转自:https://www.cnblogs.com/lusaisai/p/13019822.html
在Spring项目中,可以使用Spring-Rabbit去操作RabbitMQ https://github.com/spring-projects/spring-amqp
尤其是在spring boot项目中只需要引入对应的amqp启动器依赖即可,方便的使用RabbitTemplate发送消息,使用注解接收消息。
搭建生产者工程
1. 创建工程
创建生产者工程springboot-rabbitmq-producer
2. 添加依赖
   <parent>
        <groupId>org.springframework.boot</groupId>
        <artifactId>spring-boot-starter-parent</artifactId>
        <version>2.1.4.RELEASE</version>
    </parent>

    <dependencies>
        <!-- 使用springmvc来进行测试 -->
        <dependency>
            <groupId>org.springframework.boot</groupId>
            <artifactId>spring-boot-starter-web</artifactId>
        </dependency>
        <!--amqp的起步依赖-->
        <dependency>
            <groupId>org.springframework.boot</groupId>
            <artifactId>spring-boot-starter-amqp</artifactId>
        </dependency>
        <!--单元测试类-->
        <dependency>
            <groupId>org.springframework.boot</groupId>
            <artifactId>spring-boot-starter-test</artifactId>
        </dependency>
    </dependencies>
3. 启动类
@SpringBootApplication
public class ProducerApplication {

    public static void main(String[] args) {
        SpringApplication.run(ProducerApplication.class, args);
    }

}
4. 配置RabbitMQ
application.yml,内容如下:
#tomcat端口
server:
  port: 8888
#Rabbitmq的配置
spring:
  rabbitmq:
    host: 192.168.75.163
    port: 5672
    virtual-host: /hello
    username: test01
    password: test01
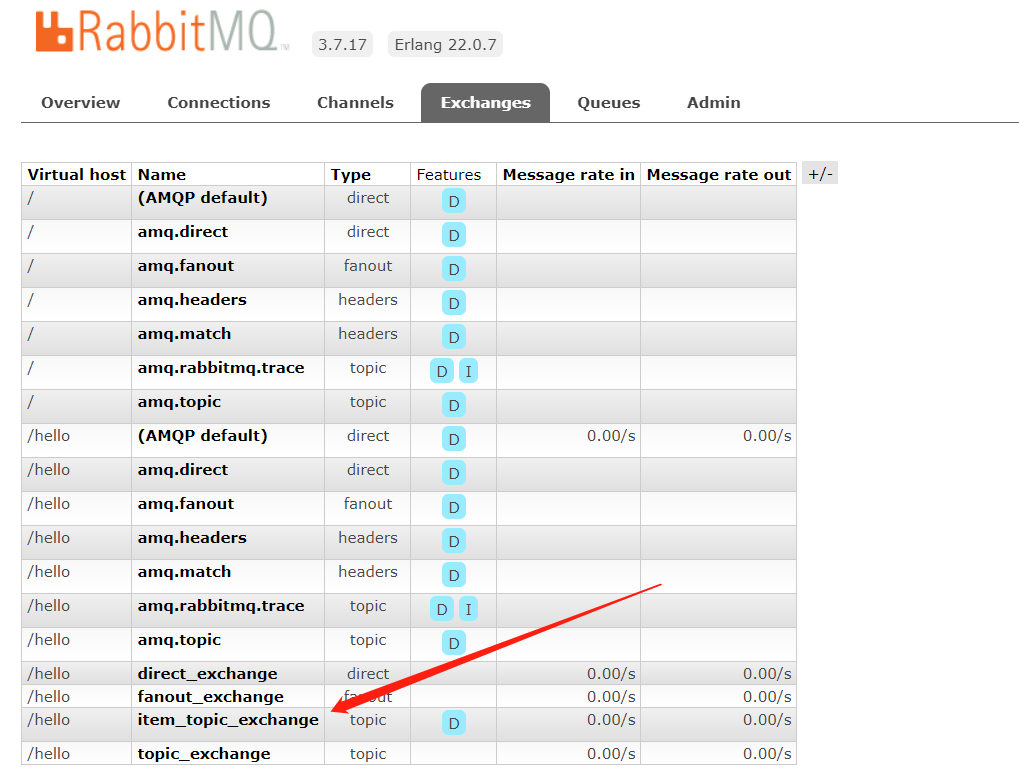
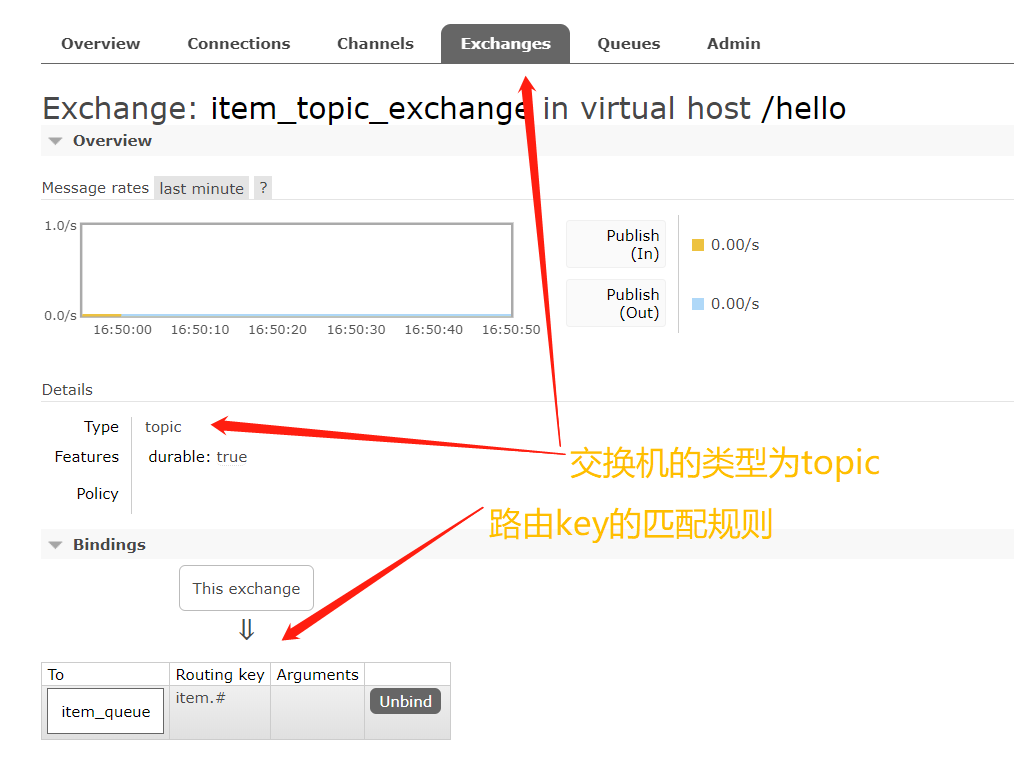
创建RabbitMQ队列与交换机绑定的配置类RabbitMQConfig
/**
 * RabbitMQ配置类
 */
@Configuration
public class RabbitMQConfig {
    //交换机名称
    public static final String ITEM_TOPIC_EXCHANGE = "item_topic_exchange";
    //队列名称
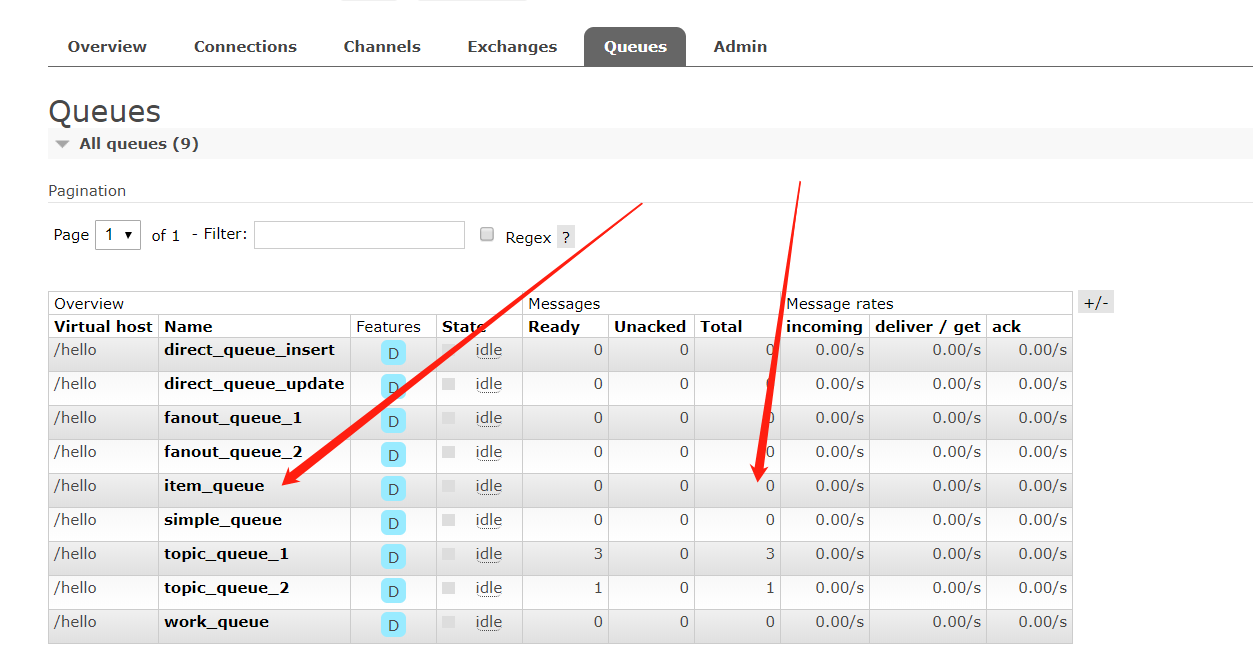
    public static final String ITEM_QUEUE = "item_queue";

    //声明交换机
    @Bean("itemTopicExchange")
    public Exchange topicExchange(){
        return ExchangeBuilder.topicExchange(ITEM_TOPIC_EXCHANGE).durable(true).build();
    }

    //声明队列
    @Bean("itemQueue")
    public Queue itemQueue(){
        return QueueBuilder.durable(ITEM_QUEUE).build();
    }

    //绑定队列和交换机
    @Bean
    public Binding itemQueueExchange(@Qualifier("itemQueue") Queue queue,
                                     @Qualifier("itemTopicExchange") Exchange exchange){
        return BindingBuilder.bind(queue).to(exchange).with("item.#").noargs();
    }

}
5 消息发送Controller
@RestController
public class SendMsgController {

    //注入RabbitMQ的模板
    @Autowired
    private RabbitTemplate rabbitTemplate;

    /**
     * 测试
     */
    @GetMapping("/sendmsg")
    public String sendMsg(@RequestParam String msg, @RequestParam String key){
        /**
         * 发送消息
         * 参数一:交换机名称
         * 参数二:路由key: item.springboot-rabbitmq,符合路由item.#规则即可
         * 参数三:发送的消息
         */
        rabbitTemplate.convertAndSend(RabbitMQConfig.ITEM_TOPIC_EXCHANGE ,key ,msg);
        //返回消息
        return "发送消息成功!";
    }
}
6发送消息
http://localhost:8888/sendmsg?msg=springboot-rabbitmq-producer&key=item.springboot-rabbitmq
查看结果


搭建消费者工程
1. 创建工程
创建消费者工程springboot-rabbitmq-consumer
2. 添加依赖
<parent>
        <groupId>org.springframework.boot</groupId>
        <artifactId>spring-boot-starter-parent</artifactId>
        <version>2.1.4.RELEASE</version>
    </parent>

    <dependencies>
        <dependency>
            <groupId>org.springframework.boot</groupId>
            <artifactId>spring-boot-starter-web</artifactId>
        </dependency>
        <dependency>
            <groupId>org.springframework.boot</groupId>
            <artifactId>spring-boot-starter-amqp</artifactId>
        </dependency>
    </dependencies>
3. 启动类
@SpringBootApplication
public class ConsumerApplication {
    public static void main(String[] args) {
        SpringApplication.run(ConsumerApplication.class, args);
    }
}
4. 配置RabbitMQ
application.yml,内容如下:
#端口,注意端口不要冲突
server:
  port: 9999
#Rabbitmq的配置
spring:
  rabbitmq:
    host: 192.168.75.163
    port: 5672
    virtual-host: /hello
    username: test01
    password: test01
5. 消息监听处理类MyListener
@Component
public class MyListener {

    @RabbitListener(queues = "item_queue")
    public void msg(String msg){
        System.out.println("消费者消费消息了:"+msg);
        //TODO 这里可以做异步的工作
    }
}
6. 测试(消息内容为test)
http://localhost:8888/sendmsg?msg=test&key=item.springboot-rabbitmq
查看结果


