作者:rickiyang
出处:www.cnblogs.com/rickiyang/p/11074232.html
我们来使用Protobuf进行序列化,它和XML,json一样都有自己的语法,xml的后缀是.xml,json文件的后缀是.json,自然Protobuf文件的后缀就是.proto(哈哈,当然不是全称)。
下面我们使用Protobuf来封装一段消息,通过一个案例简单介绍一下它的使用。
首先我们用Protobuf的语法格式来写一段需要序列化的对象,命名格式为:Msg.proto
option java_package = "cn.edu.hust.netty.demo10";
option java_outer_classname = "MessageProto";

message RequestMsg{
    required bytes msgType = 1;
    required string receiveOne = 2;
    required string msg = 3;
}

message ResponseMsg{
    required bytes msgType = 1;
    required string receiveOne = 2;
    required string msg = 3;
}
关于Message.proto中的语法格式,详情大家google一下相关的说明,网上很多介绍,再次简单就上面的语法说明一下:
- option java_package:表示生成的.java文件的包名
- option java_outer_classname:生成的java文件的文件名
- message : 为他的基本类型,如同java中的class一样
字段修饰符:
- required:一个格式良好的消息一定要含有1个这种字段。表示该值是必须要设置的;
- optional:消息格式中该字段可以有0个或1个值(不超过1个)。
- repeated:在一个格式良好的消息中,这种字段可以重复任意多次(包括0次)。重复的值的顺序会被保留。表示该值可以重复,相当于java中的List。
字符类型稍微有些不同:double,float,int32,int64,bool(boolean),string,bytes。稍微有些不同,String,boolean,int有差别。
另外我们看到上面3个字段分别赋值了,这个值是什么意思呢?消息定义中,每个字段都有唯一的一个数字标识符。这些标识符是用来在消息的二进制格式中识别各个字段的,一旦开始使用就不能够再改变。注:[1,15]之内的标识号在编码的时候会占用一个字节。[16,2047]之内的标识号则占用2个字节。所以应该为那些频繁出现的消息元素保留 [1,15]之内的标识号。
关于Protobuf 的语法我们就简单的介绍这么多,更多细节大家自己去查阅文档吧。下面我们开始使用Protobuf 来进行序列化。
首先我们的在工程中引入protobuf的jar包,目前官方版本最高3.2,我们用3.0的吧:
<dependency>
    <groupId>com.google.protobuf</groupId>
    <artifactId>protobuf-java</artifactId>
    <version>3.0.2</version>
</dependency>
Protobuf的文件已经定义好了,下就需要把它编译成java代码,这里我们的借助到google为我们提供的脚本工具protoc,链接在这里,点击下载这里提供的是protoc-3.0.2。要注意protoc的版本需要和Protobuf的版本对应上,不然不同的版本之间会有一些差异解析可能会有问题。现在知道我们为啥非得选用protobuf3.0.2版本吧,因为我没有找到别的版本的protoc。。。
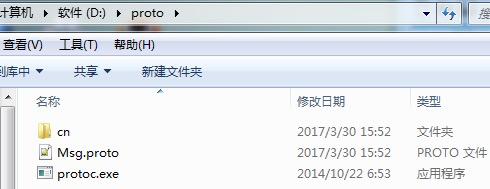
下载好了我们解压缩然后把刚才写好的Msg.proto文件复制进去。
接着我们进cmd输入如下命令:
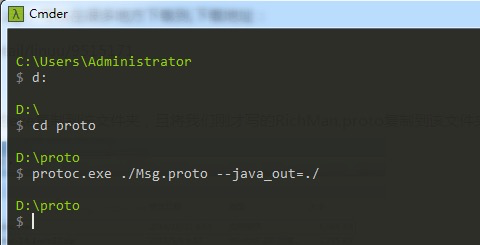
主要是第三句命令。如果你输入没有报错的话你的proto文件夹应该会生成一个子文件夹:

进去该文件夹你会看到已经生成了MessageProto.java文件,恭喜你,这时候你已经完成了protobuf序列化文件的生成。然后你把该文件拷贝至工程目录下。
接下来我们用生成的文件去发消息吧。还是老套路服务端和客户端。
服务端:
public class ProtoBufServer {
    private int port;

    public ProtoBufServer(int port) {
        this.port = port;
    }

    public void start(){
        EventLoopGroup bossGroup = new NioEventLoopGroup();
        EventLoopGroup workGroup = new NioEventLoopGroup();

        ServerBootstrap server = new ServerBootstrap().group(bossGroup,workGroup)
                                    .channel(NioServerSocketChannel.class)
                                    .childHandler(new ServerChannelInitializer());

        try {
            ChannelFuture future = server.bind(port).sync();
            future.channel().closeFuture().sync();
        } catch (InterruptedException e) {
            e.printStackTrace();
        }finally {
            bossGroup.shutdownGracefully();
            workGroup.shutdownGracefully();
        }
    }

    public static void main(String[] args) {
        ProtoBufServer server = new ProtoBufServer(7788);
        server.start();
    }
}
服务端Initializer:
public class ServerChannelInitializer extends ChannelInitializer<SocketChannel> {
    @Override
    protected void initChannel(SocketChannel socketChannel) throws Exception {
        ChannelPipeline pipeline = socketChannel.pipeline();

        pipeline.addLast(new ProtobufVarint32FrameDecoder());
        pipeline.addLast(new ProtobufDecoder(MessageProto.RequestMsg.getDefaultInstance()));
        pipeline.addLast(new ProtoBufServerHandler());
    }
}
服务端handler:
public class ProtoBufServerHandler extends ChannelInboundHandlerAdapter {
    @Override
    public void channelActive(ChannelHandlerContext ctx) throws Exception {
        MessageProto.ResponseMsg.Builder builder = MessageProto.ResponseMsg.newBuilder();
        builder.setMsgType(ByteString.copyFromUtf8("CBSP"));
        builder.setReceiveOne("小红");
        builder.setMsg("你好,你有啥事");

        ctx.writeAndFlush(builder.build());
    }


    @Override
    public void channelRead(ChannelHandlerContext ctx, Object msg) throws Exception {
        MessageProto.RequestMsg m = (MessageProto.RequestMsg)msg;
        System.out.println("Client say: "+m.getReceiveOne()+","+m.getMsg());
    }

    @Override
    public void exceptionCaught(ChannelHandlerContext ctx, Throwable cause) throws Exception {
        super.exceptionCaught(ctx, cause);
        ctx.close();
    }
}
客户端:
public class ProtoBufClient {
    private  int port;
    private  String address;

    public ProtoBufClient(int port, String address) {
        this.port = port;
        this.address = address;
    }

    public void start(){
        EventLoopGroup group = new NioEventLoopGroup();

        Bootstrap bootstrap = new Bootstrap();
        bootstrap.group(group)
                .channel(NioSocketChannel.class)
                .handler(new ClientChannelInitializer());

        try {

            ChannelFuture future = bootstrap.connect(address,port).sync();
            future.channel().closeFuture().sync();
        } catch (Exception e) {
            e.printStackTrace();
        }finally {
            group.shutdownGracefully();
        }

    }

    public static void main(String[] args) {
        ProtoBufClient client = new ProtoBufClient(7788,"127.0.0.1");
        client.start();
    }
}
客户端Initializer:
public class ClientChannelInitializer extends  ChannelInitializer<SocketChannel> {

    protected void initChannel(SocketChannel socketChannel) throws Exception {
        ChannelPipeline pipeline = socketChannel.pipeline();

        pipeline.addLast(new ProtobufVarint32LengthFieldPrepender());
        pipeline.addLast(new ProtobufEncoder());
        pipeline.addLast(new ProtoBufClientHandler());
    }
}

客户端handler:

public class ProtoBufClientHandler extends ChannelInboundHandlerAdapter {
    @Override
    public void channelRead(ChannelHandlerContext ctx, Object msg) throws Exception {
        MessageProto.ResponseMsg m = (MessageProto.ResponseMsg)msg;
        System.out.println("Server say: "+m.getReceiveOne()+","+m.getMsg());
    }

    @Override
    public void channelActive(ChannelHandlerContext ctx) throws Exception {
        MessageProto.RequestMsg.Builder builder = MessageProto.RequestMsg.newBuilder();
        builder.setMsgType(ByteString.copyFromUtf8("CBSP"));
        builder.setReceiveOne("小明");
        builder.setMsg("你好,我找你有事");

        ctx.writeAndFlush(builder.build());
    }

    @Override
    public void channelInactive(ChannelHandlerContext ctx) throws Exception {
        System.out.println("Client is close");
    }
}
启动服务端和客户端,输出如下:
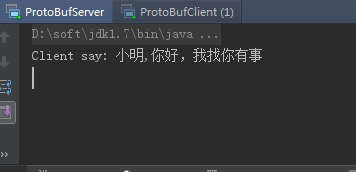
最简单的protoBuf应用案例我们就写完了,真实的使用场景大同小异,随机应变即可。
近期热文推荐:
1.1,000+ 道 Java面试题及答案整理(2021最新版)
2.终于靠开源项目弄到 IntelliJ IDEA 激活码了,真香!
3.阿里 Mock 工具正式开源,干掉市面上所有 Mock 工具!
4.Spring Cloud 2020.0.0 正式发布,全新颠覆性版本!
觉得不错,别忘了随手点赞+转发哦!