1.确认Java已经正确安装
java -version
2.rpm安装
安装包下载
Elasticsearch官网: https://www.elastic.co/products/elasticsearch
https://www.elastic.co/downloads/past-releases/elasticsearch-5-6-4
拷贝elasticsearch-5.6.4.rpm到/opt目录下
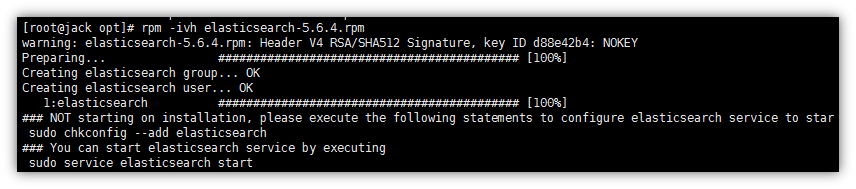
rpm -ivh elasticsearch-5.6.4.rpm
注册并启动服务

CentOS6.8 通过chkconfig --list可以查看

CentOS7.x 可以通过systemctl list-unit-files|grep elasticsearch

3.编辑ElasticSearch的服务文件
启动之前为elasticsearch配置jdk
vim /etc/sysconfig/elasticsearch 中修改JAVA_HOME路径的路径
指定JAVA_HOME位置
8 # Elasticsearch Java path
9 #JAVA_HOME=
10 JAVA_HOME=/opt/jdk1.8.0_121

4.启动ElasticSearch服务并设置为开机自动启动
systemctl start elasticsearch.service
systemctl enable elasticsearch.service
如果只是启动elasticsearch:

5.查看进程
ps -ef|grep elasticsearch|grep -v grep
或者ps -ef | grep elastic

通过进程信息得知以下文件位置:
日志文件:/var/log/elasticsearch/elasticsearch.log
数据文件:/var/lib/elasticsearch
核心配置文件:/etc/elasticsearch/elasticsearch.yml
pid文件:/var/run/elasticsearch/elasticsearch.pid
6.修改核心配置文件vim /etc/elasticsearch/elasticsearch.yml
[1]规则
每行必须顶格,前面不能有空格
“:”后面必须有一个空格
[2]配置
集群名称,同一集群名称必须相同
cluster.name: my-es
单个节点名称
node.name: node-1
把bootstrap自检程序关掉
bootstrap.memory_lock: false
bootstrap.system_call_filter: false
网络部分 改为当前的ip地址 ,端口号保持默认9200就行
network.host: 192.168.70.129
自发现配置:新节点向集群报到的主机名
discovery.zen.ping.unicast.hosts: ["rich"]
7.修改Linux默认配置
为什么要修改linux配置?
默认elasticsearch是单机访问模式,就是只能自己访问自己。
但是我们之后一定会设置成允许应用服务器通过网络方式访问。这时,elasticsearch就会因为嫌弃单机版的低端默认配置而报错,甚至无法启动。
所以我们在这里就要把服务器的一些限制打开,能支持更多并发。
原因:解除默认配置对服务器性能的束缚。
[1]设置系统允许ElasticSearch打开的最大文件数为65536
vim /etc/security/limits.conf
在文件末尾追加如下内容,注意*不能省略:
* soft nofile 65536
* hard nofile 131072
* soft nproc 2048
* hard nproc 65536
相关错误信息:max file descriptors [4096] for elasticsearch process likely too low, increase to at least [65536] elasticsearch
[2]允许最大进程数修该成2048(CentOS7不必修改)
vim /etc/security/limits.d/90-nproc.conf
修改如下内容:
* soft nproc 1024
修改为
* soft nproc 2048
相关问题:max number of threads [1024] for user [judy2] likely too low, increase to at least [2048]
[3]一个进程可以拥有的虚拟内存区域的数量(CentOS7不必修改)
sysctl -w vm.max_map_count=262144
修改占用资源:
vim /etc/elasticsearch/jvm.options
# Xms128m
# Xmx128m
-Xms128m
-Xmx128m
8.重启Linux
reboot
9.测试
[root@rich ~]# curl http://192.168.0.100:9200
{
"name" : "node-1",
"cluster_name" : "javawxid",
"cluster_uuid" : "Mv3lptVXTzCodm2JDH_4mA",
"version" : {
"number" : "5.6.4",
"build_hash" : "8bbedf5",
"build_date" : "2017-10-31T18:55:38.105Z",
"build_snapshot" : false,
"lucene_version" : "6.6.1"
},
"tagline" : "You Know, for Search"
}
或者直接浏览器访问http://192.168.0.100:9200
如果启动未成功
如果启动未成功,请去查看相关日志
vim /var/log/elasticsearch/my-es.log
10.安装kibana
[1]解压tar -zxvf kibana-5.6.4-linux-x86_64.tar.gz
[2]进入config目录

编辑kibana.yml文件:vim kibana.yml
server.host: "0.0.0.0"
elasticsearch.url: "http://192.168.70.129:9200"

[3]执行bin目录下的kibana程序
cd /opt/kibana-5.6.4-linux-x86_64/bin
./kibana ,然后ctrl+c退出,执行ps -ef
![]()
[4]使用浏览器访问http://192.168.70.129:5601

ip不同是因为图是之前的,现在又截了一部分
