系列文章目录
RabbitMQ:第一章:6 种工作模式以及消息确认机制(理论与代码相结合)
RabbitMQ:第二章:Spring整合RabbitMQ(简单模式,广播模式,路由模式,通配符模式,消息可靠性投递,防止消息丢失,TTL,死信队列,延迟队列,消息积压,消息幂等性)
RabbitMQ:第三章:Springboot集成RabbitMQ(直连模式,工作队列模式,发布订阅模式,路由模式,通配符模式
前言
提示:Springboot集成Rabbitmq实战案例,通过接口调用的方式演示。
提示:以下是本篇文章正文内容,下面案例可供参考
一、集成步骤
一、生产者:
-
创建生产者SpringBoot工程
-
引入pom依赖
<dependency> <groupId>org.springframework.boot</groupId> <artifactId>spring-boot-starter-amqp</artifactId> </dependency> -
编写rabbitmq配置消息
-
定义交换机,队列以及绑定关系的配置类
-
注入RabbitTemplate,调用方法,完成消息发送
二、消费者:
-
创建生产者SpringBoot工程
-
引入pom依赖
<dependency> <groupId>org.springframework.boot</groupId> <artifactId>spring-boot-starter-amqp</artifactId> </dependency> -
编写rabbitmq配置消息
-
定义监听类,使用@RabbitListener注解完成队列监听。
二、实现步骤
1.项目架构图
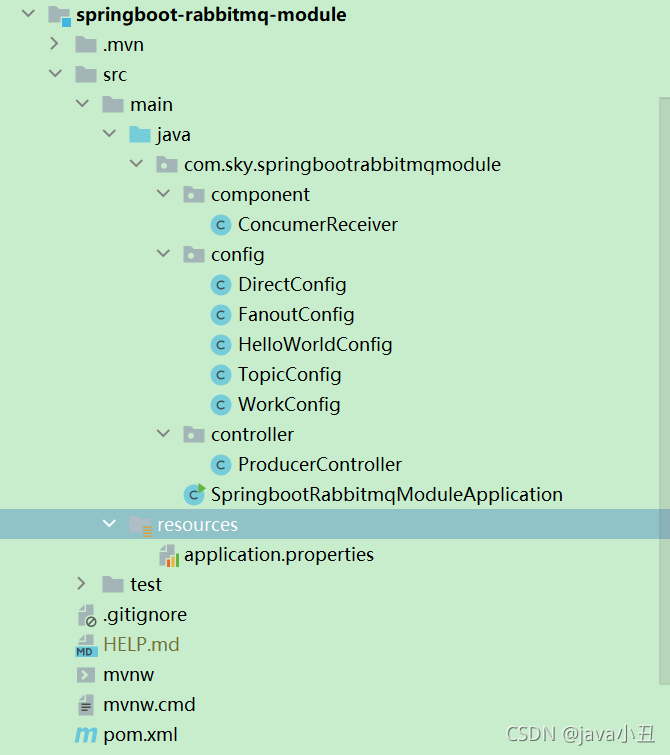
2.创建项目
代码如下(示例):
1.pom依赖
<?xml version="1.0" encoding="UTF-8"?>
<project xmlns="http://maven.apache.org/POM/4.0.0" xmlns:xsi="http://www.w3.org/2001/XMLSchema-instance"
         xsi:schemaLocation="http://maven.apache.org/POM/4.0.0 https://maven.apache.org/xsd/maven-4.0.0.xsd">
    <modelVersion>4.0.0</modelVersion>
    <parent>
        <groupId>org.springframework.boot</groupId>
        <artifactId>spring-boot-starter-parent</artifactId>
        <version>2.5.5</version>
        <relativePath/> <!-- lookup parent from repository -->
    </parent>
    <groupId>com.sky</groupId>
    <artifactId>springboot-rabbitmq-module</artifactId>
    <version>0.0.1-SNAPSHOT</version>
    <name>springboot-rabbitmq-module</name>
    <description>springboot-rabbitmq-module</description>
    <properties>
        <project.build.sourceEncoding>UTF-8</project.build.sourceEncoding>
        <maven.compiler.source>1.7</maven.compiler.source>
        <maven.compiler.target>1.7</maven.compiler.target>
    </properties>
    <dependencies>
        <dependency>
            <groupId>org.springframework.boot</groupId>
            <artifactId>spring-boot-starter</artifactId>
        </dependency>

        <dependency>
            <groupId>org.springframework.boot</groupId>
            <artifactId>spring-boot-starter-test</artifactId>
            <scope>test</scope>
        </dependency>

        <dependency>
            <groupId>org.springframework.boot</groupId>
            <artifactId>spring-boot-starter-amqp</artifactId>
        </dependency>
        <dependency>
            <groupId>org.springframework.boot</groupId>
            <artifactId>spring-boot-starter-web</artifactId>
        </dependency>

        <dependency>
            <groupId>junit</groupId>
            <artifactId>junit</artifactId>
            <version>4.11</version>
            <scope>test</scope>
        </dependency>
    </dependencies>

    <build>
        <finalName>springboot_rabbitmq</finalName>
        <pluginManagement><!-- lock down plugins versions to avoid using Maven defaults (may be moved to parent pom) -->
            <plugins>
                <plugin>
                    <artifactId>maven-clean-plugin</artifactId>
                    <version>3.1.0</version>
                </plugin>
                <!-- see http://maven.apache.org/ref/current/maven-core/default-bindings.html#Plugin_bindings_for_war_packaging -->
                <plugin>
                    <artifactId>maven-resources-plugin</artifactId>
                    <version>3.0.2</version>
                </plugin>
                <plugin>
                    <artifactId>maven-compiler-plugin</artifactId>
                    <version>3.8.0</version>
                </plugin>
                <plugin>
                    <artifactId>maven-surefire-plugin</artifactId>
                    <version>2.22.1</version>
                </plugin>
                <plugin>
                    <artifactId>maven-war-plugin</artifactId>
                    <version>3.2.2</version>
                </plugin>
                <plugin>
                    <artifactId>maven-install-plugin</artifactId>
                    <version>2.5.2</version>
                </plugin>
                <plugin>
                    <artifactId>maven-deploy-plugin</artifactId>
                    <version>2.8.2</version>
                </plugin>
            </plugins>
        </pluginManagement>
    </build>

</project>
2.application.properties配置
server.port=8080
#spring.rabbitmq.host=localhost
spring.rabbitmq.port=5672
spring.rabbitmq.username=guest
spring.rabbitmq.password=guest
spring.rabbitmq.addresses=110.42.239.246
spring.rabbitmq.virtual-host=springboot

#spring.rabbitmq.addresses=110.42.239.246:5672,110.42.239.247:5672,110.42.239.248:5672
说明:这里免费提供rabbitmq连接方式给大家使用学习
3.config配置
HelloWorldConfig
package com.sky.springbootrabbitmqmodule.config;

import org.springframework.amqp.core.Queue;
import org.springframework.context.annotation.Bean;
import org.springframework.context.annotation.Configuration;

/**
 * HelloWorld rabbitmq课上讲解的第一个工作模式
 * 直连模式只需要声明队列,所有消息都通过队列转发。
 * 无需设置交换机
 */
@Configuration
public class HelloWorldConfig {

	@Bean
	public Queue setQueue() {
		return new Queue("helloWorldqueue");
	}
}
FanoutConfig
package com.sky.springbootrabbitmqmodule.config;

import org.springframework.amqp.core.Binding;
import org.springframework.amqp.core.BindingBuilder;
import org.springframework.amqp.core.FanoutExchange;
import org.springframework.amqp.core.Queue;
import org.springframework.context.annotation.Bean;
import org.springframework.context.annotation.Configuration;

/**
 * Fanout模式需要声明exchange,并绑定queue,由exchange负责转发到queue上。
 * 广播模式 交换机类型设置为:fanout
 */
@Configuration
public class FanoutConfig {

	//声明队列
	@Bean
	public Queue fanoutQ1() {
		return new Queue("fanout.q1");
	}
	@Bean
	public Queue fanoutQ2() {
		return new Queue("fanout.q2");
	}


	//声明exchange
	@Bean
	public FanoutExchange setFanoutExchange() {
		return new FanoutExchange("fanoutExchange");
	}


	//声明Binding,exchange与queue的绑定关系
	@Bean
	public Binding bindQ1() {
		return BindingBuilder.bind(fanoutQ1()).to(setFanoutExchange());
	}
	@Bean
	public Binding bindQ2() {
		return BindingBuilder.bind(fanoutQ2()).to(setFanoutExchange());
	}

}
WorkConfig
package com.sky.springbootrabbitmqmodule.config;


import org.springframework.amqp.core.Queue;
import org.springframework.context.annotation.Bean;
import org.springframework.context.annotation.Configuration;

@Configuration
public class WorkConfig {


    //声明队列
    @Bean
    public Queue workQ1() {
        return new Queue("work_sb_mq_q");
    }

}
DirectConfig
package com.sky.springbootrabbitmqmodule.config;

import org.springframework.amqp.core.*;
import org.springframework.context.annotation.Bean;
import org.springframework.context.annotation.Configuration;


/*
   路由模式|Routing模式   交换机类型:direct
*/
@Configuration
public class DirectConfig {

	//声明队列
	@Bean
	public Queue directQ1() {
		return new Queue("direct_sb_mq_q1");
	}
	@Bean
	public Queue directQ2() {
		return new Queue("direct_sb_mq_q2");
	}


	//声明exchange
	@Bean
	public DirectExchange setDirectExchange() {
		return new DirectExchange("directExchange");
	}

	//声明binding,需要声明一个routingKey
	@Bean
	public Binding bindDirectBind1() {
		return BindingBuilder.bind(directQ1()).to(setDirectExchange()).with("directBind.one");
	}
	@Bean
	public Binding bindDirectBind2() {
			return BindingBuilder.bind(directQ2()).to(setDirectExchange()).with("directBind.two");
	}

}
TopicConfig
package com.sky.springbootrabbitmqmodule.config;

import org.springframework.amqp.core.Binding;
import org.springframework.amqp.core.BindingBuilder;
import org.springframework.amqp.core.Queue;
import org.springframework.amqp.core.TopicExchange;
import org.springframework.context.annotation.Bean;
import org.springframework.context.annotation.Configuration;


/*
Topics模式  交换机类型 topic
* */
@Configuration
public class TopicConfig {

	//声明队列
	@Bean
	public Queue topicQ1() {
		return new Queue("topic_sb_mq_q1");
	}
	@Bean
	public Queue topicQ2() {
		return new Queue("topic_sb_mq_q2");
	}


	//声明exchange
	@Bean
	public TopicExchange setTopicExchange() {
		return new TopicExchange("topicExchange");
	}

	//声明binding,需要声明一个roytingKey
	@Bean
	public Binding bindTopicHebei1() {
		return BindingBuilder.bind(topicQ1()).to(setTopicExchange()).with("directBind.*");
	}
	@Bean
	public Binding bindTopicHebei2() {
		return BindingBuilder.bind(topicQ2()).to(setTopicExchange()).with("#.two");
	}

}
4.消费端component
package com.sky.springbootrabbitmqmodule.component;

import org.springframework.amqp.rabbit.annotation.RabbitListener;
import org.springframework.amqp.rabbit.config.SimpleRabbitListenerContainerFactory;
import org.springframework.amqp.rabbit.connection.ConnectionFactory;
import org.springframework.context.annotation.Bean;
import org.springframework.stereotype.Component;

@Component
public class ConcumerReceiver {

	//直连模式的多个消费者,会分到其中一个消费者进行消费。类似task模式
	//通过注入RabbitContainerFactory对象,来设置一些属性,相当于task里的channel.basicQos
	@RabbitListener(queues="helloWorldqueue")
	public void helloWorldReceive(String message) {
	     System.out.println("helloWorld模式 received message : " +message);
	}

	//工作队列模式
    @RabbitListener(queues="work_sb_mq_q")
    public void wordQueueReceiveq1(String message) {
		System.out.println("工作队列模式1 received message : " +message);
    }

    @RabbitListener(queues="work_sb_mq_q")
    public void wordQueueReceiveq2(String message) {
		System.out.println("工作队列模式2 received message : " +message);
    }


	//pub/sub模式进行消息监听
	@RabbitListener(queues="fanout.q1")
	public void fanoutReceiveq1(String message) {
	    System.out.println("发布订阅模式1received message : " +message);
	}
	@RabbitListener(queues="fanout.q2")
	public void fanoutReceiveq2(String message) {
	    System.out.println("发布订阅模式2 received message : " +message);
	}


    //Routing路由模式
    @RabbitListener(queues="direct_sb_mq_q1")
    public void routingReceiveq1(String message) {
	    System.out.println("Routing路由模式routingReceiveqOne received message : " +message);
    }

    @RabbitListener(queues="direct_sb_mq_q2")
    public void routingReceiveq2(String message) {
	    System.out.println("Routing路由模式routingReceiveqTwo received message : " +message);
    }


    //topic 模式
	//注意这个模式会有优先匹配原则。例如发送routingKey=hunan.IT,那匹配到hunan.*(hunan.IT,hunan.eco),之后就不会再去匹配*.ITd
	@RabbitListener(queues="topic_sb_mq_q1")
	public void topicReceiveq1(String message) {
		System.out.println("Topic模式 topic_sb_mq_q1 received message : " +message);
	}

	@RabbitListener(queues="topic_sb_mq_q2")
	public void topicReceiveq2(String message) {
		System.out.println("Topic模式 topic_sb_mq_q2 received  message : " +message);
	}

}
5.生产者controller
package com.sky.springbootrabbitmqmodule.controller;
import org.springframework.amqp.AmqpException;
import org.springframework.amqp.core.Message;
import org.springframework.amqp.core.MessageProperties;
import org.springframework.amqp.rabbit.core.RabbitTemplate;
import org.springframework.beans.factory.annotation.Autowired;
import org.springframework.web.bind.annotation.GetMapping;
import org.springframework.web.bind.annotation.RestController;
import java.io.UnsupportedEncodingException;
@RestController
public class ProducerController {
@Autowired
private RabbitTemplate rabbitTemplate;
//helloWorld 直连模式
@GetMapping(value="/helloWorldSend")
public Object helloWorldSend(String message) throws AmqpException, UnsupportedEncodingException {
//设置部分请求参数
MessageProperties messageProperties = new MessageProperties();
messageProperties.setContentType(MessageProperties.CONTENT_TYPE_TEXT_PLAIN);
//发消息
rabbitTemplate.send("helloWorldqueue",new Message(message.getBytes("UTF-8"),messageProperties));
return "message sended : "+message;
}
//工作队列模式
@GetMapping(value="/workqueueSend")
public Object workqueueSend(String message) throws AmqpException, UnsupportedEncodingException {
MessageProperties messageProperties = new MessageProperties();
messageProperties.setContentType(MessageProperties.CONTENT_TYPE_TEXT_PLAIN);
//制造多个消息进行发送操作
for (int i = 0; i <10 ; i++) {
rabbitTemplate.send("work_sb_mq_q", new Message(message.getBytes("UTF-8"),messageProperties));
}
return "message sended : "+message;
}
// pub/sub 发布订阅模式 交换机类型 fanout
@GetMapping(value="/fanoutSend")
public Object fanoutSend(String message) throws AmqpException, UnsupportedEncodingException {
MessageProperties messageProperties = new MessageProperties();
messageProperties.setContentType(MessageProperties.CONTENT_TYPE_TEXT_PLAIN);
//fanout模式只往exchange里发送消息。分发到exchange下的所有queue
rabbitTemplate.send("fanoutExchange", "", new Message(message.getBytes("UTF-8"),messageProperties));
return "message sended : "+message;
}
//routing路由工作模式 交换机类型 direct
@GetMapping(value="/directSend")
public Object routingSend(String routingKey,String message) throws AmqpException, UnsupportedEncodingException {
if(null == routingKey) {
routingKey="directBind.one";
}
MessageProperties messageProperties = new MessageProperties();
messageProperties.setContentType(MessageProperties.CONTENT_TYPE_TEXT_PLAIN);
//fanout模式只往exchange里发送消息。分发到exchange下的所有queue
rabbitTemplate.send("directExchange", routingKey, new Message(message.getBytes("UTF-8"),messageProperties));
return "message sended : routingKey >"+routingKey+";message > "+message;
}
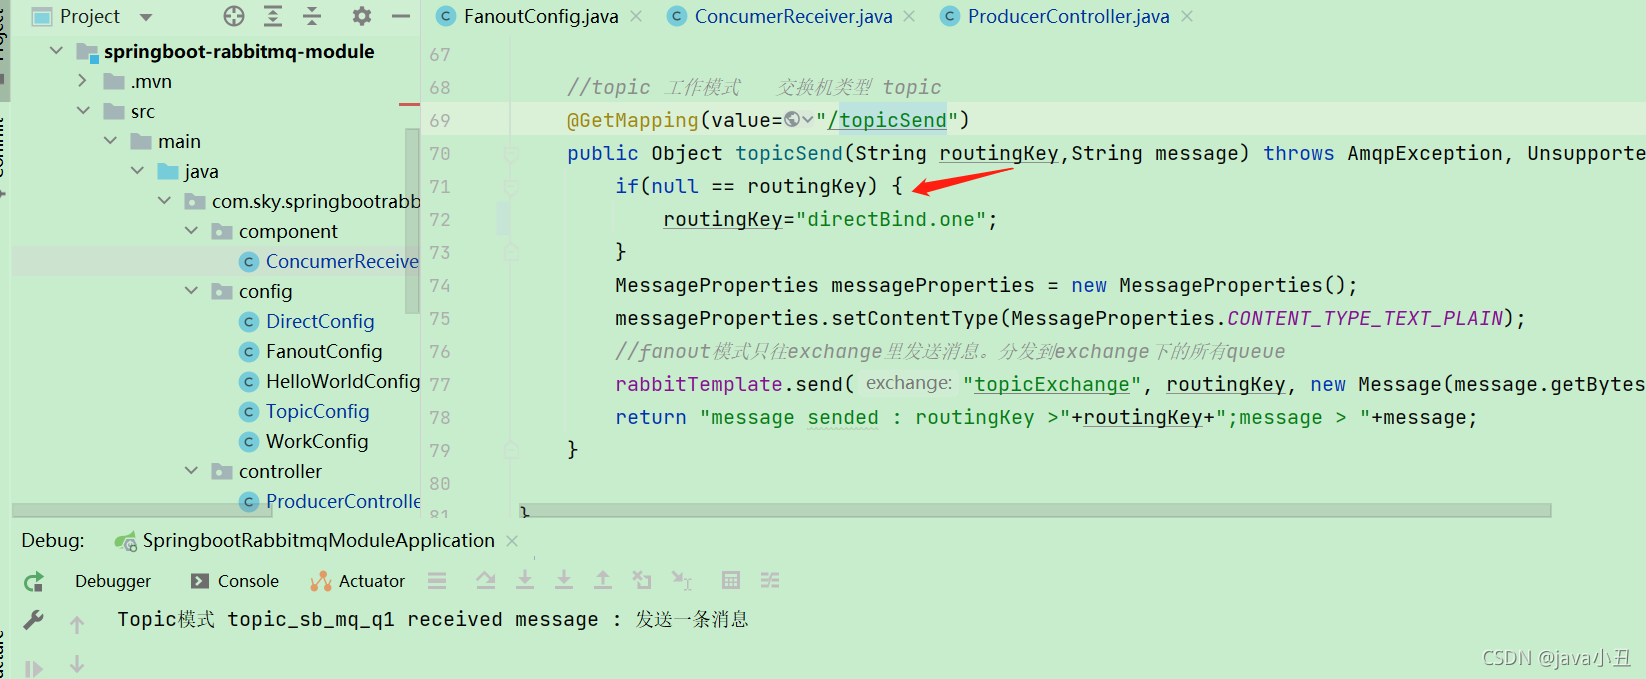
//topic 工作模式 交换机类型 topic
@GetMapping(value="/topicSend")
public Object topicSend(String routingKey,String message) throws AmqpException, UnsupportedEncodingException {
if(null == routingKey) {
routingKey="directBind.one";
}
MessageProperties messageProperties = new MessageProperties();
messageProperties.setContentType(MessageProperties.CONTENT_TYPE_TEXT_PLAIN);
//fanout模式只往exchange里发送消息。分发到exchange下的所有queue
rabbitTemplate.send("topicExchange", routingKey, new Message(message.getBytes("UTF-8"),messageProperties));
return "message sended : routingKey >"+routingKey+";message > "+message;
}
}
上面就是这个项目的所有代码了,下面就是Demo演示内容。
三、演示步骤
1.启动项目

2.调用接口演示
1.直连模式
1.接口调用

2.控制台打印

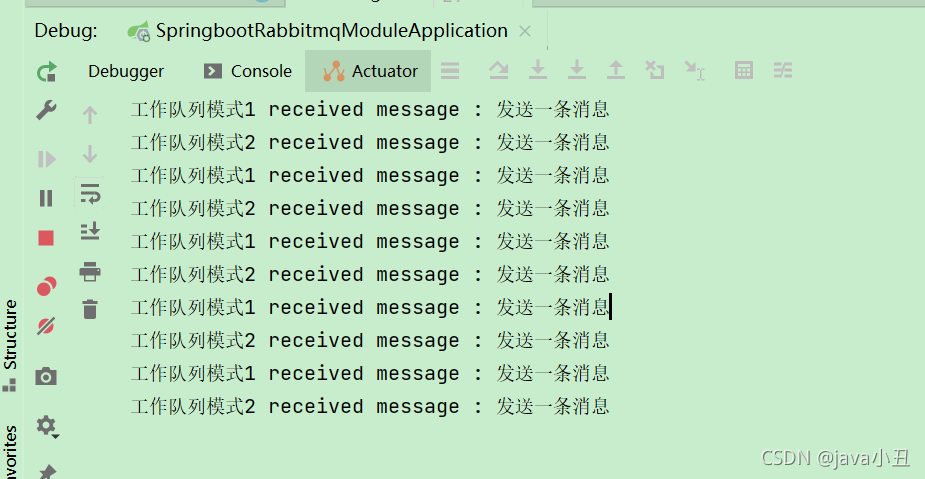
2.工作队列模式
1.接口调用

2.控制台打印
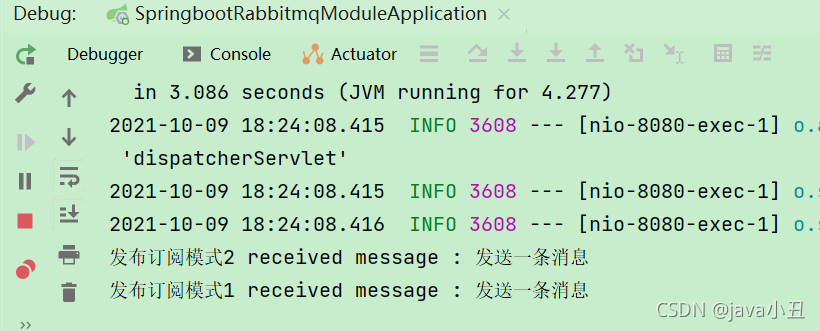
3.发布订阅模式(交换机类型:fanout)
1.接口调用

2.控制台打印
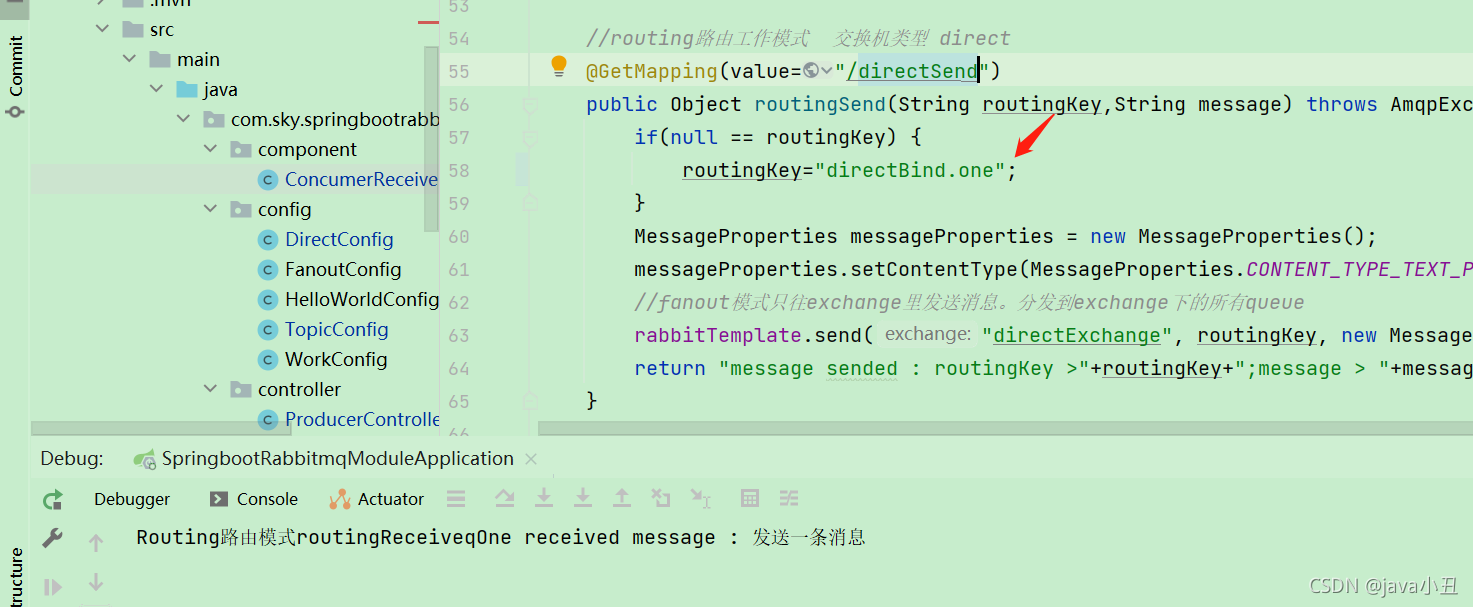
4.路由工作模式(交换机类型:direct)
1.接口调用

2.控制台打印
5.通配符模式(交换机类型:topic)
1.接口调用
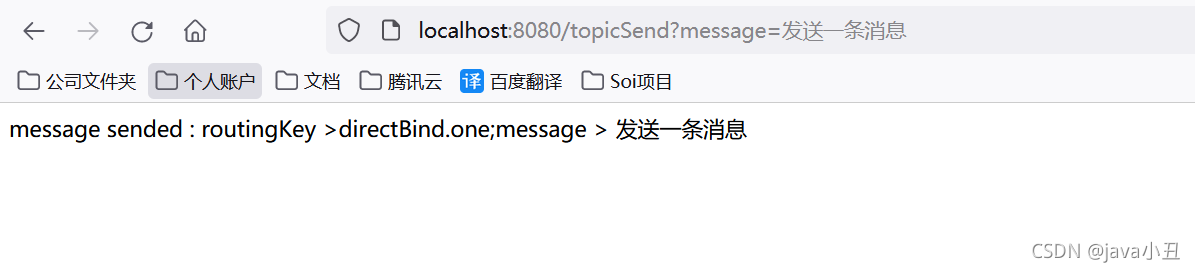
2.控制台打印
除此之外,我还提供了项目地址提供给大家clone,地址链接:https://gitee.com/java_wxid/liao
总结
提示:以上就是今天要讲的内容,本文介绍了Springboot如何快速集成Rabbitmq,提供了五种模式的Demo案例演示给大家参考,希望对大家有所帮助。