Mybatis工作原理也是面试的一大考点,必须要对其非常清晰,这样才能怼回去。本文建立在Spring+SpringMVC+Mybatis整合的项目之上。
我将其工作原理分为六个部分:
-
读取核心配置文件并返回
InputStream流对象。 -
根据
InputStream流对象解析出Configuration对象,然后创建SqlSessionFactory工厂对象 -
根据一系列属性从
SqlSessionFactory工厂中创建SqlSession -
从
SqlSession中调用Executor执行数据库操作&&生成具体SQL指令 -
对执行结果进行二次封装
-
提交与事务
先给大家看看我的实体类:
 1 /**
 2  * 图书实体
 3  */
 4 public class Book {
 5
 6     private long bookId;// 图书ID
 7
 8     private String name;// 图书名称
 9
10     private int number;// 馆藏数量
11
12         getter and setter ...
13 }
1. 读取核心配置文件
1.1 配置文件mybatis-config.xml
 1 <?xml version="1.0" encoding="UTF-8" ?>
 2 <!DOCTYPE configuration
 3   PUBLIC "-//mybatis.org//DTD Config 3.0//EN"
 4   "http://mybatis.org/dtd/mybatis-3-config.dtd">
 5 <configuration>
 6     <environments default="development">
 7         <environment id="development">
 8             <transactionManager type="JDBC"/>
 9             <dataSource type="POOLED">
10                 <property name="driver" value="com.mysql.jdbc.Driver"/>
11                 <property name="url" value="jdbc:mysql://xxx.xxx:3306/ssm" />
12                 <property name="username" value="root"/>
13                 <property name="password" value="root"/>
14             </dataSource>
15         </environment>
16     </environments>
17         <mappers>
18         <mapper resource="BookMapper.xml"/>
19     </mappers>
20 </configuration>
当然,还有很多可以在XML 文件中进行配置,上面的示例指出的则是最关键的部分。要注意 XML 头部的声明,用来验证 XML 文档正确性。environment 元素体中包含了事务管理和连接池的配置。mappers 元素则是包含一组 mapper 映射器(这些 mapper 的 XML 文件包含了 SQL 代码和映射定义信息)。
1.2 BookMapper.xml
 1 <?xml version="1.0" encoding="UTF-8"?>
 2 <!DOCTYPE mapper
 3     PUBLIC "-//mybatis.org//DTD Mapper 3.0//EN"
 4     "http://mybatis.org/dtd/mybatis-3-mapper.dtd">
 5 <mapper namespace="Book">
 6     <!-- 目的:为dao接口方法提供sql语句配置 -->
 7     <insert id="insert" >
 8         insert into book (name,number) values (#{name},#{number})
 9     </insert>
10 </mapper>
就是一个普通的mapper.xml文件。
1.3 Main方法
从 XML 文件中构建 SqlSessionFactory 的实例非常简单,建议使用类路径下的资源文件进行配置。但是也可以使用任意的输入流(InputStream)实例,包括字符串形式的文件路径或者 file:// 的 URL 形式的文件路径来配置。
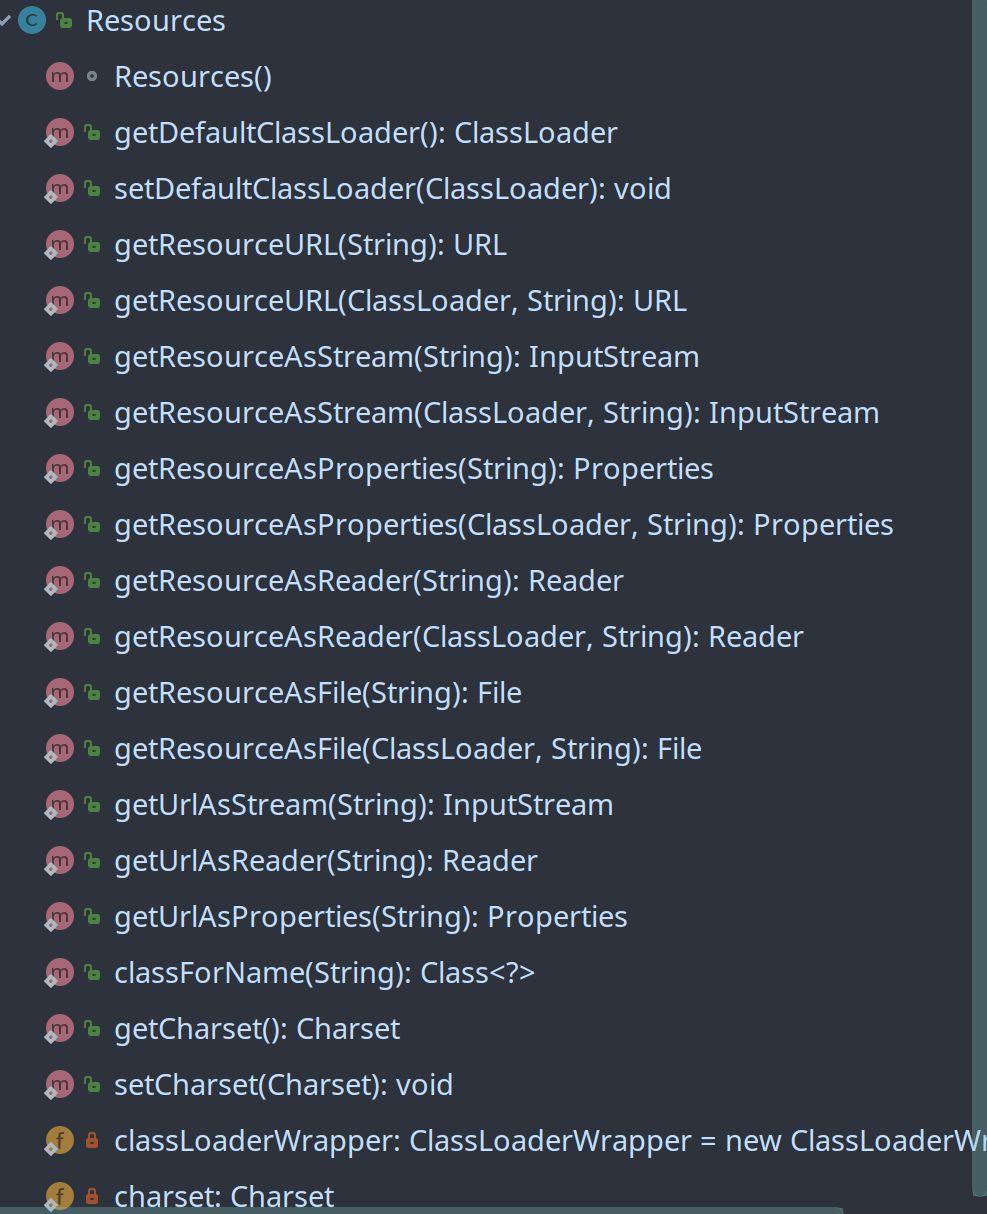
MyBatis 包含一个名叫 Resources 的工具类,它包含一些实用方法,可使从 classpath 或其他位置加载资源文件更加容易。
 1 public class Main {
 2     public static void main(String[] args) throws IOException {
 3         // 创建一个book对象
 4         Book book = new Book();
 5         book.setBookId(1006);
 6         book.setName("Easy Coding");
 7         book.setNumber(110);
 8         // 加载配置文件 并构建SqlSessionFactory对象
 9         String resource = "mybatis-config.xml";
10         InputStream inputStream = Resources.getResourceAsStream(resource);
11         SqlSessionFactory factory = new SqlSessionFactoryBuilder().build(inputStream);
12         // 从SqlSessionFactory对象中获取 SqlSession对象
13         SqlSession sqlSession = factory.openSession();
14         // 执行操作
15         sqlSession.insert("insert", book);
16         // 提交操作
17         sqlSession.commit();
18         // 关闭SqlSession
19         sqlSession.close();
20     }
21 }
这个代码是根据Mybatis官方提供的一个不使用 XML 构建 SqlSessionFactory的一个Demo改编的。
注意:是官方给的一个
不使用 XML 构建 SqlSessionFactory的例子,那么我们就从这个例子中查找入口来分析。
2. 根据配置文件生成SqlSessionFactory工厂对象
2.1 Resources.getResourceAsStream(resource);源码分析
Resources是mybatis提供的一个加载资源文件的工具类。
我们只看getResourceAsStream方法:
1 public static InputStream getResourceAsStream(String resource) throws IOException {
2     return getResourceAsStream((ClassLoader)null, resource);
3 }
getResourceAsStream调用下面的方法:
1 public static InputStream getResourceAsStream(ClassLoader loader, String resource) throws IOException {
2     InputStream in = classLoaderWrapper.getResourceAsStream(resource, loader);
3     if (in == null) {
4         throw new IOException("Could not find resource " + resource);
5     } else {
6         return in;
7     }
8 }
获取到自身的ClassLoader对象,然后交给ClassLoader(lang包下的)来加载:
 1 InputStream getResourceAsStream(String resource, ClassLoader[] classLoader) {
 2     ClassLoader[] arr$ = classLoader;
 3     int len$ = classLoader.length;
 4
 5     for(int i$ = 0; i$ < len$; ++i$) {
 6         ClassLoader cl = arr$[i$];
 7         if (null != cl) {
 8             InputStream returnValue = cl.getResourceAsStream(resource);
 9             if (null == returnValue) {
10                 returnValue = cl.getResourceAsStream("/" + resource);
11             }
12
13             if (null != returnValue) {
14                 return returnValue;
15             }
16         }
17     }
值的注意的是,它返回了一个InputStream对象。
2.2 new SqlSessionFactoryBuilder().build(inputStream);源码分析
1 public SqlSessionFactoryBuilder() { 2 }
所以new SqlSessionFactoryBuilder()只是创建一个对象实例,而没有对象返回(建造者模式),对象的返回交给build()方法。
1 public SqlSessionFactory build(InputStream inputStream) {
2     return this.build((InputStream)inputStream, (String)null, (Properties)null);
3 }
这里要传入一个inputStream对象,就是将我们上一步获取到的InputStream对象传入。
 1 public SqlSessionFactory build(InputStream inputStream, String environment, Properties properties) {
 2     SqlSessionFactory var5;
 3     try {
 4         // 进行XML配置文件的解析
 5         XMLConfigBuilder parser = new XMLConfigBuilder(inputStream, environment, properties);
 6         var5 = this.build(parser.parse());
 7     } catch (Exception var14) {
 8         throw ExceptionFactory.wrapException("Error building SqlSession.", var14);
 9     } finally {
10         ErrorContext.instance().reset();
11
12         try {
13             inputStream.close();
14         } catch (IOException var13) {
15             ;
16         }
17
18     }
19
20     return var5;
21 }
如何解析的就大概说下,通过Document对象来解析,然后返回InputStream对象,然后交给XMLConfigBuilder构造成org.apache.ibatis.session.Configuration对象,然后交给build()方法构造程SqlSessionFactory:
1 public SqlSessionFactory build(Configuration config) {
2     return new DefaultSqlSessionFactory(config);
3 }
4 public DefaultSqlSessionFactory(Configuration configuration) {
5     this.configuration = configuration;
6 }
3. 创建SqlSession
SqlSession 完全包含了面向数据库执行 SQL 命令所需的所有方法。你可以通过 SqlSession 实例来直接执行已映射的 SQL 语句。
1 public SqlSession openSession() {
2     return this.openSessionFromDataSource(this.configuration.getDefaultExecutorType(), (TransactionIsolationLevel)null, false);
3 }
调用自身的openSessionFromDataSource方法:
-
getDefaultExecutorType()默认是SIMPLE。
-
注意TX等级是 Null, autoCommit是false。
 1 private SqlSession openSessionFromDataSource(ExecutorType execType, TransactionIsolationLevel level, boolean autoCommit) {
 2     Transaction tx = null;
 3
 4     DefaultSqlSession var8;
 5     try {
 6         Environment environment = this.configuration.getEnvironment();
 7         // 根据Configuration的Environment属性来创建事务工厂
 8         TransactionFactory transactionFactory = this.getTransactionFactoryFromEnvironment(environment);
 9         // 从事务工厂中创建事务,默认等级为null,autoCommit=false
10         tx = transactionFactory.newTransaction(environment.getDataSource(), level, autoCommit);
11         // 创建执行器
12         Executor executor = this.configuration.newExecutor(tx, execType);
13         // 根据执行器创建返回对象 SqlSession
14         var8 = new DefaultSqlSession(this.configuration, executor, autoCommit);
15     } catch (Exception var12) {
16         this.closeTransaction(tx);
17         throw ExceptionFactory.wrapException("Error opening session.  Cause: " + var12, var12);
18     } finally {
19         ErrorContext.instance().reset();
20     }
21     return var8;
22 }
构建步骤:Environment>>TransactionFactory+autoCommit+tx-level>>Transaction+ExecType>>Executor+Configuration+autoCommit>>SqlSession
其中,Environment是Configuration中的属性。
4. 调用Executor执行数据库操作&&生成具体SQL指令
在拿到SqlSession对象后,我们调用它的insert方法。
1 public int insert(String statement, Object parameter) {
2
3     return this.update(statement, parameter);
4
5 }
它调用了自身的update(statement, parameter)方法:
 1 public int update(String statement, Object parameter) {
 2     int var4;
 3     try {
 4         this.dirty = true;
 5         MappedStatement ms = this.configuration.getMappedStatement(statement);
 6         // wrapCollection(parameter)判断 param对象是否是集合
 7         var4 = this.executor.update(ms, this.wrapCollection(parameter));
 8     } catch (Exception var8) {
 9         throw ExceptionFactory.wrapException("Error updating database.  Cause: " + var8, var8);
10     } finally {
11         ErrorContext.instance().reset();
12     }
13
14     return var4;
15 }
mappedStatements就是我们平时说的sql映射对象.
源码如下:protected final Map<String, MappedStatement> mappedStatements;
可见它是一个Map集合,在我们加载xml配置的时候,mapping.xml的namespace和id信息就会存放为mappedStatements的key,对应的,sql语句就是对应的value.
然后调用BaseExecutor中的update方法:
 1 public int update(MappedStatement ms, Object parameter) throws SQLException {
 2     ErrorContext.instance().resource(ms.getResource()).activity("executing an update").object(ms.getId());
 3     if (this.closed) {
 4         throw new ExecutorException("Executor was closed.");
 5     } else {
 6         this.clearLocalCache();
 7         // 真正做执行操作的方法
 8         return this.doUpdate(ms, parameter);
 9     }
10 }
doUpdate才是真正做执行操作的方法:
 1 public int doUpdate(MappedStatement ms, Object parameter) throws SQLException {
 2     Statement stmt = null;
 3
 4     int var6;
 5     try {
 6         Configuration configuration = ms.getConfiguration();
 7         // 创建StatementHandler对象,从而创建Statement对象
 8         StatementHandler handler = configuration.newStatementHandler(this, ms, parameter, RowBounds.DEFAULT, (ResultHandler)null, (BoundSql)null);
 9         // 将sql语句和参数绑定并生成SQL指令
10         stmt = this.prepareStatement(handler, ms.getStatementLog());
11         var6 = handler.update(stmt);
12     } finally {
13         this.closeStatement(stmt);
14     }
15
16     return var6;
17 }
先来看看prepareStatement方法,看看mybatis是如何将sql拼接合成的:
1 private Statement prepareStatement(StatementHandler handler, Log statementLog) throws SQLException {
2     Connection connection = this.getConnection(statementLog);
3     // 准备Statement
4     Statement stmt = handler.prepare(connection);
5     // 设置SQL查询中的参数值
6     handler.parameterize(stmt);
7     return stmt;
8 }
来看看parameterize方法:
1 public void parameterize(Statement statement) throws SQLException {
2
3     this.parameterHandler.setParameters((PreparedStatement)statement);
4
5 }
这里把statement转换程PreparedStatement对象,它比Statement更快更安全。
这都是我们在JDBC中熟用的对象,就不做介绍了,所以也能看出来Mybatis是对JDBC的封装。
从ParameterMapping中读取参数值和类型,然后设置到SQL语句中:
 1 public void setParameters(PreparedStatement ps) {
 2     ErrorContext.instance().activity("setting parameters").object(this.mappedStatement.getParameterMap().getId());
 3     List<ParameterMapping> parameterMappings = this.boundSql.getParameterMappings();
 4     if (parameterMappings != null) {
 5         for(int i = 0; i < parameterMappings.size(); ++i) {
 6             ParameterMapping parameterMapping = (ParameterMapping)parameterMappings.get(i);
 7             if (parameterMapping.getMode() != ParameterMode.OUT) {
 8                 String propertyName = parameterMapping.getProperty();
 9                 Object value;
10                 if (this.boundSql.hasAdditionalParameter(propertyName)) {
11                     value = this.boundSql.getAdditionalParameter(propertyName);
12                 } else if (this.parameterObject == null) {
13                     value = null;
14                 } else if (this.typeHandlerRegistry.hasTypeHandler(this.parameterObject.getClass())) {
15                     value = this.parameterObject;
16                 } else {
17                     MetaObject metaObject = this.configuration.newMetaObject(this.parameterObject);
18                     value = metaObject.getValue(propertyName);
19                 }
20
21                 TypeHandler typeHandler = parameterMapping.getTypeHandler();
22                 JdbcType jdbcType = parameterMapping.getJdbcType();
23                 if (value == null && jdbcType == null) {
24                     jdbcType = this.configuration.getJdbcTypeForNull();
25                 }
26
27                 try {
28                     typeHandler.setParameter(ps, i + 1, value, jdbcType);
29                 } catch (TypeException var10) {
30                     throw new TypeException("Could not set parameters for mapping: " + parameterMapping + ". Cause: " + var10, var10);
31                 } catch (SQLException var11) {
32                     throw new TypeException("Could not set parameters for mapping: " + parameterMapping + ". Cause: " + var11, var11);
33                 }
34             }
35         }
36     }
37
38 }
5. 对查询结果二次封装
在doUpdate方法中,解析生成完新的SQL后,然后执行var6 = handler.update(stmt);我们来看看它的源码。
 1 public int update(Statement statement) throws SQLException {
 2     PreparedStatement ps = (PreparedStatement)statement;
 3      // 执行sql
 4     ps.execute();
 5     // 获取返回值
 6     int rows = ps.getUpdateCount();
 7     Object parameterObject = this.boundSql.getParameterObject();
 8     KeyGenerator keyGenerator = this.mappedStatement.getKeyGenerator();
 9     keyGenerator.processAfter(this.executor, this.mappedStatement, ps, parameterObject);
10     return rows;
11 }
因为我们是插入操作,返回的是一个int类型的值,所以这里mybatis给我们直接返回int。
如果是query操作,返回的是一个ResultSet,mybatis将查询结果包装程ResultSetWrapper类型,然后一步步对应java类型赋值等…有兴趣的可以自己去看看。
6. 提交与事务
最后,来看看commit()方法的源码。
1 public void commit() {
2
3     this.commit(false);
4
5 }
调用其对象本身的commit()方法:
 1 public void commit(boolean force) {
 2     try {
 3         // 是否提交(判断是提交还是回滚)
 4         this.executor.commit(this.isCommitOrRollbackRequired(force));
 5         this.dirty = false;
 6     } catch (Exception var6) {
 7         throw ExceptionFactory.wrapException("Error committing transaction.  Cause: " + var6, var6);
 8     } finally {
 9         ErrorContext.instance().reset();
10     }
11 }
如果dirty是false,则进行回滚;如果是true,则正常提交。
1 private boolean isCommitOrRollbackRequired(boolean force) {
2     return !this.autoCommit && this.dirty || force;
3 }
调用CachingExecutor的commit方法:
1 public void commit(boolean required) throws SQLException {
2     this.delegate.commit(required);
3     this.tcm.commit();
4 }
调用BaseExecutor的commit方法:
 1 public void commit(boolean required) throws SQLException {
 2     if (this.closed) {
 3         throw new ExecutorException("Cannot commit, transaction is already closed");
 4     } else {
 5         this.clearLocalCache();
 6         this.flushStatements();
 7         if (required) {
 8             this.transaction.commit();
 9         }
10
11     }
12 }
最后调用JDBCTransaction的commit方法:
1 public void commit() throws SQLException {
2     if (this.connection != null && !this.connection.getAutoCommit()) {
3         if (log.isDebugEnabled()) {
4             log.debug("Committing JDBC Connection [" + this.connection + "]");
5         }
6         // 提交连接
7         this.connection.commit();
8     }
9 }
Demo参考文档
http://www.mybatis.org/mybatis-3/zh/getting-started.html
最后,欢迎关注下方公众号:后端技术精选。每天一篇优质技术好文!