1.1 什么是BDD(行为驱动开发)
首先了解一个概念,BDD(BehaviorDrivenDevelopment:行为驱动开发)为用户提供了从 开发人员和客户的需求创建测试脚本的机会。因此,开始时,开发人员,项目经理,质量保证,用户验收测试人员和产品所有者(股东)都齐聚一堂,集思广益,讨论应该传递哪些测试场景,以便成功调用此软件/应用程序。这样他们想出了一组测试场景。所有这些测试脚本都是简单的语言,所以它也可以服务于文档。
1.2 Cucumber 简介
Cucumber是一个测试框架。有人说,这个框架非常适合UI自动化测试,他不
仅能把用例中的测试步骤以非常友好的形式展现出来,而且能够非常灵活的构建场景。
Cucumber 是一个能够理解用普通语言 描述的测试用例的行为驱动开发(BDD)的自动化测试工具,用Ruby编写,支持Java和·Net等多种开发语言。
Cucumber可以让人们用近似自然的语言去描述Feature(什么是Feature在后面有讲述)和场景,根据Feature驱动开发。用作软件技术人员和非技术之间验收测试的桥梁。它是一个命令行工具。运行后,会执行features中的内容。feature中的step会调用stepdefinitions(Ruby代码)可以用标签来组织场景支持40多种语言高质量集成Ruby。
优点:
Cucumber支持不同的语言,例如Java、.net、Ruby
它充当业务与技术间桥梁的角色。可以通过在纯英文文本中创建一个测试用例来实现这一点。
它允许在不知道任何代码的情况下编写测试脚本,它允许非程序员参与。
它以端到端测试框架为目的
由于简单的测试脚本架构,Cucumber提供了代码可重用性
1.3 Cucumber三大组成
Cucumber有三个重要组成部分,Features、Step_definitions、Cucumber command

组件之间的工作原理如图:

1.4 Features
语法规则:
基于Gherkin。Gherkin是一种简单的英语文本语言,它有助于工具–Cucumber解释和执行测试脚本。支持语言:# language: en (zh-CN)等
Features文件必须以.features命名。包含title,多个scenarios,每个scenario包含多个step。
Step定义必须以关键字Given,When,Then,And开始。
1.5 Step_definitions
根据feature文件中定义的step编写对应的测试代码
1.6 Cucumber command
运行:*.feature文件。cucumber会分析feature文件中定义的step,然后去step - definitions寻找相匹配的step,执行step中的代码。运行结果以html的形式保存,fail的情况查看对应log日志。在IDEA上可以直接点击测试类进行运行,具体会在后面的例子中进行说明。
1.7 Cucumber的开发过程
创建feature文件,包括feature,scenarios和step。
创建step_definitions。IDEA中可右击自动创建。
cucumber –format progress。格式化输出。可修改为html,xml等格式输出。
添加断言:
一个场景失败,Cucumber将此场景标记失败,转去执行下一场景。
一个step失败,会跳过这个scenario的其余step,从而终止这个scenario。
1.8 实践
1.首先创建一个MAVEN 项目。
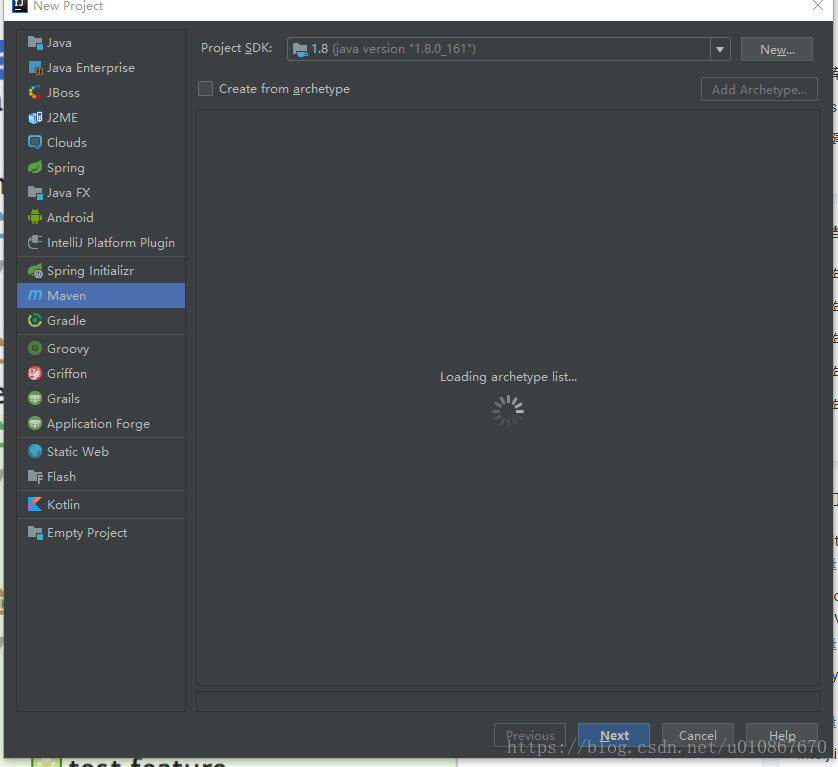
一路next直到创建完成。
2. 在pom.xml 文件中添加所需要的依赖
<dependencies>
<dependency>
<groupId>info.cukes</groupId>
<artifactId>cucumber-java</artifactId>
<scope>test</scope>
<version>1.2.4</version>
</dependency>
<dependency>
<groupId>info.cukes</groupId>
<artifactId>cucumber-jvm</artifactId>
<version>1.2.4</version>
<type>pom</type>
</dependency>
<dependency>
<groupId>info.cukes</groupId>
<artifactId>cucumber-junit</artifactId>
<version>1.2.4</version>
<exclusions>
<exclusion>
<groupId>junit</groupId>
<artifactId>junit</artifactId>
</exclusion>
</exclusions>
</dependency>
<dependency>
<groupId>junit</groupId>
<artifactId>junit</artifactId>
<version>4.12</version>
</dependency>
<dependency>
<groupId>org.seleniumhq.selenium</groupId>
<artifactId>selenium-java</artifactId>
<!--<version>2.9</version>-->
</dependency>
</dependencies>
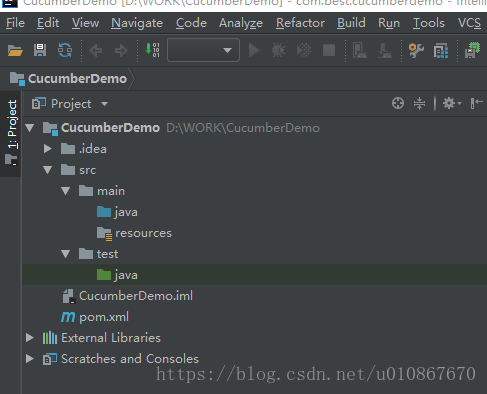
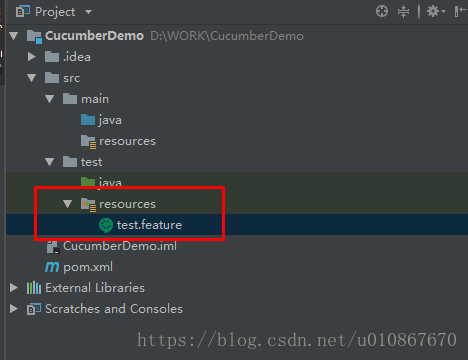
3.在test目录下创建resources目录,并标记为testResource目录,在其下创建test.feature文件,并进行编写。
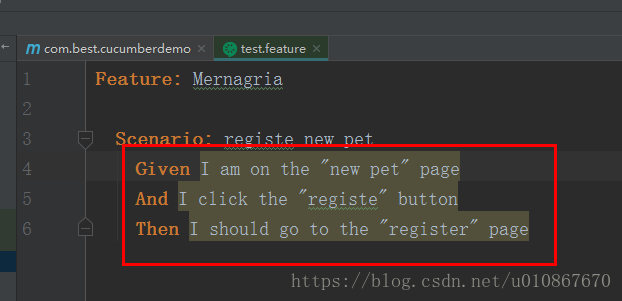
Feature: Mernagria
1.Scenario: registe new pet
2.Given I am on the "new pet" page
3.And I click the "registe" button
4.Then I should go to the "register" page
对应传统测试工具:
1.Feature:待测功能的名称。
2.Description(可选):描述测试中的功能。
3.Scenario:什么是测试场景。
4.When:为了执行下一步骤,应该匹配的特定条件。
5.Then:如果满足WHEN中提到的条件,应该会发生什么。
此时test.feature文件中会有提示,
4.创建feature文件对应的step定义类。
按住ALT+Enter,创建对应的java类,也就是step定义类文件,

得到一个新的类以及对应的方法体。
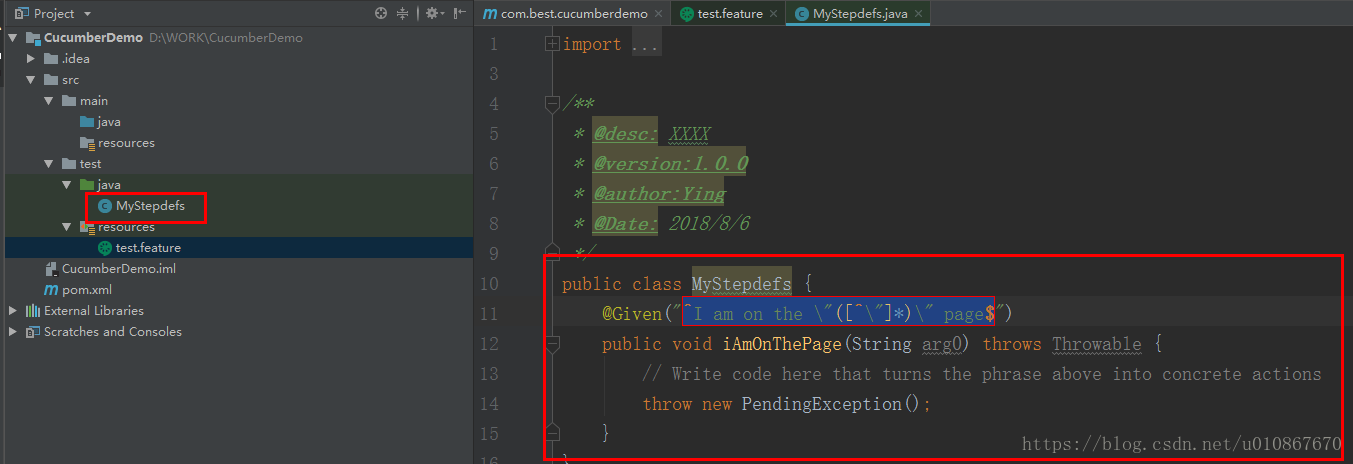
。其中MyStepdefs是上一步自动生成的step定义类,其中的方法体则是根据前面test.feature文件中的第一句自动生成的,我们也可以一次性生成所有的对应方法,或者一步一步生成。最终结果如下 MyStepdefs.java 。
import cucumber.api.PendingException;
import cucumber.api.java.en.And;
import cucumber.api.java.en.Given;
import cucumber.api.java.en.Then;
/**
* @desc: XXXX
* @version:1.0.0
* @author:Ying
* @Date: 2018/8/6
*/
public class MyStepdefs {
@Given("^I am on the "([^"]*)" page$")
public void iAmOnThePage(String arg0) throws Throwable {
// Write code here that turns the phrase above into concrete actions
throw new PendingException();
}
@And("^I click the "([^"]*)" button$")
public void iClickTheButton(String arg0) throws Throwable {
// Write code here that turns the phrase above into concrete actions
throw new PendingException();
}
@Then("^I should go to the "([^"]*)" page$")
public void iShouldGoToThePage(String arg0) throws Throwable {
// Write code here that turns the phrase above into concrete actions
throw new PendingException();
}
}
5.创建测试启动类。
在test/java路径下 创建DemoRun java类,代码如下:
import cucumber.api.CucumberOptions;
import cucumber.api.junit.Cucumber;
import org.junit.runner.RunWith;
/**
* @desc: XXXX
* @version:1.0.0
* @author:Ying
* @Date: 2018/8/6
*/
@RunWith(Cucumber.class)
@CucumberOptions(features = "src/test/resources")
public class DemoRun {
}
其中@RunWith注解就是指定运行的是黄光测试框架,@CucumberOptions则是指定对应的feature文件所在的位置,此处是src目录下的test下的resources文件夹。
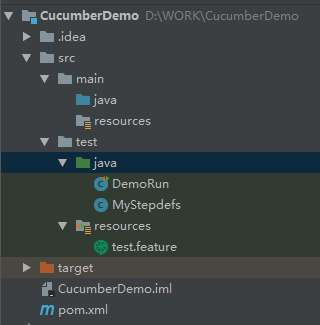
最终的文件结构如下:
右键运行DemoRun,得到如下输出:

从中看就是我们的测试,一个Scenarios,三个Steps 一个挂起,2个跳过。
如果我们把第一个step改为
@Given("^I am on the "([^"]*)" page$")
public Boolean iAmOnThePage(String arg0) throws Throwable {
// Write code here that turns the phrase above into concrete actions
// throw new PendingException();
System.out.println("这是第一步");
return true;
}
再次运行,得到如下结果
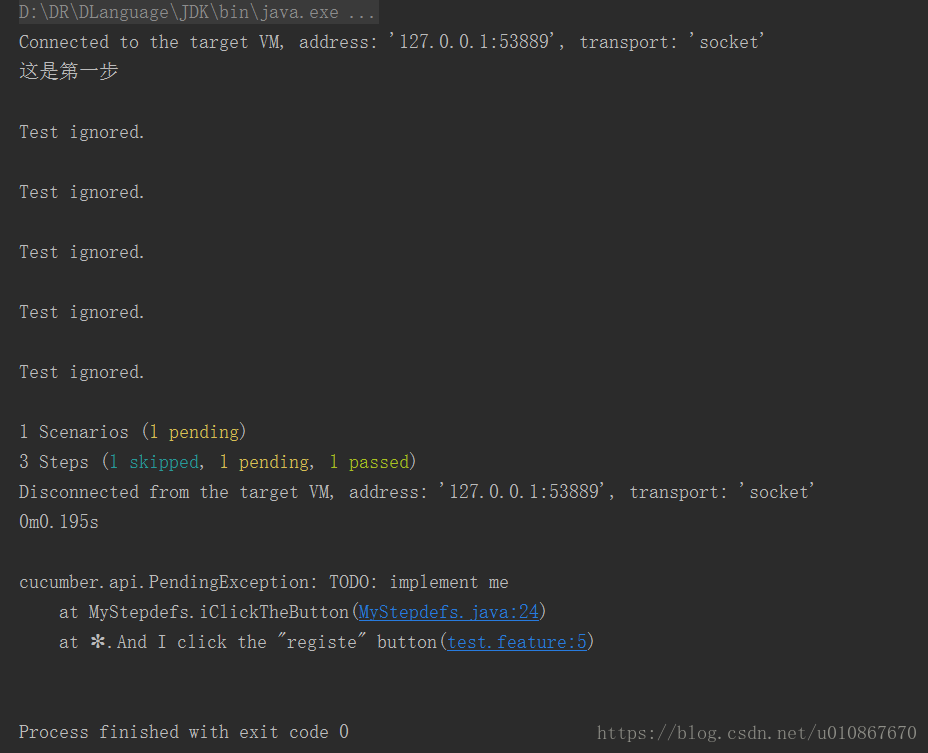
若3个都改为返回ture,则全为pass。
最后还要说一点,除了可以直接点击DemoRun方法运行测试以外,我们还可以在test/java 路径下新建一个目录,比如run文件夹,然后在其中创建和前面MyStepdefs内容一样的java类。创建完成后,右击resources目录下的test.feature文件,选择”Create featuer test”,如下图所示

注意,在Glue中填写Step定义类的路径,此处为run文件夹。创建完成后点击运行

效果与前面的直接点击DemoRun一样。
至此,我们的第一个小Demo已经跑起来了。下一期会讲述如何将demo与我们的web项目联系起来。
参考:https://www.jianshu.com/p/b934ce61c9dc
参考:https://blog.csdn.net/henni_719/article/details/53586051
参考:https://blog.csdn.net/zhanlurbh/article/details/51377907
————————————————
版权声明:本文为CSDN博主「ying105525」的原创文章,遵循CC 4.0 by-sa版权协议,转载请附上原文出处链接及本声明。
原文链接:https://blog.csdn.net/u010867670/article/details/81459923