在现阶IOS开发的样式越来越多,有些系统自带的东西我们无法满足业务的需求,因此我们需要根据自己的需求对当前所用的到技术自定义,只有灵活的自己封装自己定义才能让你的代码更具有灵活性,下面我们以一个自定义的tabbar为例子讲解,一起封装一个Tabcontroller。
分析:我们要完成一个tabbarcontroller首先我们需要跟苹果提供的一样,需要一个tabbar视图,也就是工具条用来点击用,然后我们需要排列在tabbar上面的tabbarItem,下面我们就根据苹果提供的方式分别定义如下类

1、JRTabBar类内容如下
/** 接受传过来的item标题和图片*/
@property(nonatomic,strong) NSArray *  itemArray;

@property(nonatomic,weak) id<JRTabBarProtocol> delegate;

-(instancetype)initWithFrame:(CGRect)frame andItems:(NSArray *) arr

#pragma mark - 增加item

- (void)addItems{

    CGFloat space =(kWidth-2*kEdgeMargin-self.itemArray.count*40)/(self.itemArray.count-1);


    for (int i=0;i<self.itemArray.count;i++) {

       JRItem *item= [[[NSBundle mainBundle] loadNibNamed:@"jritem" owner:nil options:nil] firstObject];
        item.tag=100+i;

        //1 初始化item

        JRItemModel * model=self.itemArray[i];
        item.imageView.image=model.image;
        item.label.text=model.title;

        //2 修改坐标
        CGRect frame=item.frame;
        frame.origin.x=kEdgeMargin+i*(space+40);
        item.frame=frame;

        //3加入tabbar
        [self addSubview:item];


        //增加点击手势
        UITapGestureRecognizer * tap=[[UITapGestureRecognizer alloc]initWithTarget:self action:@selector(showInfo:)];
        [item addGestureRecognizer:tap];

          }}
效果图如下:

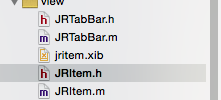
2、针对JRItem我们先通过xib创业出来,然后定义相应的类并且连接输出口如下图所示


3、然后我们需要根据苹果一样定义一个容器来存放将要展示和所有控制器和我们需要的展示的tabItem,这里我们取名为JRTabBarConroller。
3.1首先我们需要为当前的控制器添加tabbar
pragma mark - 添加tabbar
- (void) _setUpTabbar{


    JRTabBar * tab=[[JRTabBar alloc] initWithFrame:CGRectMake(0, kHeight-49,kWidth , 49) andItems:self.items];
    tab.delegate=self;
    [self.view addSubview:tab];

    //控制tabbar隐藏
    tab.hidden=self.hiddenTabBar;


}
3.2首先我们将需要传入的控制器展示出来
//设置视图控制器
- (void)_setUpSelectController:(NSInteger) index{
    //如果重复点击,取消操作
    UIViewController * vc=self.viewControllers[index];
    if(self.currentVC==vc)return;

    //第一次不进行动画
    if(self.currentVC==nil){
        [self.view addSubview:vc.view];
        self.currentVC=vc;
    }else{
     //第二次开始加载动画
        //将当前的视图移动到屏幕的最边缘位置,然后在动画慢慢的拉回来从而达到翻页效果
     [self.view insertSubview:vc.view aboveSubview:self.currentVC.view];
        vc.view.transform=CGAffineTransformMakeTranslation(kWidth, 0);
        [UIView animateWithDuration:0.5 animations:^{
            vc.view.transform=CGAffineTransformIdentity;

        } completion:^(BOOL finished) {
            [self.currentVC.view removeFromSuperview];
            self.currentVC=vc;
        }];

    }

}
3.3然后我们需要切换控制器
#pragma mark - JRTabBarProtocol

- (void)changeVC:(NSInteger)index{

    NSInteger tag=index-100;


    //  重新切换控制器
    [self _setUpSelectController:tag];
3.4这样我们就大功告成了,然后我们需要对外提供接口
/** 定义一个数组,用来存放视图控制器*/
@property(nonatomic,strong) NSArray * viewControllers;


/** 定义一个数组,用来存放Item*/
@property(nonatomic,strong) NSArray * items;

/** 选中索引*/
@property(nonatomic,assign) NSInteger selectedIndex;


@property(nonatomic,assign) BOOL hiddenTabBar;
3.5有了这些接口我们在外面调用即可
//初始化控制器
    //1
    UIViewController * vc1=[[UIViewController alloc] init];
    vc1.view.backgroundColor=[UIColor redColor];
    //2
    UIViewController * vc2=[[UIViewController alloc] init];
    vc2.view.backgroundColor=[UIColor greenColor];
    //3
    UIViewController * vc3=[[UIViewController alloc] init];
    vc3.view.backgroundColor=[UIColor orangeColor];
    //4
    UIViewController * vc4=[[UIViewController alloc] init];
    vc4.view.backgroundColor=[UIColor blueColor];


    //初始化item

    JRItemModel * item1=[[JRItemModel alloc] initWithTitle:@"tab1" andImage:[UIImage imageNamed:@"tabbar_cate"]];

    JRItemModel * item2=[[JRItemModel alloc] initWithTitle:@"tab2" andImage:[UIImage imageNamed:@"tabbar_fov"]];

    JRItemModel * item3=[[JRItemModel alloc] initWithTitle:@"tab3" andImage:[UIImage imageNamed:@"tabbar_home"]];

    JRItemModel * item4=[[JRItemModel alloc] initWithTitle:@"tab4" andImage:[UIImage imageNamed:@"tabbar_search"]];


    JRTabBarConroller * tab=[[JRTabBarConroller alloc] init];
    tab.viewControllers=@[vc1,vc2,vc3,vc4];
    tab.items=@[item1,item2,item3,item4];
//  tab.hiddenTabBar=NO;

    self.window.rootViewController=tab;
想要了解更多内容的小伙伴,可以点击查看源码,亲自运行测试。
疑问咨询或技术交流,请加入官方QQ群: (452379712)
作者:杰瑞教育
出处:http://www.cnblogs.com/jerehedu/
本文版权归烟台杰瑞教育科技有限公司和博客园共有,欢迎转载,但未经作者同意必须保留此段声明,且在文章页面明显位置给出原文连接,否则保留追究法律责任的权利。
出处:http://www.cnblogs.com/jerehedu/
本文版权归烟台杰瑞教育科技有限公司和博客园共有,欢迎转载,但未经作者同意必须保留此段声明,且在文章页面明显位置给出原文连接,否则保留追究法律责任的权利。