- Creating the POM
-
<?xml version="1.0" encoding="UTF-8"?>
<project xmlns="http://maven.apache.org/POM/4.0.0" xmlns:xsi="http://www.w3.org/2001/XMLSchema-instance" xsi:schemaLocation="http://maven.apache.org/POM/4.0.0 http://maven.apache.org/xsd/maven-4.0.0.xsd">
    <modelVersion>4.0.0</modelVersion>

    <groupId>com.example</groupId>
    <artifactId>myproject</artifactId>
    <version>0.0.1-SNAPSHOT</version>

    <parent>
        <groupId>org.springframework.boot</groupId>
        <artifactId>spring-boot-starter-parent</artifactId>
        <version>2.1.1.RELEASE</version>
    </parent>
    <dependencies>
        <dependency>
            <groupId>org.springframework.boot</groupId>
            <artifactId>spring-boot-starter-web</artifactId>
        </dependency>
    </dependencies>
</project>
- 通过POM的dependencies 实现 Adding Classpath Dependencies
-
关于
spring-boot-starter-parent:You should need to specify only the Spring Boot version number on this dependency. If you import additional starters, you can safely omit the version number.
-
- 使用
mvn dependency:tree查看project dependencies - 编写java代码
- src/main/java/Example.java
-
import org.springframework.boot.*;
import org.springframework.boot.autoconfigure.*
import org.springframework.web.bind.annotation.*;

@RestController
@EnableAutoConfiguration
public class Example{
    @RequestMapping("/")
    String home(){
        return "Hello World!";
    }
    public static void main(String[] args) throws Exception{
        SpringApplication.run(Example.class,args);
    }
}
@RestControllerand@RequestMappingannotations are Spring MVC annotations@EnableAutoConfiguration. This annotation tells Spring Boot to “guess” how you want to configure Spring, based on the jar dependencies that you have added. Sincespring-boot-starter-webadded Tomcat and Spring MVC, the auto-configuration assumes that you are developing a web application and sets up Spring accordingly.-
Starters and Auto-configuration
Auto-configuration is designed to work well with “Starters”, but the two concepts are not directly tied. You are free to pick and choose jar dependencies outside of the starters. Spring Boot still does its best to auto-configure your application.
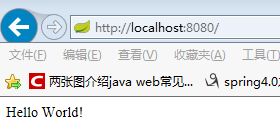
- Running the Example
- mvn spring-boot:run
- Creating an Executable Jar
- To create an executable jar, we need to add the
spring-boot-maven-pluginto ourpom.xml. To do so, insert the following lines just below thedependenciessection: - Spring Boot includes a Maven plugin that can package the project as an executable jar. Add the plugin to your
<plugins>section if you want to use it, as shown in the following example: -
<build> <plugins> <plugin> <groupId>org.springframework.boot</groupId> <artifactId>spring-boot-maven-plugin</artifactId> </plugin> </plugins> </build> <?xml version="1.0" encoding="UTF-8"?> <project xmlns="http://maven.apache.org/POM/4.0.0" xmlns:xsi="http://www.w3.org/2001/XMLSchema-instance" xsi:schemaLocation="http://maven.apache.org/POM/4.0.0 http://maven.apache.org/xsd/maven-4.0.0.xsd"> <modelVersion>4.0.0</modelVersion> <groupId>com.example</groupId> <artifactId>myproject</artifactId> <version>0.0.1-SNAPSHOT</version> <parent> <groupId>org.springframework.boot</groupId> <artifactId>spring-boot-starter-parent</artifactId> <version>2.1.1.RELEASE</version> </parent> <dependencies> <dependency> <groupId>org.springframework.boot</groupId> <artifactId>spring-boot-starter-web</artifactId> </dependency> </dependencies> <build> <plugins> <plugin> <groupId>org.springframework.boot</groupId> <artifactId>spring-boot-maven-plugin</artifactId> </plugin> </plugins> </build> </project> - mvn package
- java -jar target/myproject-0.0.1-SNAPSHOT.jar
- To create an executable jar, we need to add the
-
- 参考:https://docs.spring.io/spring-boot/docs/2.1.1.RELEASE/reference/htmlsingle/#getting-started-first-application