一键生成数据库文档,无需重复CV
在微信公众号中发现了这个一篇文章,原文地址:https://mp.weixin.qq.com/s/oNd8rsEv343hxCbwbfFziw
不必要的赘述,直接来说怎么生成吧。根据原文的描述,我在将他细致到傻瓜化。
在GitHub中有这样神奇的工具,
screw(螺丝钉),这个工具可以生成数据库文档,而且还可以支持三种输出模式:WORD、MD、HTML
数据库支持
- MySQL
- MariaDB
- TIDB
- Oracle
- SqlServer
- PostgreSQL
- Cache DB
配置
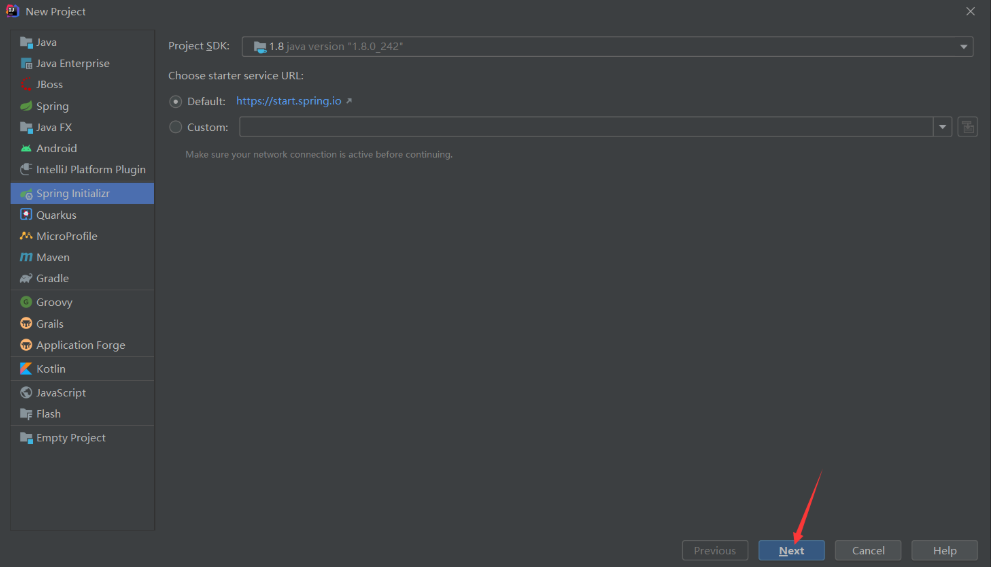
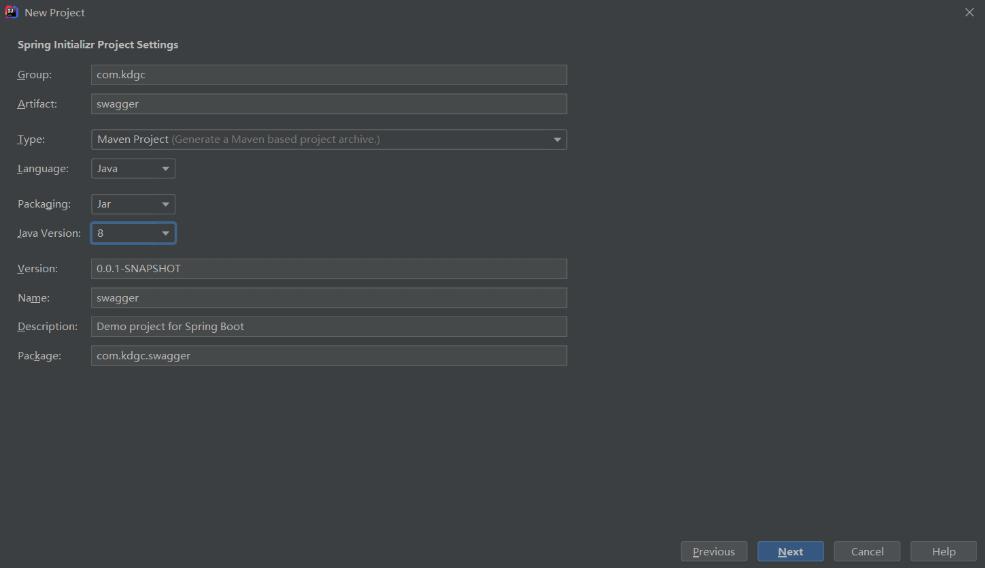
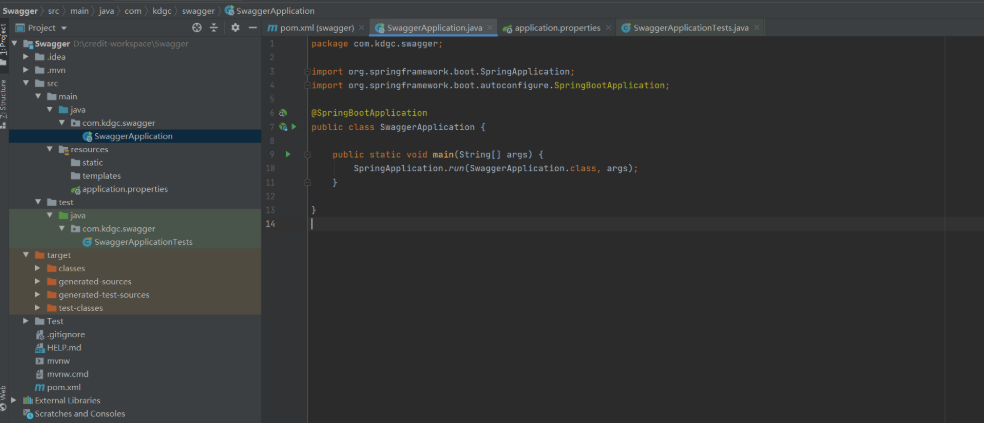
1、创建Spring项目

2、配置
引入screw核心包,HikariCP数据库连接池,HikariCP号称性能最出色的数据库连接池。整个pom.xml内容如下
<?xml version="1.0" encoding="UTF-8"?>
<project xmlns="http://maven.apache.org/POM/4.0.0" xmlns:xsi="http://www.w3.org/2001/XMLSchema-instance"
         xsi:schemaLocation="http://maven.apache.org/POM/4.0.0 https://maven.apache.org/xsd/maven-4.0.0.xsd">
    <modelVersion>4.0.0</modelVersion>
    <parent>
        <groupId>org.springframework.boot</groupId>
        <artifactId>spring-boot-starter-parent</artifactId>
        <version>2.1.5.RELEASE</version>
        <relativePath/> <!-- lookup parent from repository -->
    </parent>
    <groupId>com.kdgc</groupId>
    <artifactId>swagger</artifactId>
    <version>0.0.1-SNAPSHOT</version>
    <name>swagger</name>
    <description>Demo project for Spring Boot</description>

    <properties>
        <java.version>1.8</java.version>
    </properties>

    <dependencies>
        <dependency>
            <groupId>org.springframework.boot</groupId>
            <artifactId>spring-boot-starter-web</artifactId>
        </dependency>
        <!-- HikariCP -->
        <dependency>
            <groupId>com.zaxxer</groupId>
            <artifactId>HikariCP</artifactId>
            <version>3.4.5</version>
        </dependency>
        <!-- screw核心 -->
        <dependency>
            <groupId>cn.smallbun.screw</groupId>
            <artifactId>screw-core</artifactId>
            <version>1.0.3</version>
        </dependency>
        <dependency>
            <groupId>org.springframework.boot</groupId>
            <artifactId>spring-boot-starter-data-jdbc</artifactId>
        </dependency>
        <dependency>
            <groupId>mysql</groupId>
            <artifactId>mysql-connector-java</artifactId>
            <scope>runtime</scope>
        </dependency>
        <!-- https://mvnrepository.com/artifact/com.oracle.ojdbc/ojdbc8 -->
        <dependency>
            <groupId>com.oracle.ojdbc</groupId>
            <artifactId>ojdbc8</artifactId>
            <version>19.3.0.0</version>
        </dependency>

        <dependency>
            <groupId>org.springframework.boot</groupId>
            <artifactId>spring-boot-starter-test</artifactId>
            <scope>test</scope>
        </dependency>
    </dependencies>

    <build>
        <plugins>
            <plugin>
                <groupId>org.springframework.boot</groupId>
                <artifactId>spring-boot-maven-plugin</artifactId>
            </plugin>

        </plugins>
    </build>

</project>
3、配置数据源
在application.properties文件中的配置如下,我是测试了Oracle和Mysql
#spring.datasource.url=jdbc:mysql://192.168.11.11:3306/mas-party?useUnicode=true&characterEncoding=UTF-8&useSSL=false
#spring.datasource.username=root
#spring.datasource.password=123456
#spring.datasource.driver-class-name=com.mysql.cj.jdbc.Driver
#spring.datasource.xa.properties.useInformationSchema=true


spring.datasource.platform=oracle
spring.datasource.driver-class-name=oracle.jdbc.driver.OracleDriver
spring.datasource.url=jdbc:oracle:thin:@59.203.11.11:15211:credit
spring.datasource.username=creditfw
spring.datasource.password=credit
4、测试代码
代码生成方式也非常简单,如图SwaggerApplicationTests的代码如下:
package com.kdgc.swagger;

import cn.smallbun.screw.core.Configuration;
import cn.smallbun.screw.core.engine.EngineConfig;
import cn.smallbun.screw.core.engine.EngineFileType;
import cn.smallbun.screw.core.engine.EngineTemplateType;
import cn.smallbun.screw.core.execute.DocumentationExecute;
import cn.smallbun.screw.core.process.ProcessConfig;


import org.junit.Test;
import org.junit.runner.RunWith;
import org.springframework.beans.factory.annotation.Autowired;
import org.springframework.boot.test.context.SpringBootTest;
import org.springframework.context.ApplicationContext;
import org.springframework.test.context.junit4.SpringRunner;

import javax.sql.DataSource;
import java.util.ArrayList;
import java.util.Arrays;
import java.util.List;
@RunWith(SpringRunner.class)
@SpringBootTest
public class SwaggerApplicationTests {

    @Autowired
    ApplicationContext applicationContext;


  @Test
  public  void contextLoads() {
        DataSource dataSourceMysql = applicationContext.getBean(DataSource.class);
        // 生成文件配置
        EngineConfig engineConfig = EngineConfig.builder()
                // 生成文件路径,自己mac本地的地址,这里需要自己更换下路径
                .fileOutputDir("D:/")
                // 打开目录
                .openOutputDir(false)
                // 文件类型
                .fileType(EngineFileType.HTML)
                // 生成模板实现
                .produceType(EngineTemplateType.freemarker).build();
        // 生成文档配置(包含以下自定义版本号、描述等配置连接)
        Configuration config = Configuration.builder()
                .version("1.0.0")
                .description("数据库文档")
                .dataSource(dataSourceMysql)
                .engineConfig(engineConfig)
                .produceConfig(getProcessConfig())
                .build();
        // 执行生成
        new DocumentationExecute(config).execute();
    }

    /**
     * 配置想要生成的表+ 配置想要忽略的表
     *
     * @return 生成表配置
     */
    public static ProcessConfig getProcessConfig() {
        // 忽略表名
 //       List<String> ignoreTableName = Arrays.asList("a", "test_group");
        // 忽略表前缀,如忽略BASE_开头的数据库表
        List<String> ignorePrefix = Arrays.asList("BASE_", "T_","SYS_");
        // 忽略表后缀
       // List<String> ignoreSuffix = Arrays.asList("_test", "czb_");
        return ProcessConfig.builder()
                //根据名称指定表生成
                //.designatedTableName(Arrays.asList("fire_user"))
                //根据表前缀生成
                .designatedTablePrefix(new ArrayList<>())
                //根据表后缀生成
                .designatedTableSuffix(new ArrayList<>())
                //忽略表名
              // .ignoreTableName(ignoreTableName)
                //忽略表前缀
                .ignoreTablePrefix(ignorePrefix)
                //忽略表后缀
                //.ignoreTableSuffix(ignoreSuffix)
                .build();
    }
}
以上为全部代码,测试正常。
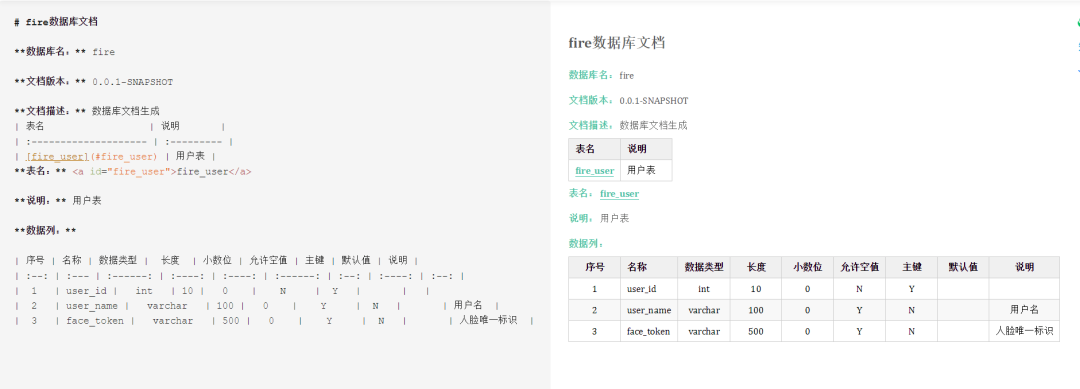
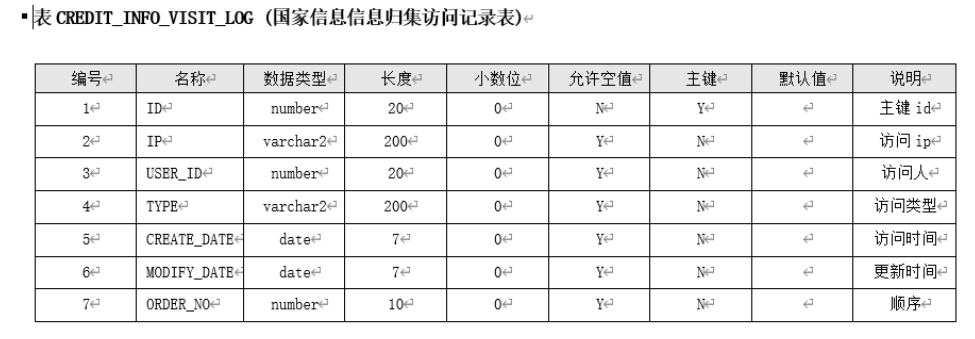
5、文档格式
screw 有 HTML、DOC、MD 三种格式的文档。
代码中的修改
.fileType(EngineFileType.HTML)
DOC文档样式
MD文档样式