一、spring概述
Spring是一个开放源代码的设计层面框架,他解决的是业务逻辑层和其他各层的松耦合问题,因此它将面向接口的编程思想贯穿整个系统应用。Spring是于2003 年兴起的一个轻量级的Java 开发框架,由Rod Johnson创建。简单来说,Spring是一个分层的JavaSE/EE full-stack(一站式) 轻量级开源框架。
二、Spring特点
1、方便解耦,简化开发。
2、AOP编程的支持。
3、声明式事务的支持。
4、方便程序的测试
5、方便集成各种优秀框架
三、spring下载
下载地址:https://repo.spring.io/libs-release-local/org/springframework/spring/
进入后可选择下载版本,选择版本后,进入目录结构。其中dist是最终发布版本,包含开发所需lib和源码。docs是开发文档。schema是一些约束文件。
四、spring搭建入门案例
1、在eclipse中创建一个动态的web工程。
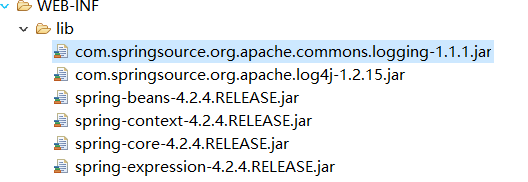
2、导入spring的基础lib包到lib文件夹下。
3、编写一个实体User类
package com.jichi.entity;

public class User {
    private String name;
    private Integer age ;
    public String getName() {
        return name;
    }
    public void setName(String name) {
        this.name = name;
    }
    public Integer getAge() {
        return age;
    }
    public void setAge(Integer age) {
        this.age = age;
    }
}
4、创建applicationContext.xml文件
在src文件下,新建applicationContext.xml文件,同时引入约束。
<?xml version="1.0" encoding="UTF-8"?>
<beans xmlns="http://www.springframework.org/schema/beans"
    xmlns:xsi="http://www.w3.org/2001/XMLSchema-instance"
    xmlns:util="http://www.springframework.org/schema/util"
    xmlns:jee="http://www.springframework.org/schema/jee"
    xmlns:lang="http://www.springframework.org/schema/lang"
    xmlns:jms="http://www.springframework.org/schema/jms"
    xmlns:aop="http://www.springframework.org/schema/aop"
    xmlns:tx="http://www.springframework.org/schema/tx"
    xmlns:context="http://www.springframework.org/schema/context"
    xmlns:jdbc="http://www.springframework.org/schema/jdbc"
    xmlns:cache="http://www.springframework.org/schema/cache"
    xmlns:mvc="http://www.springframework.org/schema/mvc"
    xmlns:oxm="http://www.springframework.org/schema/oxm"
    xmlns:task="http://www.springframework.org/schema/task"
    xmlns:tool="http://www.springframework.org/schema/tool"
    xmlns:websocket="http://www.springframework.org/schema/websocket"
    xsi:schemaLocation="
        http://www.springframework.org/schema/beans http://www.springframework.org/schema/beans/spring-beans.xsd
        http://www.springframework.org/schema/util http://www.springframework.org/schema/util/spring-util.xsd
        http://www.springframework.org/schema/jee http://www.springframework.org/schema/jee/spring-jee.xsd
        http://www.springframework.org/schema/lang http://www.springframework.org/schema/lang/spring-lang.xsd
        http://www.springframework.org/schema/jms http://www.springframework.org/schema/jms/spring-jms.xsd
        http://www.springframework.org/schema/aop http://www.springframework.org/schema/aop/spring-aop.xsd
        http://www.springframework.org/schema/tx http://www.springframework.org/schema/tx/spring-tx.xsd
        http://www.springframework.org/schema/context http://www.springframework.org/schema/context/spring-context.xsd
        http://www.springframework.org/schema/jdbc http://www.springframework.org/schema/jdbc/spring-jdbc.xsd
        http://www.springframework.org/schema/cache http://www.springframework.org/schema/cache/spring-cache.xsd
        http://www.springframework.org/schema/mvc http://www.springframework.org/schema/mvc/spring-mvc.xsd
        http://www.springframework.org/schema/oxm http://www.springframework.org/schema/oxm/spring-oxm.xsd
        http://www.springframework.org/schema/task http://www.springframework.org/schema/task/spring-task.xsd
        http://www.springframework.org/schema/tool http://www.springframework.org/schema/tool/spring-tool.xsd
        http://www.springframework.org/schema/websocket http://www.springframework.org/schema/websocket/spring-websocket.xsd">

</beans>
5、在beans内将user实体配置进去
<bean name="user" class="com.jichi.entity.User"></bean>
6、书写测试代码
public class TestDemo {
    @Test
    public void test1(){
        ApplicationContext ac = new ClassPathXmlApplicationContext("applicationContext.xml");
        User user = (User) ac.getBean("user");
        System.out.println(user);
    }
}
7、结果显示,将user对象交给spring容器管理成功
com.jichi.entity.User@db5e9c
五、spring中的工厂BeanFactory与ApplicationContext的区别
1、BeanFactory
spring原始接口,功能较为单一,在从容器中获得对象的时候才会创建对象。
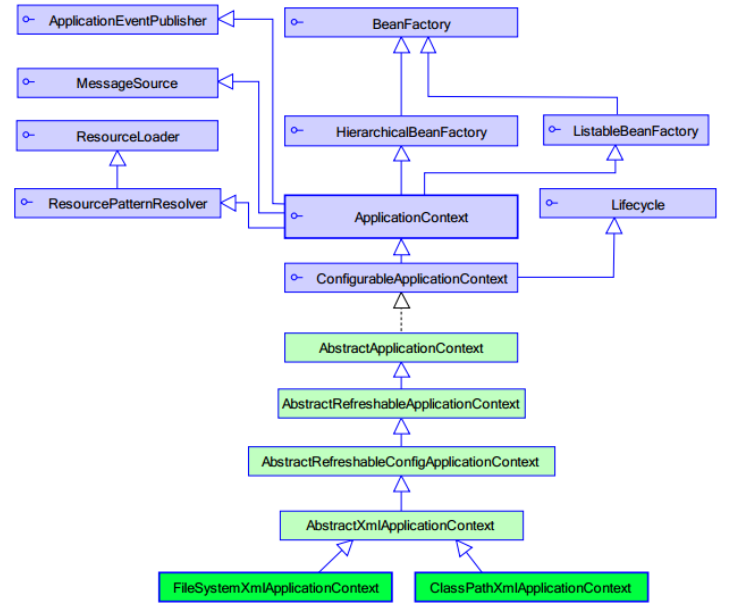
2、ApplicationContext
每次启动容器的时候,初始化容器中的所有对象并提供更多功能。
其中的实现类ClassPathXmlApplicationContext是加载类路径下的spring配置文件,FileSystemXmlApplicationContext是加载本地磁盘下spring的配置文件。
3、实现图
4、结论
web开发中,使用applicationContext。
在资源匮乏的环境可以使用BeanFactory。
六、spring的bean元素属性详解
1、class:被容器管理对象的完整类名。
2、name:被容器管理对象的名称,根据此名称从容器中获得该对象,可以重复,可以使用特殊字符。
3、id:被容器管理对象的唯一标识,id不可重复,不可使用特殊字符,作用与name相同,建议使用name。
4、scope:
(1)singleton(默认):单例对象,该对象在spring容器中只会存在一个。
(2)prototype:多例模式,配置为多例的对象不会在spring容器中创建,只有在从容器中要获取该对象的时候,容器对该对象进行创建,每次创建都是一个新的对象。注意在与struts2配合使用的时候,struts2中的action对象必须要配置成prototype这种多例模式。
(3)request:web项目中,创建一个对象,将其存放在request域中。
(4)session:web项目中,创建一个对象,将其存放在session域中。
5、init-method与destory-method
init-method是对象创建的时候所执行的方法,destory-method是对象销毁时所执行的方法。对象必须是单例的,同时容器关闭的时候,对象的销毁方法才会执行。
<bean name="user" class="com.jichi.entity.User" init-method="init" destroy-method="destory"></bean>
public class User {
    private String name;
    private Integer age ;
    public String getName() {
        return name;
    }
    public void setName(String name) {
        this.name = name;
    }
    public Integer getAge() {
        return age;
    }
    public void setAge(Integer age) {
        this.age = age;
    }
    public void init(){
        System.out.println("初始");
    }
    public void destory(){
        System.out.println("销毁");
    }
}
七、spring创建对象的方式
1、空参构造方法
<bean name="user" class="com.jichi.entity.User" ></bean>
2、静态工厂实例化
(1)创建一个工厂类
public class UserFactory {
    public static User createUser(){
        return new User();
    }
}
(2)配置
<bean name="user" class="com.jichi.factory.UserFactory" factory-method="createUser"></bean>
3、实例工厂实例化
(1)创建一个工厂类
public class UserFactory {
    public static User createUser(){
        return new User();
    }
}
(2)配置
<bean name="user" factory-bean="userFactory" factory-method="createUser"></bean>