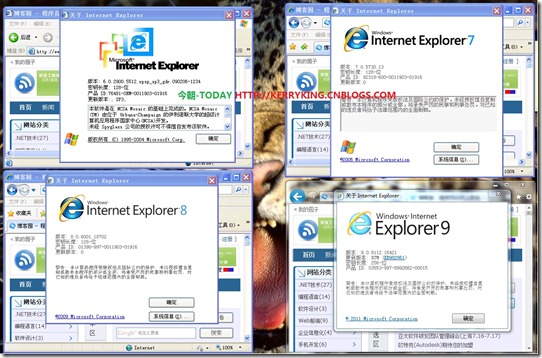
我想看过来的人肯定是搞前端或者跟前端有关的人,让我们默念IE6 Must die~~~!!!
引用:http://blog.dotsmart.net/2009/06/24/using-windows-7s-xp-mode-to-run-ie-6-and-ie-7-side-by-side/
Windows 7’s XP Mode is essentially a Windows XP virtual machine that runs in the new Windows 7 version of Virtual PC. This new edition of Virtual PC includes cool features such as seamless windows. The main reason I’m interested in this is to run older versions of Internet Explorer for testing purposes. IE8’s compatibility mode does a pretty good job of emulating IE7 but there are differences, so I investigated how to get “real” IE7 running under Windows 7’s XP Mode, without losing IE6.
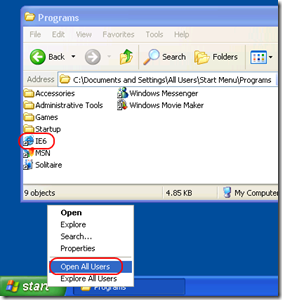
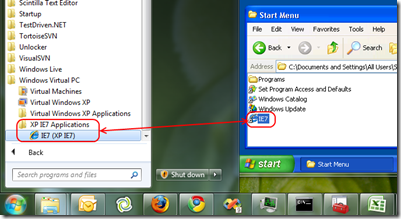
Out of the box, the Virtual PC image is Windows XP SP3 with IE6. The trick to getting IE6 to appear as a seamless window like this is to launch the Virtual Windows XP virtual machine and in the VM, create a shortcut in the “All Users” Start Menu or desktop:
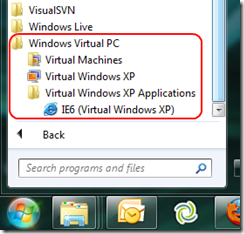
After a short delay, the shortcut will be duplicated into the Windows 7 host’s start menu:
When you launch this shortcut in Windows 7, the main Virtual PC window will close and the application will be launched and projected onto your desktop.
Creating a VM for IE7
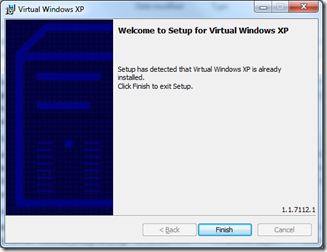
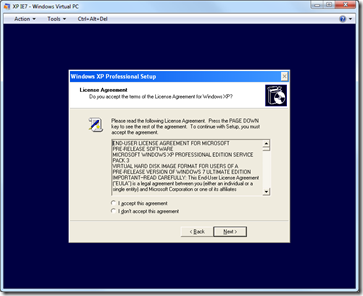
You can’t install IE7 side-by-side with IE6 on the same machine, so to run IE7 at the same time as IE6 we will need to create a new VM. Unfortunately, if you run the VirtualWindowsXP.msi setup again you’ll get a message saying “Setup has detected that Virtual Windows XP is already installed”:
The workaround is to create a new instance of the VM manually using the supplied VHD as the base disk image. To do this do the following:
Open the Virtual Machines folder from the Start Menu and click Create virtual machine:
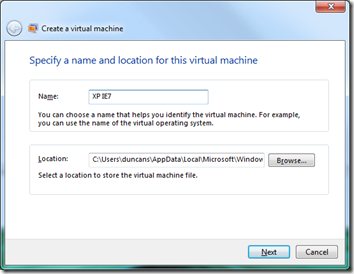
Specify a name and location for the virtual machine:
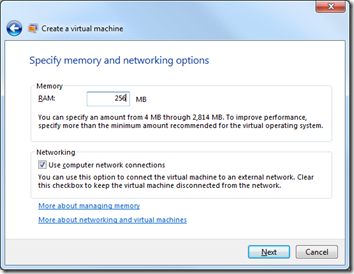
For memory I specified 256MB, which should me more than enough for just running IE7:
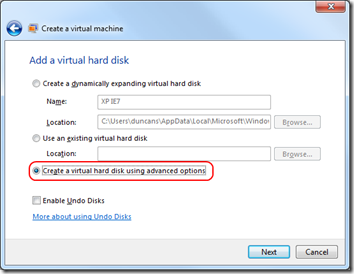
Here’s the important bit. Choose “Create a virtual hard disk using advanced options”
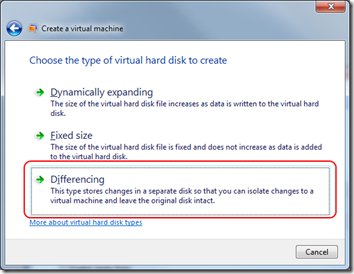
…and then choose a Differencing disk. This is the same way that the default Virtual Windows XP VM is set up:
If you want, you can change the default name and location (I didn’t bother):
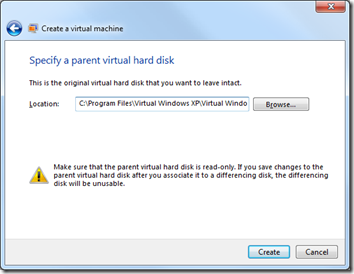
For the parent virtual hard disk choose the original Virtual Windows XP virtual disk, which on my machine was at C:\Program Files\Virtual Windows XP\Virtual Windows XP.vhd:
Now start the new Virtual PC you just created from the Virtual Machines folder and complete Windows Setup as appropriate, choosing a computer name unique for your network and an Administrator password:
When that’s done:
- Enable Integration Features from the Tools menu of the Virtual PC window
- For credentials enter Administrator and the password you entered during setup.
- I chose to Remember my credentials for convenience
- download and install IE7 in the VM,
When IE7 has installed and rebooted, create a shortcut to IE7 in the “All Users” start menu which, after a short delay, will create a corresponding shortcut in the Windows 7 start menu of the host.
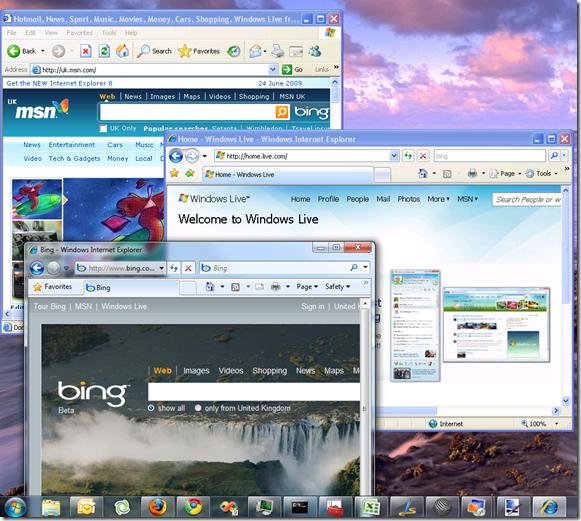
So here’s the end result, IE6, IE7 and IE8 all running on Windows 7:
注意点:
1、未装WIN7 SP1的朋友请先安装XP Mode的功能补丁;
2、初次安装XPMode时可以设置默认的VM路径,我想大部分朋友的C盘都不富裕,而且方便重装后使用;
3、在上文中安装第二个虚拟机时,如果您用的是中文版就要选择差异盘,意思顾名思义,当然了稳中有歧义的是您不必非搞差异盘,如果您愿意选哪个都行;
4、使用差异盘的话注意父磁盘的选择,不要把多个系统高多级啊什么的,我尝试后就是狂报错,还是使用默认的吧,路径上文中有;
5、安装集成工具时要小心,最好先选自动更新,我不知道是不是这个原因,等集成工具安装成功后再关更新不迟;
