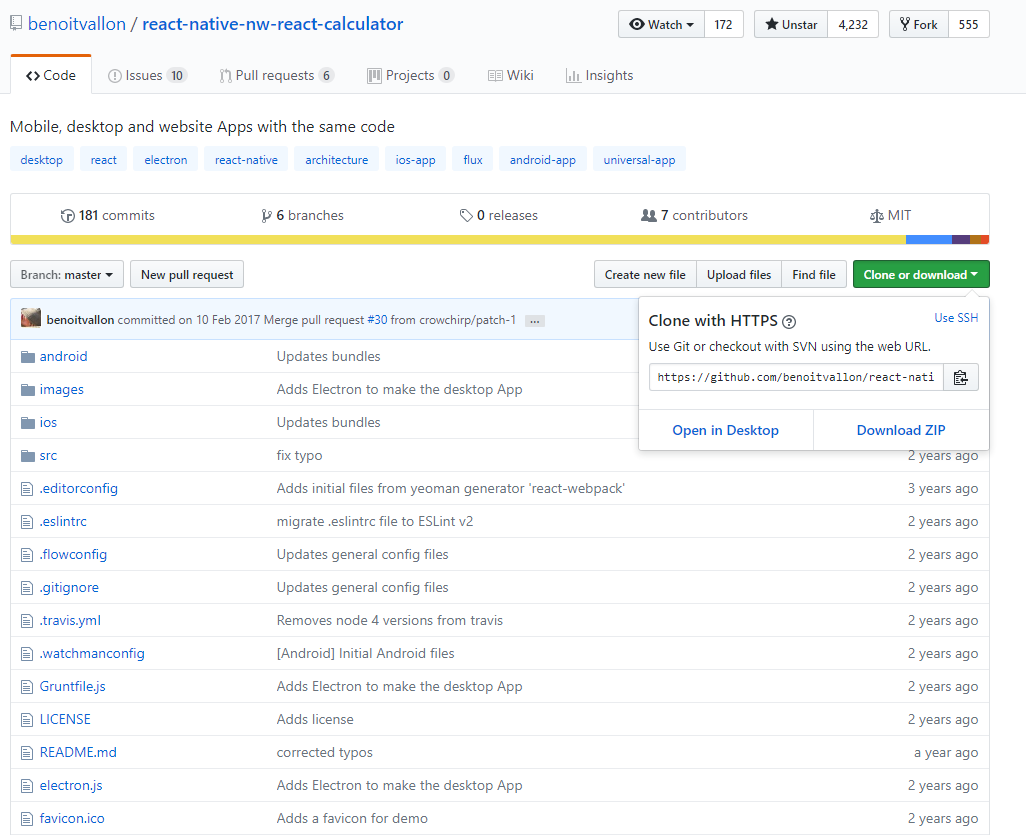
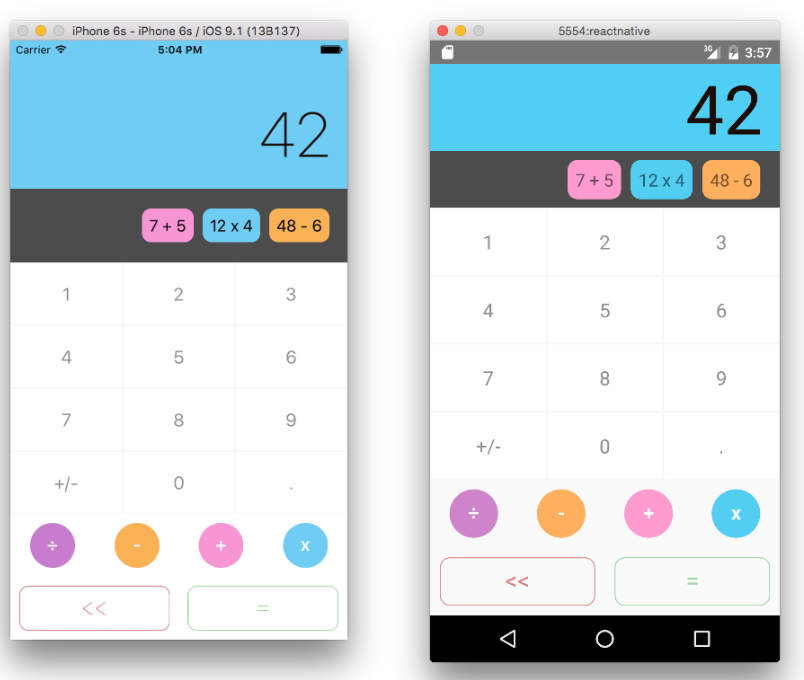
如何运行开源的RN项目?
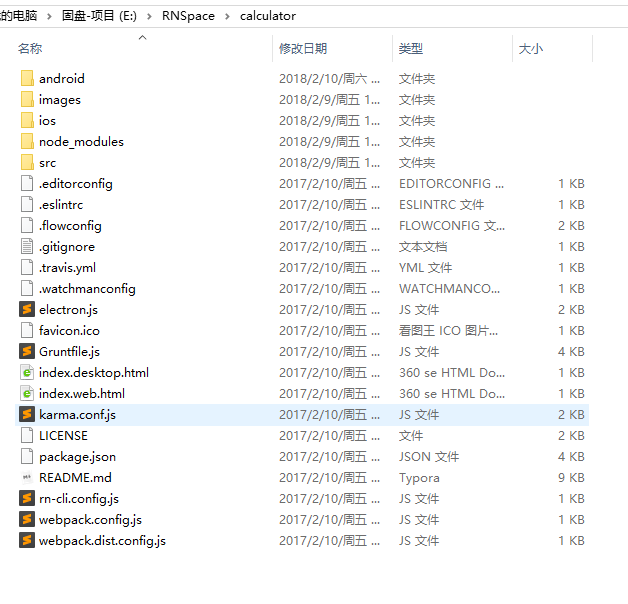
1.下载
2.解压
3.配置本地sdk位置
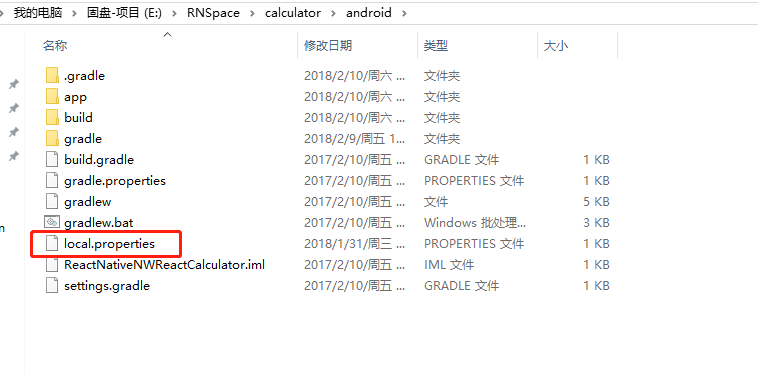
sdk.dir = D:\Android\SDK
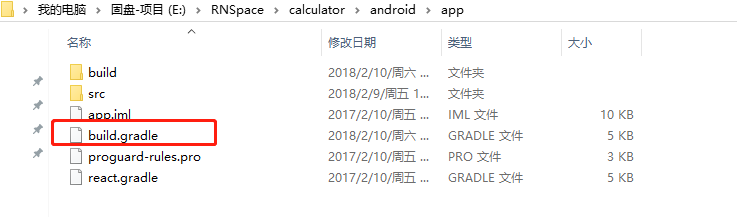
4.调整gradle版本
apply plugin: "com.android.application"

import com.android.build.OutputFile

/**
 * The react.gradle file registers a task for each build variant (e.g. bundleDebugJsAndAssets
 * and bundleReleaseJsAndAssets).
 * These basically call `react-native bundle` with the correct arguments during the Android build
 * cycle. By default, bundleDebugJsAndAssets is skipped, as in debug/dev mode we prefer to load the
 * bundle directly from the development server. Below you can see all the possible configurations
 * and their defaults. If you decide to add a configuration block, make sure to add it before the
 * `apply from: "react.gradle"` line.
 *
 * project.ext.react = [
 *   // the name of the generated asset file containing your JS bundle
 *   bundleAssetName: "index.android.bundle",
 *
 *   // the entry file for bundle generation
 *   entryFile: "index.android.js",
 *
 *   // whether to bundle JS and assets in debug mode
 *   bundleInDebug: false,
 *
 *   // whether to bundle JS and assets in release mode
 *   bundleInRelease: true,
 *
 *   // whether to bundle JS and assets in another build variant (if configured).
 *   // See http://tools.android.com/tech-docs/new-build-system/user-guide#TOC-Build-Variants
 *   // The configuration property can be in the following formats
 *   //         'bundleIn${productFlavor}${buildType}'
 *   //         'bundleIn${buildType}'
 *   // bundleInFreeDebug: true,
 *   // bundleInPaidRelease: true,
 *   // bundleInBeta: true,
 *
 *   // the root of your project, i.e. where "package.json" lives
 *   root: "../../",
 *
 *   // where to put the JS bundle asset in debug mode
 *   jsBundleDirDebug: "$buildDir/intermediates/assets/debug",
 *
 *   // where to put the JS bundle asset in release mode
 *   jsBundleDirRelease: "$buildDir/intermediates/assets/release",
 *
 *   // where to put drawable resources / React Native assets, e.g. the ones you use via
 *   // require('./image.png')), in debug mode
 *   resourcesDirDebug: "$buildDir/intermediates/res/merged/debug",
 *
 *   // where to put drawable resources / React Native assets, e.g. the ones you use via
 *   // require('./image.png')), in release mode
 *   resourcesDirRelease: "$buildDir/intermediates/res/merged/release",
 *
 *   // by default the gradle tasks are skipped if none of the JS files or assets change; this means
 *   // that we don't look at files in android/ or ios/ to determine whether the tasks are up to
 *   // date; if you have any other folders that you want to ignore for performance reasons (gradle
 *   // indexes the entire tree), add them here. Alternatively, if you have JS files in android/
 *   // for example, you might want to remove it from here.
 *   inputExcludes: ["android/**", "ios/**"]
 * ]
 */

apply from: "react.gradle"

/**
 * Set this to true to create two separate APKs instead of one:
 *   - An APK that only works on ARM devices
 *   - An APK that only works on x86 devices
 * The advantage is the size of the APK is reduced by about 4MB.
 * Upload all the APKs to the Play Store and people will download
 * the correct one based on the CPU architecture of their device.
 */
def enableSeparateBuildPerCPUArchitecture = false

/**
 * Run Proguard to shrink the Java bytecode in release builds.
 */
def enableProguardInReleaseBuilds = false

android {
    compileSdkVersion 26 // 23
    buildToolsVersion "26.0.2" // 23

    defaultConfig {
        applicationId "com.reactnativenwreactcalculator"
        minSdkVersion 16
        targetSdkVersion 22
        versionCode 1
        versionName "1.0"
        ndk {
            abiFilters "armeabi-v7a", "x86"
        }
    }
    splits {
        abi {
            reset()
            enable enableSeparateBuildPerCPUArchitecture
            universalApk false  // If true, also generate a universal APK
            include "armeabi-v7a", "x86"
        }
    }
    buildTypes {
        release {
            minifyEnabled enableProguardInReleaseBuilds
            proguardFiles getDefaultProguardFile("proguard-android.txt"), "proguard-rules.pro"
        }
    }
    // applicationVariants are e.g. debug, release
    applicationVariants.all { variant ->
        variant.outputs.each { output ->
            // For each separate APK per architecture, set a unique version code as described here:
            // http://tools.android.com/tech-docs/new-build-system/user-guide/apk-splits
            def versionCodes = ["armeabi-v7a":1, "x86":2]
            def abi = output.getFilter(OutputFile.ABI)
            if (abi != null) {  // null for the universal-debug, universal-release variants
                output.versionCodeOverride =
                        versionCodes.get(abi) * 1048576 + defaultConfig.versionCode
            }
        }
    }
}

dependencies {
    compile fileTree(dir: "libs", include: ["*.jar"])
    compile "com.android.support:appcompat-v7:23.0.1"
    compile "com.facebook.react:react-native:+"  // From node_modules
}
调成本地存在的。
5.安装一些依赖
npm i 或者 npm install
6.运行

react-native run-android
