CentOS7:配置SVN服务器
Posted on 2016-11-10 15:17 eastson 阅读(4266) 评论(0) 编辑 收藏 </div>
<div class="postbody"><div id="cnblogs_post_body"><h3>1. 安装</h3>
CentOS通过yum安装subversion。
$ sudo yum install subversion
subversion安装在/bin目录:
$ which svnserve
/bin/svnserve
检查一下subversion是否安装成功。

$ svnserve --version svnserve, version 1.7.14 (r1542130) compiled Nov 20 2015, 19:25:09Copyright (C) 2013 The Apache Software Foundation.
This software consists of contributions made by many people; see the NOTICE
file for more information.
Subversion is open source software, see http://subversion.apache.org/
The following repository back-end (FS) modules are available:* fs_base : Module for working with a Berkeley DB repository.
* fs_fs : Module for working with a plain file (FSFS) repository.Cyrus SASL authentication is available.
2. 建立版本库
subversion默认以/var/svn作为数据根目录,可以通过/etc/sysconfig/svnserve修改这个默认位置。
$ systemctl cat svnserve.service # /usr/lib/systemd/system/svnserve.service [Unit] Description=Subversion protocol daemon After=syslog.target network.target[Service]
Type=forking
EnvironmentFile=/etc/sysconfig/svnserve
ExecStart=/usr/bin/svnserve --daemon --pid-file=/run/svnserve/svnserve.pid $OPTIONS[Install]
WantedBy=multi-user.target$ cat /etc/sysconfig/svnserve
OPTIONS is used to pass command-line arguments to svnserve.
Specify the repository location in -r parameter:
OPTIONS="-r /var/svn"
我们修改/etc/sysconfig/svnserver将默认目录指定到/opt/svn。
$ cat /etc/sysconfig/svnserve
OPTIONS="-r /opt/svn"
使用svnadmin建立版本库spring-hello-world。
$ sudo mkdir -p /opt/svn $ sudo svnadmin create /opt/svn/spring-hello-world$ ll /opt/svn/
drwxr-xr-x. 6 root root 80 Nov 10 14:42 spring-hello-world$ ll /opt/svn/spring-hello-world/
drwxr-xr-x. 2 root root 51 Nov 10 14:42 conf
drwxr-sr-x. 6 root root 4096 Nov 10 14:42 db
-r--r--r--. 1 root root 2 Nov 10 14:42 format
drwxr-xr-x. 2 root root 4096 Nov 10 14:42 hooks
drwxr-xr-x. 2 root root 39 Nov 10 14:42 locks
-rw-r--r--. 1 root root 229 Nov 10 14:42 README.txt
3. 配置
编辑用户文件passwd,新增两个用户:admin和guest。
$ cat /opt/svn/spring-hello-world/conf/passwd
[users]
admin = admin
guest = guest
编辑权限文件authz,用户admin设置可读写权限,guest设置只读权限。
$ cat /opt/svn/spring-hello-world/conf/authz
[/]
admin = rw
guest = r
编辑svnserve.conf:
$ cat /opt/svn/spring-hello-world/conf/svnserve.conf
[general]
anon-access = none                     #控制非鉴权用户访问版本库的权限
auth-access = write                    #控制鉴权用户访问版本库的权限
password-db = passwd                   #指定用户名口令文件名
authz-db = authz                       #指定权限配置文件名
realm = spring-hello-world             #指定版本库的认证域,即在登录时提示的认证域名称
4. SVN服务
启动SVN服务。
$ sudo systemctl start svnserve.service
检查服务是否启动成功。
$ ps aux | grep svn
root      16349  0.0  0.1 162180   900 ?        Ss   15:01   0:00 /usr/bin/svnserve --daemon --pid-file=/run/svnserve/svnserve.pid -r /opt/svn
通过netstat可以看到SVN打开了3690端口。
$ sudo netstat -tnlp
Proto Recv-Q Send-Q Local Address           Foreign Address         State       PID/Program name
tcp        0      0 0.0.0.0:3690            0.0.0.0:*               LISTEN      16349/svnserve
设置成开机启动。
$ sudo systemctl enable svnserve.service
5. 客户端测试
客户端可以通过TortoriseSVN测试。
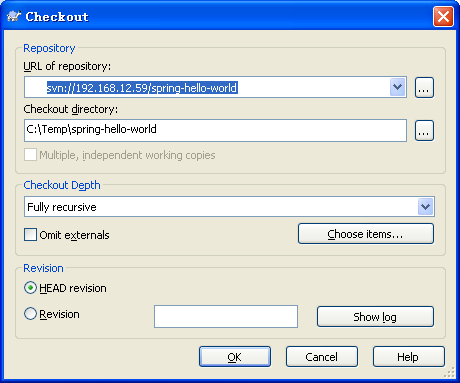
这时候可能会防火墙问题。如果是防火墙问题,会提示无法连接。
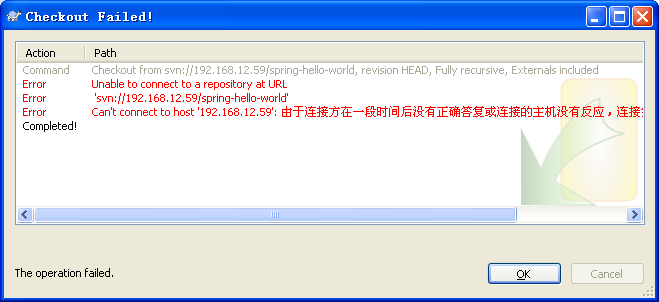
客户端用telnet无法连接。
C:Temp>telnet 192.168.12.59 360
用systemctl检查服务器的防火墙配置:
$ firewall-cmd --list-all
public (default, active)
  interfaces: eno16777736 eno33554984
  sources:
  services: dhcpv6-client ssh
  ports:
  masquerade: no
  forward-ports:
  icmp-blocks:
  rich rules:
可以看到,没有telnet服务和3690端口。增加telnet服务器和3690端口:
$ sudo firewall-cmd --permanent --add-service=telnet
$ sudo firewall-cmd --permanent --add-port=3690/tcp
$ sudo firewall-cmd --reload
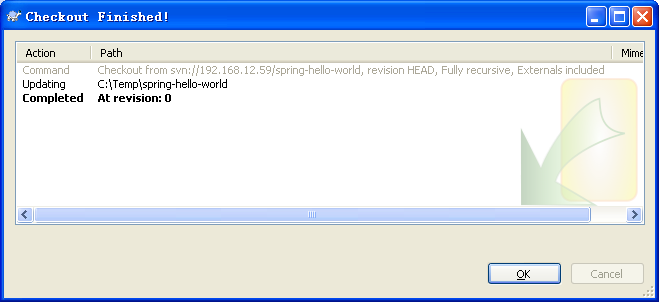
客户端再用telnet,应该就可以了。
SQL Server 2012 Managed Service Account
Step by step SQL Server 2012的安装
Step by step 活动目录中添加一个子域
Step by step 如何创建一个新森林
向活动目录中添加一个子域
活动目录的信任关系
RAID 概述
DNS 正向查找与反向查找
Microsoft Dynamics CRM 2013 and 2011 Update Rollups and Service Packs
- 最新文章
-
Python中实例化class的执行顺序示例详解
学习python了,看完这篇文章,你的Linux基础就差不多了
U盘做为系统盘安装系统,出现start booting from usb device和boot failed解决方案
谁家学霸两百年:从布尔代数到人工智能
DApp是什么,DApp是必然趋势
DCEP:中国自己的数字货币
几张图看懂区块链技术到底是什么?
北京大学蔡剑教授:区块链设计是去中心化的 但在社会网络上并非去中心化
如何学习离散数学和在计算机科学中应用
浅谈PageRank
- 热门文章
-
使用哈希加盐法来为密码加密
AD域内DNS服务器如何解析公网域名
Step by Step 创建一个 Web Service
对称加密与非对称加密
Step by Step 安装 BizTalk Server 2009
Base 64 编码
Step by step Dynamics CRM 2011升级到Dynamics CRM 2013
Step by Step 创建一个新的Dynamics CRM Organization
Step by step Install a Local Report Server and Remote Report Server Database
Optimistic Concurrency VS. Pessimistic Concurrency Control