前言
不得不说SpringBoot大大方便了程序开发,xml不配置了,连tomcat也不用配置了,典型的一键启动系统,那么tomcat在springboot是怎么启动的呢?
内置tomcat
开发阶段对我们来说使用内置的tomcat是非常够用了,当然也可以使用jetty。
<dependency>
   <groupId>org.springframework.boot</groupId>
   <artifactId>spring-boot-starter-web</artifactId>
   <version>1.5.2.RELEASE</version>
</dependency>
@SpringBootApplication
public class MySpringbootTomcatStarter{
    public static void main(String[] args) {
        Long time=System.currentTimeMillis();
        SpringApplication.run(MySpringbootTomcatStarter.class);
        System.out.println("===应用启动耗时:"+(System.currentTimeMillis()-time)+"===");
    }
}
这里是main函数入口,两句代码最耀眼,分别是SpringBootApplication注解和SpringApplication.run()方法。
发布生产
发布的时候,目前大多数的做法还是排除内置的tomcat,打瓦包(war)然后部署在生产的tomcat中,好吧,那打包的时候应该怎么处理?
<dependency>
    <groupId>org.springframework.boot</groupId>
    <artifactId>spring-boot-starter-web</artifactId>
    <!-- 移除嵌入式tomcat插件 -->
    <exclusions>
        <exclusion>
            <groupId>org.springframework.boot</groupId>
            <artifactId>spring-boot-starter-tomcat</artifactId>
        </exclusion>
    </exclusions>
</dependency>
<!--添加servlet-api依赖--->
<dependency>
    <groupId>javax.servlet</groupId>
    <artifactId>javax.servlet-api</artifactId>
    <version>3.1.0</version>
    <scope>provided</scope>
</dependency>
更新main函数,主要是继承SpringBootServletInitializer,并重写configure()方法。
@SpringBootApplication
public class MySpringbootTomcatStarter extends SpringBootServletInitializer {
    public static void main(String[] args) {
        Long time=System.currentTimeMillis();
        SpringApplication.run(MySpringbootTomcatStarter.class);
        System.out.println("===应用启动耗时:"+(System.currentTimeMillis()-time)+"===");
    }

    @Override
    protected SpringApplicationBuilder configure(SpringApplicationBuilder builder) {
        return builder.sources(this.getClass());
    }
}
从main函数说起
public static ConfigurableApplicationContext run(Class<?> primarySource, String... args) {
    return run(new Class[]{primarySource}, args);
}

--这里run方法返回的是ConfigurableApplicationContext
public static ConfigurableApplicationContext run(Class<?>[] primarySources, String[] args) {
	return (new SpringApplication(primarySources)).run(args);
}
public ConfigurableApplicationContext run(String... args) {
	ConfigurableApplicationContext context = null;
	Collection<SpringBootExceptionReporter> exceptionReporters = new ArrayList();
	this.configureHeadlessProperty();
	SpringApplicationRunListeners listeners = this.getRunListeners(args);
	listeners.starting();

	Collection exceptionReporters;
	try {
		ApplicationArguments applicationArguments = new DefaultApplicationArguments(args);
		ConfigurableEnvironment environment = this.prepareEnvironment(listeners, applicationArguments);
		this.configureIgnoreBeanInfo(environment);

		//打印banner,这里你可以自己涂鸦一下,换成自己项目的logo
		Banner printedBanner = this.printBanner(environment);

		//创建应用上下文
		context = this.createApplicationContext();
		exceptionReporters = this.getSpringFactoriesInstances(SpringBootExceptionReporter.class,
                                              new Class[]{ConfigurableApplicationContext.class}, context);

		//预处理上下文
		this.prepareContext(context, environment, listeners, applicationArguments, printedBanner);

		//刷新上下文
		this.refreshContext(context);

		//再刷新上下文
		this.afterRefresh(context, applicationArguments);

		listeners.started(context);
		this.callRunners(context, applicationArguments);
	} catch (Throwable var10) {

	}

	try {
		listeners.running(context);
		return context;
	} catch (Throwable var9) {

	}
}
既然我们想知道tomcat在SpringBoot中是怎么启动的,那么run方法中,重点关注创建应用上下文(createApplicationContext)和刷新上下文(refreshContext)。
创建上下文
//创建上下文
protected ConfigurableApplicationContext createApplicationContext() {
	Class<?> contextClass = this.applicationContextClass;
	if (contextClass == null) {
		try {
			switch(this.webApplicationType) {
				case SERVLET:
                                        //创建AnnotationConfigServletWebServerApplicationContext
				        contextClass = Class.forName("org.springframework.boot.web.servlet.context
                                                                 .AnnotationConfigServletWebServerApplicationContext");
					break;
				case REACTIVE:
					contextClass = Class.forName("org.springframework.boot.web.reactive.context
                                .AnnotationConfigReactiveWebServerApplicationContext");
					break;
				default:
					contextClass = Class.forName("org.springframework.context.annotation.AnnotationConfigApplicationContext");
			}
		} catch (ClassNotFoundException var3) {
			throw new IllegalStateException("Unable create a default ApplicationContext, please specify an ApplicationContextClass", var3);
		}
	}

	return (ConfigurableApplicationContext)BeanUtils.instantiateClass(contextClass);
}
这里会创建AnnotationConfigServletWebServerApplicationContext类。
而AnnotationConfigServletWebServerApplicationContext类继承了ServletWebServerApplicationContext,而这个类是最终集成了AbstractApplicationContext。
刷新上下文
//SpringApplication.java
//刷新上下文
private void refreshContext(ConfigurableApplicationContext context) {
	this.refresh(context);
	if (this.registerShutdownHook) {
		try {
			context.registerShutdownHook();
		} catch (AccessControlException var3) {
		}
	}
}

//这里直接调用最终父类AbstractApplicationContext.refresh()方法
protected void refresh(ApplicationContext applicationContext) {
	((AbstractApplicationContext)applicationContext).refresh();
}
//AbstractApplicationContext.java
public void refresh() throws BeansException, IllegalStateException {
	synchronized(this.startupShutdownMonitor) {
		this.prepareRefresh();
		ConfigurableListableBeanFactory beanFactory = this.obtainFreshBeanFactory();
		this.prepareBeanFactory(beanFactory);

		try {
			this.postProcessBeanFactory(beanFactory);
			this.invokeBeanFactoryPostProcessors(beanFactory);
			this.registerBeanPostProcessors(beanFactory);
			this.initMessageSource();
			this.initApplicationEventMulticaster();
			//调用各个子类的onRefresh()方法,也就说这里要回到子类:ServletWebServerApplicationContext,调用该类的onRefresh()方法
			this.onRefresh();
			this.registerListeners();
			this.finishBeanFactoryInitialization(beanFactory);
			this.finishRefresh();
		} catch (BeansException var9) {
			this.destroyBeans();
			this.cancelRefresh(var9);
			throw var9;
		} finally {
			this.resetCommonCaches();
		}

	}
}
//ServletWebServerApplicationContext.java
//在这个方法里看到了熟悉的面孔,this.createWebServer,神秘的面纱就要揭开了。
protected void onRefresh() {
	super.onRefresh();
	try {
		this.createWebServer();
	} catch (Throwable var2) {

	}
}

//ServletWebServerApplicationContext.java
//这里是创建webServer,但是还没有启动tomcat,这里是通过ServletWebServerFactory创建,那么接着看下ServletWebServerFactory
private void createWebServer() {
	WebServer webServer = this.webServer;
	ServletContext servletContext = this.getServletContext();
	if (webServer == null && servletContext == null) {
		ServletWebServerFactory factory = this.getWebServerFactory();
		this.webServer = factory.getWebServer(new ServletContextInitializer[]{this.getSelfInitializer()});
	} else if (servletContext != null) {
		try {
			this.getSelfInitializer().onStartup(servletContext);
		} catch (ServletException var4) {

		}
	}

	this.initPropertySources();
}

//接口
public interface ServletWebServerFactory {
    WebServer getWebServer(ServletContextInitializer... initializers);
}

//实现
AbstractServletWebServerFactory
JettyServletWebServerFactory
TomcatServletWebServerFactory
UndertowServletWebServerFactory
这里ServletWebServerFactory接口有4个实现类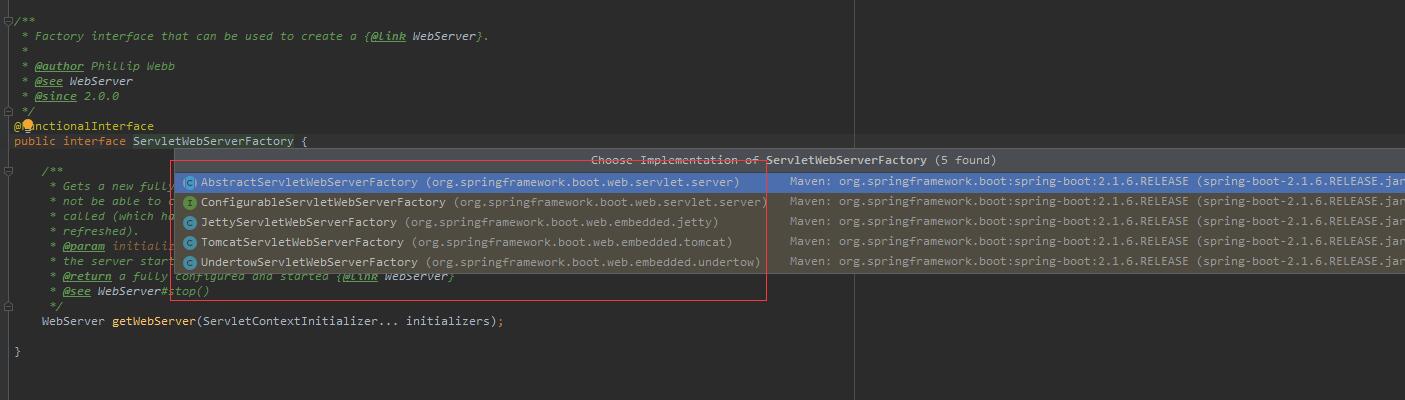
而其中我们常用的有两个:TomcatServletWebServerFactory和JettyServletWebServerFactory。
//TomcatServletWebServerFactory.java
//这里我们使用的tomcat,所以我们查看TomcatServletWebServerFactory。到这里总算是看到了tomcat的踪迹。
@Override
public WebServer getWebServer(ServletContextInitializer... initializers) {
	Tomcat tomcat = new Tomcat();
	File baseDir = (this.baseDirectory != null) ? this.baseDirectory : createTempDir("tomcat");
	tomcat.setBaseDir(baseDir.getAbsolutePath());
    //创建Connector对象
	Connector connector = new Connector(this.protocol);
	tomcat.getService().addConnector(connector);
	customizeConnector(connector);
	tomcat.setConnector(connector);
	tomcat.getHost().setAutoDeploy(false);
	configureEngine(tomcat.getEngine());
	for (Connector additionalConnector : this.additionalTomcatConnectors) {
		tomcat.getService().addConnector(additionalConnector);
	}
	prepareContext(tomcat.getHost(), initializers);
	return getTomcatWebServer(tomcat);
}

protected TomcatWebServer getTomcatWebServer(Tomcat tomcat) {
	return new TomcatWebServer(tomcat, getPort() >= 0);
}

//Tomcat.java
//返回Engine容器,看到这里,如果熟悉tomcat源码的话,对engine不会感到陌生。
public Engine getEngine() {
    Service service = getServer().findServices()[0];
    if (service.getContainer() != null) {
        return service.getContainer();
    }
    Engine engine = new StandardEngine();
    engine.setName( "Tomcat" );
    engine.setDefaultHost(hostname);
    engine.setRealm(createDefaultRealm());
    service.setContainer(engine);
    return engine;
}
//Engine是最高级别容器,Host是Engine的子容器,Context是Host的子容器,Wrapper是Context的子容器
getWebServer这个方法创建了Tomcat对象,并且做了两件重要的事情:把Connector对象添加到tomcat中,configureEngine(tomcat.getEngine());
getWebServer方法返回的是TomcatWebServer。
//TomcatWebServer.java
//这里调用构造函数实例化TomcatWebServer
public TomcatWebServer(Tomcat tomcat, boolean autoStart) {
	Assert.notNull(tomcat, "Tomcat Server must not be null");
	this.tomcat = tomcat;
	this.autoStart = autoStart;
	initialize();
}

private void initialize() throws WebServerException {
    //在控制台会看到这句日志
	logger.info("Tomcat initialized with port(s): " + getPortsDescription(false));
	synchronized (this.monitor) {
		try {
			addInstanceIdToEngineName();

			Context context = findContext();
			context.addLifecycleListener((event) -> {
				if (context.equals(event.getSource()) && Lifecycle.START_EVENT.equals(event.getType())) {
					removeServiceConnectors();
				}
			});

			//===启动tomcat服务===
			this.tomcat.start();

			rethrowDeferredStartupExceptions();

			try {
				ContextBindings.bindClassLoader(context, context.getNamingToken(), getClass().getClassLoader());
			}
			catch (NamingException ex) {

			}

            //开启阻塞非守护进程
			startDaemonAwaitThread();
		}
		catch (Exception ex) {
			stopSilently();
			destroySilently();
			throw new WebServerException("Unable to start embedded Tomcat", ex);
		}
	}
}
//Tomcat.java
public void start() throws LifecycleException {
	getServer();
	server.start();
}
//这里server.start又会回到TomcatWebServer的
public void stop() throws LifecycleException {
	getServer();
	server.stop();
}
//TomcatWebServer.java
//启动tomcat服务
@Override
public void start() throws WebServerException {
	synchronized (this.monitor) {
		if (this.started) {
			return;
		}
		try {
			addPreviouslyRemovedConnectors();
			Connector connector = this.tomcat.getConnector();
			if (connector != null && this.autoStart) {
				performDeferredLoadOnStartup();
			}
			checkThatConnectorsHaveStarted();
			this.started = true;
			//在控制台打印这句日志,如果在yml设置了上下文,这里会打印
			logger.info("Tomcat started on port(s): " + getPortsDescription(true) + " with context path '"
					+ getContextPath() + "'");
		}
		catch (ConnectorStartFailedException ex) {
			stopSilently();
			throw ex;
		}
		catch (Exception ex) {
			throw new WebServerException("Unable to start embedded Tomcat server", ex);
		}
		finally {
			Context context = findContext();
			ContextBindings.unbindClassLoader(context, context.getNamingToken(), getClass().getClassLoader());
		}
	}
}

//关闭tomcat服务
@Override
public void stop() throws WebServerException {
	synchronized (this.monitor) {
		boolean wasStarted = this.started;
		try {
			this.started = false;
			try {
				stopTomcat();
				this.tomcat.destroy();
			}
			catch (LifecycleException ex) {

			}
		}
		catch (Exception ex) {
			throw new WebServerException("Unable to stop embedded Tomcat", ex);
		}
		finally {
			if (wasStarted) {
				containerCounter.decrementAndGet();
			}
		}
	}
}