rsync图片参考
d本地模式,cp的感觉
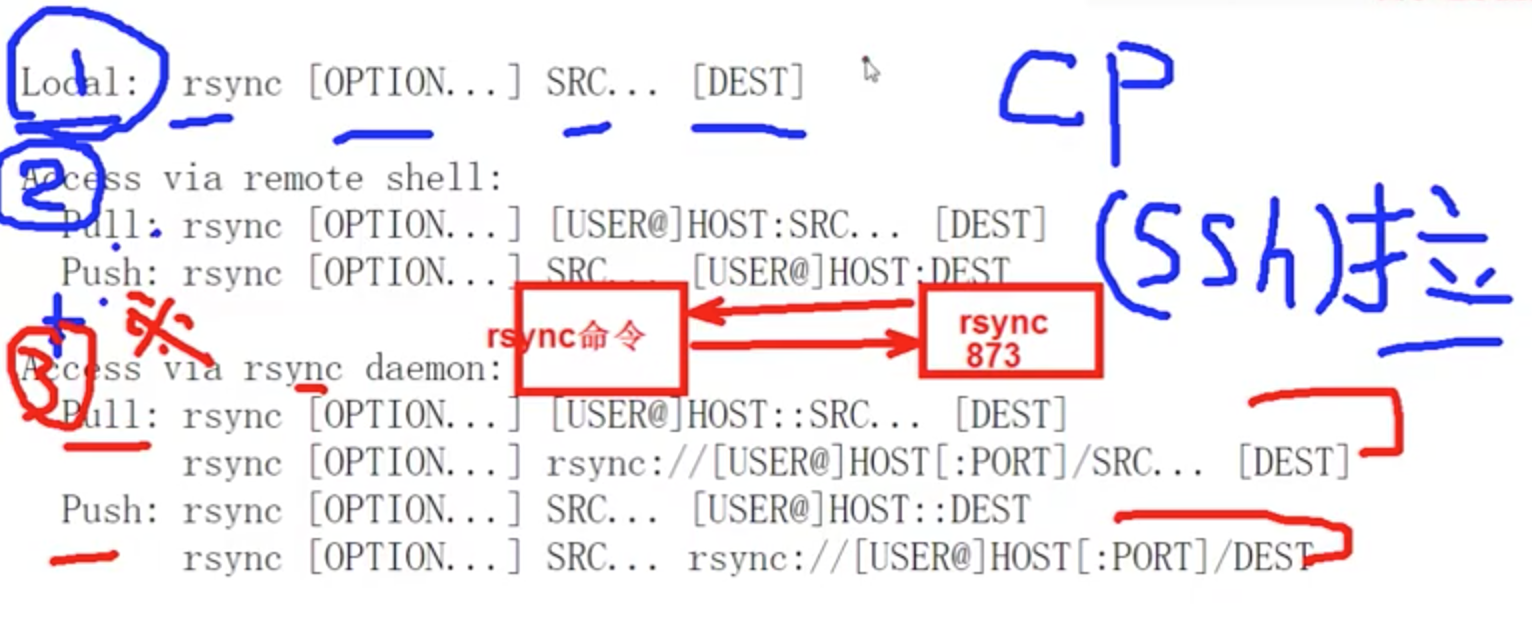
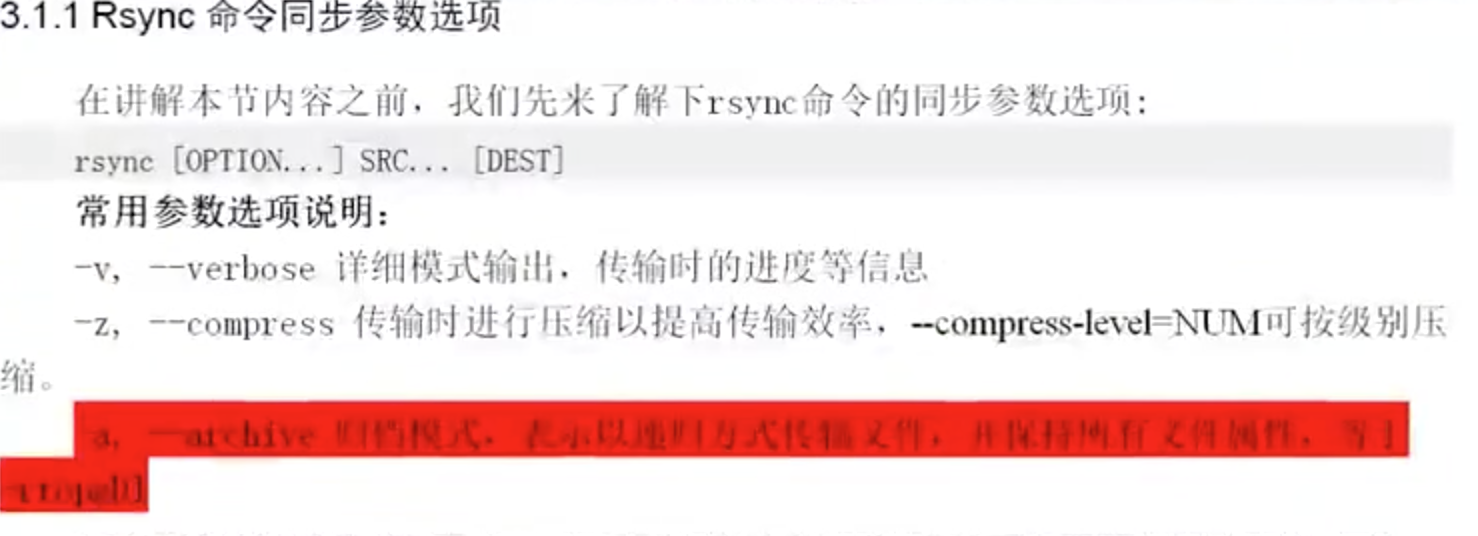
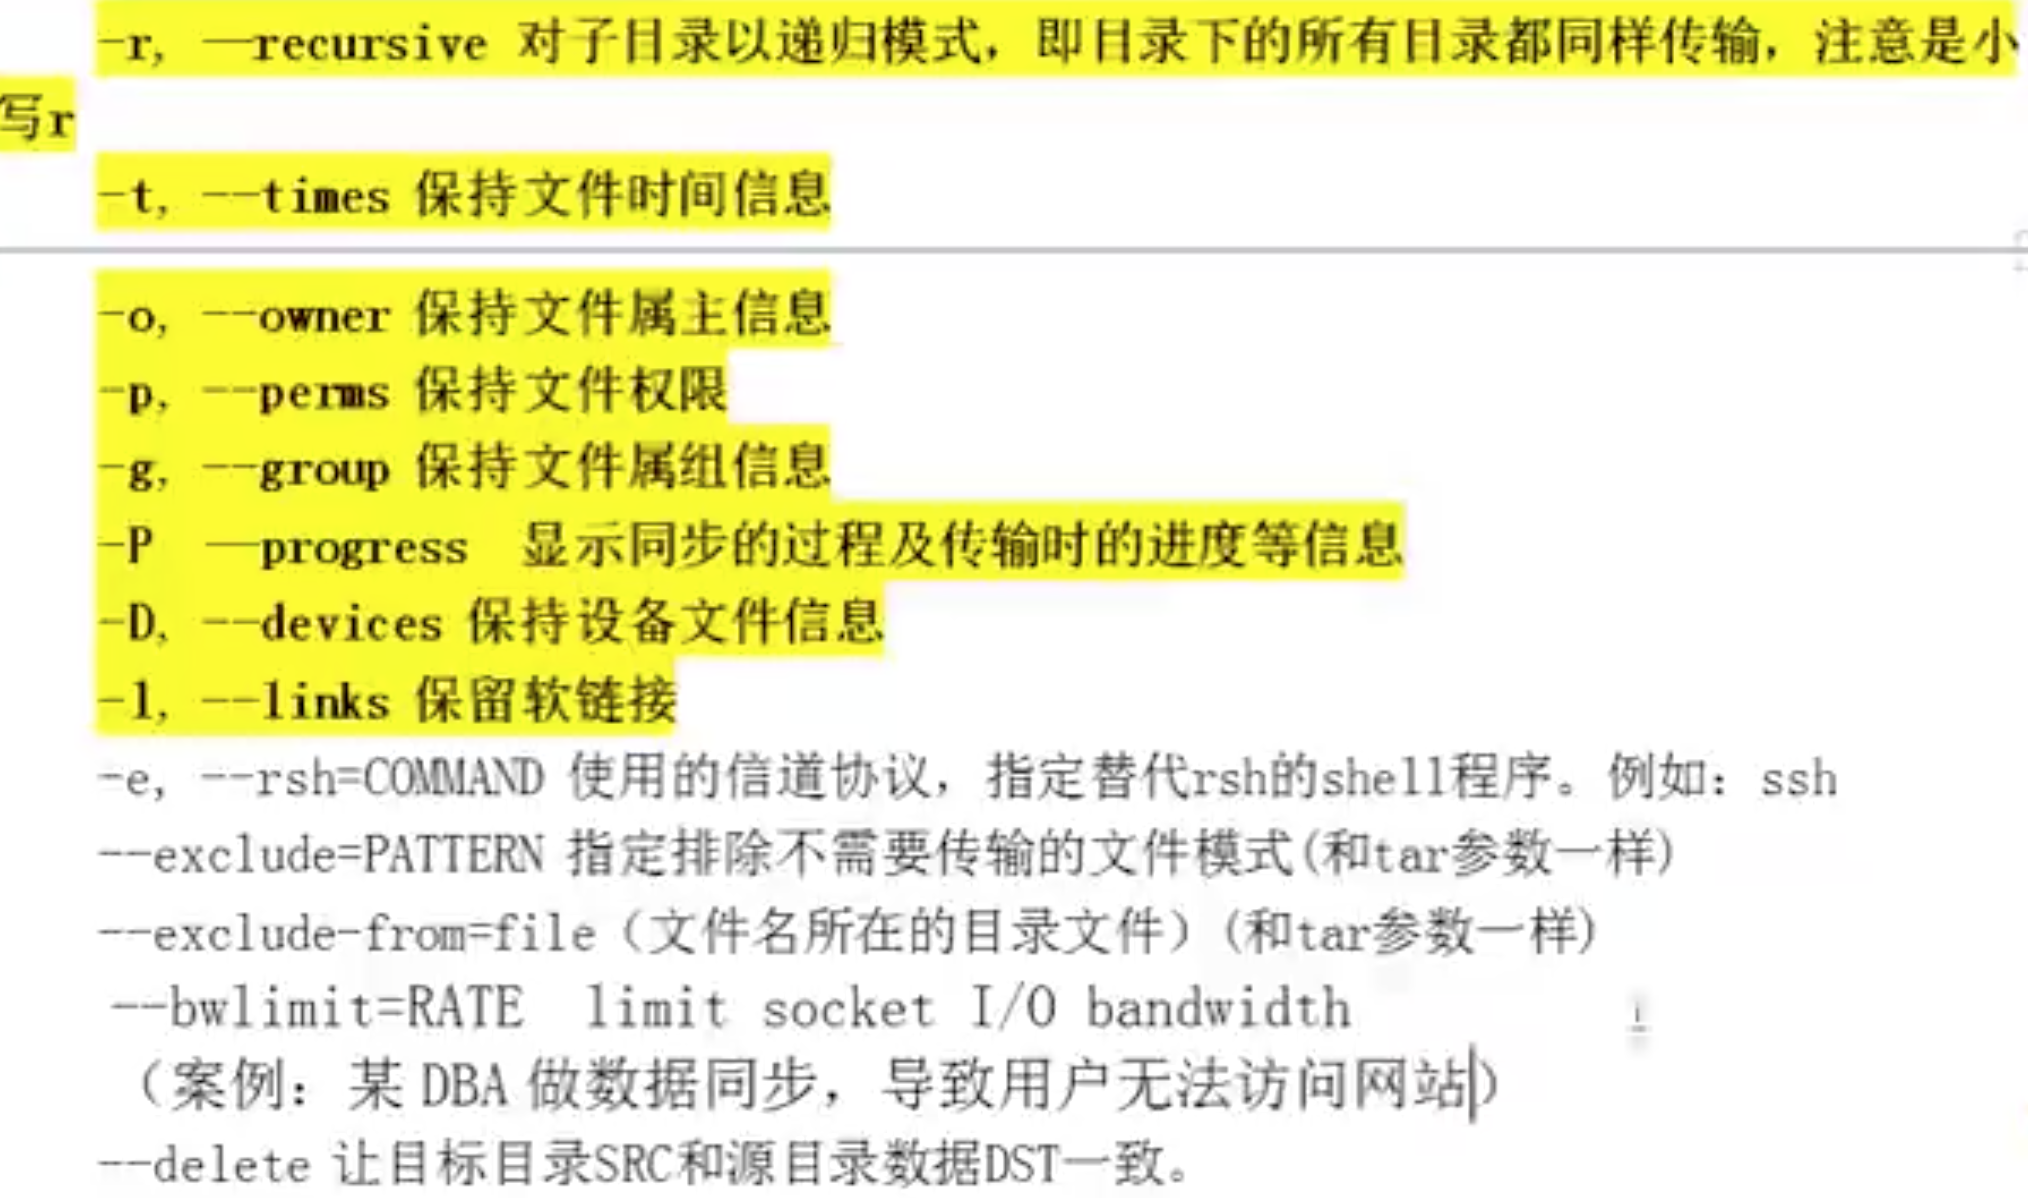

vzrtopg = a - d -l
--delete适用于2个目录完全一样的情况
默认avz就可以了
2,远端的shell


解决ssh链接慢的问题


3.daemon方式
yum install rsync
/etc/rsyncd.conf
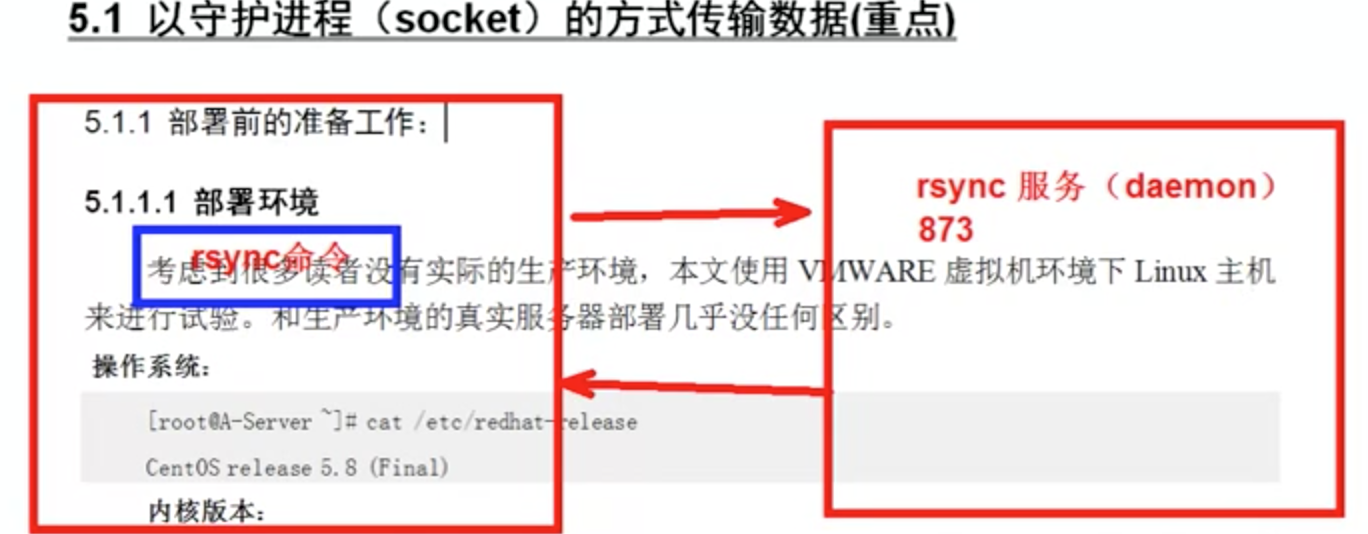


 2
2
客户端


推子目录
![]()


rsync 文字参考
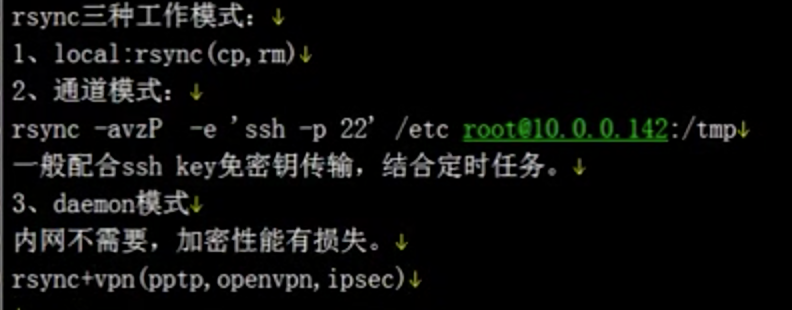
本地模式
1,yum install rsync
rsync -avzP /mnt/ /data/ 类似cp

ssh信道模式
1,客户端,服务端 yum install rsync
rsync -avzP -e "ssh -p 22" root@ip:/mnt/ /data/ 类似scp

deamon守护进程模式
1,服务端 yum install rsync
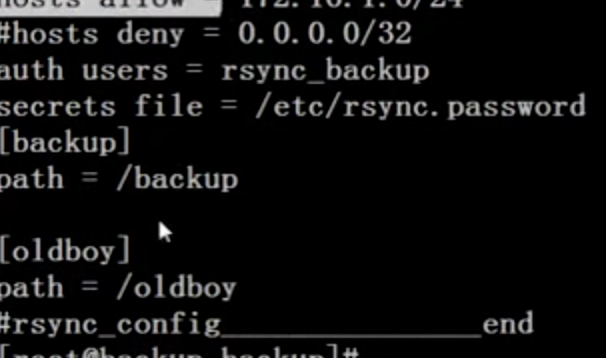
2,cat /etc/rsyncd.conf
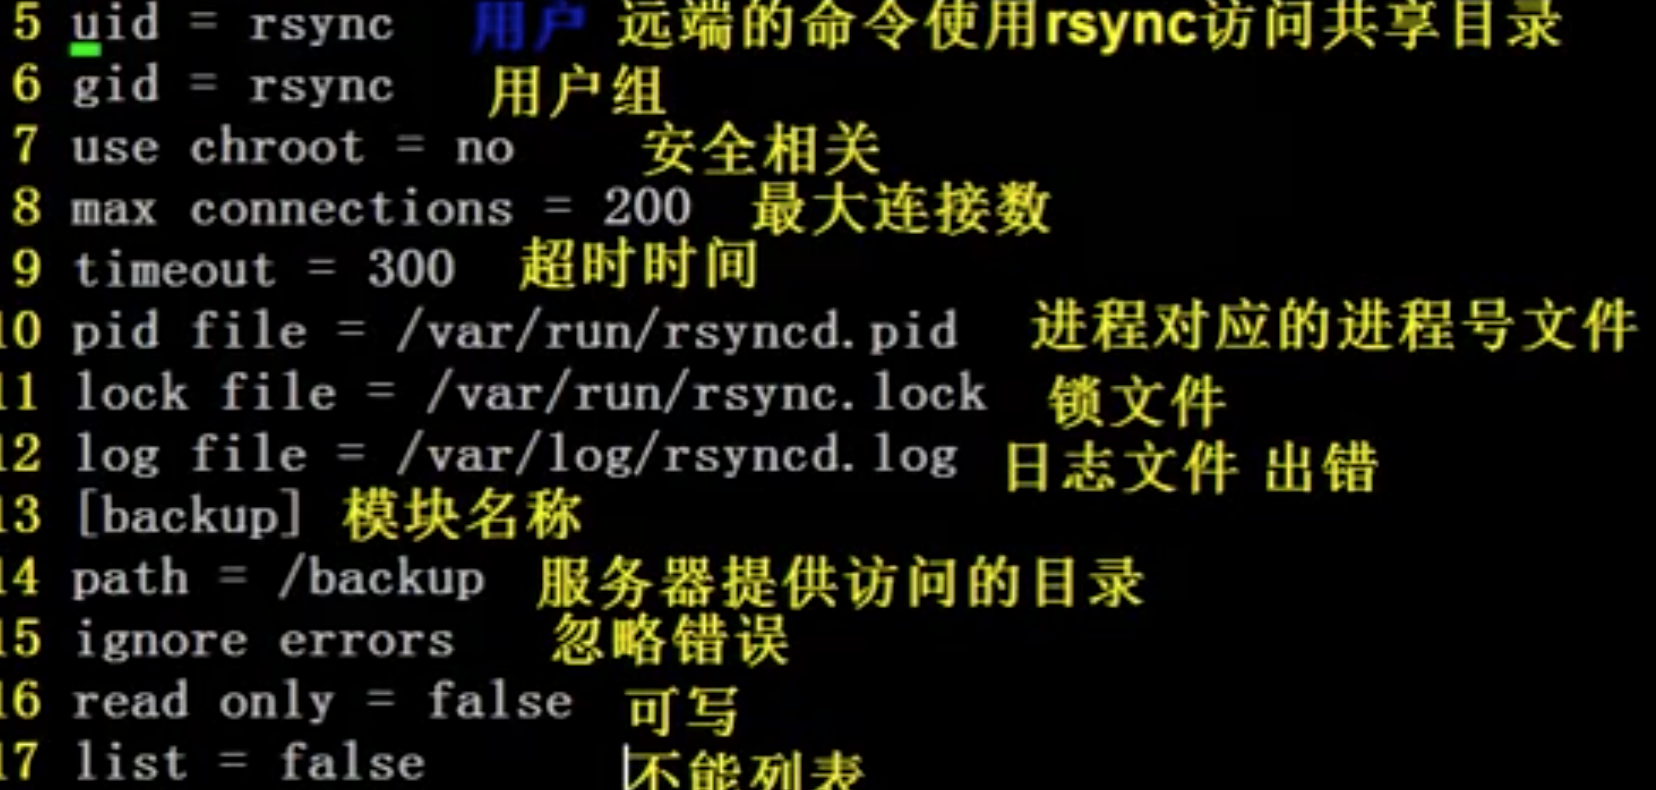
uid = rsync
gid = rsync
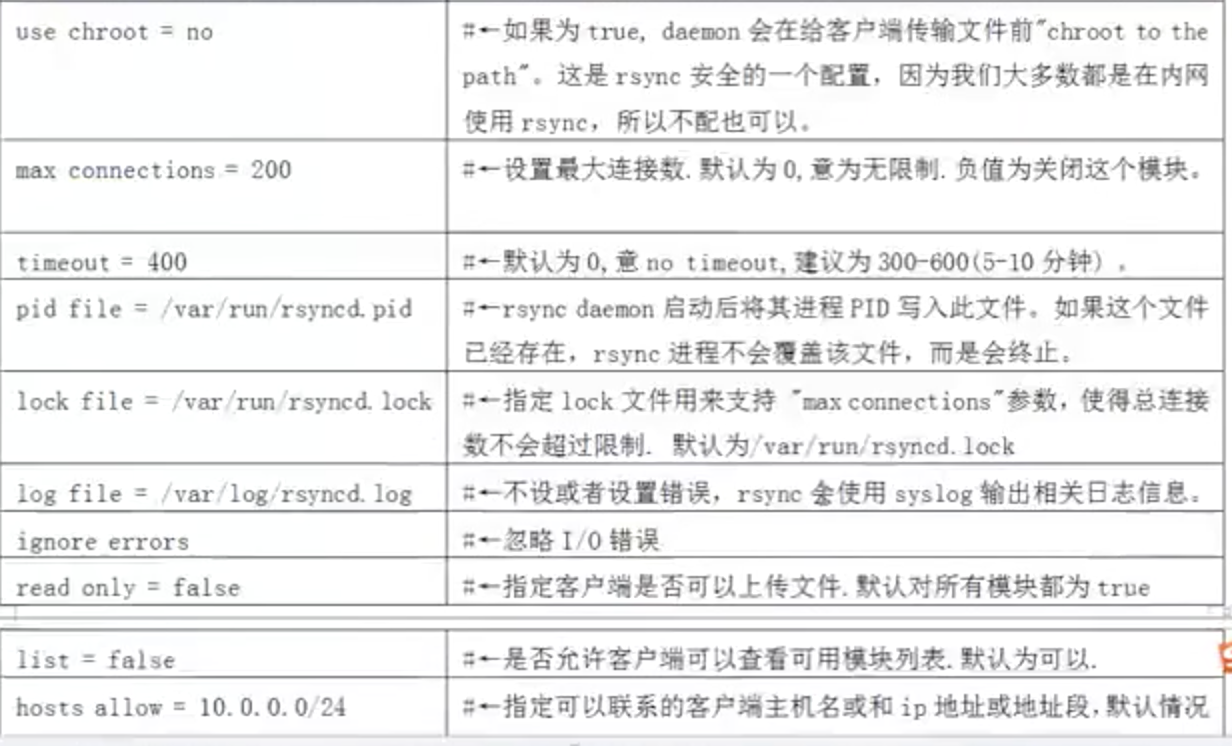
use chroot = no
max connections = 2000
pid file = /var/run/rsyncd.pid
lock file = /var/run/rsyncd.lock
log file = /var/log/rsyncd.log
timeout = 900
# ignore errors
read only = false
# list = false # 是否允许客户端查看模块列表(不常用)
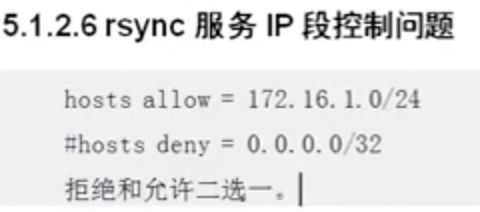
# hosts allow = ip 允许访问的地址,默认没有此参数,都可以链接
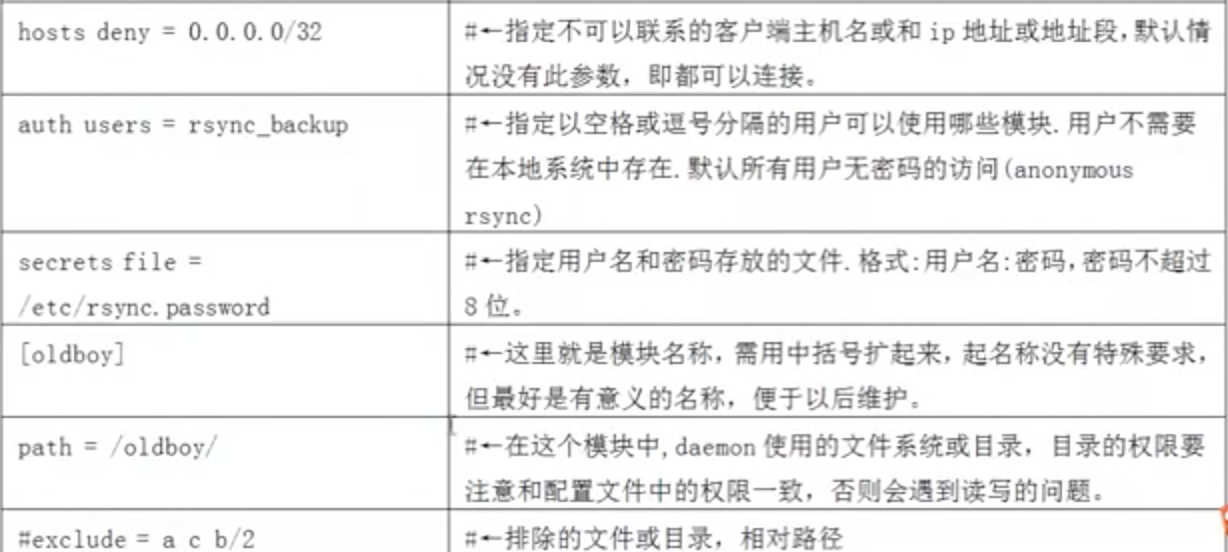
# hosts deny = 0.0.0.0/32 拒绝的网段,默认情况没有此参数,都可以链接,与上面二选一
auth users = rsync_backup
secrets file = /etc/rsyncd.password
exclude = *.txt 1111 # 过滤到.txt文件

[backup1]
path = /backup1

[backup2]
path = /backup2
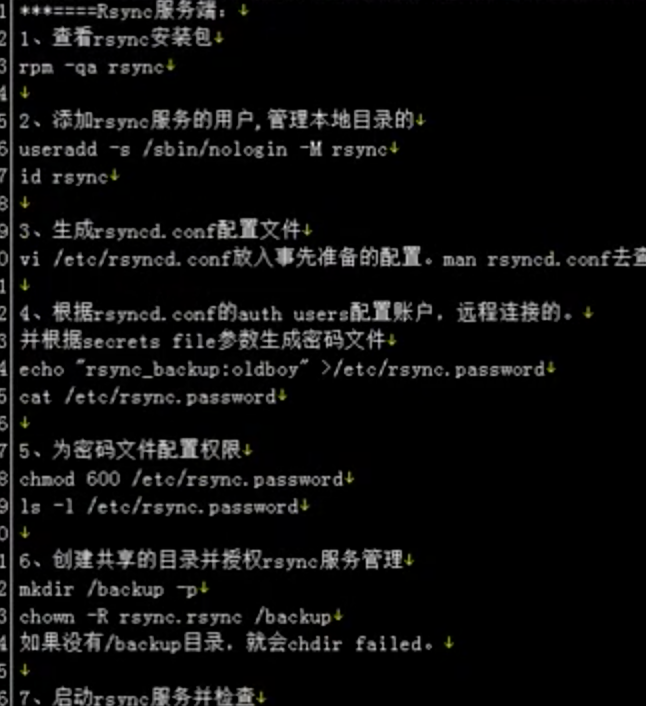
3,cat  /etc/rsyncd.password     600权限
rsync_backup:woshimima
4,创建目录,注意是rsync的属主和属组,记得创建rsync账号
useradd rsync -s /sbin/nologin -M
chown -R rsync.rsync /backup
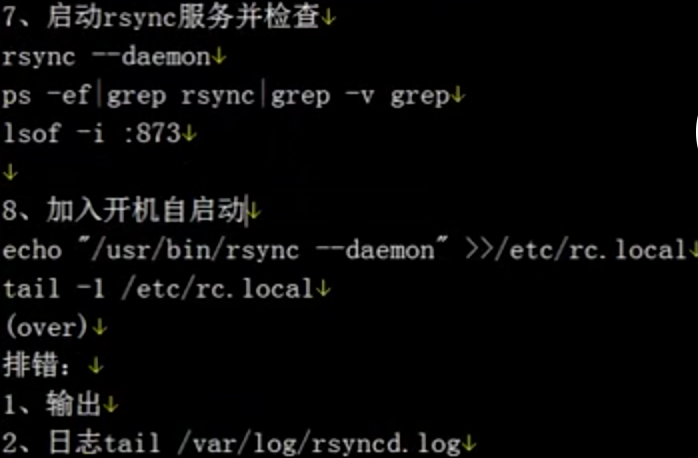
5,rsync --daemon --config=/etc/rsyncd.conf
   systemctl stop/start/status/enable/disable rsyncd.service


1,客户端 yum install rsync
2,推送的目录属主属组也要是rsync,并且要有rsync的账号
3,cat  /etc/rsyncd.password     600权限
woshimima
4,rsync -avzP /data/ rsync_backup(auth_users)@ip::backup(模块)/ --password-file=/etc/rsyncd.password
5,如果是/data/就是把/data/目录下的所有文件同步,如果是/data就会把/data目录传送过去
附赠配置文件说明
######### 全局配置参数 ##########
port=888    # 指定rsync端口。默认873
uid = rsync # rsync服务的运行用户,默认是nobody,文件传输成功后属主将是这个uid
gid = rsync # rsync服务的运行组,默认是nobody,文件传输成功后属组将是这个gid
use chroot = no # rsync daemon在传输前是否切换到指定的path目录下,并将其监禁在内
max connections = 200 # 指定最大连接数量,0表示没有限制
timeout = 300         # 确保rsync服务器不会永远等待一个崩溃的客户端,0表示永远等待
motd file = /var/rsyncd/rsync.motd   # 客户端连接过来显示的消息
pid file = /var/run/rsyncd.pid       # 指定rsync daemon的pid文件
lock file = /var/run/rsync.lock      # 指定锁文件
log file = /var/log/rsyncd.log       # 指定rsync的日志文件,而不把日志发送给syslog
dont compress = *.gz *.tgz *.zip *.z *.Z *.rpm *.deb *.bz2  # 指定哪些文件不用进行压缩传输

###########下面指定模块,并设定模块配置参数,可以创建多个模块###########
[longshuai]        # 模块ID
path = /longshuai/ # 指定该模块的路径,该参数必须指定。启动rsync服务前该目录必须存在。rsync请求访问模块本质就是访问该路径。
ignore errors      # 忽略某些IO错误信息
read only = false  # 指定该模块是否可读写,即能否上传文件,false表示可读写,true表示可读不可写。所有模块默认不可上传
write only = false # 指定该模式是否支持下载,设置为true表示客户端不能下载。所有模块默认可下载
list = false       # 客户端请求显示模块列表时,该模块是否显示出来,设置为false则该模块为隐藏模块。默认true
hosts allow = 10.0.0.0/24 # 指定允许连接到该模块的机器,多个ip用空格隔开或者设置区间
hosts deny = 0.0.0.0/32   # 指定不允许连接到该模块的机器
auth users = rsync_backup # 指定连接到该模块的用户列表,只有列表里的用户才能连接到模块,用户名和对应密码保存在secrts file中,
                          # 这里使用的不是系统用户,而是虚拟用户。不设置时,默认所有用户都能连接,但使用的是匿名连接
secrets file = /etc/rsyncd.passwd # 保存auth users用户列表的用户名和密码,每行包含一个username:passwd。由于"strict modes"
                                  # 默认为true,所以此文件要求非rsync daemon用户不可读写。只有启用了auth users该选项才有效。
[xiaofang]    # 以下定义的是第二个模块
path=/xiaofang/
read only = false
ignore errors
comment = anyone can access
附赠rsync脚本,执行于备份服务器,daemon模式
#!/bin/bash # The author is joker, applied to file synchronization. # deamon守护进程模式 # 模块,备份目录,如果是多目录,或者单目录,请修改,在下面代码中有创建该目录过程,也请修改,注意上层目录joker的修改 module1=gameserver1 path1=/joker/$module1 module2=gameserver2 path2=/joker/$module2 # 认证用户密码 author=rsync_backup password=woshimima # 进程检索 rsync_process=`ps -ef|grep rsync|grep -v grep|wc -l` # 软件安装检索 rsync_order=`which rsync 1>/dev/null 2>&1` if [ $? -eq 1 ];then # 1,安装rsync——deamon守护进程模式 echo -e "�33[31m 红色字,正在安装rsync �33[0m" yum install rsync -y sleep 1 sh $0 else # 2,创建配置文件 cat >/etc/rsyncd.conf<<EOF # The author is joker, which is the configuration file for rsync. uid = rsync gid = rsync use chroot = no max connections = 2000 pid file = /var/run/rsyncd.pid lock file = /var/run/rsyncd.lock log file = /var/log/rsyncd.log # motd file = /var/rsyncd/rsync.motd 端口链接过来信息 timeout = 100 ignore errors read only = false # list = false # 是否允许客户端查看模块列表(不常用) # hosts allow = ip 允许访问的地址,默认没有此参数,都可以链接 # hosts deny = 0.0.0.0/32 拒绝的网段,默认情况没有此参数,都可以链接,与上面二选一 auth users = $author secrets file = /etc/rsync.passwd # exclude = *.txt 1111 # 过滤到.txt文件 [$module1] path = $path1 [$module2] path = $path2 EOF # 3,密码文件 cat >/etc/rsync.passwd<<EOF $author:$password EOF chmod 600 /etc/rsync.passwd # 4,创建目录,注意是rsync的属主和属组,记得创建rsync账号 useradd rsync -s /sbin/nologin -M mkdir $path1 $path2 -p chown -R rsync.rsync $path1 chown -R rsync.rsync $path2 # 5,用配置文件启动进程 # $rsync_order --daemon --config=/etc/rsyncd.conf # 6, 系统启动 systemctl start rsyncd.service sleep 1 if [ $rsync_process -ge 1 ];then echo -e "�33[32m rsync deamon 启动成功 �33[0m" else echo -e "�33[31m rsync deamon 启动失败 ,请检查原因�33[0m" #systemctl stop/start/status/enable/disable rsyncd.service fi fi