1、Flume在集群中扮演的角色
Flume、Kafka用来实时进行数据收集,Spark、Storm用来实时处理数据,impala用来实时查询。
2、Flume框架简介
1.1 Flume提供一个分布式的,可靠的,对大数据量的日志进行高效收集、聚集、移动的服务,Flume只能在Unix环境下运行。
1.2 Flume基于流式架构,容错性强,也很灵活简单,主要用于在线实时分析。
1.3 角色
** Source
用于采集数据,Source是产生数据流的地方,同时Source会将产生的数据流传输到Channel,这个有点类似于Java IO部分的Channel
** Channel
用于桥接Sources和Sinks,类似于一个队列。
** Sink
从Channel收集数据,将数据写到目标源(可以是下一个Source,也可以是HDFS或者HBase)
1.4 传输单元
** Event
Flume数据传输的基本单元,以事件的形式将数据从源头送至目的地
1.5 传输过程
source监控某个文件,文件产生新的数据,拿到该数据后,
将数据封装在一个Event中,并put到channel后commit提交,
channel队列先进先出,sink去channel队列中拉取数据,然后写入到hdfs或者HBase中。
3.安装配置flume
3.1上传并解压( tar -zxvf flume-ng-1.5.0-cdh5.3.6.tar.gz -C /opt/module/)
3.2进入flume目录(cd /opt/module/apache-flume-1.5.0-cdh5.3.6-bin/)
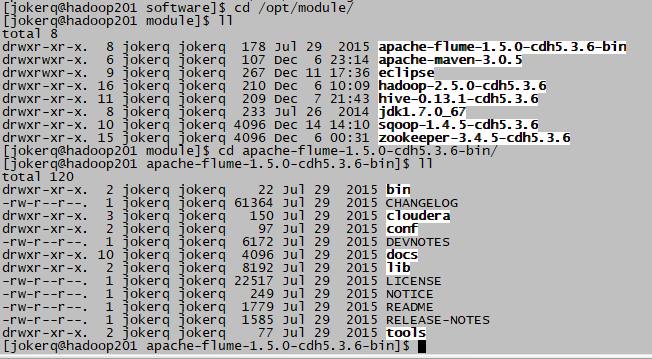
3.3进入conf文件夹(cd conf)
3.4重命名flume-env.sh.template( cp flume-env.sh.template flume-env.sh)

3.5 修改flume-env.sh(vim flume-env.sh)的java环境位置

4.案例测试
4.1、案例一:Flume监听端口,输出端口数据。
4.1.1复制模板文件flume-conf.properties.template( cp flume-conf.properties.template flume-telnet.conf)

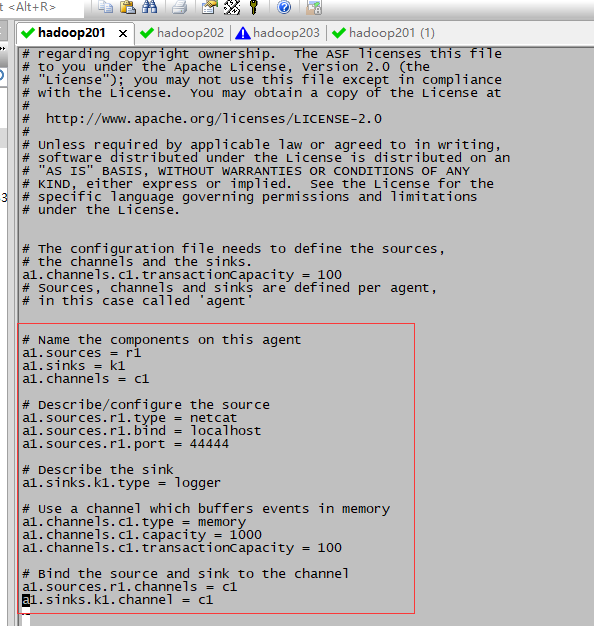
4.1.2编辑flume-telnet.conf(vim flume-telnet.conf)为官方给的文件
# Name the components on this agent        #指定名称
a1.sources = r1
a1.sinks = k1
a1.channels = c1

# Describe/configure the source      #监听端口的方式(根据方式改变)
a1.sources.r1.type = netcat
a1.sources.r1.bind = localhost
a1.sources.r1.port = 44444

# Describe the sink
a1.sinks.k1.type = logger

# Use a channel which buffers events in memory      #传输数据是以什么样的方式流转(下面配置为内存)
a1.channels.c1.type = memory
a1.channels.c1.capacity = 1000
a1.channels.c1.transactionCapacity = 100

# Bind the source and sink to the channel      #连接操作
a1.sources.r1.channels = c1
a1.sinks.k1.channel = c1
4.1.3安装telnet工具
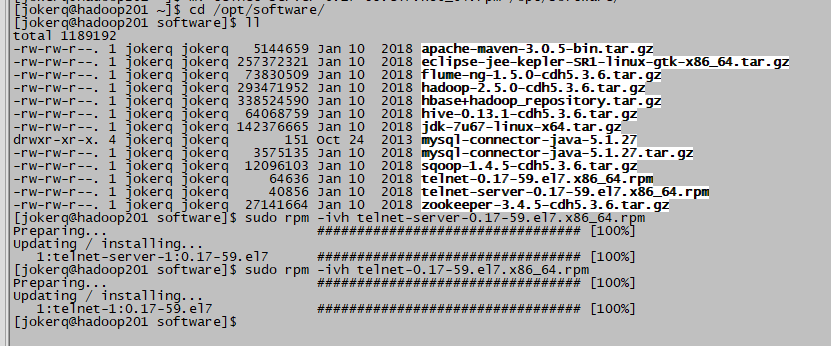
4.1.3.1 上传telnet-server-0.17-59.el7.x86_64.rpm和telnet-0.17-59.el7.x86_64.rpm
4.1.3.2 安装rpm包(顺序不能乱)
            $ sudo rpm -ivh telnet-server-0.17-59.el7.x86_64.rpm
                    $ sudo rpm -ivh telnet-0.17-59.el7.x86_64.rpm
4.1.4首先判断44444端口是否被占用
$ netstat -an | grep 44444
4.1.5先开启flume监听端口(在flume目录下)
$ bin/flume-ng agent --conf conf/ --name a1 --conf-file conf/flume-telnet.conf -Dflume.root.logger==INFO,console
4.1.6使用telnet工具向本机的44444端口发送内容。(新开窗口)
$ telnet localhost 44444
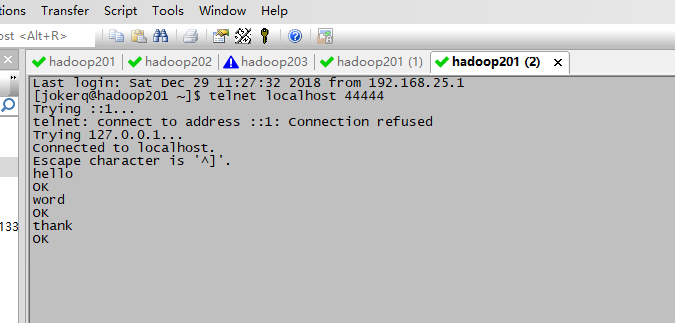
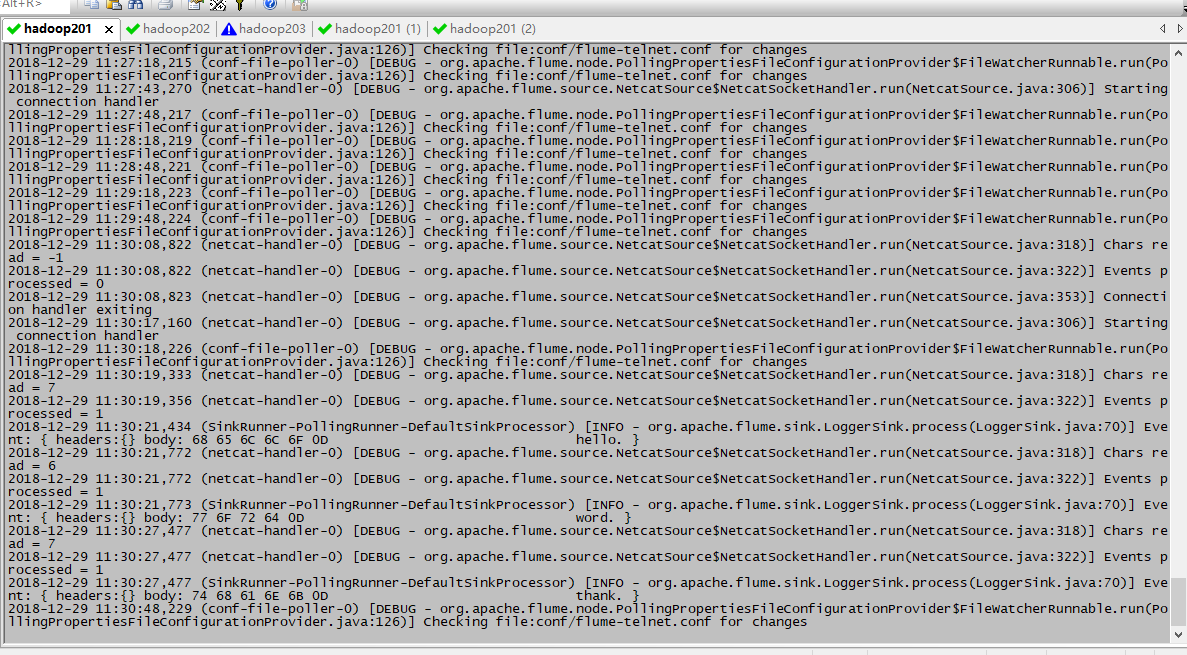
监听接受到的数据
4.2案例二 监听上传Hive日志文件到HDFS
4.2.1拷贝Hadoop相关jar到Flume的lib目录下
            share/hadoop/common/lib/hadoop-auth-2.5.0-cdh5.3.6.jar
                    share/hadoop/common/lib/commons-configuration-1.6.jar
                    share/hadoop/mapreduce1/lib/hadoop-hdfs-2.5.0-cdh5.3.6.jar
                    share/hadoop/common/hadoop-common-2.5.0-cdh5.3.6.jar
cp -a /opt/module/hadoop-2.5.0-cdh5.3.6/share/hadoop/common/lib/hadoop-auth-2.5.0-cdh5.3.6.jar ./lib/
cp -a /opt/module/hadoop-2.5.0-cdh5.3.6/share/hadoop/common/lib/commons-configuration-1.6.jar ./lib/
cp -a /opt/module/hadoop-2.5.0-cdh5.3.6/share/hadoop/mapreduce1/lib/hadoop-hdfs-2.5.0-cdh5.3.6.jar ./lib/
cp -a /opt/module/hadoop-2.5.0-cdh5.3.6/share/hadoop/common/hadoop-common-2.5.0-cdh5.3.6.jar  ./lib/

4.2.2创建flume-hdfs.conf文件( cd conf/ ---》cp -a flume-telnet.conf flume-hdfs.conf )
4.2.3编辑flume-hdfs.conf (vim flume-hdfs.conf)
#Name the components on this agent
a2.sources = r2
a2.sinks = k2
a2.channels = c2

# Describe/configure the source
a2.sources.r2.type = exec
a2.sources.r2.command = tail -f /opt/module/hive-0.13.1-cdh5.3.6/logs/hive.log
a2.sources.r2.shell = /bin/bash -c

# Describe the sink
a2.sinks.k2.type = hdfs
a2.sinks.k2.hdfs.path = hdfs://192.168.25.201:8020/flume/%Y%m%d/%H
#上传文件的前缀
a2.sinks.k2.hdfs.filePrefix = events-hive-
#是否按照时间滚动文件夹
a2.sinks.k2.hdfs.round = true
#多少时间单位创建一个新的文件夹
a2.sinks.k2.hdfs.roundValue = 1
#重新定义时间单位
a2.sinks.k2.hdfs.roundUnit = hour
#是否使用本地时间戳
a2.sinks.k2.hdfs.useLocalTimeStamp = true
#积攒多少个Event才flush到HDFS一次
a2.sinks.k2.hdfs.batchSize = 1000
#设置文件类型,可支持压缩
a2.sinks.k2.hdfs.fileType = DataStream
#多久生成一个新的文件
a2.sinks.k2.hdfs.rollInterval = 600
#设置每个文件的滚动大小
a2.sinks.k2.hdfs.rollSize = 134217700
#文件的滚动与Event数量无关
a2.sinks.k2.hdfs.rollCount = 0
#最小冗余数
a2.sinks.k2.hdfs.minBlockReplicas = 1
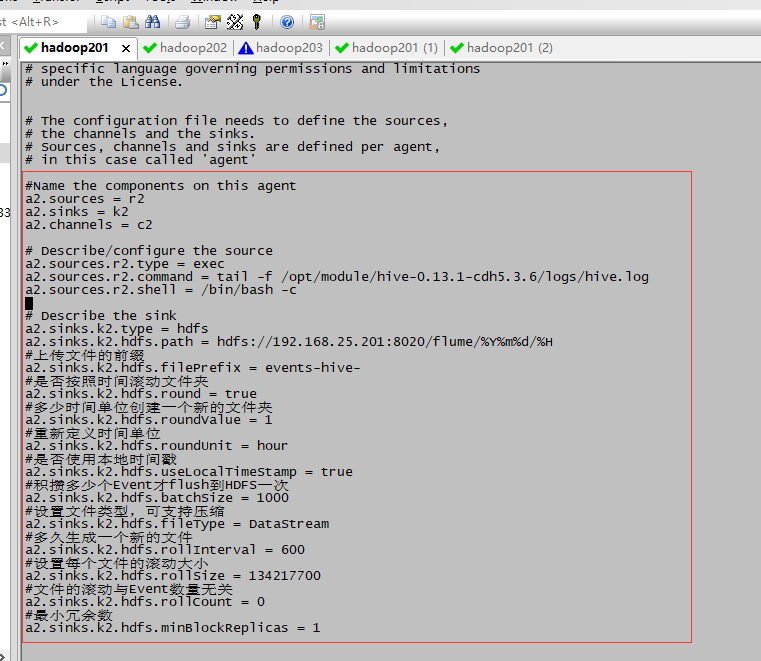
4.2.4 执行监控配置
$ bin/flume-ng agent --conf conf/ --name a2 --conf-file conf/flume-hdfs.conf
在另一个窗口进入hive输入测试命令

4.2.5在hadoop中可以查看新增出来的滚动文件

4.3案例三 Flume监听整个目录
4.3.1 创建配置文件flume-dir.conf(cp flume-telnet.conf flume-dir.conf )

4.3.2编辑flume-dir.conf(vim flume-dir.conf)
#Name the components on this agent
a3.sources = r3
a3.sinks = k3
a3.channels = c3

#Describe/configure the source
a3.sources.r3.type = spooldir
a3.sources.r3.spoolDir = /opt/module/apache-flume-1.5.0-cdh5.3.6-bin/upload    #手动创建upload目录
a3.sources.r3.fileHeader = true
#忽略所有以.tmp结尾的文件,不上传
a3.sources.r3.ignorePattern = ([^ ]*.tmp)

# Describe the sink
a3.sinks.k3.type = hdfs
a3.sinks.k3.hdfs.path = hdfs://192.168.25.201:8020/flume/upload/%Y%m%d/%H
#上传文件的前缀
a3.sinks.k3.hdfs.filePrefix = upload-
#是否按照时间滚动文件夹
a3.sinks.k3.hdfs.round = true
#多少时间单位创建一个新的文件夹
a3.sinks.k3.hdfs.roundValue = 1
#重新定义时间单位
a3.sinks.k3.hdfs.roundUnit = hour
#是否使用本地时间戳
a3.sinks.k3.hdfs.useLocalTimeStamp = true
#积攒多少个Event才flush到HDFS一次
a3.sinks.k3.hdfs.batchSize = 1000
#设置文件类型,可支持压缩
a3.sinks.k3.hdfs.fileType = DataStream
#多久生成一个新的文件
a3.sinks.k3.hdfs.rollInterval = 600
#设置每个文件的滚动大小
a3.sinks.k3.hdfs.rollSize = 134217700
#文件的滚动与Event数量无关
a3.sinks.k3.hdfs.rollCount = 0
#最小冗余数
a3.sinks.k3.hdfs.minBlockReplicas = 1


# Use a channel which buffers events in memory
a3.channels.c3.type = memory
a3.channels.c3.capacity = 1000
a3.channels.c3.transactionCapacity = 100

# Bind the source and sink to the channel
a3.sources.r3.channels = c3
a3.sinks.k3.channel = c3
4.3.3 执行测试(最后加&为后台执行 想结束 可以kill掉jps里的application)
$ bin/flume-ng agent --conf conf/ --name a3 --conf-file conf/flume-dir.conf &
4.3.4在upload文件夹进行文件添加等操作 检验hdfs是否生效
5.总结:
在使用Spooling Directory Source
注意事项:
1、不要在监控目录中创建并持续修改文件
2、上传完成的文件会以.COMPLETED结尾
3、被监控文件夹每600毫秒扫描一次变动