◆安装Gitlab前系统预配置准备工作
1.关闭firewalld防火墙
# systemctl stop firewalld
# systemctl disable firewalld
2.关闭SELINUX并重启系统
#:wq
SEL INUX=disabled
# reboot
# getenforce (查看策略是否被禁用)
◆安装Omnibus Gitlab-ce package
1.安装Gitlab组件
# yum -y install curl policycoreutils openssh-server openssh-clients postfix
2.配置YUM仓库
# curl -sS https://packages.gitlab.com/install/repositories/gitlab/gitlab-ce/script.rpm.sh | sudo bash
3.启动postfix邮件服务
# systemctl start postfix
# systemctl enable postfix
4.安装Gitlab-ce社区版本
# yum install -y gitlab-ce
◆Omnibus Gitlab等相关配置初始化并完成安装
1.证书创建与配置加加载
#mkdir -p /etc/gitlab/ssl (手动创建ssl目录)
#openssl genrsa -out "/etc/gitlab/ssl/gitlab.example.com.key" 2048(创建一个本地的私有秘钥)
#cd /etc/gitlab/ssl
#openssl req -new -key "/etc/gitlab/ssl/gitlab.example.com.key" -out "/etc/gitlab/ssl/gitlab.example.com.csr"(创建私有证书)
这时候已经进入到csr证书,安装向导界面
#cn
#bj
#bj
然后输入2次空格
如果输入gitlab的域名
# gitlab.example.com

![]()
然后输入邮箱地址
#admin@example.com
然后输入证书密码
然后回车安装完成,使用 ll /etc/gitlab/ssl/ 查看证书是否创建成功

![]()
创建crt签署证书
#openssl x509 -req -days 365 -in "/etc/gitlab/ssl/gitlab.example.com.csr" -signkey "/etc/gitlab/ssl/gitlab.example.com.key" -out "/etc/gitlab/ssl/gitlab.example.com.crt"
#ll /etc/gitlab/ssl/(查看是否创建成功)
创建pem证书
#openssl dhparam -out /etc/gitlab/ssl/dhparams.pem 2048
更改所有证书的权限
#cd /etc/gitlab/ssl/
#chmod 600 *
配置gitlab的文件,将所有生产证书,配置到文件中
#vi /etc/gitlab/gitlab.rb
external_url 'http://gitlab.example.com'
external_url 'https://gitlab.example.com'  # 修改成https


#nginx['redirect_http_to_https'] = false
nginx['redirect_http_to_https'] = ture    #去掉注释 false改成ture


# nginx['ssl_certificate'] = "/etc/gitlab/ssl/#{node['fqdn']}.crt"
# nginx['ssl_certificate'] = "/etc/gitlab/ssl/gitlab.example.com.crt"  # 更改路径


# nginx['ssl_certificate_key'] = "/etc/gitlab/ssl/#{node['fqdn']}.key"
# nginx['ssl_certificate_key'] = "/etc/gitlab/ssl/gitlab.example.com.key"  # 更改路径


# nginx['ssl_dhparam'] = nil # Path to dhparams.pem, eg. /etc/gitlab/ssl/dhparams.pem
# nginx['ssl_dhparam'] = /etc/gitlab/ssl/dhparams.pem # Path to dhparams.pem, eg. /etc/gitlab/ssl/dhparams.pem        #添加证书路径
初始化相关配置
#gitlab-ctl reconfigure
2.Nginx SSL代理服务配置
配置nginx。修改配置http配置文件
#vi /var/opt/gitlab/nginx/conf/gitlab-http.conf
rewrite ^(.*)$ https://$host$1 permanent; #添加此行,用来重定向配置http请求。如下
server {
listen *:80;

server_name gitlab.example.com;
rewrite ^(.*)$ https://$host$1 permanent;
server_tokens off; ## Don't show the nginx version number, a security best practice
使nginx配置生效
#gitlab-ctl restart
3.初始化Gitlab相关服务并完成安装
在本地电脑上配置hosts
192.168.96.188 gitlab.example.com
在浏览器中访问 gitlab.example.com

![]()
设置管理员密码后。
登录默认账号root

![]()
使用创建新的仓库 test-repo

![]()

![]()
创建完后复制地址

![]()
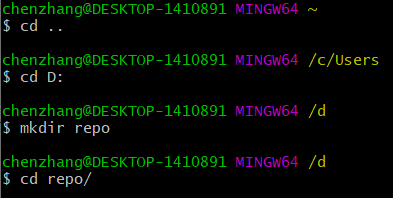
打开git Bash
在本地d盘创建一个目录
#cd d:
#mkdir repo
#cd repo/
![]()
克隆
#git -c http.sslVerify=false clone https://gitlab.example.com/root/test-repo.git
#cd test-repo/

![]()
创建一个程序,添加多本地
# vi test.py
# git add .

![]()
连接
# git commit -m"First commit"
需要创建一个全局用户名
#git config --global user.email "289900168@qq.com"
#git config --global user.email "admin"

![]()
再次连接
#git commit -m"first commit"
推送
#git -c http.sslVerify=false push origin master

![]()
访问gitlab.example.com/root/test-repo 。上传成功

![]()