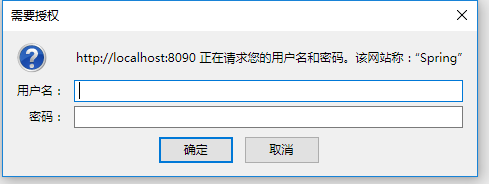
,spring security 会默认使用一个用户名为:user 的用户,密码就是 启动的时候生成的(通过控制台console中查看),如图

然后在用户名中输入:user 密码框中输入 上面的密码 ,之后就可以正常访问之前URL了。很显然这根本不是我们想要的,接下来我们需要一步一步的改造。
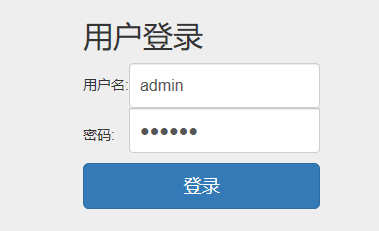
改造1 使用页面表单登录
WebSecurityConfigurerAdapter ,重写configure方法。

@Configuration @EnableWebSecurity public class SecurityConfig extends WebSecurityConfigurerAdapter {@Override</br> </span><span style="color: #0000ff;">protected</span> <span style="color: #0000ff;">void</span> configure(HttpSecurity http) <span style="color: #0000ff;">throws</span><span style="color: #000000;"> Exception {</br> </span><span style="color: #008000;">//</span><span style="color: #008000;"> TODO Auto-generated method stub</br> </span><span style="color: #008000;">//</span><span style="color: #008000;">super.configure(http);</span></br>http
.formLogin().loginPage("/login").loginProcessingUrl("/login/form").failureUrl("/login-error").permitAll() //表单登录,permitAll()表示这个不需要验证 登录页面,登录失败页面
.and()
.authorizeRequests().anyRequest().authenticated()
.and()
.csrf().disable();
}
}

<form class="form-signin" action="/login/form" method="post"> <h2 class="form-signin-heading">用户登录</h2> <table> <tr> <td>用户名:</td> <td><input type="text" name="username" class="form-control" placeholder="请输入用户名"/></td> </tr> <tr> <td>密码:</td> <td><input type="password" name="password" class="form-control" placeholder="请输入密码" /></td> </tr> <tr><td colspan="2"></br> <button type="submit" <span style="color: #0000ff;">class</span>="btn btn-lg btn-primary btn-block" >登录</button></br> </td></br> </tr></br> </table></br> </form></pre>
<!DOCTYPE HTML>
<html xmlns="http://www.w3.org/1999/xhtml"
      xmlns:th="http://www.thymeleaf.org">
<head>
<title>用户登录</title>
<link rel="stylesheet" href="https://cdn.bootcss.com/bootstrap/3.3.7/css/bootstrap.min.css" />
<link rel="stylesheet" href="/css/sign.css" />
</head>
<body>
            <h3>用户名或密码错误</h3>
</body>
</html>

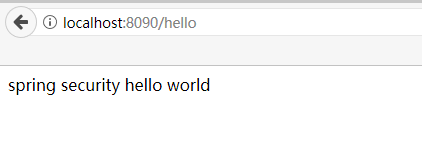
我们用一个测试的RestController来测试
@RestController
public class HelloWorldController {
      @RequestMapping("/hello")
      public String helloWorld()
      {
            return "spring security hello world";
      }
}
@Autowired
        public void configureGlobal(AuthenticationManagerBuilder auth) throws Exception {
                auth
                        .inMemoryAuthentication()
                                .withUser("user").password("password").roles("USER");
        }
我们也照样,这是把用户名改成 admin 密码改成 123456 roles是该用户的角色,我们后面再细说。
@Autowired public void configureGlobal(AuthenticationManagerBuilder auth) throws Exception { auth .inMemoryAuthentication() .withUser("admin").password("123456").roles("USER");}</span></pre>
还有种方法 就是 重写 另外一种configure(AuthenticationManagerBuilder auth) 方法,这个和上面那个方法的作用是一样的。选其一就可。
 @Override
      protected void configure(AuthenticationManagerBuilder auth) throws Exception {
            // TODO Auto-generated method stub

            auth
            .inMemoryAuthentication()
                  .withUser("admin").password("123456").roles("USER")
                  .and()
                  .withUser("test").password("test123").roles("ADMIN");
      }
程序运行起来,这时用我们自己的用户名和密码 输入 admin 和123456 就可以了。
public class UserInfo implements Serializable, UserDetails {
      /**
       *
       */
      private static final long serialVersionUID = 1L;
      private String username;
      private String password;
      private String role;
      private boolean accountNonExpired;
      private boolean accountNonLocked;
      private boolean credentialsNonExpired;
      private boolean enabled;
      public UserInfo(String username, String password, String role, boolean accountNonExpired, boolean accountNonLocked,
                  boolean credentialsNonExpired, boolean enabled) {
            // TODO Auto-generated constructor stub
            this.username = username;
            this.password = password;
            this.role = role;
            this.accountNonExpired = accountNonExpired;
            this.accountNonLocked = accountNonLocked;
            this.credentialsNonExpired = credentialsNonExpired;
            this.enabled = enabled;
      }
      // 这是权限
      @Override
      public Collection<? extends GrantedAuthority> getAuthorities() {
            // TODO Auto-generated method stub
            return AuthorityUtils.commaSeparatedStringToAuthorityList(role);
      }
      @Override
      public String getPassword() {
            // TODO Auto-generated method stub
            return password;
      }
      @Override
      public String getUsername() {
            // TODO Auto-generated method stub
            return username;
      }
      @Override
      public boolean isAccountNonExpired() {
            // TODO Auto-generated method stub
            return accountNonExpired;
      }
      @Override
      public boolean isAccountNonLocked() {
            // TODO Auto-generated method stub
            return accountNonLocked;
      }
      @Override
      public boolean isCredentialsNonExpired() {
            // TODO Auto-generated method stub
            return credentialsNonExpired;
      }
      @Override
      public boolean isEnabled() {
            // TODO Auto-generated method stub
            return enabled;
      }
}
然后实现第2个类 UserService 来返回这个UserInfo的对象实例
@Component public class MyUserDetailsService implements UserDetailsService {@Override </span><span style="color: #0000ff;">public</span> UserDetails loadUserByUsername(String username) <span style="color: #0000ff;">throws</span><span style="color: #000000;"> UsernameNotFoundException { </span><span style="color: #008000;">//</span><span style="color: #008000;"> TODO Auto-generated method stub </span><span style="color: #008000;">//</span><span style="color: #008000;">这里可以可以通过username(登录时输入的用户名)然后到数据库中找到对应的用户信息,并构建成我们自己的UserInfo来返回。</span> <span style="color: #0000ff;">return</span> <span style="color: #0000ff;">null</span><span style="color: #000000;">; }}
// TODO Auto-generated method stub
</span><span style="color: #008000;">//</span><span style="color: #008000;">这里可以通过数据库来查找到实际的用户信息,这里我们先模拟下,后续我们用数据库来实现</span> <span style="color: #0000ff;">if</span>(username.equals("admin"<span style="color: #000000;">)) { </span><span style="color: #008000;">//</span><span style="color: #008000;">假设返回的用户信息如下;</span> UserInfo userInfo=<span style="color: #0000ff;">new</span> UserInfo("admin", "123456", "ROLE_ADMIN", <span style="color: #0000ff;">true</span>,<span style="color: #0000ff;">true</span>,<span style="color: #0000ff;">true</span>, <span style="color: #0000ff;">true</span><span style="color: #000000;">); </span><span style="color: #0000ff;">return</span><span style="color: #000000;"> userInfo; } </span><span style="color: #0000ff;">return</span> <span style="color: #0000ff;">null</span>;</pre>
@Component
public class MyAuthenticationProvider implements AuthenticationProvider {
      /**
       * 注入我们自己定义的用户信息获取对象
       */
      @Autowired
      private UserDetailsService userDetailService;
      @Override
      public Authentication authenticate(Authentication authentication) throws AuthenticationException {
            // TODO Auto-generated method stub
            String userName = authentication.getName();// 这个获取表单输入中返回的用户名;
            String password = (String) authentication.getPrincipal();// 这个是表单中输入的密码;
            // 这里构建来判断用户是否存在和密码是否正确
            UserInfo userInfo = (UserInfo) userDetailService.loadUserByUsername(userName); // 这里调用我们的自己写的获取用户的方法;
            if (userInfo == null) {
                  throw new BadCredentialsException("用户名不存在");
            }
            // //这里我们还要判断密码是否正确,实际应用中,我们的密码一般都会加密,以Md5加密为例
            // Md5PasswordEncoder md5PasswordEncoder=new Md5PasswordEncoder();
            // //这里第个参数,是salt
            // 就是加点盐的意思,这样的好处就是用户的密码如果都是123456,由于盐的不同,密码也是不一样的,就不用怕相同密码泄漏之后,不会批量被破解。
            // String encodePwd=md5PasswordEncoder.encodePassword(password, userName);
            // //这里判断密码正确与否
            // if(!userInfo.getPassword().equals(encodePwd))
            // {
            // throw new BadCredentialsException("密码不正确");
            // }
            // //这里还可以加一些其他信息的判断,比如用户账号已停用等判断,这里为了方便我接下去的判断,我就不用加密了。
            //
            //
            if (!userInfo.getPassword().equals("123456")) {
                  throw new BadCredentialsException("密码不正确");
            }
            Collection<? extends GrantedAuthority> authorities = userInfo.getAuthorities();
            // 构建返回的用户登录成功的token
            return new UsernamePasswordAuthenticationToken(userInfo, password, authorities);
      }
      @Override
      public boolean supports(Class<?> authentication) {
            // TODO Auto-generated method stub
            // 这里直接改成retrun true;表示是支持这个执行
            return true;
      }
}
到此为止,我们的用户信息的获取,校验部分已经完成了。接下来要让它起作用,则我们需要在配置文件中修改,让他起作用。回到我的SecurityConfig代码文件,修改如下:
@Autowired private AuthenticationProvider provider; //注入我们自己的AuthenticationProvider@Override </span><span style="color: #0000ff;">protected</span> <span style="color: #0000ff;">void</span> configure(AuthenticationManagerBuilder auth) <span style="color: #0000ff;">throws</span><span style="color: #000000;"> Exception { </span><span style="color: #008000;">//</span><span style="color: #008000;"> TODO Auto-generated method stub</span>auth.authenticationProvider(provider);
// auth
// .inMemoryAuthentication()
// .withUser("admin").password("123456").roles("USER")
// .and()
// .withUser("test").password("test123").roles("ADMIN");
}
      @RequestMapping("/whoim")
      public Object whoIm()
      {
            return SecurityContextHolder.getContext().getAuthentication().getPrincipal();
      }
我们运行,直接反问 /whoim ,则直接跳转到登录页面,我们验证过之后,再访问此url,结果如下:

到这里,我们自定义的登录已经成功了。
改造3、自定义登录成功和失败的处理逻辑
//处理登录成功的。 @Component("myAuthenticationSuccessHandler") public class MyAuthenticationSuccessHandler extends SavedRequestAwareAuthenticationSuccessHandler{Map<String,String> map=new HashMap<>(); map.put("code", "200"); map.put("msg", "登录成功"); response.setContentType("application/json;charset=UTF-8"); response.getWriter().write(objectMapper.writeValueAsString(map));@Autowired </span><span style="color: #0000ff;">private</span><span style="color: #000000;"> ObjectMapper objectMapper; @Override </span><span style="color: #0000ff;">public</span> <span style="color: #0000ff;">void</span><span style="color: #000000;"> onAuthenticationSuccess(HttpServletRequest request, HttpServletResponse response, Authentication authentication) </span><span style="color: #0000ff;">throws</span><span style="color: #000000;"> IOException, ServletException { </span><span style="color: #008000;">//</span><span style="color: #008000;">什么都不做的话,那就直接调用父类的方法</span> <span style="color: #0000ff;">super</span><span style="color: #000000;">.onAuthenticationSuccess(request, response, authentication); </span><span style="color: #008000;">//</span><span style="color: #008000;">这里可以根据实际情况,来确定是跳转到页面或者json格式。 </span><span style="color: #008000;">//</span><span style="color: #008000;">如果是返回json格式,那么我们这么写</span></span><span style="color: #008000;">//</span><span style="color: #008000;">如果是要跳转到某个页面的,比如我们的那个whoim的则</span> <span style="color: #0000ff;">new</span> DefaultRedirectStrategy().sendRedirect(request, response, "/whoim"<span style="color: #000000;">); }}
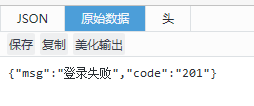
//登录失败的 @Component("myAuthenticationFailHander") public class MyAuthenticationFailHander extends SimpleUrlAuthenticationFailureHandler { @Autowired private ObjectMapper objectMapper; private Logger logger = LoggerFactory.getLogger(getClass()); @Override public void onAuthenticationFailure(HttpServletRequest request, HttpServletResponse response, AuthenticationException exception) throws IOException, ServletException { // TODO Auto-generated method stub logger.info("登录失败"); //以Json格式返回 Map<String,String> map=new HashMap<>(); map.put("code", "201"); map.put("msg", "登录失败"); response.setStatus(HttpStatus.INTERNAL_SERVER_ERROR.value()); response.setContentType("application/json"); response.setCharacterEncoding("UTF-8"); response.getWriter().write(objectMapper.writeValueAsString(map));}}
@Autowired private AuthenticationSuccessHandler myAuthenticationSuccessHandler; @Autowired private AuthenticationFailureHandler myAuthenticationFailHander;@Override </span><span style="color: #0000ff;">protected</span> <span style="color: #0000ff;">void</span> configure(HttpSecurity http) <span style="color: #0000ff;">throws</span><span style="color: #000000;"> Exception { </span><span style="color: #008000;">//</span><span style="color: #008000;"> TODO Auto-generated method stub </span><span style="color: #008000;">//</span><span style="color: #008000;">super.configure(http);</span>http
.formLogin().loginPage("/login").loginProcessingUrl("/login/form")
.successHandler(myAuthenticationSuccessHandler)
.failureHandler(myAuthenticationFailHander)
.permitAll() //表单登录,permitAll()表示这个不需要验证 登录页面,登录失败页面
.and()
.authorizeRequests().anyRequest().authenticated()
.and()
.csrf().disable();
}
进行测试,我们先返回json格式的(登录成功和失败的)

改成跳转到默认页面

改造4、添加权限控制
@Override
      protected void configure(HttpSecurity http) throws Exception {
            // TODO Auto-generated method stub
            //super.configure(http);
            http
                  .formLogin().loginPage("/login").loginProcessingUrl("/login/form")
                  .successHandler(myAuthenticationSuccessHandler)
                  .failureHandler(myAuthenticationFailHander)
                  .permitAll()  //表单登录,permitAll()表示这个不需要验证 登录页面,登录失败页面
                  .and()
                  .authorizeRequests()
                        .antMatchers("/index").permitAll()  //这就表示 /index这个页面不需要权限认证,所有人都可以访问
                  .anyRequest().authenticated()
                  .and()
                  .csrf().disable();
      }
   http
                  .formLogin().loginPage("/login").loginProcessingUrl("/login/form")
                  .successHandler(myAuthenticationSuccessHandler)
                  .failureHandler(myAuthenticationFailHander)
                  .permitAll()  //表单登录,permitAll()表示这个不需要验证 登录页面,登录失败页面
                  .and()
                  .authorizeRequests()
                        .antMatchers("/index").permitAll()
                  .antMatchers("/whoim").hasRole("ADMIN") //这就表示/whoim的这个资源需要有ROLE_ADMIN的这个角色才能访问。不然就会提示拒绝访问
                  .anyRequest().authenticated() //必须经过认证以后才能访问
                  .and()
                  .csrf().disable();
这个用户的角色哪里来,就是我们自己的UserDetailsService中返回的用户信息中的角色权限信息,这里需要注意一下就是 .hasRole("ADMIN"),那么给用户的角色时就要用:ROLE_ADMIN

/** * 返回权限验证的接口 * * */ public interface RbacService { boolean hasPermission(HttpServletRequest request,Authentication authentication); }@Component(
"rbacService")
public class RbacServiceImpl implements RbacService {
private AntPathMatcher antPathMatcher = new AntPathMatcher();
@Override
public boolean hasPermission(HttpServletRequest request, Authentication authentication) {
Object principal = authentication.getPrincipal();
boolean hasPermission = false;
if (principal instanceof UserDetails) { //首先判断先当前用户是否是我们UserDetails对象。
String userName = ((UserDetails) principal).getUsername();
Set<String> urls = new HashSet<>(); // 数据库读取 //读取用户所拥有权限的所有URL
urls.add("/whoim");
// 注意这里不能用equal来判断,因为有些URL是有参数的,所以要用AntPathMatcher来比较
for (String url : urls) {
if (antPathMatcher.match(url, request.getRequestURI())) {
hasPermission = true;
break;
}
}
}
return hasPermission;
}
}
然后在Security的配置项中添加自定义的权限表达式就可以了。
@Override
      protected void configure(HttpSecurity http) throws Exception {
            // TODO Auto-generated method stub
            //super.configure(http);
            http
                  .formLogin().loginPage("/login").loginProcessingUrl("/login/form")
                  .successHandler(myAuthenticationSuccessHandler)
                  .failureHandler(myAuthenticationFailHander)
                  .permitAll()  //表单登录,permitAll()表示这个不需要验证 登录页面,登录失败页面
                  .and()
                  .authorizeRequests()
//                      .antMatchers("/index").permitAll()
//                .antMatchers("/whoim").hasRole("ADMIN")
//                .antMatchers(HttpMethod.POST,"/user/*").hasRole("ADMIN")
//                .antMatchers(HttpMethod.GET,"/user/*").hasRole("USER")
                  .anyRequest().access("@rbacService.hasPermission(request,authentication)")    //必须经过认证以后才能访问
                  .and()
                  .csrf().disable();
      }
其中 @rbacService 就是我们自己声明的bean,在RbacServiceImpl实现类的头部注解中。
改造5、记住我的功能Remeber me
CREATE TABLE persistent_logins (
    username VARCHAR(64) NOT NULL,
    series VARCHAR(64) NOT NULL,
    token VARCHAR(64) NOT NULL,
    last_used TIMESTAMP NOT NULL,
    PRIMARY KEY (series)
);
然后,配置好token 的存储 及数据源
@Autowired private DataSource dataSource; //是在application.properites<span style="color: #008000;">/**</span><span style="color: #008000;"> * 记住我功能的token存取器配置 * </span><span style="color: #808080;">@return</span> <span style="color: #008000;">*/</span><span style="color: #000000;"> @Bean </span><span style="color: #0000ff;">public</span><span style="color: #000000;"> PersistentTokenRepository persistentTokenRepository() { JdbcTokenRepositoryImpl tokenRepository </span>= <span style="color: #0000ff;">new</span><span style="color: #000000;"> JdbcTokenRepositoryImpl(); tokenRepository.setDataSource(dataSource); </span><span style="color: #0000ff;">return</span><span style="color: #000000;"> tokenRepository; }</span></pre>
修改Security配置
  @Override
      protected void configure(HttpSecurity http) throws Exception {
            // TODO Auto-generated method stub
            //super.configure(http);
            http
                  .formLogin().loginPage("/login").loginProcessingUrl("/login/form")
                  .successHandler(myAuthenticationSuccessHandler)
                  .failureHandler(myAuthenticationFailHander)
                  .permitAll()  //表单登录,permitAll()表示这个不需要验证 登录页面,登录失败页面
                  .and()
                  .rememberMe()
                        .rememberMeParameter("remember-me").userDetailsService(userDetailsService)
                        .tokenRepository(persistentTokenRepository())
                        .tokenValiditySeconds(60)
                  .and()
                  .authorizeRequests()
//                      .antMatchers("/index").permitAll()
//                .antMatchers("/whoim").hasRole("ADMIN")
//                .antMatchers(HttpMethod.POST,"/user/*").hasRole("ADMIN")
//                .antMatchers(HttpMethod.GET,"/user/*").hasRole("USER")
                  .anyRequest().access("@rbacService.hasPermission(request,authentication)")    //必须经过认证以后才能访问
                  .and()
                  .csrf().disable();

.png)
