Title: PHP画图基础
Author: MoreWindows
Blog: http://blog.csdn.net/MoreWindows
KeyWord: PHP绘图 画点、线、弧线 绘制和填充区域 图片特效 彩色圣诞节大雪花图
本篇对PHP常用的绘图函数进行总结。内容有建立图像,为图像分配颜色,画点,画线,画弧线,绘制和填充区域,输出字符和汉字及一些常见的图片特效如反色和浮雕。此外还给出一些有趣的实例,如绘制彩色的圣诞节大雪花图。
一.新建图像
resource imagecreate( int $x_size , int $y_size )
imagecreate()返回一个图像标识符,代表了一幅大小为 x_size 和y_size 的空白图像。
resource imagecreatetruecolor( int $x_size , int $y_size )
imagecreatetruecolor() 返回一个图像标识符,代表了一幅大小为 x_size 和y_size 的黑色图像。PHP手册上推荐尽量使用imagecreatetruecolor()函数。
还有根据.gif、.png、.jpg等文件来创建图像的函数。
resource imagecreatefromgif( string $filename )
resource imagecreatefrompng ( string $filename )
resource imagecreatefromjpeg( string $filename )
二.为图像分配颜色
int imagecolorallocate ( resource $image , int $red , int $green , int $blue )
imagecolorallocate() 返回一个标识符,代表了由给定的 RGB 成分组成的颜色。red,green 和 blue 分别是所需要的颜色的红,绿,蓝成分。这些参数是 0 到 255 的整数或者十六进制的 0x00 到 0xFF。第一次图像调用 imagecolorallocate()表示设置图像背景色。
int imagecolorallocatealpha( resource $image , int $red , int $green , int $blue , int $alpha )
imagecolorallocatealpha() 的行为和imagecolorallocate()相同,但多了一个额外的透明度参数alpha,其值从 0 到127。0表示完全不透明,127 表示完全透明。
三.画点
bool imagesetpixel( resource $image , int $x , int $y , int $color )
注:图像左上角为(0,0)
四.画线
bool imageline( resource $image , int $x1 , int $y1 , int $x2 , int $y2 , int $color )
从(x1, y1)到(x2,y2)。线的风格可以由bool imagesetstyle( resource $image , array $style )来控制。宽度由bool imagesetthickness ( resource $image , int $thickness )控制,注意这个宽度在画矩形、弧线时也生效。
五.画椭圆弧
bool imagearc(resource $image , int $cx , int $cy , int $w , int $h , int $s , int $e , int $color)
imagearc()以cx,cy(图像左上角为 0, 0)为中心在 image 所代表的图像中画一个椭圆弧。w和h 分别指定了椭圆的宽度和高度,起始和结束点以 s 和e参数以角度指定。0度位于三点钟位置,以顺时针方向绘画。如:
$black = imagecolorallocate($img, 0, 0, 0);
imagearc($img, 100, 100, 150, 180, 0, 90,$black);
将在(100,100)处画一段宽150高180的从0到90度的弧,如下图所示(作为参照,右边是全图):

六.绘制区域
矩形
bool imagerectangle ( resource $image , int $x1 , int $y1 , int $x2 , int $y2 , int $col )
椭圆
bool imageellipse ( resource $image , int $cx , int $cy , int $w , int $h , int $color )
多边形
bool imagepolygon ( resource $image , array $points , int $num_points , int $color )
七.填充区域
填充区域
bool imagefill( resource $image , int $x , int $y , int $color )
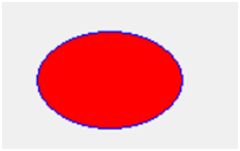
imagefill()在image图像的(x,y)处用 color颜色执行区域填充(即与 (x, y) 点颜色相同且相邻的点都会被填充)。如以下代码片段会先画出蓝色的椭圆,然后用红色填充椭圆内部。
- $blue_color = imagecolorallocate($img, 0, 0, 255);
- $red_color = imagecolorallocate($img, 255, 0, 0);
- imageellipse($img, 300, 200, 300, 200, $blue_color);
- imagefill($img, 300, 200, $red_color);
画一椭圆并填充
bool imagefilledellipse( resource $image , int $cx , int $cy , int $w , int $h , int $color )
这种画法椭圆是没有边框的,当然也可以如下实现:
- $lucency_color = imagecolorallocatealpha($img, 0, 0, 0, 126);//127为全透明 0全不透明
- $red_color = imagecolorallocate($img, 255, 0, 0);
- imageellipse($img, 300, 200, 300, 200, $lucency_color);
- imagefill($img, 300, 200, $red_color);
- //imagefilledellipse($img, 300, 200, 300, 200, $red_color);
画一矩形并填充
bool imagefilledrectangle (resource $image , int $x1 , int $y1 , int $x2 , int $y2 , int $color )
类似于画一椭圆并填充。
画一椭圆弧且填充
bool imagefilledarc( resource $image , int $cx , int $cy , int $w , int $h , int $s , int $e , int $color , int $style )
对最后一个参数说明下,有4种值:
IMG_ARC_PIE 产生圆形边界(如果两个都用,IMG_ARC_CHORD生效)。
IMG_ARC_CHORD 用直线连接了起始和结束点。
IMG_ARC_NOFILL画弧,只有轮廓,不填充。
IMG_ARC_EDGED 指明用直线将起始和结束点与中心点相连
看下实际的效果(圆弧角度从0到210度):

下一篇将用这个函数来画饼状图。
八.字符
水平地画一个字符
bool imagechar(resource $image , int $font , int $x , int $y , string $c , int $color)
垂直地画一个字符
bool imagecharup(resource $image , int $font , int $x , int $y , string $c , int $color)
水平地画一行字符串
bool imagestring(resource $image , int $font , int $x , int $y , string $s , int $col)
垂直地画一行字符串
bool imagestringup(resource $image , int $font , int $x , int $y , string $s , int $col)
$font参数要注意下,要么使用内置的字体(从1到5),要么用int imageloadfont ( string $file )加载字体后再设置。
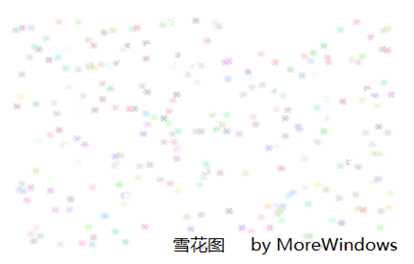
可以用输出*来得到彩色的圣诞节雪花图,代码如下:
- <?php
- // by MoreWindows( http://blog.csdn.net/MoreWindows )
- $imgWidth = 300;
- $imgHeight = 200;
- $img = imagecreate($imgWidth, $imgHeight);
- imagecolorallocate($img, 255, 255, 255);//设置底色
- $snowflake_size = 5; //可从1到5
- //生成雪花 其实就是调用imagechar()输出*号
- for ($i=1; $i<=400; $i++)
- imagechar($img, $snowflake_size, mt_rand(0, $imgWidth),mt_rand(0, $imgHeight), "*", imagecolorallocate($img, mt_rand(200,255), mt_rand(200,255), mt_rand(200,255)));
- imagepng($img);
- imagedestroy($img);
- ?>
运行效果如下:
九.文本
array imagettftext(resource $image , float $size , float $angle , int $x , int $y , int $color , string $fontfile , string $text )
解释几个参数:
第二参数$size为字体大小。
第三参数$angle为文本旋转角度,0度为从左向右读的文本,更高数值表示逆时针旋转。例如 90 度表示从下向上读的文本。
第七个参数$fontfile表示字体文件,如"c:\\WINDOWS\\Fonts\\simhei.ttf"。
注意!使用这个函数应当配合imagecreatetruecolor(),而不是imagecreate()。
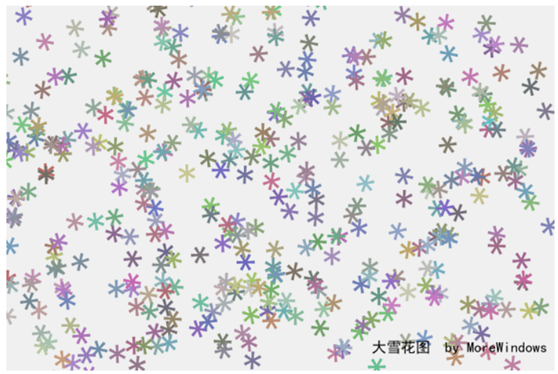
下面用这个imagettftext()来代替上面的imagechar从而生成彩色的圣诞节大雪花图,代码如下:
- <?php
- // by MoreWindows( http://blog.csdn.net/MoreWindows )
- $imgWidth = 600;
- $imgHeight = 400;
- $img = imagecreatetruecolor($imgWidth, $imgHeight);
- imagefill($img, 0, 0, imagecolorallocate($img, 240, 240, 240));//设置底色
- $snowflake_size = 30;
- $font_file = "c:\\WINDOWS\\Fonts\\simhei.ttf";
- //生成大雪花 其实就是调用imagettftext()输出*号
- for ($i=1; $i<=400; $i++)
- {
- $font_color = imagecolorallocate($img, mt_rand(100,200), mt_rand(100,200), mt_rand(100,200));
- imagettftext($img, $snowflake_size, mt_rand(0, 180), mt_rand(0, $imgWidth),mt_rand(0, $imgHeight), $font_color, $font_file, "*");
- }
- //水印文字
- $black_color = imagecolorallocate($img, 0, 0, 0);
- imagettftext($img, 12, 0, $imgWidth - 200 , $imgHeight - 20, $black_color, $font_file, "大雪花图 by MoreWindows");
- imagepng($img);
- imagedestroy($img);
- ?>
运行效果如下:
十.图像特效
bool imagefilter ( resource $src_im , int $filtertype [,int $arg1 [, int $arg2 [, int $arg3 ]]] )
这里提供了很多特效,如浮雕,反色(底片色),调节灰度、亮度,对比度,模糊化等等。这只展示几种常用的特效,更多的请访问http://www.php.net/manual/zh/function.imagefilter.php。
原图:
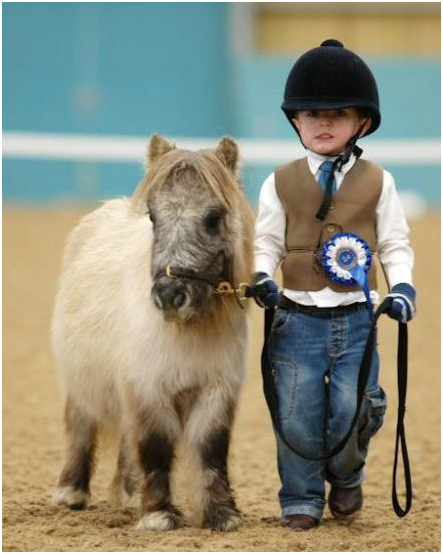
将图处保存到D:\\1234.png,就可以执行下面的代码了。
IMG_FILTER_NEGATE:将图像中所有颜色反转(底片色)。

代码:
- <?php
- // by MoreWindows( http://blog.csdn.net/MoreWindows )
- $img = imagecreatefrompng("D:\\1234.png");
- imagefilter($img, IMG_FILTER_NEGATE);
- imagepng($img);
- imagedestroy($img);
- ?>
IMG_FILTER_EMBOSS:使图像浮雕化。
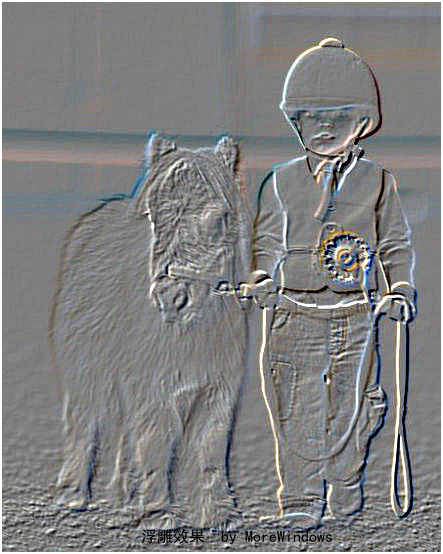
代码:
- <?php
- // by MoreWindows( http://blog.csdn.net/MoreWindows )
- $img = imagecreatefrompng("D:\\1234.png");
- imagefilter($img, IMG_FILTER_EMBOSS);
- imagepng($img);
- imagedestroy($img);
- ?>
本篇就介绍到此,下一篇《PHP 画图应用 验证码 柱状图》将用本篇介绍的函数来绘制验证码和柱状图。
转载请标明出处,原文地址:http://blog.csdn.net/morewindows/article/details/7274870