2、stackview

ApplicationWindow {
visible: true
width: 640
height: 480

MouseArea{
anchors.fill: parent
acceptedButtons: Qt.LeftButton|Qt.RightButton|Qt.MiddleButton
onClicked: {
if(mouse.button === Qt.LeftButton ){
stackView.push([blueView,greenView,yellowView]);
}else if(mouse.button === Qt.RightButton){
stackView.pop();
}else{
stackView.push({item:orangeView,replace:ture})
}
}
}

Rectangle {id:blueView;color: "blue"}
Rectangle {id:greenView;color: "green"}
Rectangle {id:yellowView;color: "yellow"}
Rectangle {id:orangeView;color: "orange"}
StackView{
id:stackView
anchors.fill: parent
initialItem: Item{
id:redView
Rectangle{anchors.fill: parent;color: "red"}
}
}
}
3、messagedialog
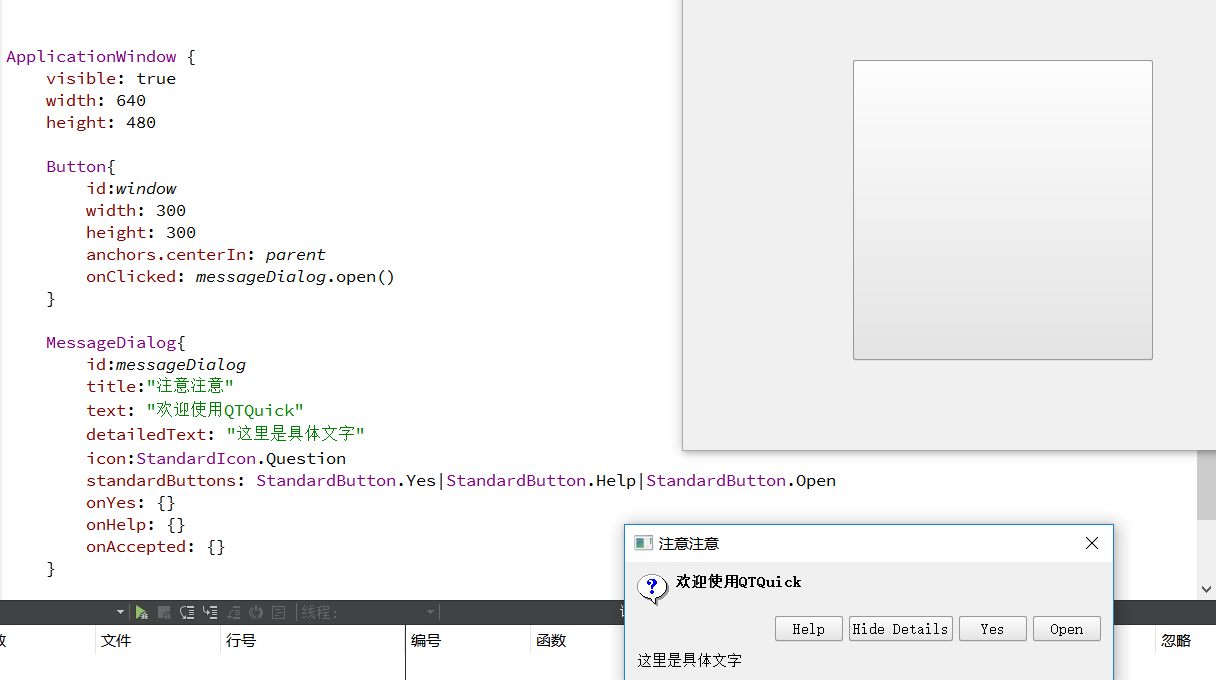
ApplicationWindow {
visible: true
width: 640
height: 480

Button{
id:window
width: 300
height: 300
anchors.centerIn: parent
onClicked: messageDialog.open()
}

MessageDialog{
id:messageDialog
title:"注意注意"
text: "欢迎使用QTQuick"
detailedText: "这里是具体文字"
icon:StandardIcon.Question
standardButtons: StandardButton.Yes|StandardButton.Help|StandardButton.Open
onYes: {}
onHelp: {}
onAccepted: {}
}

}