1. 相关软件版本
xshell:
xmanager:
pycharm:
pycharm破解服务器:https://jetlicense.nss.im/
2. 将相应的软件安装(pojie好)
a> 启动xmanager passive,这个是用来接受linux转发过来的x11的:
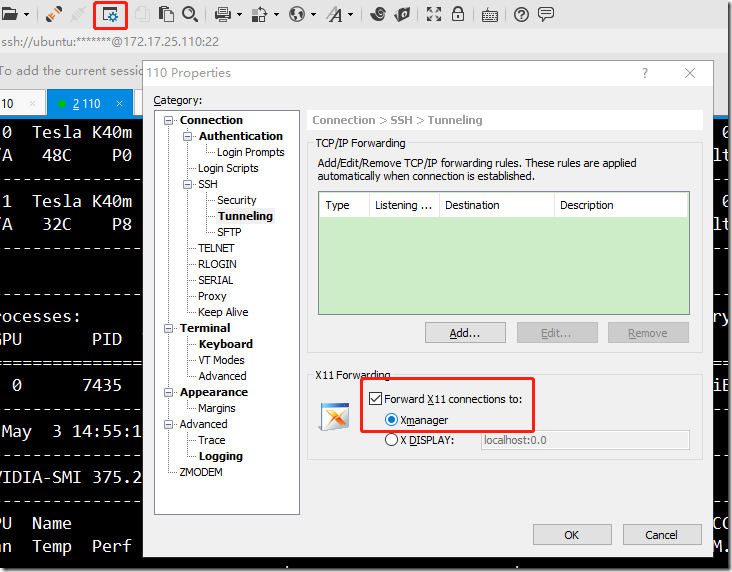
b> 设置xshell,使用ssh隧道将x11转发到windows机器上
在被设置的服务器上执行echo $DISPLAY,如下:
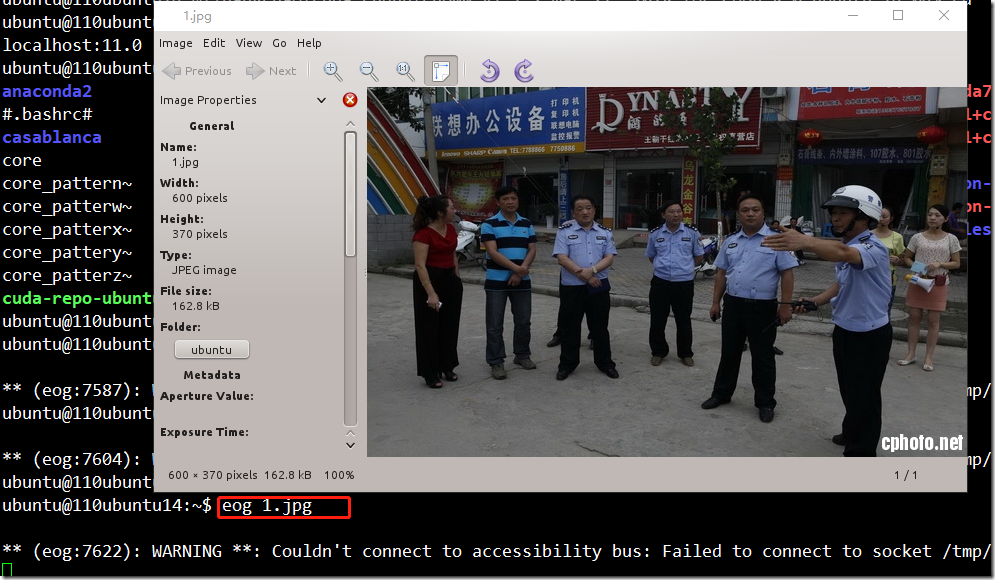
c> 通过设置后,就可以将linux中的图形界面转发到windows机器上了,例如,在linux命令行中使用eog 1.jpg可以将1.jpg显示在window系统中:
可以看到linux已经通过ssh隧道将x11成功的转发到window,而背后支撑x11的服务器正是xmanager提供的:
3. 配置pycharm,使其能够通过ssh协议远程的使用linux上的python环境,并且进行远程调试、代码同步:
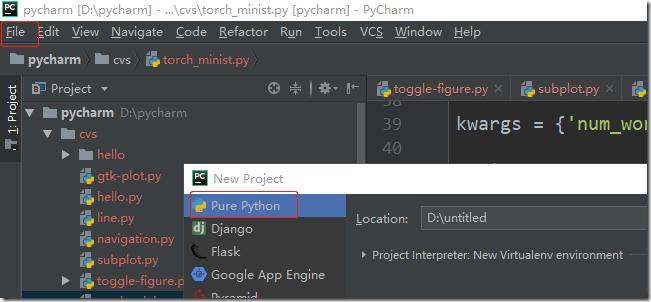
a> 新建一个pythonproject,选择好项目的位置:
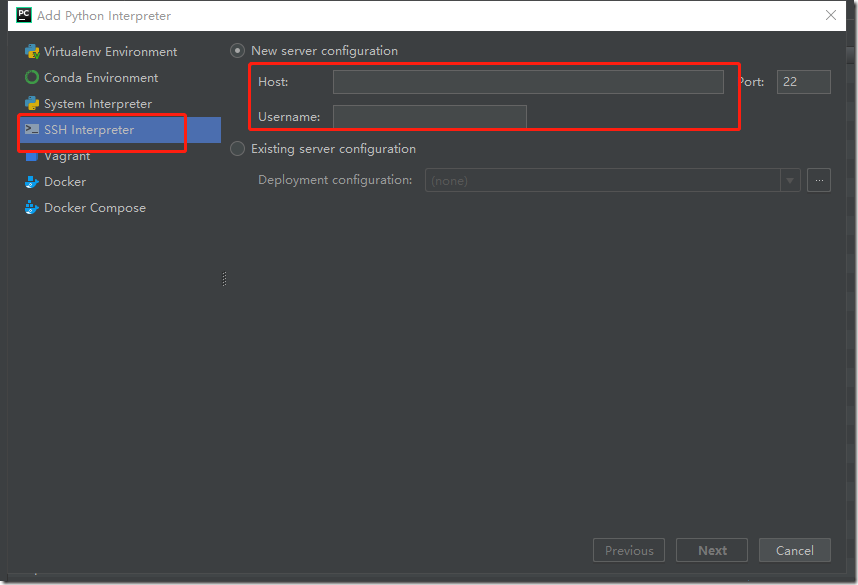
b> 在File->settings中,设置远程linux服务器:
选择Add..,然后填写好远程服务器的ip地址以及用户名和密码:
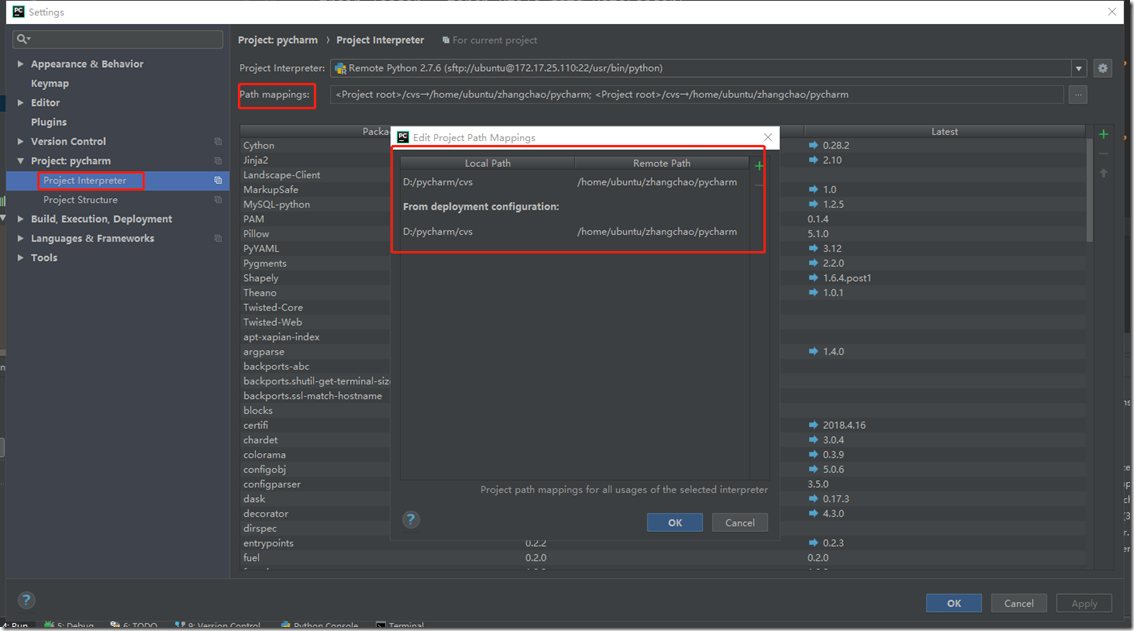
在path mapping中设置windows目录和linux目录的映射关系,这样方便进行windows和linux之间进行代码同步:
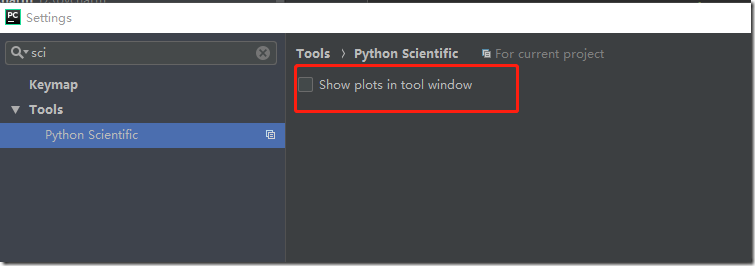
在settings=>Tools=>python Scientific页面中,将show plots in tool window关闭,这样是为了使pycharm能够正常的将linux的中的x11协议转发到xmanger中:
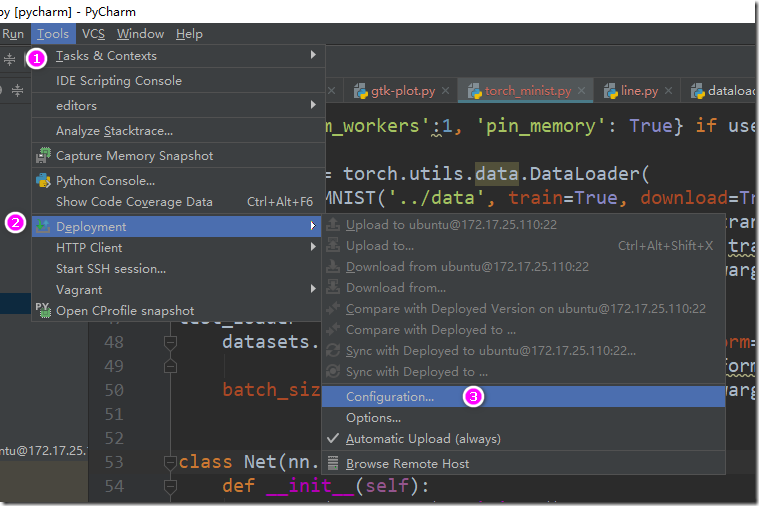
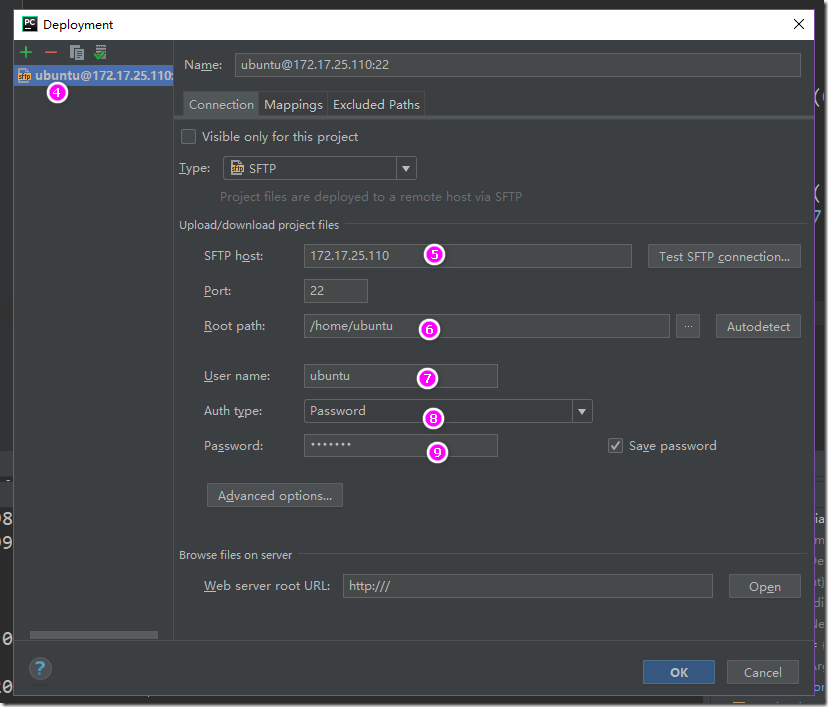
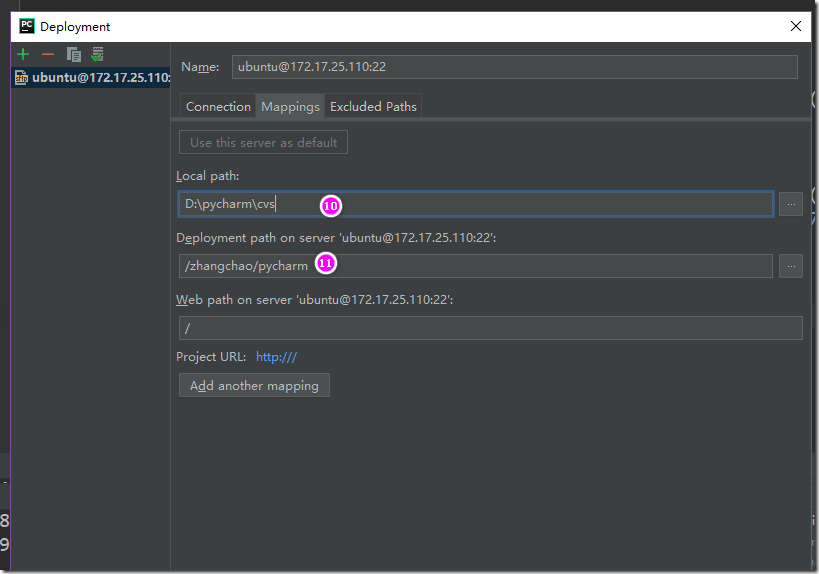
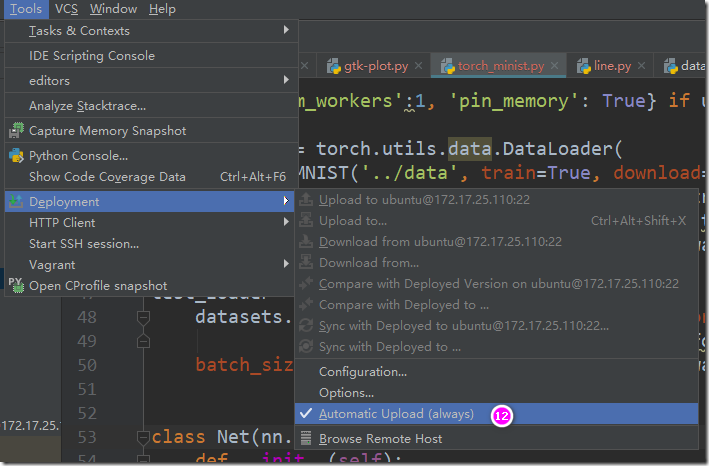
c> 设置源代码同步:
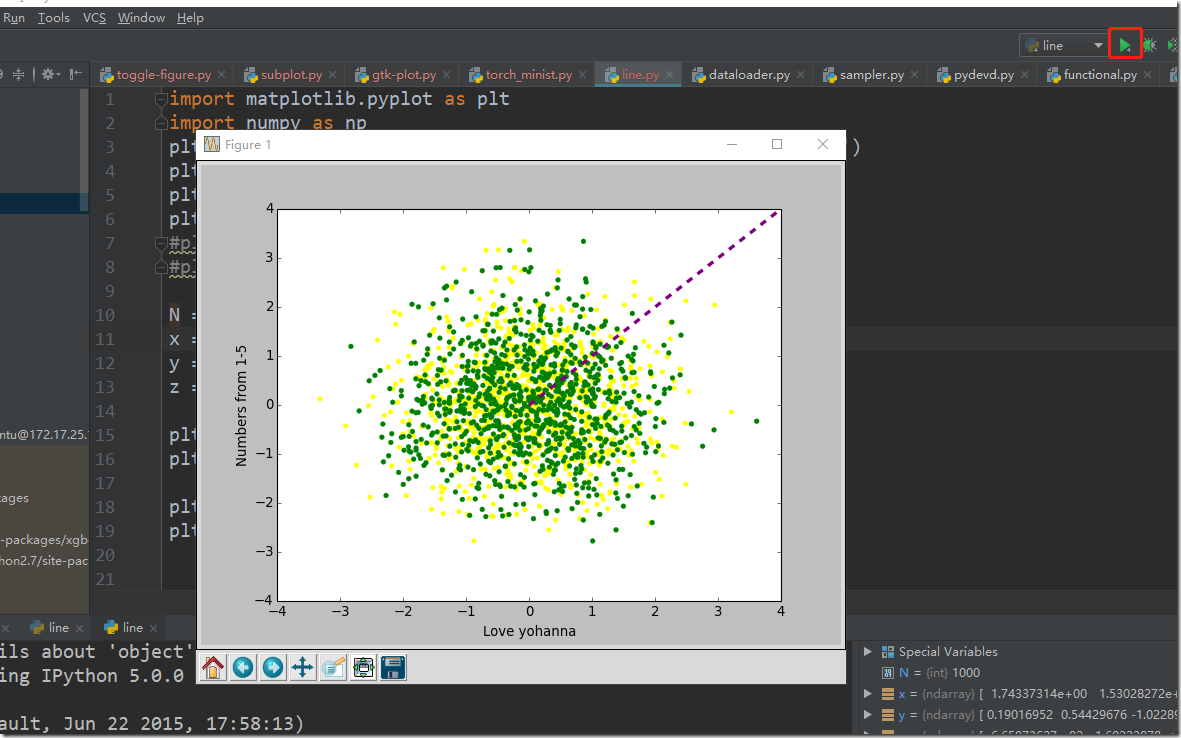
到此,已经设置好了pycharm、xshell、xmanager相互交互的环境。下面在pycharm中写一段测试代码,这个测试代码通过pycharm提交到linux机器上,然后linux通过x11协议转发到windows上,在windows上显示一张图片,line.py代码如下:
import matplotlib.pyplot as plt
import numpy as np
plt.plot(range(5), linestyle='--', linewidth=3, color='purple')
plt.ylabel('Numbers from 1-5')
plt.xlabel('Love yohanna')
plt.show()
#plt.clf()
#plt.close()

N = 1000
x = np.random.randn(N)
y = np.random.randn(N)
z = np.random.randn(N)

plt.scatter(z, y, color='yellow', linewidths=0.05)
plt.scatter(x, y, color='green', linewidths=0.2)

plt.axis([-4, 4, -4, 4])
plt.show()
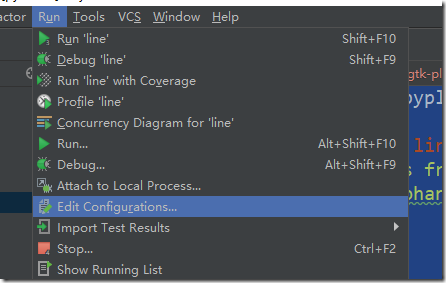
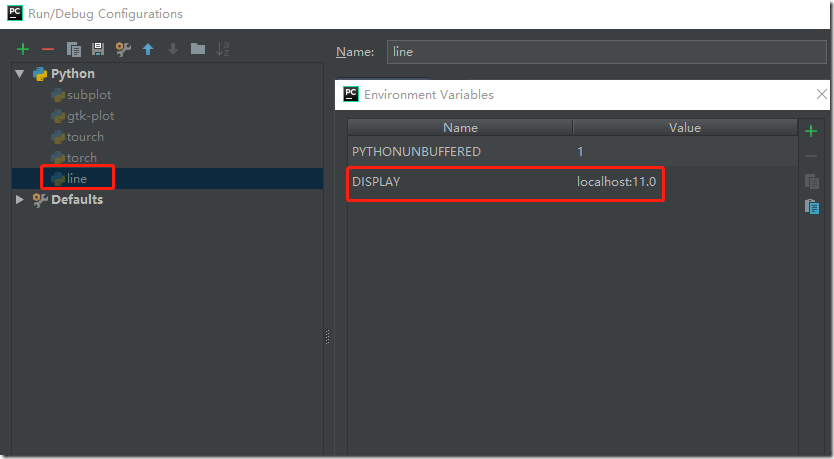
设置pycharm运行line.py的环境变量:
在环境变量列表中加入DISPLAY变量,值为localhost:11.0(具体值,在设置好xshell x11转发规则后,通过linux shell中的echo $DISPLAY获得)
点击运行按钮,可以看到在windows中显示了画图的效果:
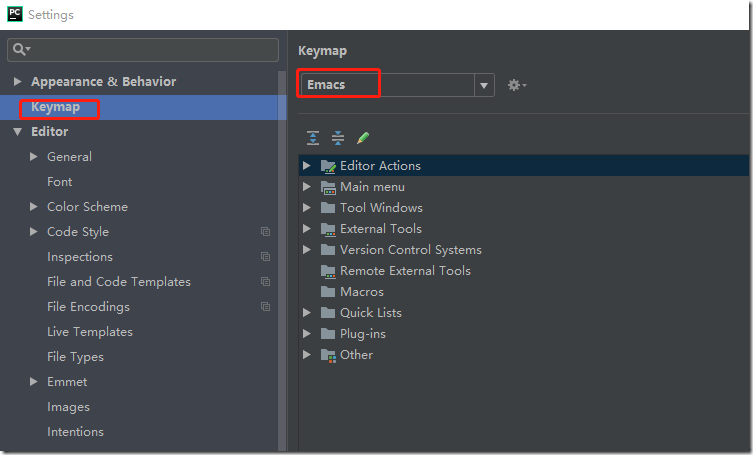
4. 设置pycharm使用emacs方式编辑:File->settings->keyMap->Emacs
设置文件结尾为unix格式:
5. 搭建pytorch+cuda的环境:
a> 安装pytorch使用,sudo pip install pytorch
b> 下载和安装cuda:
https://developer.nvidia.com/cuda-toolkit-archive
cuda的默认安装位置:/usr/local/cuda-8.0
在安装的过程中如果遇到X dispaly的问题,
It appears that an X server is running. Please exit X before installation. If you're sure that X is not running, but are getting this error, please delete any X lock files in /tmp.
那么可以尝试使用/etc/init.d/lightdm stop
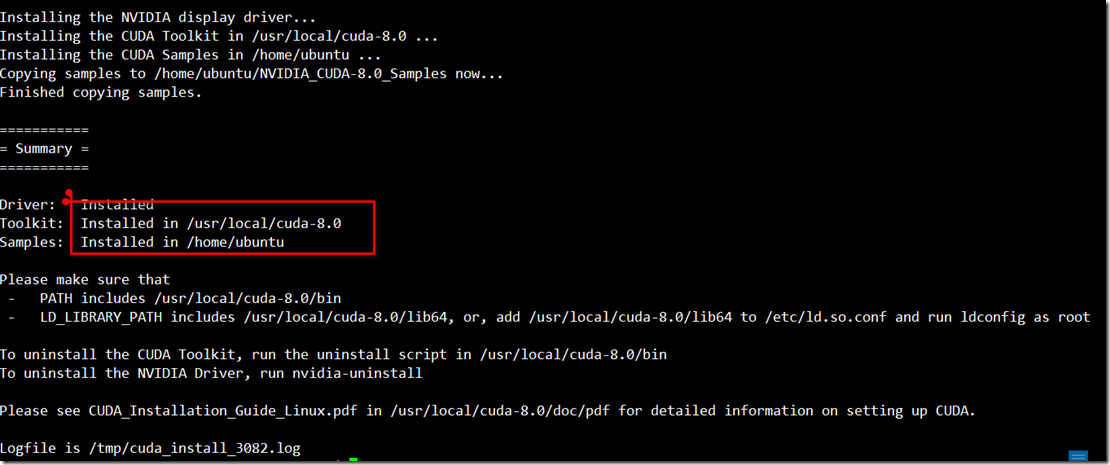
然后在尝试安装,安装成功后日志如下:
c> 下载和安装cudnn:
https://developer.nvidia.com/rdp/cudnn-download
libcudnn的安装,先安装runtime,然后再安装dev包。
d>
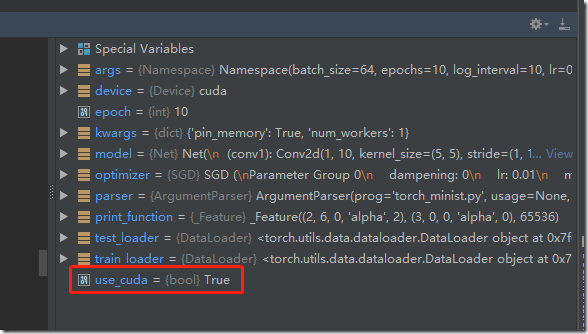
将cuda和cudnn安装成功后,发现torch已经支持cuda了:torch.cuda.is_available() --> true
6. 现在pytorch+cuda的环境已经搭建好,可以跑一个简单的minst例子了,首先将代码下载好torch_minist.py:
# This file will train minist dataset , using pytorch

from __future__ import print_function
import argparse
import torch
import torch.nn as nn
import torch.nn.functional as F
import torch.optim as optim
from torchvision import datasets, transforms
import pdb


# Training settings
parser = argparse.ArgumentParser(description='PyTorch MNIST Example')
parser.add_argument('--batch-size', type=int, default=64, metavar='N',
                    help='input batch size for training(default: 64)')
parser.add_argument('--test-batch-size', type=int, default=1000, metavar='N',
                    help='input batch size for testing (default: 1000)')
parser.add_argument('--epochs', type=int, default=10, metavar='N',
                    help='number of epochs to train (default: 10)')
parser.add_argument('--lr', type=float, default=0.01, metavar='LR',
                    help='learning rate(default: 0.01)')
parser.add_argument('--momentum', type=float, default=0.5, metavar='M',
                    help='SGD momentum (default: 0.5)')
parser.add_argument('--no-cuda', action='store_true', default=False,
                    help='disables CUDA training')
parser.add_argument('--seed', type=int, default=1, metavar='S',
                    help='random seed (default: 1)')
parser.add_argument('--log-interval', type=int, default=10, metavar='N',
                    help='how many batches to wait before logging training status')
args = parser.parse_args()

use_cuda = not args.no_cuda and torch.cuda.is_available()

torch.manual_seed(args.seed)

device = torch.device('cuda' if use_cuda else 'cpu')

kwargs = {'num_workers':1, 'pin_memory': True} if use_cuda else {}

train_loader = torch.utils.data.DataLoader(
    datasets.MNIST('../data', train=True, download=True,
                   transform=transforms.Compose([transforms.ToTensor(),
                                                  transforms.Normalize((0.1307,),(0.3081,))])),
    batch_size=args.batch_size, shuffle=True, **kwargs)

test_loader = torch.utils.data.DataLoader(
    datasets.MNIST('../data', train=False, transform=transforms.Compose([transforms.ToTensor(),
                                            transforms.Normalize((0.1307,),(0.3081,))])),
    batch_size=args.batch_size, shuffle=True, **kwargs)


class Net(nn.Module):
    def __init__(self):
        super(Net, self).__init__()
        self.conv1 = nn.Conv2d(1, 10, kernel_size=5)
        self.conv2 = nn.Conv2d(10, 20, kernel_size=5)
        self.conv2_drop = nn.Dropout2d()
        self.fc1 = nn.Linear(320, 50)
        self.fc2 = nn.Linear(50, 10)

    def forward(self, x):
        x = F.relu(F.max_pool2d(self.conv1(x), 2))
        x = F.relu(F.max_pool2d(self.conv2_drop(self.conv2(x)), 2))
        x = x.view(-1, 320)
        x = F.relu(self.fc1(x))
        x = F.dropout(x, training=self.training)
        x = self.fc2(x)
        return F.log_softmax(x, dim=1)


model = Net().to(device)

optimizer = optim.SGD(model.parameters(), lr=args.lr, momentum=args.momentum)


def train(epoch):
    #pdb.set_trace()
    model.train()
    for batch_idx, (data, target) in enumerate(train_loader):
        data, target = data.to(device), target.to(device)
        optimizer.zero_grad()
        output = model(data)
        loss = F.nll_loss(output, target)
        loss.backward()
        optimizer.step()
        if batch_idx % args.log_interval == 0:
            print('Train Epoch: {} [{}/{} ({:.0f}%)]	Loss: {:.6f}'.format(
                epoch, batch_idx * len(data), len(train_loader.dataset),
                100. * batch_idx / len(train_loader), loss.item()
            ))


def test():
    model.eval()
    test_loss = 0
    correct = 0
    with torch.no_grad():
        for data, target in test_loader:
            data, target = data.to(device), target.to(device)
            output = model(data)
            test_loss += F.nll_loss(output, target, size_average=False).item() # sum up batch loss
            pred = output.max(1, keepdim=True)[1] # get the index of the max log-probability
            correct += pred.eq(target.view_as(pred)).sum().item()

    test_loss /= len(test_loader.dataset)
    print('
Test set: Average loss: {:.4f}, Accuracy: {}/{} ({:.0f}%)
'.format(
        test_loss, correct, len(test_loader.dataset),
        100. * correct / len(test_loader.dataset)
    ))


for epoch in range(1, args.epochs+1):
    train(epoch)
    test()
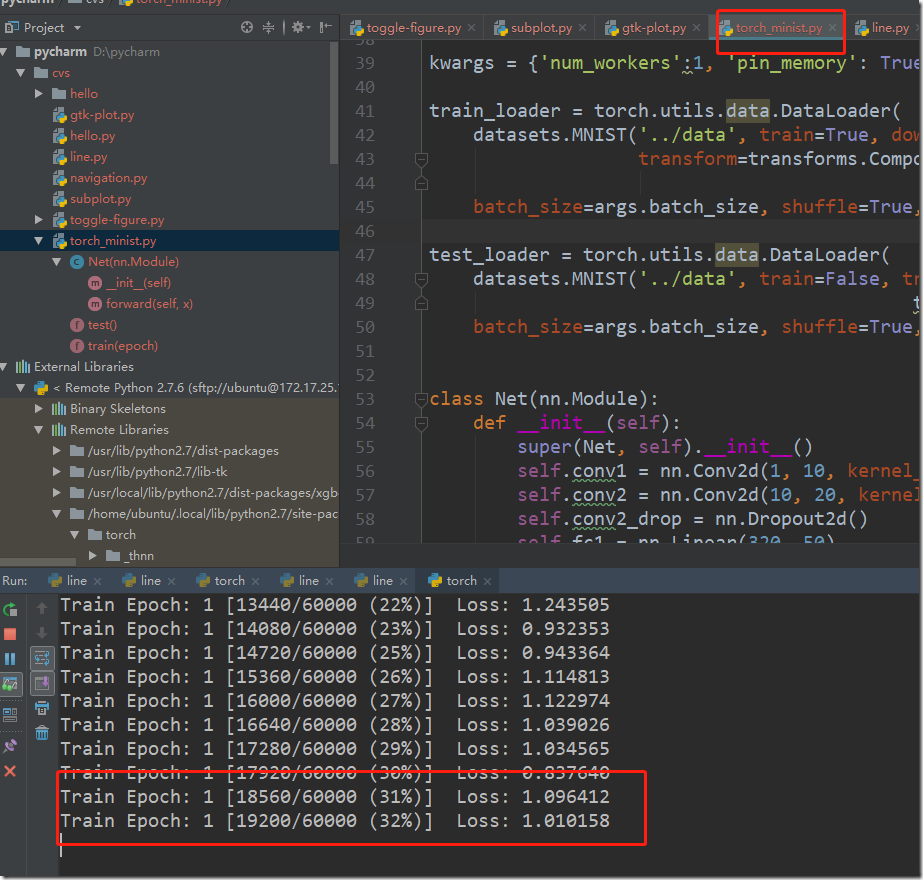
然后设置torch_minst.py运行时的环境变量DISPLAY=localhost:11.0,点击run按钮可以看到运行效果:
图终于截完。


