1.PIL简介
Python Imaging Library(缩写为PIL)(在新的版本中被称为Pillow)是Python编程语言的开源库,它增加了对打开,操作和保存许多不同图像文件格式的支持。它适用于Windows,Mac OS X和Linux。可惜的是它在2009年停止更新了。
不过,幸运的是一个名为Pillow的后继项目已经分叉了PIL存储库并添加了Python 3.x支持。这个分支已被用作Linux发行版中原始PIL的替代品,包括Debian 和Ubuntu。
PIL库由于它对图像处理的优秀,已经成为Python平台事实上的图像处理标准库了。
2.PIL(Pillow)的用法
2.1 PIL库Image类
from PIL import Image #Image 是 PIL 最重要的类,使用前要先引用
而 open()是 Image 类中最常用的模块,其功能为打开一个图片文件。使用如下:
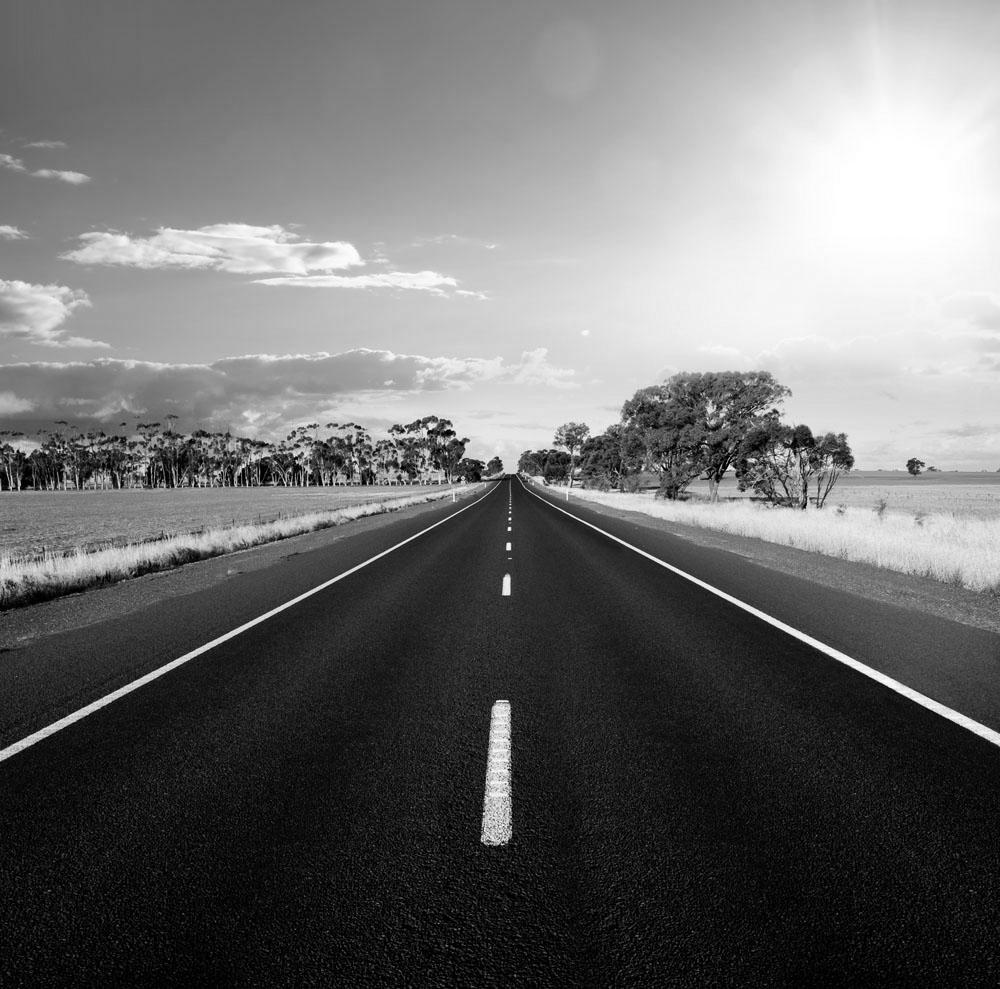
>>> from PIL import Image
>>> im = Image.open("rode。jpg")     #打开图片 rode。jpg
如果读取图片成功,可以试着对其进行一些操作。不妨我们试着输出图片的一些信息:
>>> from __future__ import print_function      #引用格式识别函数
>>> print(im.format, im.size, im.mode)         #输出图片的格式,大小,图像色彩模式(彩色为 RGB,灰色为 L)
还有一个常用功能,显示图片 show()。
im.show() #显示图片
对GIF图提取各帧的图像,并保存图片。
from PIL import Image
import os

gifFileName = 'hand.gif'

im = Image.open(gifFileName)            #使用Image模块的open()方法打开gif动态图像时,默认是第一帧
pngDir = gifFileName[:-4]
os.mkdir(pngDir)                        #创建存放每帧图片的文件夹

try:
  while True:

    current = im.tell()                #保存当前帧图片
  im.save(pngDir+'/'+str(current)+'.png')
  im.seek(current+1)           #获取下一帧的图片
except EOFError:

  pass
2.2 对图片进行一些处理
from PIL import Image

im = Image.open("rode.jpg")

r, g, b = im.split()

om = Image.merge("RGB",(b, g, r))    #让图片变为蓝色色调

om.save('rodeBGR.jpg')


im = Image.open("rode.jpg").convert("L")   #由RGB色彩体系转变为灰白体系

im.save('rodegray.jpg')


im = Image.open("rodegray.jpg")

im.thumbnail((628,628))                           #改变图片的大小

im.save("rodemini.jpg")

原图

变为蓝调
变为灰白

缩小
要对图片做进一步处理,就要引用 ImageFilter 类了
from PIL import ImageFilter

im = Image.open('rode.jpg')

om = im.filter(ImageFilter.CONTOUR)              #轮廓效果

om.save('rodeContour.jpg')


om = im.filter(ImageFilter.BLUR)                  #模糊化处理

om.save('rodeBlur.jpg')


im = Image.open('rode.jpg')

om = im.filter(ImageFilter.EMBOSS)               #浮雕效果

om.save('rodeEmboss.jpg')

原图
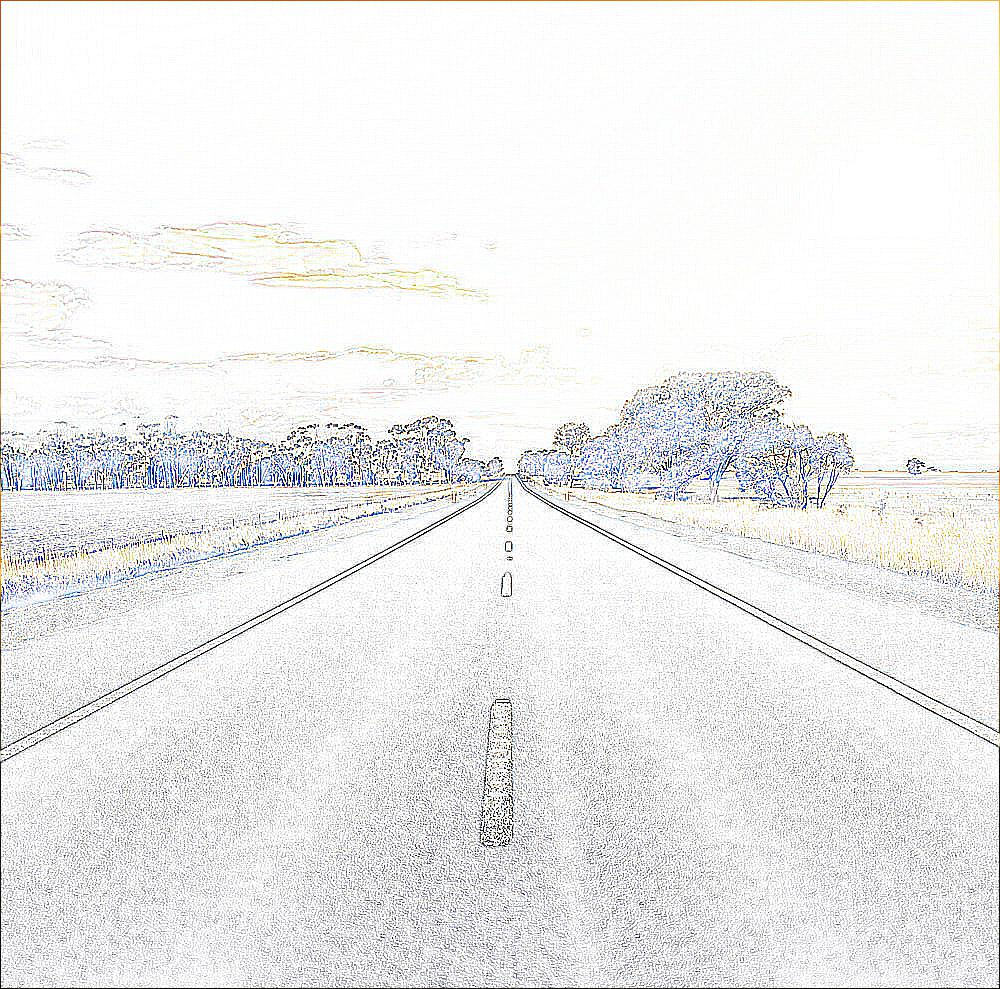
轮廓

模糊化
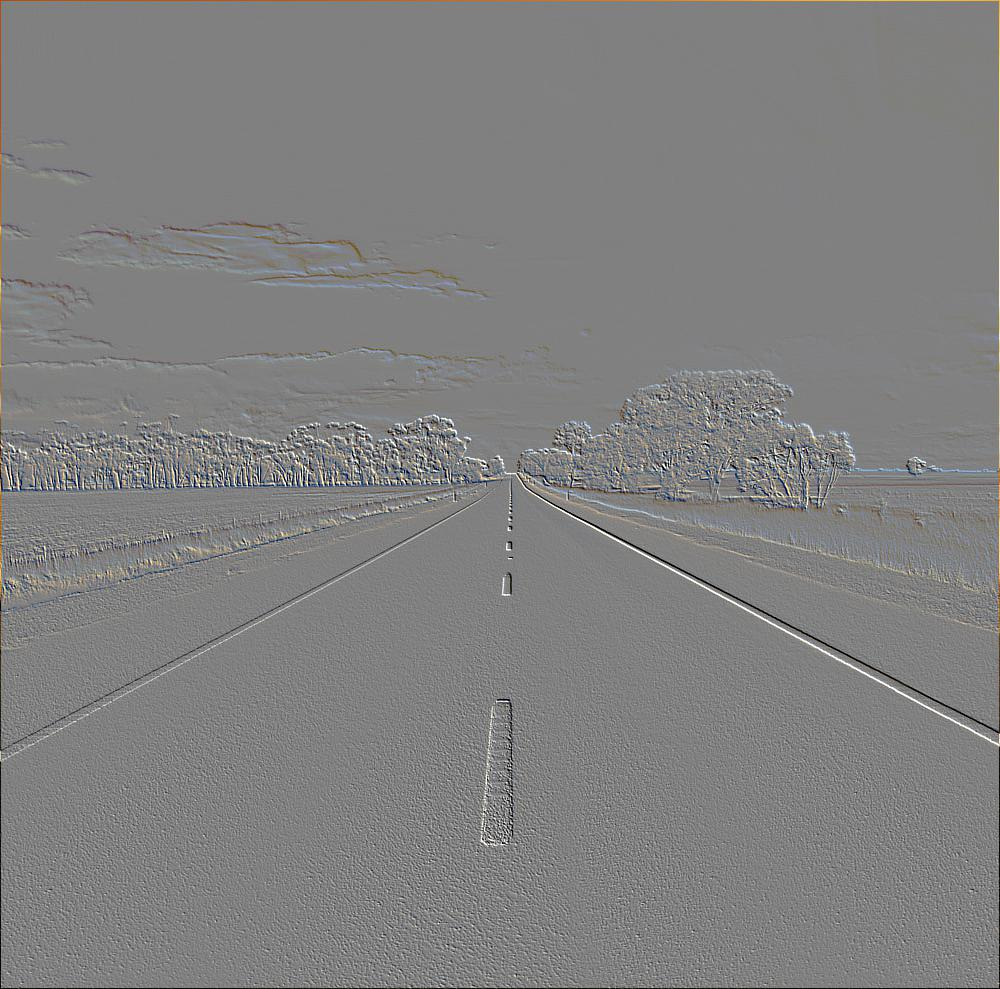
浮雕
现在我们把上面的图片生成一个GIF图吧。先上代码:
import matplotlib.pyplot as plt
import imageio,os

images = []
filenames=sorted((fn for fn in os.listdir('.') if fn.endswith('.jpg')))

for filename in filenames:
    images.append(imageio.imread(filename))
imageio.mimsave('gif3.gif', images,duration=1)
最后效果: