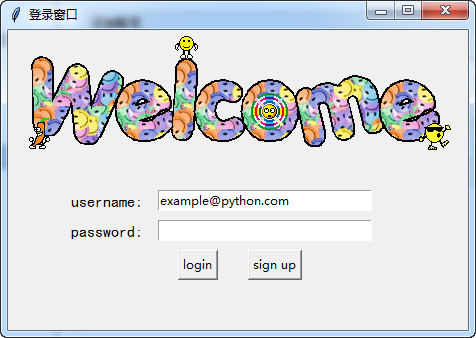
最终的运行效果图(程序见序号6.2):
#!/usr/bin/env python
# -*- coding:utf-8 -*-
# ------------------------------------------------------------
#
# 参考资料:
# 用 python 和 tkinter 做简单的窗口视窗 - 网易云课堂
# https://study.163.com/course/courseLearn.htm?courseId=1003216011#/learn/video?lessonId=1003649337&courseId=1003216011
#
#
# ------------------------------------------------------------
# ******************** class13and14and15_登录窗口 *******************
# ******************** class13and14and15_登录窗口 *******************
# =====>>>>>>内容概览
# =====>>>>>>内容概览# class13and14and15_登录窗口
'''
# ------------------------------------------------------------
# # 1、生成对应窗口,并加载图片
# ------------------------------------------------------------# ------------------------------------------------------------
# # 2、放置登录的标签
# # # 已经实现功能:1、生成对应窗口,并加载图片
# ------------------------------------------------------------# ------------------------------------------------------------
# # 3、放置登录输入信息栏
# # # 已经实现功能:
# # # 1、生成对应窗口,并加载图片
# # # 2、放置登录的标签
# ------------------------------------------------------------# ------------------------------------------------------------
# # 4、放置登录按钮
# # # 已经实现功能:
# # # 1、生成对应窗口,并加载图片
# # # 2、放置登录的标签
# # # 3、放置登录输入信息栏
# ------------------------------------------------------------# ------------------------------------------------------------
# # 5、绑定login 按钮的相关功能
# # # 已经实现功能:
# # # 1、生成对应窗口,并加载图片
# # # 2、放置登录的标签
# # # 3、放置登录输入信息栏
# # # 4、放置登录按钮
# ------------------------------------------------------------# ------------------------------------------------------------
# # 6、绑定sign up 按钮的功能
# # # 已经实现功能:
# # # 1、生成对应窗口,并加载图片
# # # 2、放置登录的标签
# # # 3、放置登录输入信息栏
# # # 4、放置登录按钮
# # # 5、绑定login 按钮的相关功能
# ------------------------------------------------------------# ------------------------------------------------------------
# # 6.1、绑定sign up 按钮的功能, 建立新的sign up窗口
# # # 已经实现功能:
# # # 1、生成对应窗口,并加载图片
# # # 2、放置登录的标签
# # # 3、放置登录输入信息栏
# # # 4、放置登录按钮
# # # 5、绑定login 按钮的相关功能
# # # 6、绑定sign up 按钮的功能
# ------------------------------------------------------------# ------------------------------------------------------------
# # 6.2、完成登录窗口设计
# # # 已经实现功能:
# # # 1、生成对应窗口,并加载图片
# # # 2、放置登录的标签
# # # 3、放置登录输入信息栏
# # # 4、放置登录按钮
# # # 5、绑定login 按钮的相关功能
# # # 6、绑定sign up 按钮的功能
# # # 6.1、绑定sign up 按钮的功能, 建立新的sign up窗口
# ------------------------------------------------------------
'''
# ------------------------------------------------分割线-------------------------------------------------
# ------------------------------------------------分割线-------------------------------------------------
# ------------------------------------------------分割线-------------------------------------------------
# ------------------------------------------------分割线-------------------------------------------------
'''
# ------------------------------------------------------------
# # 1、生成对应窗口,并加载图片
# ------------------------------------------------------------
'''

#
# import tkinter as tk
#
# window = tk.Tk()
# window.title("登录窗口")
# window.maxsize(460, 300)
# window.minsize(460, 300)
# # welcom image
# canvas = tk.Canvas(window, width=500, height=200)
# image_file = tk.PhotoImage(file='welcome.gif')
# # 10, 0 表示锚点的横,纵位置;     anchor='nw'表示锚点的位置是左上角
# image = canvas.create_image(10, 0, anchor='nw', image=image_file)
# canvas.pack(side='top')
#
# window.mainloop()


# ------------------------------------------------分割线-------------------------------------------------
'''
# ------------------------------------------------------------
# # 2、放置登录的标签
# # # 已经实现功能:1、生成对应窗口,并加载图片
# ------------------------------------------------------------
'''
# import tkinter as tk
#
# window = tk.Tk()
# window.title("登录窗口")
# window.maxsize(460, 300)
# window.minsize(460, 300)
# # welcom image
# canvas = tk.Canvas(window, width=500, height=200)
# image_file = tk.PhotoImage(file='welcome.gif')
# # 10, 0 表示锚点的横,纵位置;     anchor='nw'表示锚点的位置是左上角
# image = canvas.create_image(10, 0, anchor='nw', image=image_file)
# canvas.pack(side='top')
#
# tk.Label(window, text='username', font=('黑体', 12)).place(x=60, y=160, anchor='nw')
# tk.Label(window, text='password', font=('黑体', 12)).place(x=60, y=190, anchor='nw')
#
# window.mainloop()
#


# ------------------------------------------------分割线-------------------------------------------------
'''
# ------------------------------------------------------------
# # 3、放置登录输入信息栏
# # # 已经实现功能:
# # # 1、生成对应窗口,并加载图片
# # # 2、放置登录的标签
# ------------------------------------------------------------
'''
# import tkinter as tk
#
# window = tk.Tk()
# window.title("登录窗口")
# window.maxsize(460, 300)
# window.minsize(460, 300)
# # welcom image
# canvas = tk.Canvas(window, width=500, height=200)
# image_file = tk.PhotoImage(file='welcome.gif')
# # 10, 0 表示锚点的横,纵位置;     anchor='nw'表示锚点的位置是左上角
# image = canvas.create_image(10, 0, anchor='nw', image=image_file)
# canvas.pack(side='top')
#
# tk.Label(window, text='username', font=('黑体', 12)).place(x=60, y=160, anchor='nw')
# tk.Label(window, text='password', font=('黑体', 12)).place(x=60, y=190, anchor='nw')
#
# # 设置存储的变量
# username = tk.StringVar()
# password = tk.StringVar()
# # 设置登录的输入框,并获取信息
# entry_username = tk.Entry(window, textvariable=username, width=30).place(x=150, y=160, anchor='nw')
# entry_password = tk.Entry(window, textvariable=password, width=30, show='*').place(x=150, y=190, anchor='nw')
# # 初始化 username 的信息
# username.set('example@python.com')
#
# window.mainloop()
#
#


# ------------------------------------------------分割线-------------------------------------------------
'''
# ------------------------------------------------------------
# # 4、放置登录按钮
# # # 已经实现功能:
# # # 1、生成对应窗口,并加载图片
# # # 2、放置登录的标签
# # # 3、放置登录输入信息栏
# ------------------------------------------------------------
'''
# import tkinter as tk
#
# window = tk.Tk()
# window.title("登录窗口")
# window.maxsize(460, 300)
# window.minsize(460, 300)
# # welcom image
# canvas = tk.Canvas(window, width=500, height=200)
# image_file = tk.PhotoImage(file='welcome.gif')
# # 10, 0 表示锚点的横,纵位置;     anchor='nw'表示锚点的位置是左上角
# image = canvas.create_image(10, 0, anchor='nw', image=image_file)
# canvas.pack(side='top')
#
# tk.Label(window, text='username', font=('黑体', 12)).place(x=60, y=160, anchor='nw')
# tk.Label(window, text='password', font=('黑体', 12)).place(x=60, y=190, anchor='nw')
#
# # 设置存储的变量
# username = tk.StringVar()
# password = tk.StringVar()
# # 设置登录的输入框,并获取信息
# entry_username = tk.Entry(window, textvariable=username, width=30).place(x=150, y=160, anchor='nw')
# entry_password = tk.Entry(window, textvariable=password, width=30, show='*').place(x=150, y=190, anchor='nw')
# # 初始化 username 的信息
# username.set('example@python.com')
#
# tk.Button(text='login').place(x=170, y=220, anchor='nw')
# tk.Button(text='sign up').place(x=240, y=220, anchor='nw')
#
# window.mainloop()


# ------------------------------------------------分割线-------------------------------------------------
'''
# ------------------------------------------------------------
# # 5、绑定login 按钮的相关功能
# # # 已经实现功能:
# # # 1、生成对应窗口,并加载图片
# # # 2、放置登录的标签
# # # 3、放置登录输入信息栏
# # # 4、放置登录按钮
# ------------------------------------------------------------
'''
# import tkinter as tk
# from tkinter import messagebox
# import pickle
#
# window = tk.Tk()
# window.title("登录窗口")
# window.maxsize(460, 300)
# window.minsize(460, 300)
# # welcom image
# canvas = tk.Canvas(window, width=500, height=200)
# image_file = tk.PhotoImage(file='welcome.gif')
# # 10, 0 表示锚点的横,纵位置;     anchor='nw'表示锚点的位置是左上角
# image = canvas.create_image(10, 0, anchor='nw', image=image_file)
# canvas.pack(side='top')
#
# tk.Label(window, text='username', font=('黑体', 12)).place(x=60, y=160, anchor='nw')
# tk.Label(window, text='password', font=('黑体', 12)).place(x=60, y=190, anchor='nw')
#
# # 设置存储的变量
# username = tk.StringVar()
# password = tk.StringVar()
# # 设置登录的输入框,并获取信息
# entry_username = tk.Entry(window, textvariable=username, width=30).place(x=150, y=160, anchor='nw')
# entry_password = tk.Entry(window, textvariable=password, width=30, show='*').place(x=150, y=190, anchor='nw')
# # 初始化 username 的信息
# username.set('example@python.com')
#
# def usr_login():
#     usr_name = username.get()
#     usr_password = password.get()
#     try:
#         with open('usrs_info.pickle', 'rb') as usr_file:
#             usrs_info = pickle.load(usr_file)
#     except FileNotFoundError:
#         usrs_info = {'admin': 'admin'}
#         pickle.dump(usrs_info, usr_file)
#
#     if usr_name in usrs_info:
#         if usr_password == usrs_info[usr_name]:
#             messagebox.showinfo(title='Welcom', message='Welcome to log in!
'+ usr_name)
#         else:
#             messagebox.showerror(title='Error', message='Password Error!
Try again!!')
#     else:
#         is_sign_up = messagebox.askyesno(title='Ask', message='You have not sign up yet.
Sign up now?')
#         if is_sign_up is True:
#             usr_sign_up()
#
#
# def usr_sign_up():
#     pass
#
# tk.Button(text='login', command=usr_login).place(x=170, y=220, anchor='nw')
# tk.Button(text='sign up', command=usr_sign_up).place(x=240, y=220, anchor='nw')
#
# window.mainloop()


# ------------------------------------------------分割线-------------------------------------------------
'''
# ------------------------------------------------------------
# # 6、绑定sign up 按钮的功能
# # # 已经实现功能:
# # # 1、生成对应窗口,并加载图片
# # # 2、放置登录的标签
# # # 3、放置登录输入信息栏
# # # 4、放置登录按钮
# # # 5、绑定login 按钮的相关功能
# ------------------------------------------------------------
'''
# import tkinter as tk
# from tkinter import messagebox
# import pickle
#
# window = tk.Tk()
# window.title("登录窗口")
# window.maxsize(460, 300)
# window.minsize(460, 300)
# # welcom image
# canvas = tk.Canvas(window, width=500, height=200)
# image_file = tk.PhotoImage(file='welcome.gif')
# # 10, 0 表示锚点的横,纵位置;     anchor='nw'表示锚点的位置是左上角
# image = canvas.create_image(10, 0, anchor='nw', image=image_file)
# canvas.pack(side='top')
#
# tk.Label(window, text='username', font=('黑体', 12)).place(x=60, y=160, anchor='nw')
# tk.Label(window, text='password', font=('黑体', 12)).place(x=60, y=190, anchor='nw')
#
# # 设置存储的变量
# username = tk.StringVar()
# password = tk.StringVar()
# # 设置登录的输入框,并获取信息
# entry_username = tk.Entry(window, textvariable=username, width=30).place(x=150, y=160, anchor='nw')
# entry_password = tk.Entry(window, textvariable=password, width=30, show='*').place(x=150, y=190, anchor='nw')
# # 初始化 username 的信息
# username.set('example@python.com')
#
# def usr_login():
#     usr_name = username.get()
#     usr_password = password.get()
#     try:
#         with open('usrs_info.pickle', 'rb') as usr_file:
#             usrs_info = pickle.load(usr_file)
#     except FileNotFoundError:
#         usrs_info = {'admin': 'admin'}
#         pickle.dump(usrs_info, usr_file)
#
#     if usr_name in usrs_info:
#         if usr_password == usrs_info[usr_name]:
#             messagebox.showinfo(title='Welcom', message='Welcome to log in!
'+ usr_name)
#         else:
#             messagebox.showerror(title='Error', message='Password Error!
Try again!!')
#     else:
#         is_sign_up = messagebox.askyesno(title='Ask', message='You have not sign up yet.
Sign up now?')
#         if is_sign_up is True:
#             usr_sign_up()
#
#
# def usr_sign_up():
#     window_sign_up = tk.Toplevel(window)
#     window_sign_up.title('Sign up window')
#     window_sign_up.maxsize(460, 300)
#     window_sign_up.minsize(460, 300)
#
#
#
#
# tk.Button(text='login', command=usr_login).place(x=170, y=220, anchor='nw')
# tk.Button(text='sign up', command=usr_sign_up).place(x=240, y=220, anchor='nw')
#
# window.mainloop()


# ------------------------------------------------分割线-------------------------------------------------
'''
# ------------------------------------------------------------
# # 6.1、绑定sign up 按钮的功能, 建立新的sign up窗口
# # # 已经实现功能:
# # # 1、生成对应窗口,并加载图片
# # # 2、放置登录的标签
# # # 3、放置登录输入信息栏
# # # 4、放置登录按钮
# # # 5、绑定login 按钮的相关功能
# # # 6、绑定sign up 按钮的功能
# ------------------------------------------------------------
'''
# import tkinter as tk
# from tkinter import messagebox
# import pickle
#
# window = tk.Tk()
# window.title("登录窗口")
# window.maxsize(460, 300)
# window.minsize(460, 300)
# # welcom image
# canvas = tk.Canvas(window, width=500, height=200)
# image_file = tk.PhotoImage(file='welcome.gif')
# # 10, 0 表示锚点的横,纵位置;     anchor='nw'表示锚点的位置是左上角
# image = canvas.create_image(10, 0, anchor='nw', image=image_file)
# canvas.pack(side='top')
#
# tk.Label(window, text='username:', font=('黑体', 12)).place(x=60, y=160, anchor='nw')
# tk.Label(window, text='password:', font=('黑体', 12)).place(x=60, y=190, anchor='nw')
#
# # 设置存储的变量
# username = tk.StringVar()
# password = tk.StringVar()
# # 设置登录的输入框,并获取信息
# entry_username = tk.Entry(window, textvariable=username, width=30).place(x=150, y=160, anchor='nw')
# entry_password = tk.Entry(window, textvariable=password, width=30, show='*').place(x=150, y=190, anchor='nw')
# # 初始化 username 的信息
# username.set('example@python.com')
#
# def usr_login():
#     usr_name = username.get()
#     usr_password = password.get()
#     try:
#         with open('usrs_info.pickle', 'rb') as usr_file:
#             usrs_info = pickle.load(usr_file)
#     except FileNotFoundError:
#         usrs_info = {'admin': 'admin'}
#         pickle.dump(usrs_info, usr_file)
#
#     if usr_name in usrs_info:
#         if usr_password == usrs_info[usr_name]:
#             messagebox.showinfo(title='Welcom', message='Welcome to log in!
'+ usr_name)
#         else:
#             messagebox.showerror(title='Error', message='Password Error!
Try again!!')
#     else:
#         is_sign_up = messagebox.askyesno(title='Ask', message='You have not sign up yet.
Sign up now?')
#         if is_sign_up is True:
#             usr_sign_up()
#
#
# def usr_sign_up():
#     # 设置窗口
#     window_sign_up = tk.Toplevel(window)
#     window_sign_up.title('Sign up window')
#     window_sign_up.maxsize(460, 150)
#     window_sign_up.minsize(460, 150)
#
#     # 设置标签
#     tk.Label(window_sign_up, text='username:', font=('黑体', 12)).place(x=30, y=30, anchor='nw')
#     tk.Label(window_sign_up, text='password:', font=('黑体', 12)).place(x=30, y=60, anchor='nw')
#     tk.Label(window_sign_up, text='confirm password:', font=('黑体', 12)).place(x=30, y=90, anchor='nw')
#
#     # 设置输入框
#     # 设置存储的变量
#     usr_username = tk.StringVar()
#     usr_password1 = tk.StringVar()
#     usr_password2 = tk.StringVar()
#     # 设置登录的输入框,并获取信息
#     entry_username = tk.Entry(window_sign_up, textvariable=usr_username, width=30).place(x=170, y=30, anchor='nw')
#     entry_password1 = tk.Entry(window_sign_up, textvariable=usr_password1, width=30, show='*').place(x=170, y=60, anchor='nw')
#     entry_password2 = tk.Entry(window_sign_up, textvariable=usr_password2, width=30, show='*').place(x=170, y=90, anchor='nw')
#     # 初始化 username 的信息
#     usr_username.set('example@python.com')
#
#
#
#
# tk.Button(text='login', command=usr_login).place(x=170, y=220, anchor='nw')
# tk.Button(text='sign up', command=usr_sign_up).place(x=240, y=220, anchor='nw')
#
# window.mainloop()
#


# ------------------------------------------------分割线-------------------------------------------------
'''
# ------------------------------------------------------------
# # 6.2、完成登录窗口设计
# # # 已经实现功能:
# # # 1、生成对应窗口,并加载图片
# # # 2、放置登录的标签
# # # 3、放置登录输入信息栏
# # # 4、放置登录按钮
# # # 5、绑定login 按钮的相关功能
# # # 6、绑定sign up 按钮的功能
# # # 6.1、绑定sign up 按钮的功能, 建立新的sign up窗口
# ------------------------------------------------------------
'''
import tkinter as tk
from tkinter import messagebox
import pickle

window = tk.Tk()
window.title("登录窗口")
window.maxsize(460, 300)
window.minsize(460, 300)
# welcom image
canvas = tk.Canvas(window, width=500, height=200)
image_file = tk.PhotoImage(file='welcome.gif')
# 10, 0 表示锚点的横,纵位置;     anchor='nw'表示锚点的位置是左上角
image = canvas.create_image(10, 0, anchor='nw', image=image_file)
canvas.pack(side='top')

tk.Label(window, text='username:', font=('黑体', 12)).place(x=60, y=160, anchor='nw')
tk.Label(window, text='password:', font=('黑体', 12)).place(x=60, y=190, anchor='nw')

# 设置存储的变量
username = tk.StringVar()
password = tk.StringVar()
# 设置登录的输入框,并获取信息
entry_username = tk.Entry(window, textvariable=username, width=30).place(x=150, y=160, anchor='nw')
entry_password = tk.Entry(window, textvariable=password, width=30, show='*').place(x=150, y=190, anchor='nw')
# 初始化 username 的信息
username.set('example@python.com')

def usr_login():
    usr_name = username.get()
    usr_password = password.get()
    try:
        with open('usrs_info.pickle', 'rb') as usr_file:
            usrs_info = pickle.load(usr_file)
    except FileNotFoundError:
        usrs_info = {'admin': 'admin'}
        pickle.dump(usrs_info, usr_file)

    if usr_name in usrs_info:
        if usr_password == usrs_info[usr_name]:
            messagebox.showinfo(title='Welcom', message='Welcome to log in!
'+ usr_name)
        else:
            messagebox.showerror(title='Error', message='Password Error!
Try again!!')
    else:
        is_sign_up = messagebox.askyesno(title='Ask', message='You have not sign up yet.
Sign up now?')
        if is_sign_up is True:
            usr_sign_up()


def usr_sign_up():
    # 设置窗口
    window_sign_up = tk.Toplevel(window)
    window_sign_up.title('Sign up window')
    window_sign_up.maxsize(460, 180)
    window_sign_up.minsize(460, 180)

    # 设置标签
    tk.Label(window_sign_up, text='username:', font=('黑体', 12)).place(x=30, y=30, anchor='nw')
    tk.Label(window_sign_up, text='password:', font=('黑体', 12)).place(x=30, y=60, anchor='nw')
    tk.Label(window_sign_up, text='confirm password:', font=('黑体', 12)).place(x=30, y=90, anchor='nw')

    # 设置输入框
    # 设置存储的变量
    usr_username = tk.StringVar()
    usr_password1 = tk.StringVar()
    usr_password2 = tk.StringVar()
    # 设置登录的输入框,并获取信息
    usr_entry_username = tk.Entry(window_sign_up, textvariable=usr_username, width=40).place(x=170, y=30, anchor='nw')
    usr_entry_password1 = tk.Entry(window_sign_up, textvariable=usr_password1, width=40, show='*').place(x=170, y=60, anchor='nw')
    usr_entry_password2 = tk.Entry(window_sign_up, textvariable=usr_password2, width=40, show='*').place(x=170, y=90, anchor='nw')
    # 初始化 username 的信息
    usr_username.set('example@python.com')
    def new_sign_up():
        new_name = usr_username.get()
        new_password = usr_password1.get()
        new_password_confirm = usr_password2.get()
        # 打开配置文件,查看注册的信息是否在文件中
        with open('usrs_info.pickle', 'rb') as usr_file:
            exist_usr_info = pickle.load(usr_file)
        # 对比用户名是否已经储存在文件中
        if new_name in exist_usr_info :
            messagebox.showerror(title='Error',message='The user has already signed up!')

        else:
            if new_password != new_password_confirm:
                messagebox.showerror(title='Error', message='Password and confirm password must be the same!')
            else:
                exist_usr_info[new_name] = new_password
                with open('usrs_info.pickle', 'wb') as usr_file:
                    # 写入到文件中
                    pickle.dump(exist_usr_info, usr_file)
                    messagebox.showinfo(title='Welcome', message='You have successfully signed up!')
                    window_sign_up.destroy()


    # 设置注册的按钮
    tk.Button(window_sign_up, text='sign up', command=new_sign_up).place(x=220, y=120, anchor='nw')

tk.Button(text='login', command=usr_login).place(x=170, y=220, anchor='nw')
tk.Button(text='sign up', command=usr_sign_up).place(x=240, y=220, anchor='nw')

window.mainloop()
最终的运行效果图(程序见序号6.2):