原文首发于微信公众号:躬行之(jzman-blog)
Android 开发中经常考虑的一个问题就是 OOM(Out Of Memory),也就是内存溢出,一方面大量加载图片时有可能出现 OOM, 通过采样压缩图片可避免 OOM,另一方面,如一张 1024 x 768 像素的图像被缩略显示在 128 x 96 的 ImageView 中,这种做法显然是不值得的,可通过采样加载一个合适的缩小版本到内存中,以减小内存的消耗,Bitmap 的优化主要有两个方面如下,一是有效的处理较大的位图,二是位图的缓存,其中位图缓存对应文章如下:
这篇文章主要侧重于如何有效的处理较大的位图。
此外,在 Android 中按照位图采样的方法加载一个缩小版本到内存中应该考虑因素?
- 估计加载完整图像所需要的内存
- 加载这个图片所需的空间带给其程序的其他内存需求
- 加载图片的目标 ImageView 或 UI 组件的尺寸
- 当前设备的屏幕尺寸或密度
位图采样
图像有不同的形状的和大小,读取较大的图片时会耗费内存。读取一个位图的尺寸和类型,为了从多种资源创建一个位图,BitmapFactory 类提供了许多解码的方法,根据图像数据资源选择最合适的解码方法,这些方法试图请求分配内存来构造位图,因此很容易导致 OOM 异常。每种类型的解码方法都有额外的特征可以让你通过 BitMapFactory.Options 类指定解码选项。当解码时设置 inJustDecodeBounds 为true,可在不分配内存之前读取图像的尺寸和类型,下面的代码实现了简单的位图采样:
/**
  * 位图采样
  * @param res
  * @param resId
  * @return
  */
public Bitmap decodeSampleFromResource(Resources res, int resId){
    //BitmapFactory创建设置选项
    BitmapFactory.Options options = new BitmapFactory.Options();
    //设置采样比例
    options.inSampleSize = 200;
    Bitmap bitmap = BitmapFactory.decodeResource(res,resId,options);
    return bitmap;
}
注意:其他 decode... 方法与 decodeResource 类似,这里都以 decodeRedource 为例。
实际使用时,必须根据具体的宽高要求计算合适的 inSampleSize 来进行位图的采样,比如,将一个分辨率为 2048 x 1536 的图像使用 inSampleSize 值为 4 去编码产生一个 512 x 384 的图像,这里假设位图配置为 ARGB_8888,加载到内存中仅仅是 0.75M 而不是原来的 12M,关于图像所占内存的计算将在下文中介绍,下面是根据所需宽高进行计算采样比例的计算方法:
/**
 * 1.计算位图采样比例
 *
 * @param option
 * @param reqWidth
 * @param reqHeight
 * @return
 */
public int calculateSampleSize(BitmapFactory.Options option, int reqWidth, int reqHeight) {
    //获得图片的原宽高
    int width = option.outWidth;
    int height = option.outHeight;

    int inSampleSize = 1;
    if (width > reqWidth || height > reqHeight) {
        if (width > height) {
            inSampleSize = Math.round((float) height / (float) reqHeight);
        } else {
            inSampleSize = Math.round((float) width / (float) reqWidth);
        }
    }
    return inSampleSize;
}

/**
 * 2.计算位图采样比例
 * @param options
 * @param reqWidth
 * @param reqHeight
 * @return
 */
public int calculateSampleSize1(BitmapFactory.Options options, int reqWidth, int reqHeight) {

    //获得图片的原宽高
    int height = options.outHeight;
    int width = options.outWidth;

    int inSampleSize = 1;
    if (height > reqHeight || width > reqWidth) {
        // 计算出实际宽高和目标宽高的比率
        final int heightRatio = Math.round((float) height / (float) reqHeight);
        final int widthRatio = Math.round((float) width / (float) reqWidth);
        /**
         * 选择宽和高中最小的比率作为inSampleSize的值,这样可以保证最终图片的宽和高
         * 一定都会大于等于目标的宽和高。
         */
        inSampleSize = heightRatio < widthRatio ? heightRatio : widthRatio;
    }
    return inSampleSize;
}
获得采样比例之后就可以根据所需宽高处理较大的图片了,下面是根据所需宽高计算出来的 inSampleSize 对较大位图进行采样:
/**
 * 位图采样
 * @param resources
 * @param resId
 * @param reqWidth
 * @param reqHeight
 * @return
 */
public Bitmap decodeSampleFromBitmap(Resources resources, int resId, int reqWidth, int reqHeight) {
    //创建一个位图工厂的设置选项
    BitmapFactory.Options options = new BitmapFactory.Options();
    //设置该属性为true,解码时只能获取width、height、mimeType
    options.inJustDecodeBounds = true;
    //解码
    BitmapFactory.decodeResource(resources, resId, options);
    //计算采样比例
    int inSampleSize = options.inSampleSize = calculateSampleSize(options, reqWidth, reqHeight);
    //设置该属性为false,实现真正解码
    options.inJustDecodeBounds = false;
    //解码
    Bitmap bitmap = BitmapFactory.decodeResource(resources, resId, options);
    return bitmap;
}
在解码过程中使用了 BitmapFactory.decodeResource() 方法,具体如下:
/**
 * 解码指定id的资源文件
 */
public static Bitmap decodeResource(Resources res, int id, BitmapFactory.Options opts) {
    ...
    /**
     * 根据指定的id打开数据流读取资源,同时为TypeValue进行复制获取原始资源的density等信息
     * 如果图片在drawable-xxhdpi,那么density为480dpi
     */
    is = res.openRawResource(id, value);
    //从输入流解码出一个Bitmap对象,以便根据opts缩放相应的位图
    bm = decodeResourceStream(res, value, is, null, opts);
    ...
}
显然真正解码的方法应该是 decodeResourceStream() 方法,具体如下:
/**
 * 从输入流中解码出一个Bitmap,并对该Bitmap进行相应的缩放
 */
public static Bitmap decodeResourceStream(Resources res, TypedValue value,
                     InputStream is, Rect pad, BitmapFactory.Options opts) {

    if (opts == null) {
        //创建一个默认的Option对象
        opts = new BitmapFactory.Options();
    }

    /**
     * 如果设置了inDensity的值,则按照设置的inDensity来计算
     * 否则将资源文件夹所表示的density设置inDensity
     */
    if (opts.inDensity == 0 && value != null) {
        final int density = value.density;
        if (density == TypedValue.DENSITY_DEFAULT) {
            opts.inDensity = DisplayMetrics.DENSITY_DEFAULT;
        } else if (density != TypedValue.DENSITY_NONE) {
            opts.inDensity = density;
        }
    }

    /**
     * 同理,也可以通过BitmapFactory.Option对象设置inTargetDensity
     * inTargetDensity 表示densityDpi,也就是手机的density
     * 使用DisplayMetrics对象.densityDpi获得
     */
    if (opts.inTargetDensity == 0 && res != null) {
        opts.inTargetDensity = res.getDisplayMetrics().densityDpi;
    }
    //decodeStream()方法中调用了native方法
    return decodeStream(is, pad, opts);
}
设置完 inDensity 和 inTargetDensity 之后调用了 decodeStream() 方法,该方法返回完全解码后的 Bitmap 对象,具体如下:
/**
 * 返回解码后的Bitmap,
 */
public static Bitmap decodeStream(InputStream is, Rect outPadding, BitmapFactory.Options opts) {
    ...
    bm = nativeDecodeAsset(asset, outPadding, opts);
    //调用了native方法:nativeDecodeStream(is, tempStorage, outPadding, opts);
    bm = decodeStreamInternal(is, outPadding, opts);
    Set the newly decoded bitmap's density based on the Options
    //根据Options设置最新解码的Bitmap
    setDensityFromOptions(bm, opts);
    ...
    return bm;
}
显然,decodeStream() 方法主要调用了本地方法完成 Bitmap 的解码,跟踪源码发现 nativeDecodeAsset() 和 nativeDecodeStream() 方法都调用了 dodecode() 方法,doDecode 方法关键代码如下:
/**
 * BitmapFactory.cpp 源码
 */
static jobject doDecode(JNIEnv*env, SkStreamRewindable*stream, jobject padding, jobject options) {
    ...
    if (env -> GetBooleanField(options, gOptions_scaledFieldID)) {
        const int density = env -> GetIntField(options, gOptions_densityFieldID);
        const int targetDensity = env -> GetIntField(options, gOptions_targetDensityFieldID);
        const int screenDensity = env -> GetIntField(options, gOptions_screenDensityFieldID);
        if (density != 0 && targetDensity != 0 && density != screenDensity) {
            //计算缩放比例
            scale = (float) targetDensity / density;
        }
    }
    ...
    //原始Bitmap
    SkBitmap decodingBitmap;
    ...

    //原始位图的宽高
    int scaledWidth = decodingBitmap.width();
    int scaledHeight = decodingBitmap.height();

    //综合density和targetDensity计算最终宽高
    if (willScale && decodeMode != SkImageDecoder::kDecodeBounds_Mode) {
        scaledWidth = int(scaledWidth * scale + 0.5f);
        scaledHeight = int(scaledHeight * scale + 0.5f);
    }
    ...
    //x、y方向上的缩放比例,大概与scale相等
    const float sx = scaledWidth / float(decodingBitmap.width());
    const float sy = scaledHeight / float(decodingBitmap.height());
    ...
    //将canvas放大scale,然后绘制Bitmap
    SkCanvas canvas (outputBitmap);
    canvas.scale(sx, sy);
    canvas.drawARGB(0x00, 0x00, 0x00, 0x00);
    canvas.drawBitmap(decodingBitmap, 0.0f, 0.0f, & paint);
}
上面代码能看到缩放比例的计算,以及 density 与 targetDensity 对 Bitmap 宽高的影响,实际上间接影响了 Bitmap 在所占内存的大小,这个问题会在下文中举例说明,注意 density 与当前 Bitmap 所对应资源文件(图片)的目录有关,如有一张图片位于 drawable-xxhdpi 目录中,其对应的 Bitmap 的 density 为 480dpi,而 targetDensity 就是 DisPlayMetric 的 densityDpi,也就是手机屏幕代表的 density。那么怎么查看 Android 中本地的 native 方法的实现呢,链接如下:
BitmapFactory.cpp,直接搜索 native 方法的方法名即可,可以试一下咯。
Bitmap 内存计算
首先贡献一张大图 6000 x 4000 ,图片接近 12M,【可在公众号零点小筑索要】 当直接加载这张图片到内存中肯定会发生 OOM,当然通过适当的位图采样缩小图片可避免 OOM,那么 Bitmap 所占内存又如何计算呢,一般情况下这样计算:
Bitmap Memory = widthPix * heightPix * 4
可使用 bitmap.getConfig() 获取 Bitmap 的格式,这里是 ARGB_8888 ,这种 Bitmap 格式下一个像素点占 4 个字节,所以要 x 4,如果将图片放置在 Android 的资源文件夹中,计算方式如下:
scale = targetDensity / density
widthPix = originalWidth * scale
heightPix = orignalHeight * scale
Bitmap Memory = widthPix * scale * heightPix * scale * 4
上述简单总结了一下 Bitmap 所占内存的计算方式,验证时可使用如下方法获取 Bitmap 所占内存大小:
BitmapMemory = bitmap.getByteCount()
由于选择的这张图片直接加载会导致 OOM,所以下文的事例中都是先采样压缩,然后在进行 Bitmap 所占内存的计算。
直接采样
这种方式就是直接指定采样比例 inSampleSize 的值,然后先采样然后计算采样后的内存,这里指定 inSampleSize 为200。
- 将该图片放在 drawable-xxhdpi 目录中,此时 drawable-xxhdpi 所代表的 density 为 480(density),我的手机屏幕所代表的 density 是 480(targetDensity),显然,此时 scale 为1,当然首先对图片进行采样,然后将图片加载到内存中, 此时 Bitmap 所占内存内存为:
inSampleSize = 200
scale = targetDensity / density} = 480 / 480 = 1
widthPix = orignalScale * scale = 6000 / 200 * 1 = 30
heightPix = orignalHeight * scale = 4000 / 200 * 1 = 20
Bitmap Memory =  widthPix * heightPix * 4 = 30 * 20 * 4 = 2400(Byte)
- 将图片放在 drawable-xhdpi 目录中,此时 drawable-xhdpi 所代表的 density 为 320,我的手机屏幕所代表的 density 是 480(targetDensity),将图片加载到内存中,此时 Bitmap 所代表的内存为:
inSampleSize = 200
scale = targetDensity / density = 480 / 320
widthPix = orignalWidth * scale = 6000 / 200 * scale = 45
heightPix = orignalHeight * scale = 4000 / 200 * 480 / 320 = 30
Bitmap Memory =  widthPix * scale * heightPix * scale * 4 = 45 * 30 * 4 = 5400(Byte)
计算采样
这种方式就是根据请求的宽高计算合适的 inSampleSize,而不是随意指定 inSampleSize,实际开发中这种方式最常用,这里请求宽高为100x100,具体 inSampleSize 计算在上文中已经说明。
- 将图片放在 drawable-xxhdpi 目录中,此时 drawable-xxhdpi 所代表的 density 为 480,我的手机屏幕所代表的 density 是 480(targetDensity),将图片加载到内存中,此时 Bitmap 所代表的内存为:
inSampleSize = 4000 / 100 = 40
scale = targetDensity / density = 480 / 480 = 1
widthPix = orignalWidth * scale = 6000 / 40 * 1 = 150
heightPix = orignalHeight * scale = 4000 / 40 * 1 = 100
BitmapMemory = widthPix * scale * heightPix * scale * 4 = 60000(Byte)
- 将图片放在 drawable-xhdpi 目录中,此时 drawable-xhdpi 所代表的 density 为 320,我的手机屏幕所代表的 density 是 480(targetDensity),将图片加载到内存中,此时 Bitmap 所代表的内存为:
inSampleSize = 4000 / 100 = 40
scale = targetDensity / density = 480 / 320
widthPix = orignalWidth * scale = 6000 / 40 * scale = 225
heightPix = orignalHeight * scale = 4000 / 40 * scale = 150
BitmapMemory = widthPix * heightPix * 4 = 225 * 150 * 4 = 135000(Byte)
位图采样及 Bitmap 在不同情况下所占内存的计算大概过程如上所述。
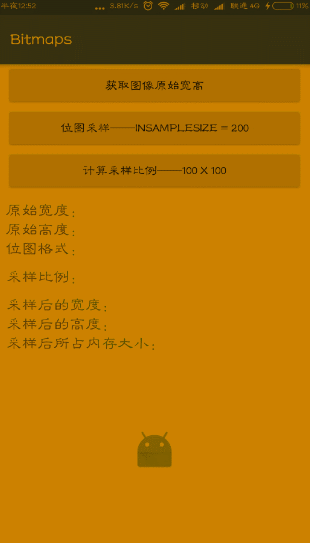
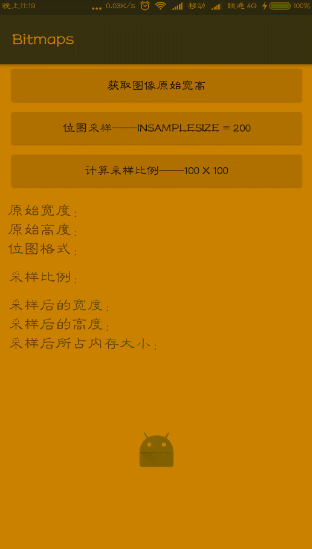
测试效果
测试效果图参考如下:
| drawable-xhdpi | drawable-xxhdpi |
|---|---|
 |
 |
如果感兴趣,可以关注公众号:jzman-blog,一起交流学习。