
0×00 引子
近年来,随着云计算、物联网技术的快速发展,物联网的理念和相关技术产品已经广泛渗透到社会经济民生的各个领域,越来越多的穿戴设备、家用电器通过蓝牙、Wi-Fi、Li-Fi、z-wave、LoRa等技术接入互联网,成为联网的终端设备。

但是由于这些技术普遍为短距离无线通信技术,通常被设计用于室内和短距离使用,在室外尤其是非视距下性能表现非常差,而作为现有成熟的GSM(Global System for Mobile Communication)技术,因其网络在全国范围内实现了联网和漫游,在网络资源、传输特性及数据可靠性等方面的优势,提供了一个机动、灵活、可靠的远距离传输方式,所以使用GSM模块联网的方案也被广泛使用。
0×01 测试短板
针对短距离无线通信技术的测试方法有很多,同时也被大家所悉知、使用,所以这里不再一一详述。而对于通过使用2G/GSM、3G/UMTS以及4G/LTE基站联网通信的设备,例如智能电表、POS机、抓娃娃机、自动售货机这些硬件的测试方法、技巧却是寥寥无几,几乎一片空白。

本文将分享如何通过SDR加开源项目搭建伪基站并使用伪基站的GPRS功能作为网关来进行GSM/GPRS网络测试,并对GSM模块的硬件流量进行拦截、分析、重放等。

0×02 环境搭建
下载Ubuntu-16.04-desktop-i386.iso,安装使用一台全新的机器,防止因依赖问题导致的报错。
2.1 更新
sudo apt-get install software-properties-common python-software-properties
sudo add-apt-repository ppa:git-core/ppa
sudo apt-get update
sudo apt-get install git
2.2 搭建OpenBTS开发环境
mkdir sdr  //新建sdr文件夹
cd sdr  //进入该文件夹
git clone https://github.com/RangeNetworks/dev.git
cd dev
./clone.sh  //从GitHub克隆代码
./switchto.sh master  //切到master分支
./build.sh B200
编译下载的源码,因为使用的是USRP B200 build脚本后加SDR硬件 ,如果使用的是USRP N200 则执行./build.sh N200(过程中需从谷歌下载源码,建议全程翻墙,否则会报错!)
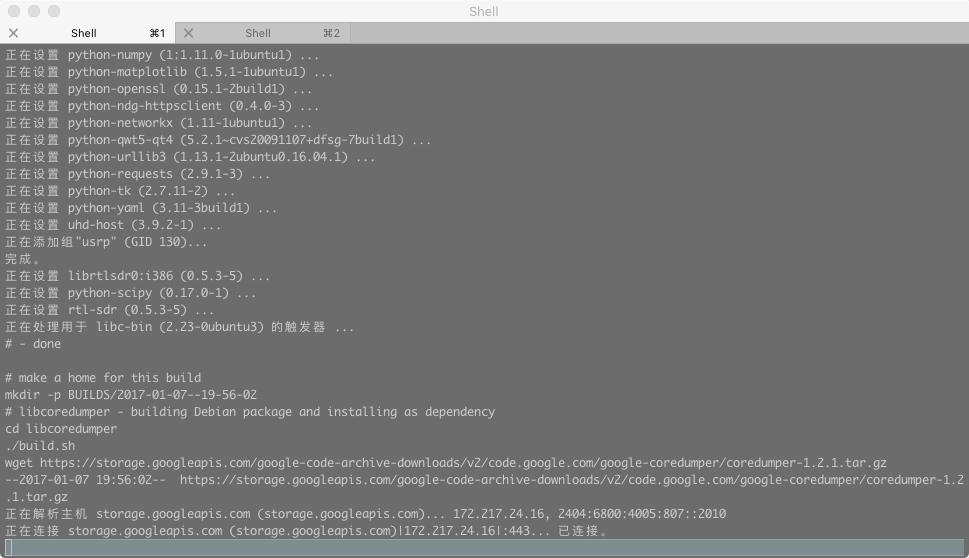
编译过程根据网络、机器性能而异,通常在30-45分钟左右,编译完成后,ubuntu自动安装GnuRadio、USRP的UHD驱动等相关SDR环境,但USRP的固件还需手动下载:
$sudo python /usr/lib/uhd/utils/uhd_images_downloader.py
Images destination:      /usr/share/uhd/images
Downloading images from: http://files.ettus.com/binaries/images/uhd-images_003.009.002-release.zip
Downloading images to:   /tmp/tmpEplLOD/uhd-images_003.009.002-release.zip
26296 kB / 26296 kB (100%)

Images successfully installed to: /usr/share/uhd/images
$ uhd_usrp_probe
linux; GNU C++ version 5.3.1 20151219; Boost_105800; UHD_003.009.002-0-unknown

-- Loading firmware image: /usr/share/uhd/images/usrp_b200_fw.hex...
-- Detected Device: B200
-- Loading FPGA image: /usr/share/uhd/images/usrp_b200_fpga.bin... done
-- Operating over USB 2.
-- Detecting internal GPSDO.... No GPSDO found
-- Initialize CODEC control...
-- Initialize Radio control...
-- Performing register loopback test... pass
-- Performing CODEC loopback test... pass
-- Asking for clock rate 16.000000 MHz...
-- Actually got clock rate 16.000000 MHz.
-- Performing timer loopback test... pass
-- Setting master clock rate selection to 'automatic'.
  _____________________________________________________
 /
|       Device: B-Series Device
|     _____________________________________________________
|    /
|   |       Mboard: B200
|   |   revision: 5
|   |   product: 1
|   |   serial: 30EA064
|   |   name: MyB200
|   |   FW Version: 8.0
|   |   FPGA Version: 13.0
|   |
|   |   Time sources: none, internal, external, gpsdo
|   |   Clock sources: internal, external, gpsdo
|   |   Sensors: ref_locked
|   |     _____________________________________________________
|   |    /
|   |   |       RX DSP: 0
|   |   |   Freq range: -8.000 to 8.000 MHz
|   |     _____________________________________________________
|   |    /
|   |   |       RX Dboard: A
|   |   |     _____________________________________________________
|   |   |    /
|   |   |   |       RX Frontend: A
|   |   |   |   Name: FE-RX1
|   |   |   |   Antennas: TX/RX, RX2
|   |   |   |   Sensors: temp, rssi, lo_locked
|   |   |   |   Freq range: 50.000 to 6000.000 MHz
|   |   |   |   Gain range PGA: 0.0 to 76.0 step 1.0 dB
|   |   |   |   Bandwidth range: 200000.0 to 56000000.0 step 0.0 Hz
|   |   |   |   Connection Type: IQ
|   |   |   |   Uses LO offset: No
|   |   |     _____________________________________________________
|   |   |    /
|   |   |   |       RX Codec: A
|   |   |   |   Name: B200 RX dual ADC
|   |   |   |   Gain Elements: None
|   |     _____________________________________________________
|   |    /
|   |   |       TX DSP: 0
|   |   |   Freq range: -8.000 to 8.000 MHz
|   |     _____________________________________________________
|   |    /
|   |   |       TX Dboard: A
|   |   |     _____________________________________________________
|   |   |    /
|   |   |   |       TX Frontend: A
|   |   |   |   Name: FE-TX1
|   |   |   |   Antennas: TX/RX
|   |   |   |   Sensors: temp, lo_locked
|   |   |   |   Freq range: 50.000 to 6000.000 MHz
|   |   |   |   Gain range PGA: 0.0 to 89.8 step 0.2 dB
|   |   |   |   Bandwidth range: 200000.0 to 56000000.0 step 0.0 Hz
|   |   |   |   Connection Type: IQ
|   |   |   |   Uses LO offset: No
|   |   |     _____________________________________________________
|   |   |    /
|   |   |   |       TX Codec: A
|   |   |   |   Name: B200 TX dual DAC
|   |   |   |   Gain Elements: None
编译完成后也会在BUILD目录下生成一个以编译时间为名的文件,如果系统为32bit编译后则在该目录下生成i386.deb的软件包,如果系统为64bit则生成amd64.deb :

2.3 更新&安装依赖包
sudo apt-get install software-properties-common python-software-properties
sudo add-apt-repository ppa:chris-lea/zeromq
sudo apt-get update
2.4 安装编译完成的DEB软件包
需注意是否有报错:
cd dev/BUILD/2016-11-29--23-23-16
sudo dpkg -i libcoredumper1_1.2.1-1_i386.deb libcoredumper-dev_1.2.1-1_i386.deb
sudo dpkg -i  liba53_0.1_i386.deb
sudo dpkg -i range-configs_5.0_all.deb
sudo dpkg -i range-asterisk*.deb
sudo apt-get install -f
sudo dpkg -i sipauthserve_5.0_i386.deb
sudo apt-get install -f
sudo dpkg -i smqueue_5.0_i386.deb
sudo apt-get install -f
sudo dpkg -i openbts_5.0_i386.deb
sudo apt-get install -f
0×03 开启数据转发、配置iptables
因为OpenBTS基站的GPRS网络流量是基于PC机,所以在开启基站GPRS功能前,需要开启数据包转发以及配置Iptables防火墙规则。
3.1 开启数据包转发:
ubuntu开数据转发需以root身份执行,如果不是root用户,即使使用sudo也无法开启:

sudo su
echo 1 >> /proc/sys/net/ipv4/ip_forward
3.2 配置iptables规则:
/etc/OpenBTS/iptables.rules 配置规则文件内容如下:
# Generated by iptables-save v1.4.4
*nat
 :P REROUTING ACCEPT [0:0]
 :P
 OSTROUTING ACCEPT [0:0]
:OUTPUT ACCEPT [0:0]
-A POSTROUTING -o eth0 -j MASQUERADE
COMMIT
# Generated by iptables-save v1.4.4
*filter
:INPUT ACCEPT [0:0]
:FORWARD ACCEPT [0:0]
:OUTPUT ACCEPT [0:0]
COMMIT

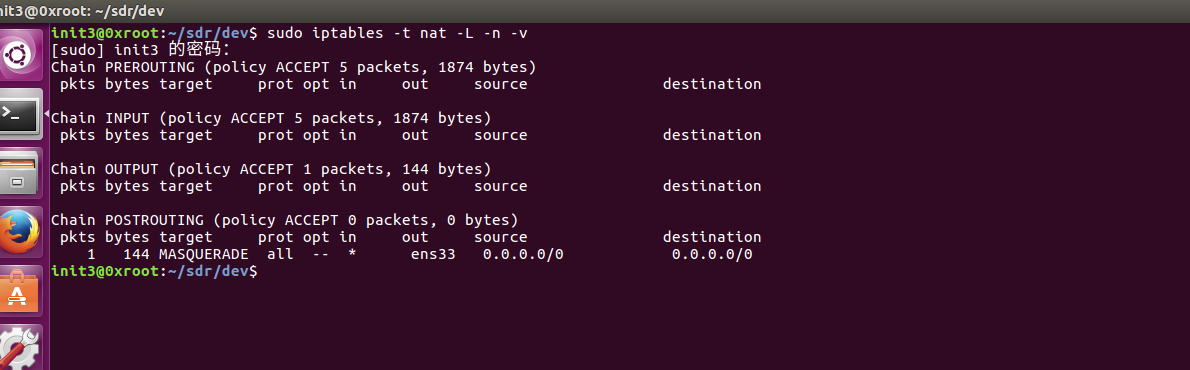
某些情况下机器的网卡并非eth0 ,所以需要根据自身实际情况,灵活地修改配置文件。
sudo iptables-restore < /etc/OpenBTS/iptables.rules
iptables -t nat -L -n -v
3.3 加载数据库
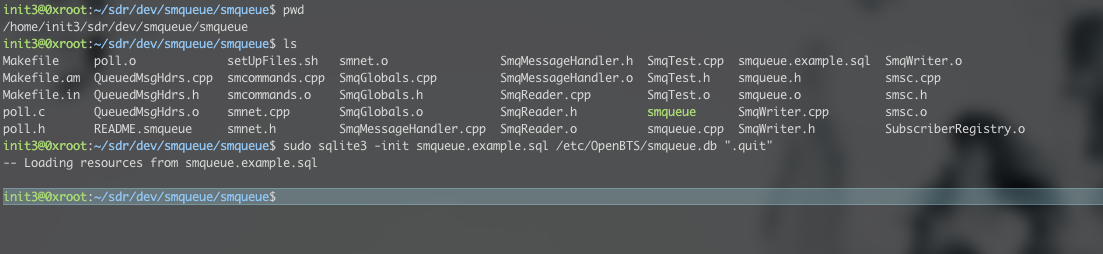
cd sdr/dev/openbts/apps
sudo sqlite3 -init OpenBTS.example.sql /etc/OpenBTS/OpenBTS.db ".quit"

cd sdr/dev/subscriberRegistry/apps
sudo sqlite3 -init sipauthserve.example.sql /etc/OpenBTS/sipauthserve.db ".quit"

cd sdr/dev/smqueue/smqueue
sudo sqlite3 -init smqueue.example.sql /etc/OpenBTS/smqueue.db ".quit"
3.4 配置asterisk
Asterisk是运行在Linux上来实现用户电话交换的IP-PBX系统开源软件,支持各种的VOIP协议。Asterisk提供了很多以前只有昂贵、专业的PBX系统才支持的功能,如:会议电话、语音信箱、交互式语音应答、自动电话转接。
在/etc/asterisk/目录中需要修改sip.conf、extensions.conf 具体方法:将手机的IMSI国际用户识别码和分配的号码登记数据asterisk中,也就是将数据写入sip.conf、extensions.conf两个配置文件。 SIP.CONF:
[IMSI46001658*****19]
callerid=2000003
canreinvite=no
type=friend
allow=gsm
context=sip-external
host=dynamic
dtmfmode=info

[IMSI41004030*****62]
callerid=2000004
canreinvite=no
type=friend
allow=gsm
context=sip-external
host=dynamic
dtmfmode=info
callerid=2000003,表示将IMSI为46001658*****19的手机分配号码2000003;
canreinvite=no,表示被呼叫的手机一旦建立连接后OpenBTS将不再发送重新邀请的指令;
context=sip-external,表示允许外部未分配号码的匿名电话呼入。
0×04 启动基站:
4.1 执行 transceiver连接SDR硬件
cd sdr/dev/openbts/Transceiver52M
sudo ./transceiver

4.3 执行smqueue,启用短信服务
cd sdr/dev/smqueue/smqueue
sudo ./smqueue

4.4 执行sipauthserve,启用鉴权服务
cd sdr/dev/subscriberRegistry/apps
sudo ./sipauthserve

4.5 asterisk -vvvc or asterisk -r


4.6 启动OpenBTS终端控制台:
cd sdr/dev/openbts/apps
sudo ./OpenBTSCLI
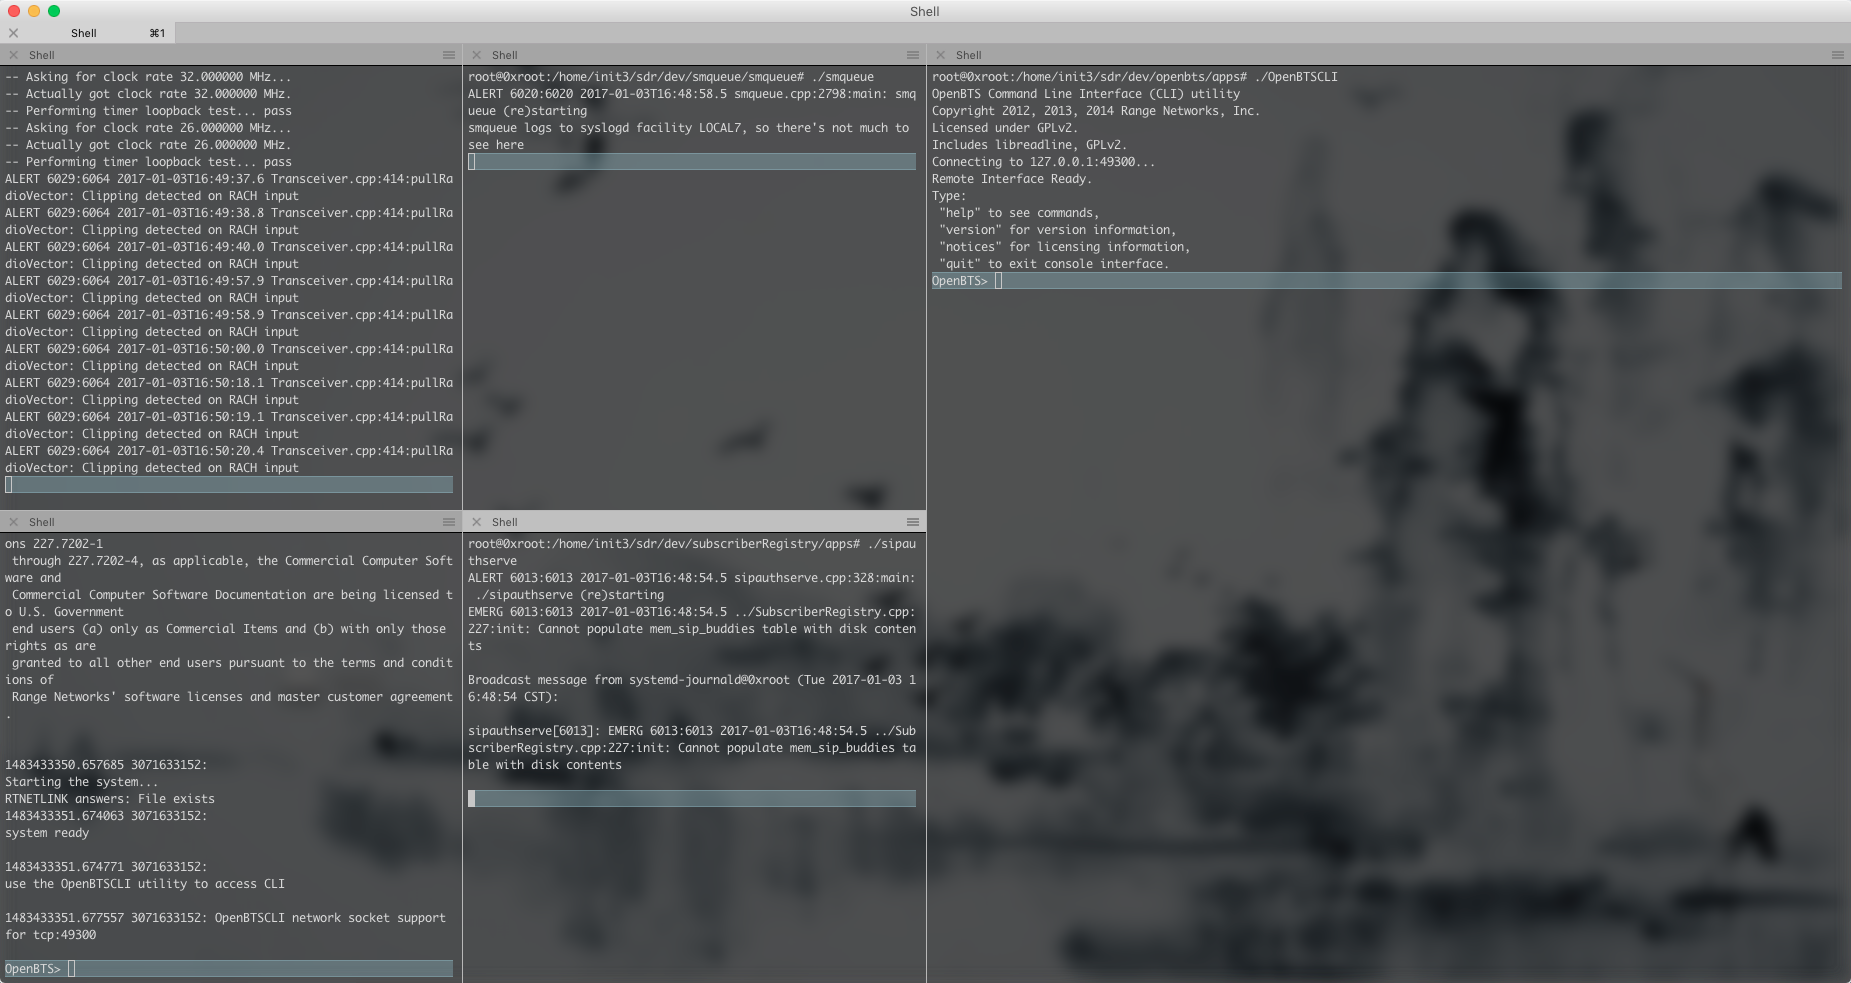
root@0xroot:/home/init3/sdr/dev/openbts/apps# ./OpenBTSCLI
OpenBTS Command Line Interface (CLI) utility
Copyright 2012, 2013, 2014 Range Networks, Inc.
Licensed under GPLv2.
Includes libreadline, GPLv2.
Connecting to 127.0.0.1:49300...
Remote Interface Ready.
Type:
 "help" to see commands,
 "version" for version information,
 "notices" for licensing information,
 "quit" to exit console interface.
OpenBTS> version
release 5.0-master+c438a5a689 CommonLibs:76b71d509b+GPRS P built 2016-11-29T23:31:19

OpenBTS> help

Type "help" followed by the command name for help on that command.

alarms        audit        calls
cbs        cellid        chans
config        crashme        devconfig
endcall        freqcorr    gprs
handover    help        load
memstat        neighbors    noise
notices        page        power
rawconfig    regperiod    restart
rmconfig    rxgain        sendsimple
sendsms        sgsn        shutdown
stats        sysinfo        tmsis
trxfactory    txatten        unconfig
uptime        version

OpenBTS>
0×05 配置基站
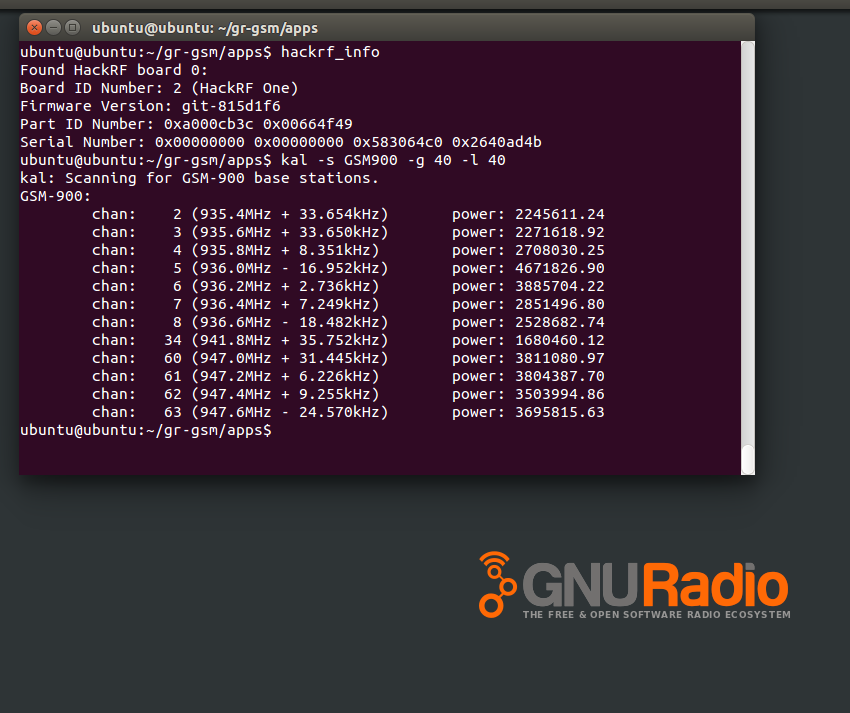
GSM 900频段瀑布图:

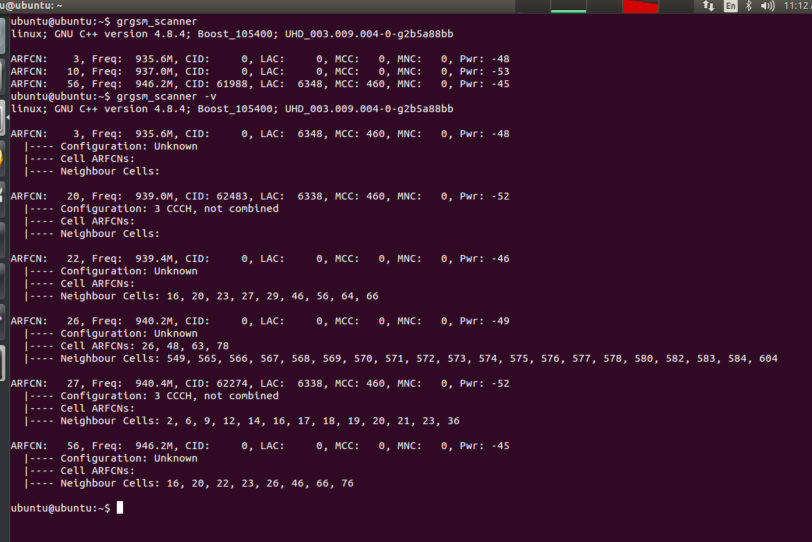
gr-gsm &Kal扫描GSM基站
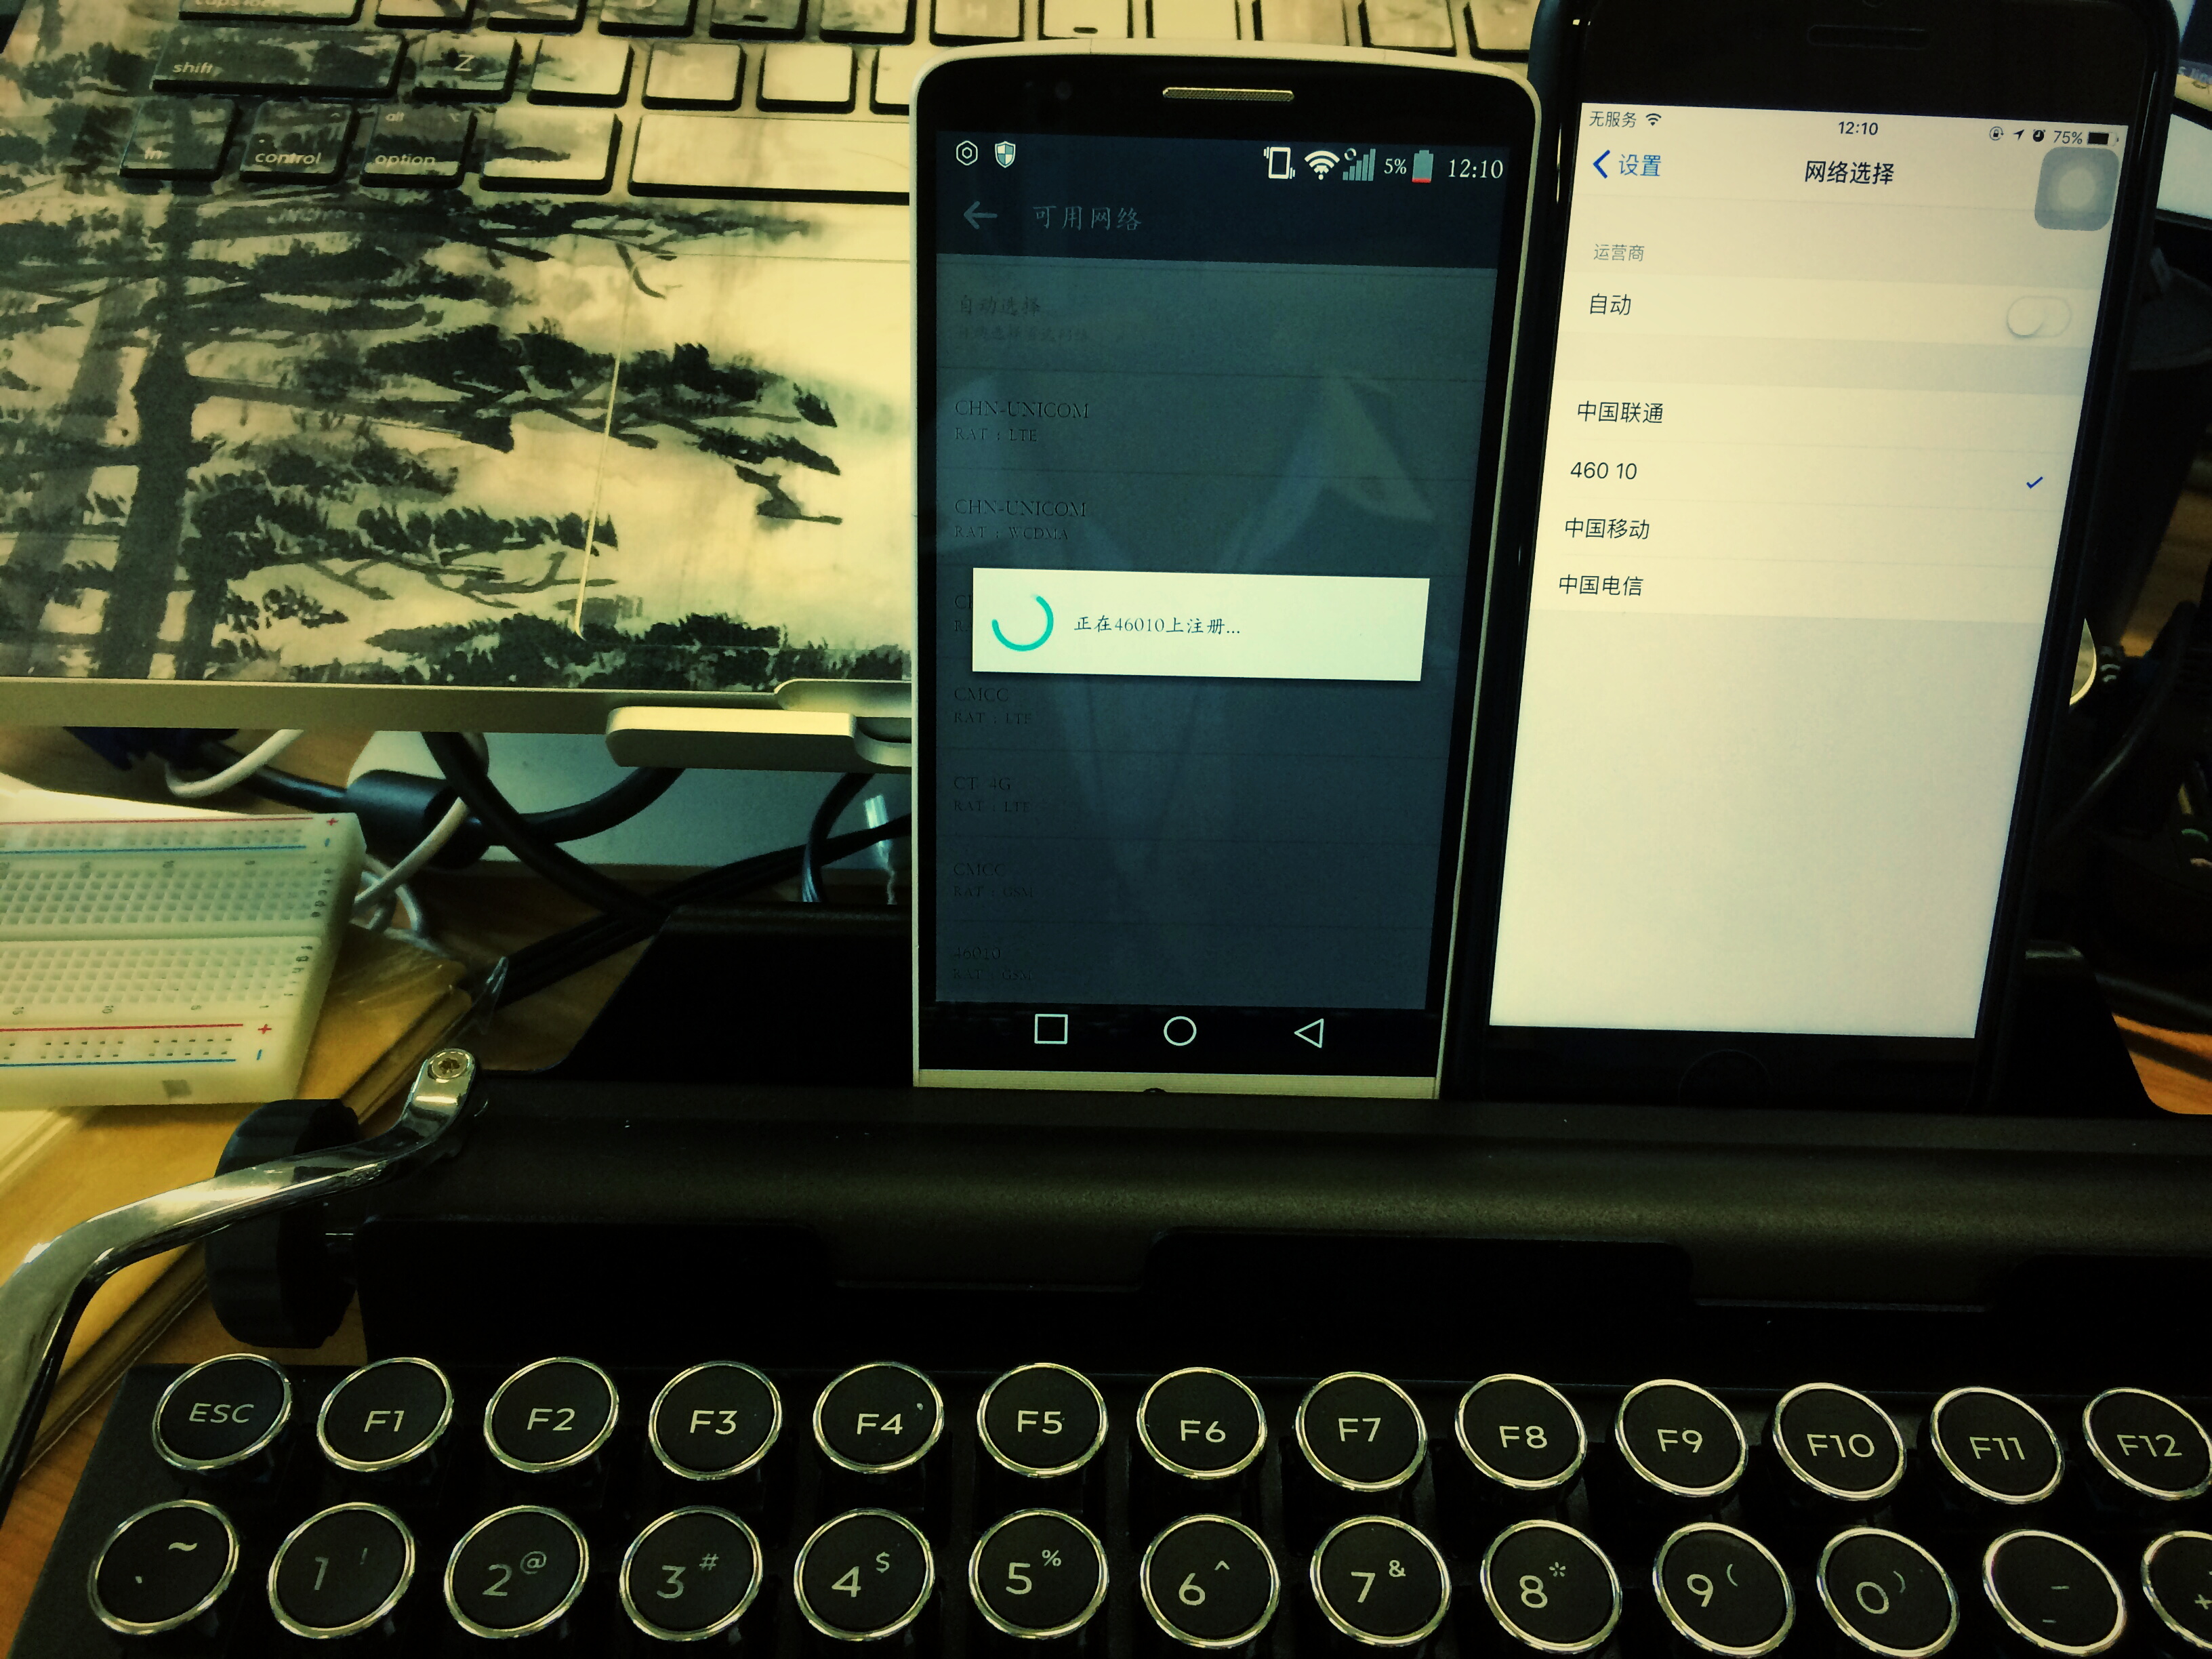
刚搭建完成的基站由于天线功率过大以及手机跟基站的距离太近等原因,可能会导致手机不能正常加入到基站,这时需要配置加入基站的条件以及设置天线功率:
允许任意机器接入:
OpenBTS> config Control.LUR.OpenRegistration .*
Control.LUR.OpenRegistration changed from "" to ".*"

设置天线功率:
OpenBTS> devconfig GSM.Radio.RxGain 18
GSM.Radio.RxGain changed from "50" to "18"
GSM.Radio.RxGain is static; change takes effect on restart
设置基站频段:
OpenBTS> config GSM.Radio.Band 900
GSM.Radio.Band changed from "850" to "900"
GSM.Radio.Band is static; change takes effect on restart
设置欢迎短信:
config Control.LUR.NormalRegistration.Message Welcome to BTS 1

设置基站名:
config GSM.Identity.ShortName GroundControl
将基站设置为测试网络:
config Identity config GSM.Identity.MCC 001
将基站设置为国内: MCC460 为中国
config GSM.Identity.MCC 460
设置运营商为联通:
config GSM.Identity.MNC 01
设置运营商为移动:
config GSM.Identity.MNC 00
设置ARFCN、LAC、BCC
网络色码,NCC,一般用于标识运营商;基站色码,BCC,区分同一运营商下的相同BCCH的不同基站。
一般采用BCCH频点和BSIC来联合标识小区,BSIC=NCC+BCC。在TD和WCDMA里,存在PLMN,PLMN=MCC+MNC,其中MCC为移动国家码,MNC为移动网络码标识运营商。
基站切换的时候,主要是通过CI、BCCHBSIC等信息寻找目标小区,当同时检测到邻区列表里出现同BCCH同扰码组的小区时,容易出现切换失败。
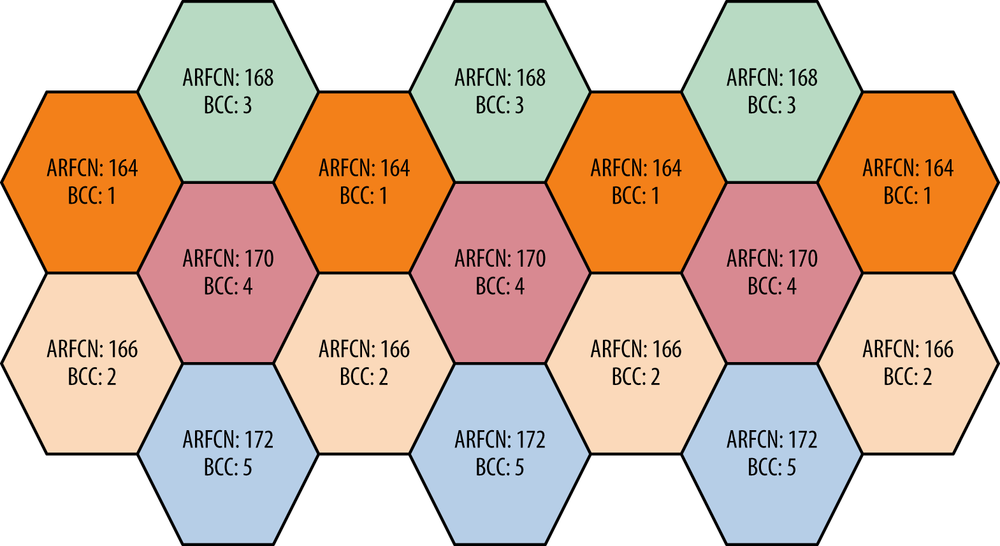
OpenBTS> config GSM.Radio.C0 168
GSM.Radio.C0 changed from "151" to "168"
GSM.Radio.C0 is static; change takes effect on restart
OpenBTS> config GSM.Identity.BSIC.BCC 3
GSM.Identity.BSIC.BCC changed from "2" to "3"
OpenBTS> config GSM.Identity.LAC 1001
GSM.Identity.LAC changed from "1000" to "1001"
OpenBTS> config GSM.Identity.CI 11
GSM.Identity.CI changed from "10" to "11"
用户管理
在3.4配置asterisk再我们给部分用户配置了callerid号码,启动OpenBTS后可通过NodeManager目录下的nmcli.py脚本进行用户管理:
cd sdr/dev/openbts/NodeManager/
添加用户示例:
./nmcli.py sipauthserve subscribers create name imsi msisdn
将123456 (MSISDN码)分配到IMSI 码为46001658*****19的LG G3设备中
./nmcli.py sipauthserve subscribers create "LG G3" IMSI46001658*****19 123456
读取已录入信息:
root@0xroot:/home/init3/sdr/dev/openbts/NodeManager#./nmcli.py sipauthserve subscribers read
raw request: {"command":"subscribers","action":"read","key":"","value":""}
raw response: {
    "code" : 200,
    "data" : [
        {
            "imsi" : "IMSI46001658*****19",
            "msisdn" : " 123456",
            "name" : "LG G3"
        },
        {
            "imsi" : "IMSI46000645*****91",
            "msisdn" : " 223456",
            "name" : "MoTo"
        }
    ]
}
启用GPRS功能:
OpenBTS> config GPRS.Enable 1

设置基站DNS服务器:
OpenBTS> config GGSN.DNS 8.8.8.8
编辑/etc/resolv.conf
nameserver 8.8.8.8
为防止机器重启或重启网络后/etc/resolv.conf文件被重写复原,可修改/etc/resolvconf/resolv.conf.d/head
nameserver 8.8.8.8
设置GGSN日志存放路径:
OpenBTS> devconfig GGSN.Logfile.Name /tmp/GGSN.log
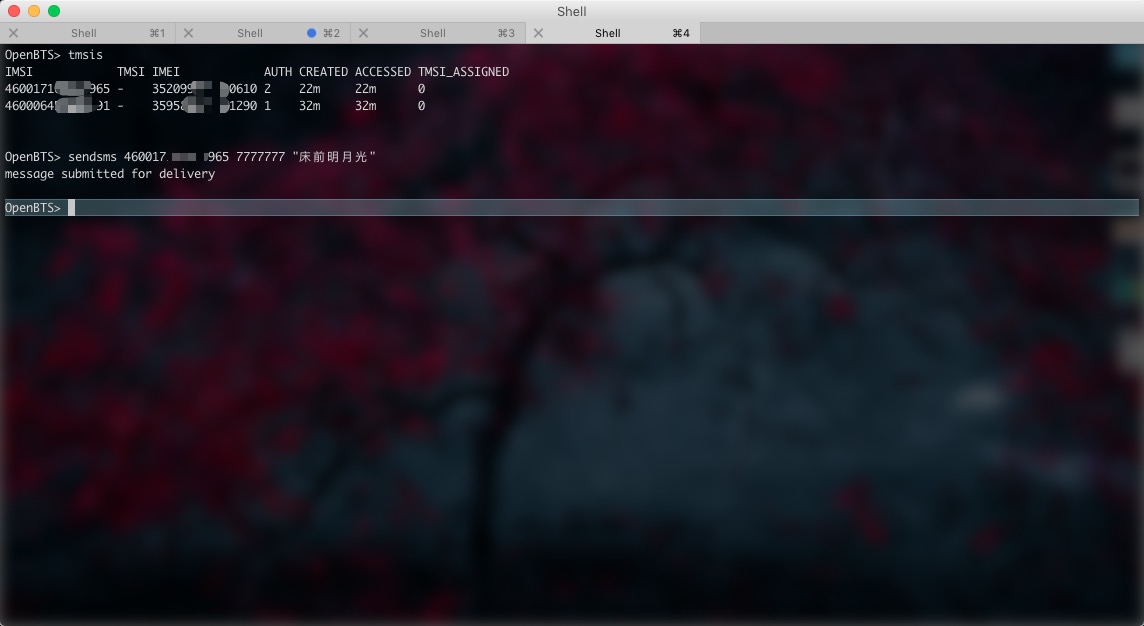
查看已加入基站的设备:
OpenBTS> tmsis
IMSI            TMSI IMEI            AUTH CREATED ACCESSED TMSI_ASSIGNED
46001658*****19 -    354834060*****0 1    30m     30m      0
查看日志:cat /var/log/OpenBTS.log
配置文件:/etc/rsyslog.d/OpenBTS.conf
发送短信:sendsms $IMSI $号码 ”$内容”
sendsms 46001658*****19 888888 "Hello World"


OpenBTS+Burp suite
使用Burp拦截硬件流量请求的方法这里可参考NCC Group的一篇博客:GSM/GPRS Traffic Interception for Penetration Testing Engagements

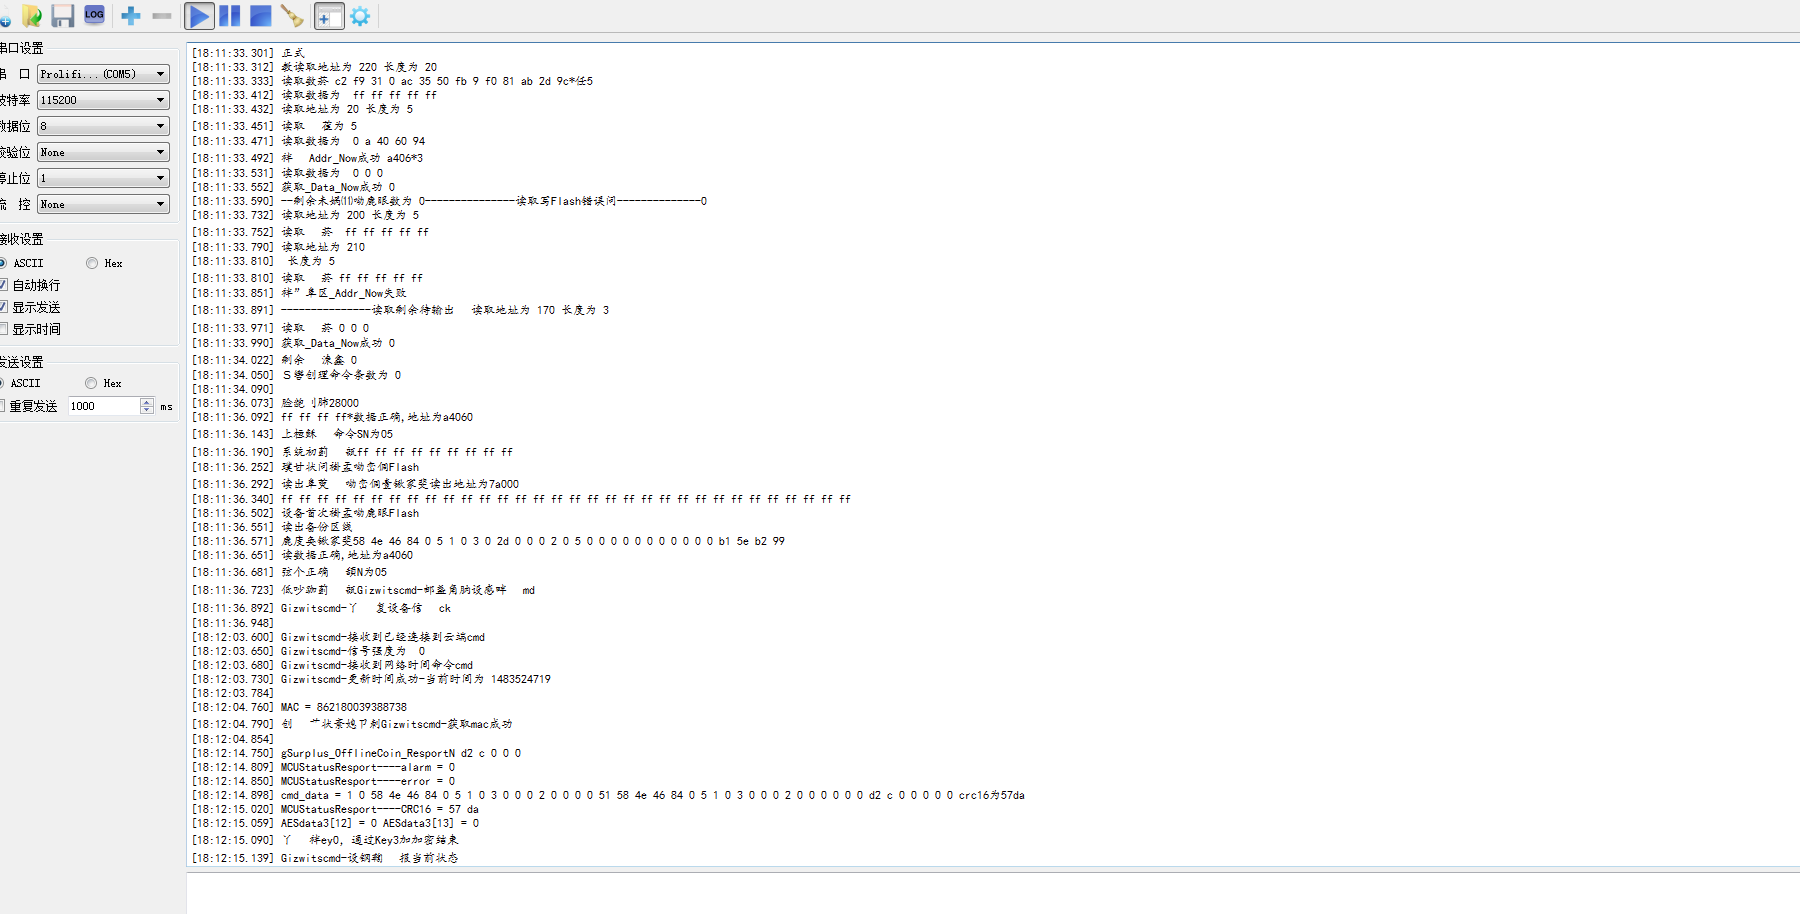
0×06 硬件调试
硬件芯片模块

G510-Q50-00 Pin Definitoins

焊接TTL进行调试:

串口调试:
0×07 refer
GSM/GPRS Traffic Interception for Penetration Testing Engagements
Getting Started with OpenBTS
PDF: http://openbts.org/site/wp-content/uploads/ebook/Getting_Started_with_OpenBTS_Range_Networks.pdf
HTML:https://www.safaribooksonline.com/library/view/getting-started-with/9781491924280/ch04.html
OpenBTS Application Suite Release 4.0 User Manual
http://openbts.org/site/wp-content/uploads/2014/07/OpenBTS-4.0-Manual.pdf
OpenBTS BuildInstallRun
http://openbts.org/w/index.php?title=BuildInstallRun
http://openbts.org/w/index.php?title=OpenBTS-UMTS
https://wush.net/trac/rangepublic/wiki/GPRS
How to get 3G working on the UmTRX
https://fairwaves.co/blog/openbts-umts-3g-umtrx/
FIBOCOM G510
http://www.fibocom.com/product/2-1-2-1.html
FIBOCOM G510 Q50-00
http://www.tme.eu/gb/details/g510-q50-00/gsmgpsgprshspaedgelte-modules/fibocom/g510-q50-00/
http://www.fibocom.com/upfile/down/document_2_1_2_1.pdf
http://www.tme.eu/gb/Document/fabb43e22a46fba821931db19e577988/FIBOCOM_G510_U_M.pdf
原文地址:http://www.freebuf.com/articles/wireless/124147.html