Habor是由VMWare公司开源的容器镜像仓库。事实上,Habor是在Docker Registry上进行了相应的 企业级扩展,从而获得了更加广泛的应用,这些新的企业级特性包括:管理用户界面,基于角色的访 问控制 ,AD/LDAP集成以及审计日志等,足以满足基本企业需求。
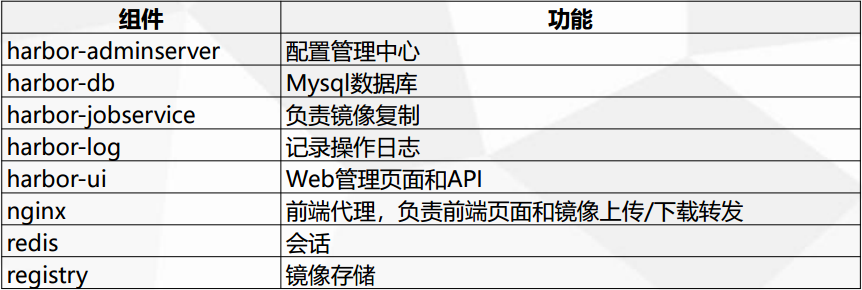
harbor各组件介绍:
Harbor安装有3种方式
1)在线安装:从Docker Hub下载Harbor相关镜像,因此安装软件包非常小
2)离线安装:安装包包含部署的相关镜像,因此安装包比较大
3)OVA安装程序:当用户具有vCenter环境时,使用此安装程序,在部署OVA后启动Harb
在此我们使用第二种离线安装方式来搭建基于 https 访问的 harbor 镜像仓库。
1.下载并解压离线安装包
harbor离线包下载地址:https://github.com/goharbor/harbor/releases
[root@docker03 ~]# tar -zxf harbor-offline-installer-v1.7.1.tgz
[root@docker03 ~]# cd harbor/
[root@docker03 harbor]# ll
total 590236
drwxr-xr-x 3 root root        23 Mar 13 13:10 common
-rw-r--r-- 1 root root       939 Jan  4 19:23 docker-compose.chartmuseum.yml
-rw-r--r-- 1 root root       975 Jan  4 19:23 docker-compose.clair.yml
-rw-r--r-- 1 root root      1434 Jan  4 19:23 docker-compose.notary.yml
-rw-r--r-- 1 root root      5608 Jan  4 19:23 docker-compose.yml
-rw-r--r-- 1 root root      8033 Jan  4 19:23 harbor.cfg
-rw-r--r-- 1 root root 603562385 Jan  4 19:24 harbor.v1.7.1.tar.gz
-rwxr-xr-x 1 root root      5739 Jan  4 19:23 install.sh
-rw-r--r-- 1 root root     11347 Jan  4 19:23 LICENSE
-rw-r--r-- 1 root root    748160 Jan  4 19:23 open_source_license
-rwxr-xr-x 1 root root     36337 Jan  4 19:23 prepare
2.自签http证书
1)获取权威认证证书
[root@docker03 harbor]# mkdir ssl
[root@docker03 harbor]# cd ssl
[root@docker03 ssl]# openssl genrsa -out ca.key 4096
Generating RSA private key, 4096 bit long modulus
..................................................................................................................................................................................................................++
...................++
e is 65537 (0x10001)
[root@docker03 ssl]# openssl req -x509 -new -nodes -sha512 -days 3650
>   -subj "/C=TW/ST=Taipei/L=Taipei/O=example/OU=Personal/CN=reg.dingkai.com"
>   -key ca.key
>   -out ca.crt
[root@docker03 ssl]# ll
total 8
-rw-r--r-- 1 root root 2033 Mar 13 13:16 ca.crt
-rw-r--r-- 1 root root 3243 Mar 13 13:16 ca.key
2)获取服务端证书
1.Create your own Private Key:
[root@docker03 ssl]# openssl genrsa -out reg.dingkai.com.key 4096
Generating RSA private key, 4096 bit long modulus
...........................................................................................................................................++
.......................................++
e is 65537 (0x10001)

2.Generate a Certificate Signing Request:
[root@docker03 ssl]# openssl req -sha512 -new
>   -subj "/C=TW/ST=Taipei/L=Taipei/O=example/OU=Personal/CN=reg.dingkai.com"
>   -key reg.dingkai.com.key
>   -out reg.dingkai.com.csr
[root@docker03 ssl]# ll
total 16
-rw-r--r-- 1 root root 2033 Mar 13 13:16 ca.crt
-rw-r--r-- 1 root root 3243 Mar 13 13:16 ca.key
-rw-r--r-- 1 root root 1708 Mar 13 13:18 reg.dingkai.com.csr
-rw-r--r-- 1 root root 3243 Mar 13 13:18 reg.dingkai.com.key

3.Generate the certificate of your registry host:
[root@docker03 ssl]# cat > v3.ext <<-EOF
> authorityKeyIdentifier=keyid,issuer
> basicConstraints=CA:FALSE
> keyUsage = digitalSignature, nonRepudiation, keyEncipherment, dataEncipherment
> extendedKeyUsage = serverAuth
> subjectAltName = @alt_names
>
> [alt_names]
> DNS.1=reg.dingkai.com
> DNS.2=reg.dingkai
> DNS.3=dingkai
> EOF
[root@docker03 ssl]# openssl x509 -req -sha512 -days 3650
>   -extfile v3.ext
>   -CA ca.crt -CAkey ca.key -CAcreateserial
>   -in reg.dingkai.com.csr
>   -out reg.dingkai.com.crt
Signature ok
subject=/C=TW/ST=Taipei/L=Taipei/O=example/OU=Personal/CN=reg.dingkai.com
Getting CA Private Key
[root@docker03 ssl]# ll
total 28
-rw-r--r-- 1 root root 2033 Mar 13 13:16 ca.crt
-rw-r--r-- 1 root root 3243 Mar 13 13:16 ca.key
-rw-r--r-- 1 root root   17 Mar 13 13:27 ca.srl
-rw-r--r-- 1 root root 2102 Mar 13 13:27 reg.dingkai.com.crt
-rw-r--r-- 1 root root 1708 Mar 13 13:18 reg.dingkai.com.csr
-rw-r--r-- 1 root root 3243 Mar 13 13:18 reg.dingkai.com.key
-rw-r--r-- 1 root root  267 Mar 13 13:27 v3.ext
3)修改harbor配置,以及为Docker配置服务端证书,key和CA。
[root@docker03 ssl]# cd ../
[root@docker03 harbor]# vim harbor.cfg
......
hostname = reg.dingkai.com
ui_url_protocol = https
ssl_cert = ./ssl/reg.dingkai.com.crt
ssl_cert_key = ./ssl/reg.dingkai.com.key
harbor_admin_password = 123456
......
密码可不修改,默认登录用户admin,密码Harbor12345
Docker守护进程会将.crt文件解释为CA证书,将.cert文件解释为客户机证书,先将.crt文件转换一份.cert文件。
[root@docker03 ssl]# mkdir /etc/docker/certs.d/reg.dingkai.com
[root@docker03 ssl]# openssl x509 -inform PEM -in reg.dingkai.com.crt -out reg.dingkai.com.cert
[root@docker01 ssl]# cp reg.dingkai.com.cert reg.dingkai.com.key ca.crt /etc/docker/certs.d/reg.dingkai.com/
如果没有此步docker login将会报错:
[root@docker03 harbor]# docker login reg.dingkai.com
Username: admin
Password:
Error response from daemon: Get https://reg.dingkai.com/v2/: x509: certificate signed by unknown authority
到此自签成功!
3.初始化及安装验证
初始化安装:
[root@docker03 harbor]# ./prepare
Generated and saved secret to file: /data/secretkey
Generated configuration file: ./common/config/nginx/nginx.conf
Generated configuration file: ./common/config/adminserver/env
Generated configuration file: ./common/config/core/env
Generated configuration file: ./common/config/registry/config.yml
Generated configuration file: ./common/config/db/env
Generated configuration file: ./common/config/jobservice/env
Generated configuration file: ./common/config/jobservice/config.yml
Generated configuration file: ./common/config/log/logrotate.conf
Generated configuration file: ./common/config/registryctl/env
Generated configuration file: ./common/config/core/app.conf
Generated certificate, key file: ./common/config/core/private_key.pem, cert file: ./common/config/registry/root.crt
The configuration files are ready, please use docker-compose to start the service.
[root@docker03 harbor]# ./install.sh

[Step 0]: checking installation environment ...

Note: docker version: 18.06.1

Note: docker-compose version: 1.22.0

[Step 1]: loading Harbor images ...
ae18db924eef: Loading layer [==================================================>]  32.92MB/32.92MB
1c06074dba9c: Loading layer
.............
Loaded image: goharbor/chartmuseum-photon:v0.7.1-v1.7.1

[Step 2]: preparing environment ...
Clearing the configuration file: ./common/config/adminserver/env
............
The configuration files are ready, please use docker-compose to start the service.

[Step 3]: checking existing instance of Harbor ...

[Step 4]: starting Harbor ...
Creating network "harbor_harbor" with the default driver
Creating harbor-log ... done
Creating redis              ... done
Creating harbor-adminserver ... done
Creating harbor-db          ... done
Creating registry           ... done
Creating registryctl        ... done
Creating harbor-core        ... done
Creating harbor-jobservice  ... done
Creating harbor-portal      ... done
Creating nginx              ... done

✔ ----Harbor has been installed and started successfully.----

Now you should be able to visit the admin portal at https://reg.dingkai.com.
For more details, please visit https://github.com/goharbor/harbor .
浏览器访问验证:
浏览器访问要做域名解析,在本地hosts(C:WindowsSystem32driversetchosts)文件中加入:10.0.0.111 reg.dingkai.com
访问:https://reg.dingkai.com,并登陆。
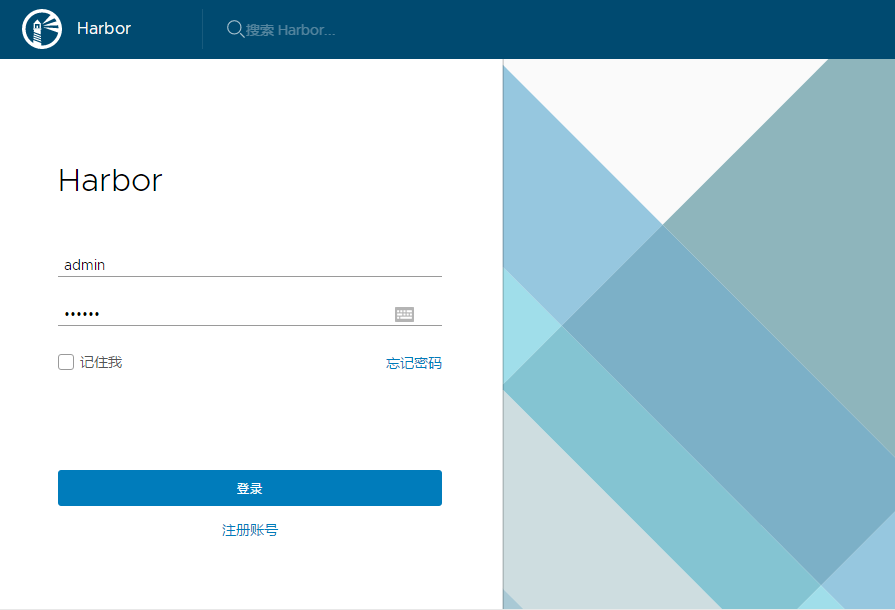
登录后界面基本操作:
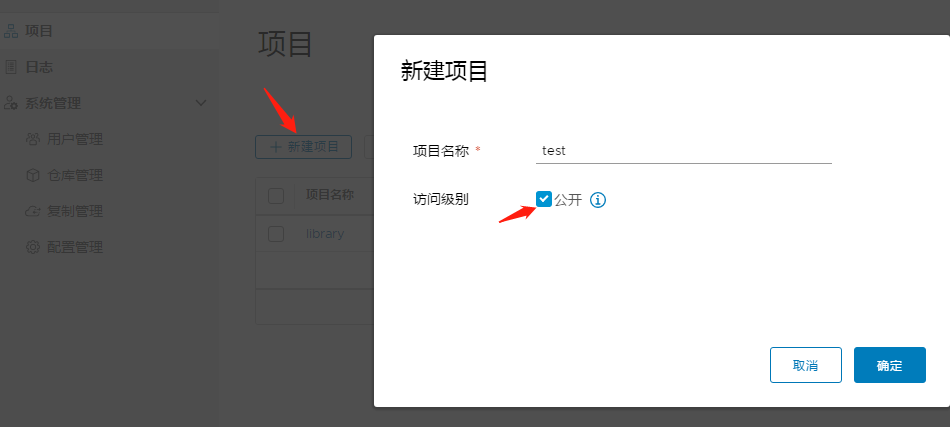
新建项目test
新建用户kai

将用户kai设置为test项目管理员

4.服务端上传及下载镜像
首先在服务端本地做hosts解析
[root@docker01 ssl]# echo "10.0.0.111 reg.dingkai.com" >> /etc/hosts
此时可以通过docker login reg.dingkai.com 登录harbor,输入用户名及密码:
[root@docker03 ssl]# docker login reg.dingkai.com
Username: admin
Password:
WARNING! Your password will be stored unencrypted in /root/.docker/config.json.
Configure a credential helper to remove this warning. See
https://docs.docker.com/engine/reference/commandline/login/#credentials-store

Login Succeeded
上传与下载镜像,上传前需要先将镜像打tag,再上传
[root@docker03 ~]# docker tag busybox:latest reg.dingkai.com/test/busybox:v1
[root@docker03 ~]# docker push reg.dingkai.com/test/busybox:v1
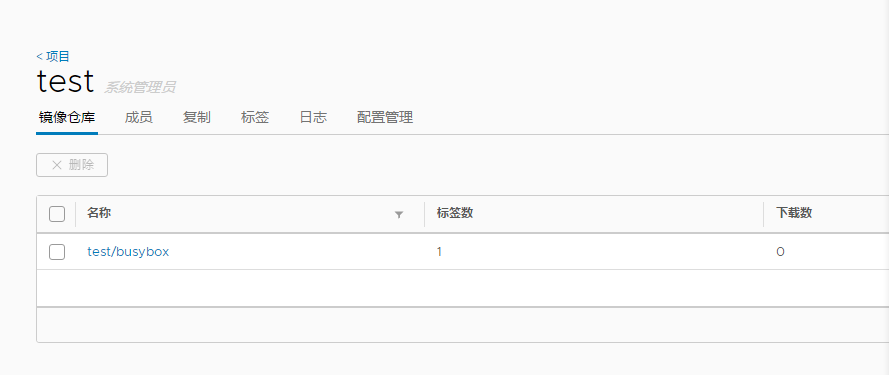
可以看到项目仓库已经存在我们刚刚上传的镜像文件。
删除本地刚上传的镜像,再将仓库的镜像下载下来:
[root@docker03 ~]# docker rmi reg.dingkai.com/test/busybox:v1
Untagged: reg.dingkai.com/test/busybox:v1
Untagged: reg.dingkai.com/test/busybox@sha256:5e8e0509e829bb8f990249135a36e81a3ecbe94294e7a185cc14616e5fad96bd
[root@docker03 ~]# docker images
busybox                                                                          latest              e1ddd7948a1c        7 months ago        1.16MB
ubuntu                                                                           latest              735f80812f90        7 months ago        83.5MB
python                                                                           2.7                 17c0fe4e76a5        7 months ago        908MB
[root@docker03 ~]# docker pull reg.dingkai.com/test/busybox:v1
v1: Pulling from test/busybox
Digest: sha256:5e8e0509e829bb8f990249135a36e81a3ecbe94294e7a185cc14616e5fad96bd
Status: Downloaded newer image for reg.dingkai.com/test/busybox:v1
[root@docker03 ~]# docker images
reg.dingkai.com/test/busybox                                                     v1                  e1ddd7948a1c        7 months ago        1.16MB
busybox                                                                          latest              e1ddd7948a1c        7 months ago        1.16MB
ubuntu                                                                           latest              735f80812f90        7 months ago        83.5MB
python                                                                           2.7                 17c0fe4e76a5        7 months ago        908MB