作者:ssslinppp
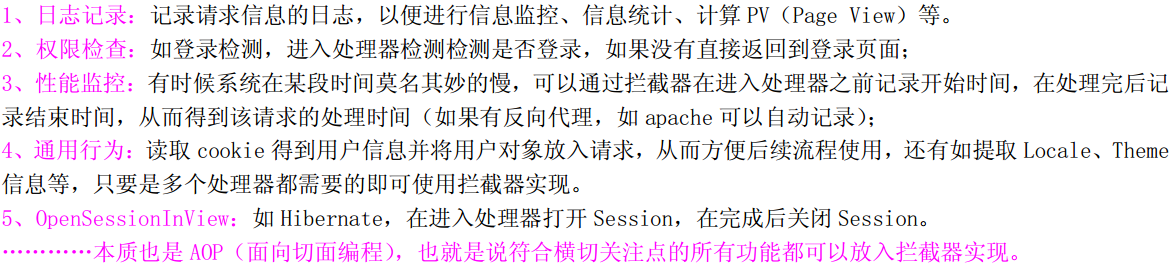
1. 拦截器简介及应用场景

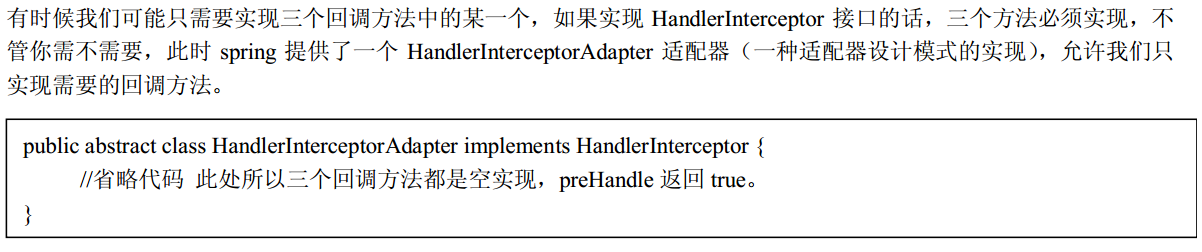
2. 拦截器接口及拦截器适配器


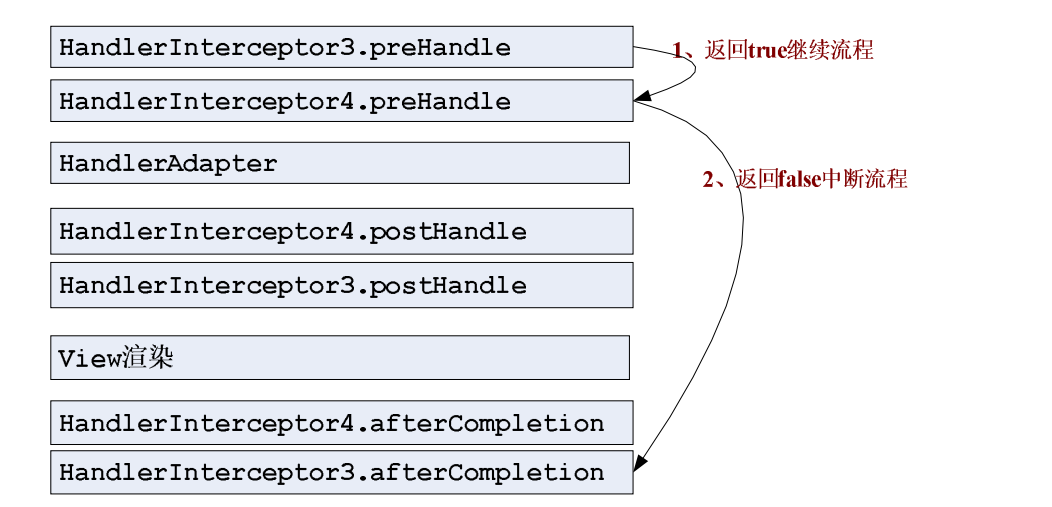
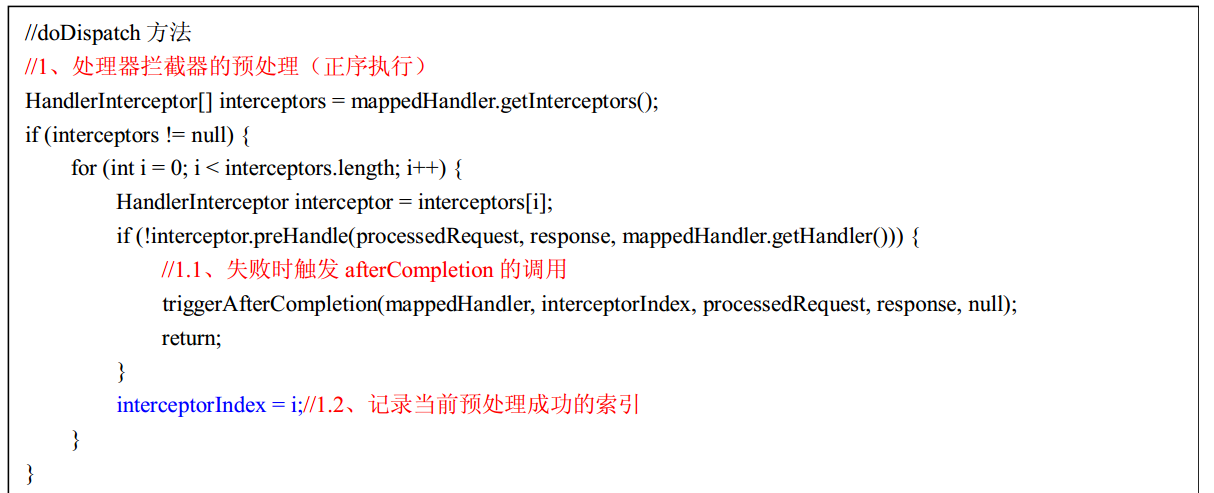
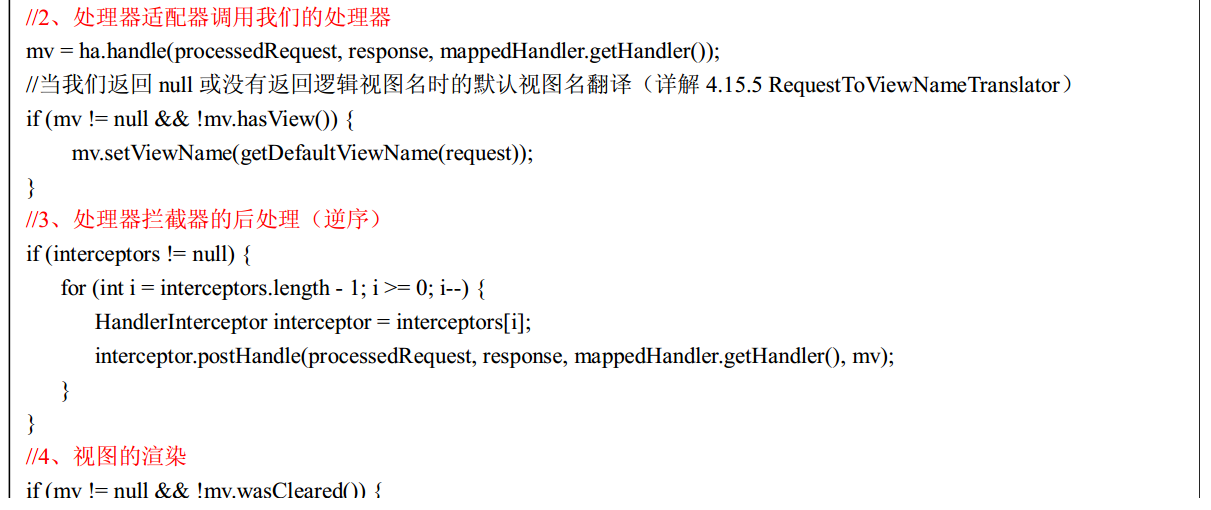
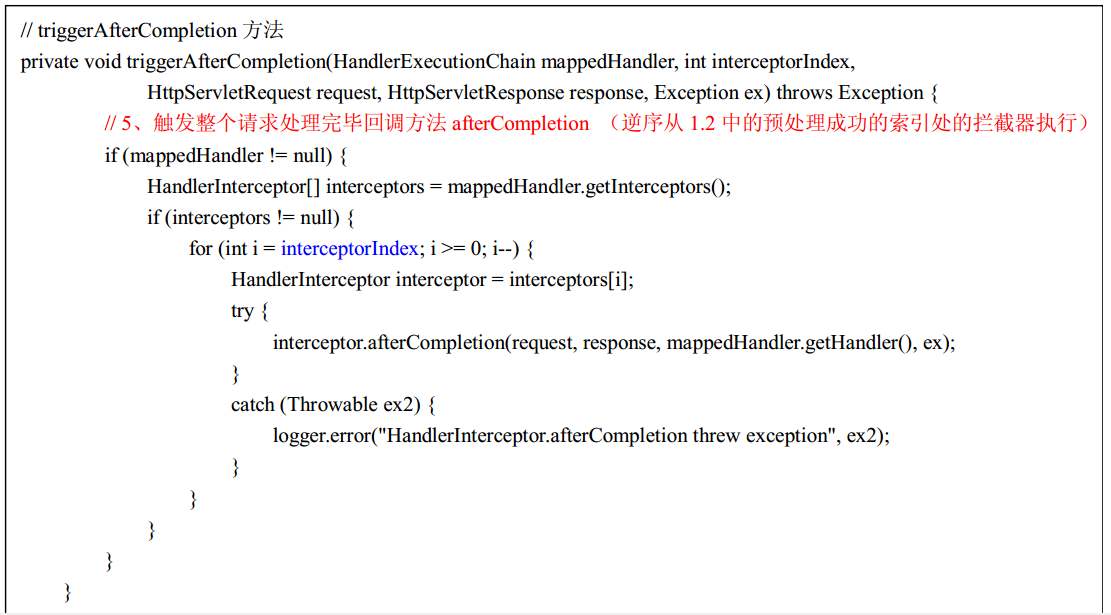
3. 运行流程图
正常运行

中断流程


4. 程序实例
控制层:
@Controller
@RequestMapping(value = "/test")
public class TestController {
@RequestMapping(value = "/interceptor12")
public String interceptor12() {
System.out.println("Controller层方法-interceptor12");
return "index";
}
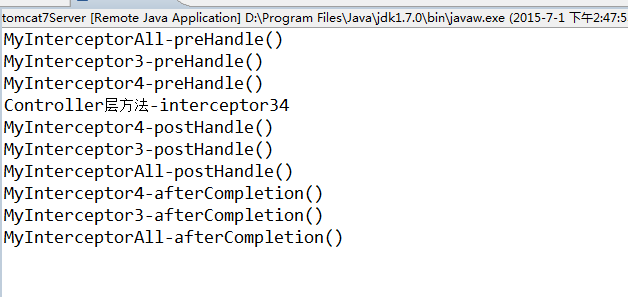
@RequestMapping(value = "/interceptor34")
public String interceptor34() {
System.out.println("Controller层方法-interceptor34");
return "index";
}
} 总共定义了5个拦截器
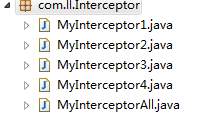
每个拦截器中只是打印消息,各拦截器类似,程序如下:
public class MyInterceptor1 extends HandlerInterceptorAdapter {
@Override
public boolean preHandle(HttpServletRequest request,
HttpServletResponse response, Object handler) throws Exception {
System.out.println("MyInterceptor1-preHandle()");
return true;
}
@Override
public void postHandle(HttpServletRequest request,
HttpServletResponse response, Object o, ModelAndView mav)
throws Exception {
System.out.println("MyInterceptor1-postHandle()");
}
@Override
public void afterCompletion(HttpServletRequest request,
HttpServletResponse response, Object o, Exception excptn)
throws Exception {
System.out.println("MyInterceptor1-afterCompletion()");
}
配置拦截器
<!-- 定义拦截器 -->
<mvc:interceptors>
<mvc:interceptor>
<!-- 拦截指定请求 -->
<mvc:mapping path="/test/interceptor12" />
<bean class="com.ll.Interceptor.MyInterceptor1" />
</mvc:interceptor>
<!-- 拦截所有的请求 -->
<mvc:interceptor>
<mvc:mapping path="/test/*" />
<bean class="com.ll.Interceptor.MyInterceptorAll" />
</mvc:interceptor>
<mvc:interceptor>
<mvc:mapping path="/test/interceptor12" />
<bean class="com.ll.Interceptor.MyInterceptor2" />
</mvc:interceptor>
<mvc:interceptor>
<mvc:mapping path="/test/interceptor34" />
<bean class="com.ll.Interceptor.MyInterceptor3" />
</mvc:interceptor>
<mvc:interceptor>
<mvc:mapping path="/test/interceptor34" />
<bean class="com.ll.Interceptor.MyInterceptor4" />
</mvc:interceptor>
</mvc:interceptors> 特别注意拦截器的配置顺序,如下:
- MyInterceptor1;
- MyInterceptorAll;
- MyInterceptor2;
- MyInterceptor3;
- MyInterceptor4;
其中,MyInterceptor1和MyInterceptor2拦截interceptor12请求,MyInterceptor3和MyInterceptor4拦截interceptor34请求,MyInterceptorAll拦截所有请求。

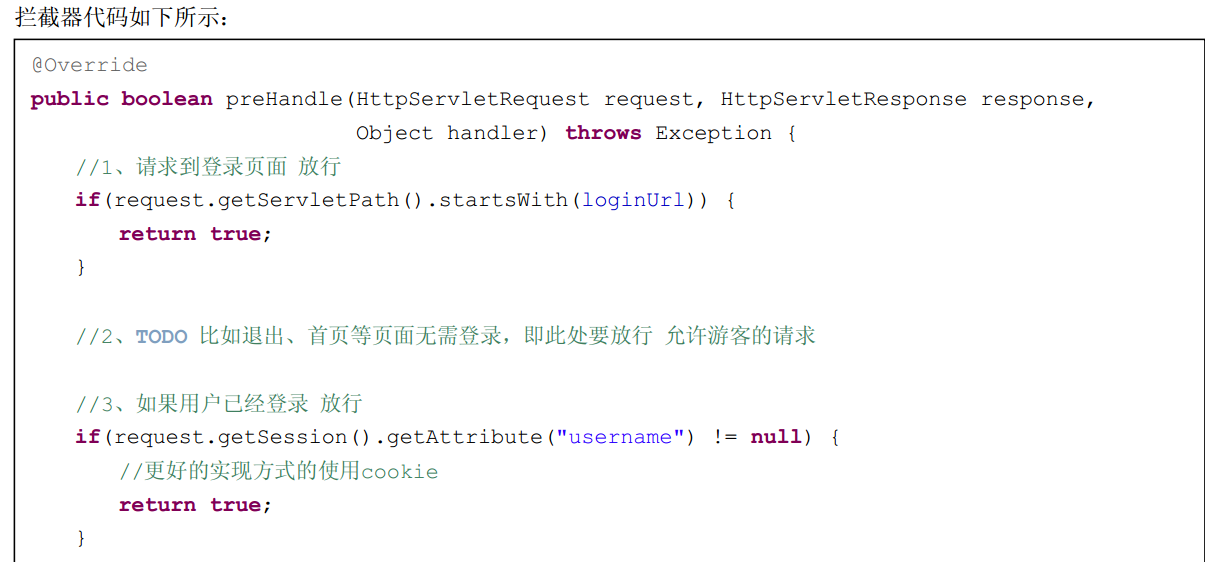
6. 其他应用举例-登录检测