http://www.taikr.com/my/course/870
这个项目用到了EasyTouch3和NGUI3.6制作,版本都比较老,但是我换成新的发现EasyTouch5没有一些方法或者方法的使用变了形式,NGUI还没有尝试换新的。
第一步,导入NGUI插件和商城、游戏资源图集。
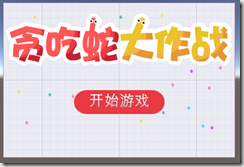
第二步,登陆界面(背景、游戏文字,开始按钮),开始游戏跳转
using UnityEngine;
using System.Collections;
using UnityEngine.SceneManagement;
public class LoadScene : MonoBehaviour {
public void LoadScene002()//加载002场景,在001的开始游戏中调用
{
SceneManager.LoadScene("002");
}
}
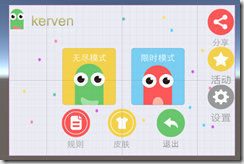
第三步,游戏场景,界面搭建
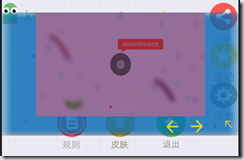
第四步,游戏教程功能的实现,用到了一个数组存储
using UnityEngine;
using System.Collections;
public class GameManager : MonoBehaviour {
public GameObject RulePanel;
public void OpenRuleClick()//打开帮助面板
{
RulePanel.SetActive(true);
}
}
using UnityEngine;
using System.Collections;
public class Rule : MonoBehaviour {
public GameObject RulePanel;//规则面板
public GameObject[] HelpPictures;//用一个数组存储帮助图片
private int index = 0;
public void LeftClick()//左图按钮
{
if (index > 0)
{
index--;
ShowPicture();
}
}
public void RightClick()//右图按钮
{
if(index< HelpPictures.Length)
{
index++;
ShowPicture();
}
}
void ShowPicture()//显示图片的函数,在这里写而不再update里面写可以节省资源
{
switch (index)
{
case 0:
HelpPictures[0].SetActive(true);
HelpPictures[1].SetActive(false);
HelpPictures[2].SetActive(false);
break;
case 1:
HelpPictures[0].SetActive(false);
HelpPictures[1].SetActive(true);
HelpPictures[2].SetActive(false);
break;
case 2:
HelpPictures[0].SetActive(false);
HelpPictures[1].SetActive(false);
HelpPictures[2].SetActive(true);
break;
default:
break;
}
}
public void CloseRulePanel()//关闭规则面板
{
RulePanel.SetActive(false);
}
}
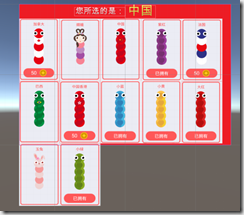
第五步,皮肤商店功能实现
using UnityEngine;
using System.Collections;
public class SkinMaker : MonoBehaviour {
public Sprite[] spritePicture;//精灵数组
public GameObject skin1Prefab;//预设
void Awake () {
for (int i = 0; i < spritePicture.Length; i++)
{
GameObject temp = Instantiate(skin1Prefab) as GameObject;//用temp存储skin1Prefab
temp.transform.parent = transform;//把生成的预制体的位置设置成skin1Prefab的位置
temp.transform.localScale = Vector3.one;//预制体被莫名增大到300,把它的scale变为1
//把对应的精灵图片复制到预制体的图片上面
temp.GetComponent<UISprite>().spriteName = spritePicture[i].name;
//由于精灵图片的UIButton有一个默认值,进入之后会显示Prefab的精灵图片,所以要改默认值
temp.GetComponent<UIButton>().normalSprite = spritePicture[i].name;
}
Destroy(gameObject.GetComponent<SkinMaker>());//生成结束,销毁组件,节省性能
}
}
第六步,完善顶部的Lable显示,和场景功能跳转
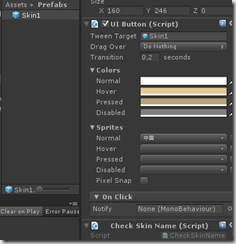
挂在Skin1上面,生成的时候有这个脚本。(//用斜杠/来区分层级)
using UnityEngine;
using System.Collections;
public class CheckSkinName : MonoBehaviour {
public void OnClick()
{
string str=GetComponent<UISprite>().spriteName;
//用斜杠/来区分层级
GameObject.Find("SkinPanel/TopLabel/PictureName").GetComponent<UILabel>().text = str;
}
}
场景功能跳转
using UnityEngine;
using System.Collections;
public class GameManager002 : MonoBehaviour {
public GameObject RulePanel;
public GameObject MainPanel;
public GameObject SkinPanel;
public void OpenRulePanel()//打开教程面板
{
RulePanel.SetActive(true);
}
public void OpenSkinPanel()//打开皮肤面板
{
MainPanel.SetActive(false);
SkinPanel.SetActive(true);
}
public void SkinPanelBackMain()//皮肤面板返回主界面
{
MainPanel.SetActive(true);
SkinPanel.SetActive(false);
}
}
第七步,游戏主场景,用EasyTouch实现,虚拟摇杆与加速
第八步,地图食物的随机生成,制作食物预设,生成的食物放在NodeManager中
using System.Collections;
using System.Collections.Generic;
using UnityEngine;
public class Node : MonoBehaviour {
private Vector3 startPoint, EndPoint;//记录开始坐标和结束坐标
public GameObject[] NodeSprites;//食物的预设放在数组里面
public int NodeCount;//生成的食物个数
private void Awake()
{
startPoint =new Vector3(-1990f, -1120f, 0);
EndPoint = new Vector3(1990f, 1111f, 0);
}
private void Start()
{
CreatNode();
}
private void CreatNode()
{
for (int i = 0; i < NodeCount; i++)
{
//从0到NodeSprites.Length随机生成预设
GameObject temp = Instantiate (NodeSprites[Random.Range(0, NodeSprites.Length)]) as GameObject;
Vector3 v = new Vector3(Random.Range(startPoint.x, EndPoint.x), Random.Range(startPoint.y, EndPoint.y), 0);
temp.transform.parent = transform;
temp.transform.position = v;
}
}
}
第九步,控制蛇头移动,(弧度与角度的换算)
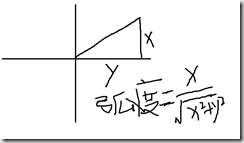
弧度=角度乘以π后再除以180
角度=弧度除以π再乘以180
(控制蛇头移动的代码有点绕,要多看看)
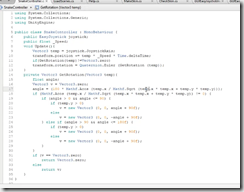
using UnityEngine;
using System.Collections;
public class SnackCtroller : MonoBehaviour {
public EasyJoystick joystick;
public float Speed;
void Update () {
Vector3 temp = joystick.JoystickAxis;
transform.position += temp * Speed * Time.deltaTime;
if(GetRotation(temp)!=Vector3.zero)
{
transform.rotation = Quaternion.Euler(GetRotation(temp));//旋转的角度
}
}
private Vector3 GetRotation(Vector3 temp)
{
float angle;//角度
Vector3 v = Vector3.zero;
//角度等于弧度乘以180除以π,这个弧度还要根据在第几象限来做判断
angle =Mathf.Acos(temp.x / Mathf.Sqrt(temp.x * temp.x + temp.y * temp.y)) * 180 / Mathf.PI;
if(Mathf.Acos(temp.x / Mathf.Sqrt(temp.x * temp.x + temp.y * temp.y))!=0)
{
if (angle > 0 && angle <= 90)//一三象限
{
if (temp.y > 0)//第一象限
{
v = new Vector3(0, 0, angle + 90f);
}
else//第三象限
{
v = new Vector3(0, 0, -angle + 90f);
}
}
else if (angle > 90 && angle <= 180f)//二四象限
{
if (temp.y > 0)//第二象限
{
v = new Vector3(0, 0, angle + 90f);
}
else//第四象限
{
v = new Vector3(0, 0, -angle + 90f);
}
}
}
if (v == Vector3.zero)
{
return Vector3.zero;
}
else
{
return v;
}
}
}
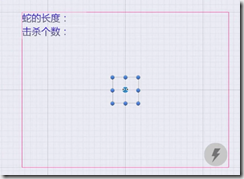
第十步,摄像机的智能跟随、加速按钮和左上角的文字也要跟随,因为这个是NGUI.
using UnityEngine;
using System.Collections;
public class CameraFollow : MonoBehaviour {
public GameObject SnackHead;
private void LateUpdate()
{
Vector3 temp = SnackHead.transform.position;
//Vector3.MoveTowards(this.transform.position, temp, 1000f);
transform.position= Vector3.Lerp(transform.position, temp, 1f);
}
}
第十一步,蛇的身子这部分
