1. JUnit4基础
JUnit4 与 JUnit3不同的是,不需要继承测试类,而是通过JDK5提供的注解去标识测试方法。
常用的注解如下:
@Before:初始化方法 对于每一个测试方法都要执行一次(注意与BeforeClass区别,后者是对于所有方法执行一次)
@After:释放资源 对于每一个测试方法都要执行一次(注意与AfterClass区别,后者是对于所有方法执行一次)
@Test:测试方法,在这里可以测试期望异常和超时时间
--@Test(expected=ArithmeticException.class)检查被测方法是否抛出ArithmeticException异常
--@Test(timeout=100)检查测试方法运行耗费的时间,如果超时,则抛出异常:test timed out after xxx milliseconds

@Ignore:忽略的测试方法
@BeforeClass:针对所有测试,只执行一次,且必须为static void
@AfterClass:针对所有测试,只执行一次,且必须为static void
一个JUnit4的单元测试用例执行顺序为:
@BeforeClass -> @Before -> @Test -> @After -> @AfterClass;
一个Junit4的单元测试方法执行顺序为:
@Before -> @Test -> @After
示例代码:
package com.khlin.test.junit.jmockit.demo;

import org.junit.After;
import org.junit.AfterClass;
import org.junit.Assert;
import org.junit.Before;
import org.junit.BeforeClass;
import org.junit.Test;

public class CameraTest {

    private static Camera camera;

    //针对所有测试,只运行一次。且只能是static方法
    @BeforeClass
    public static void init() {
        camera = new Camera();
        System.out.println("annotation BeforeClass:");
    }

    //每个测试方法调用前都会调用此方法
    @Before
    public void initClass() {
        System.out.println("annotation Before:");
    }

    @Test(timeout=1)
    public void testTakePhoto() {
        Assert.assertEquals(48, camera.takePhoto("abc"));
        System.out.println("test method");
    }

    @After
    public void teardownClass() {
        System.out.println("annotation After:");
    }

    @AfterClass
    public static void teardown() {
        System.out.println("annotation AfterClass:");
    }
}
2.JUnit4高级特性
此外,JUnit4为单元测试提供了默认的测试运行器,它的测试方法都是由它负责执行的。
开发者也可以通过继承org.junit.runner.Runner来定制自己的运行器,然后通过RunWith注解指定对应的测试运行器。
作为非专业测试人员,一般的默认运行器就可以满足需要了。当要使用一些高级特性时,就必须显式指定测试运行器。
高级特性常用的有参数化和套件测试。
1)参数化测试
构建无限组数据,对一个方法进行测试,优点是多次测试时测试方法只需要写一个,缺点是这样只能对一个方法进行测试,除非有必要大量测试,否则意义不是很大。
步骤如下:
1.在测试类上添加注解@RunWith(Parameterized.class),指定测试运行器
2.创建用于存储期望值和参数的变量
3.声明构造方法,为上述变量赋值
4.声明数据供给方法,static,返回值为Collection类型(二维数组),用@Parameters注解
示例代码:
 1 package com.khlin.test.junit.jmockit.demo;
 2
 3 import java.util.Arrays;
 4 import java.util.Collection;
 5
 6 import org.junit.After;
 7 import org.junit.Assert;
 8 import org.junit.Before;
 9 import org.junit.Test;
10 import org.junit.runner.RunWith;
11 import org.junit.runners.Parameterized;
12 import org.junit.runners.Parameterized.Parameters;
13
14 //0.注解,表示是参数化测试
15 @RunWith(Parameterized.class)
16 public class CalculatorTest {
17
18     private Calculator calculator;
19
20     //1.创建用于存储期望值和参数
21
22     private int expected;
23
24     private int i;
25
26     private int j;
27
28     //2. 构造方法赋值
29     public CalculatorTest(int expected, int i, int j) {
30         // TODO Auto-generated constructor stub
31         this.expected = expected;
32         this.i = i;
33         this.j = j;
34     }
35
36     //3. 数据供给方法,static,返回值为Collection类型,用@Parameters注解
37     @Parameters
38     public static Collection initParameter() {
39         return Arrays.asList(new Object[][] { { 2, 1, 1 }, { 3, 2, 1 },
40                 { 88, 22, 66 }});
41     }
42
43     // 每次方法前都会调用
44     @Before
45     public void init() {
46         calculator = new Calculator();
47     }
48
49     @Test
50     public void testAdd() {
51         Assert.assertEquals(expected, calculator.add(i, j));
52     }
53
54     @After
55     public void teardown() {
56         this.calculator = null;
57     }
58 }
2)套件测试
实际上就是将所有的测试类,集合到一个总的测试类当中,运行时将会依次去调用所有测试类的测试方法,意义。。。。好像也不是很大的样子。
步骤如下:
1.创建一个空的测试类
2.在该测试类上使用注解,@RunWith(Suite.class)指定运行器,@SuiteClasses({xxx.class, xxx.class})指定集合进来的测试类
3.保证这个空类使用public 修饰,而且存在公开的不带有任何参数的构造函数
以上面两段代码为例,套件测试类的代码如下:
 1 package com.khlin.test.junit.jmockit.demo;
 2
 3 import org.junit.runner.RunWith;
 4 import org.junit.runners.Suite;
 5 import org.junit.runners.Suite.SuiteClasses;
 6
 7 @RunWith(Suite.class)
 8 @SuiteClasses({CalculatorTest.class, CameraTest.class})
 9 public class SuitTest {
10
11 }
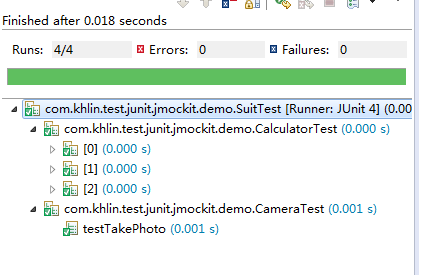
运行结果,依次调用了测试方法: