软件:
Jenkins 容器:jenkins/jenkins:lts
Jenkins 插件:Git Parameter, Pipeline, NodeJS Plugin
安装 Jenkins 的步骤就不写了,我这里使用的是 docker 方式,大家也可以参考我前面的文章:https://www.cnblogs.com/klvchen/p/10593501.html
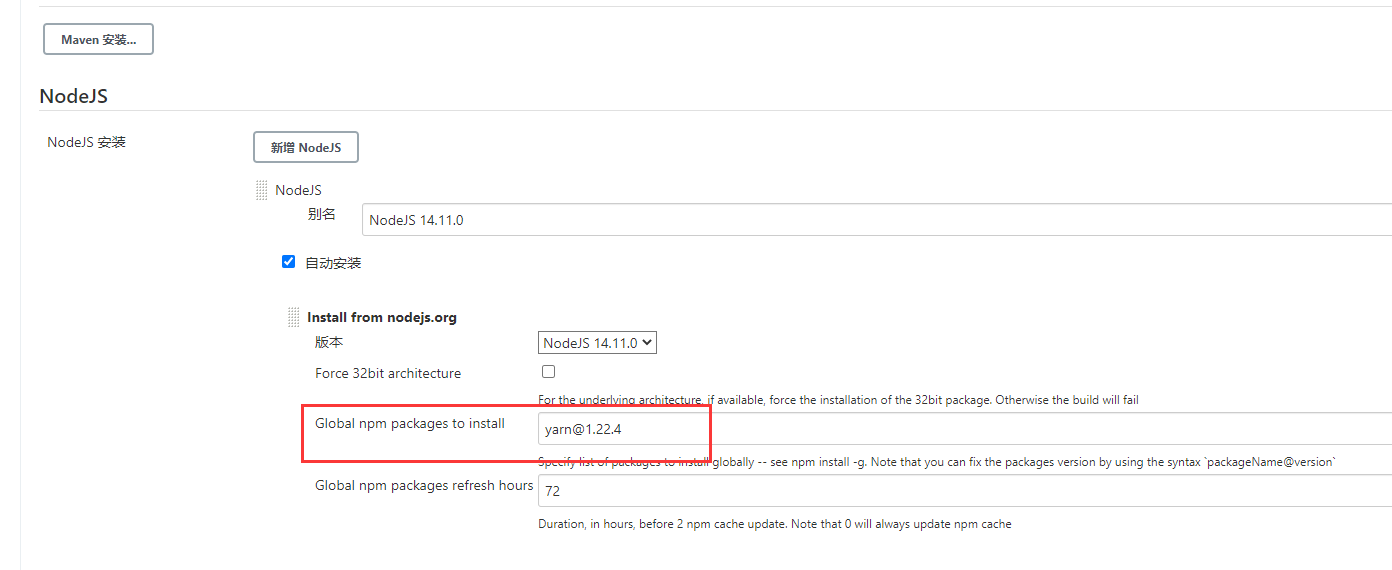
配置 NodeJS
"Manage Jenkins" -> "Global Tool Configuration" -> 输入名字:"NodeJS 14.11.0",自动安装

配置 git 拉取代码的凭证和 ssh 登录凭证
"Manage Jenkins" -> "Manage Credentials"

注意,下面两个 ID 后面会用到
git 拉取代码的ID: 1639462c-7254-497a-b352-0fba485a0fcb
ssh 登录凭证的ID:cb9d8a50-0141-4316-97df-8da33e5a3ab0
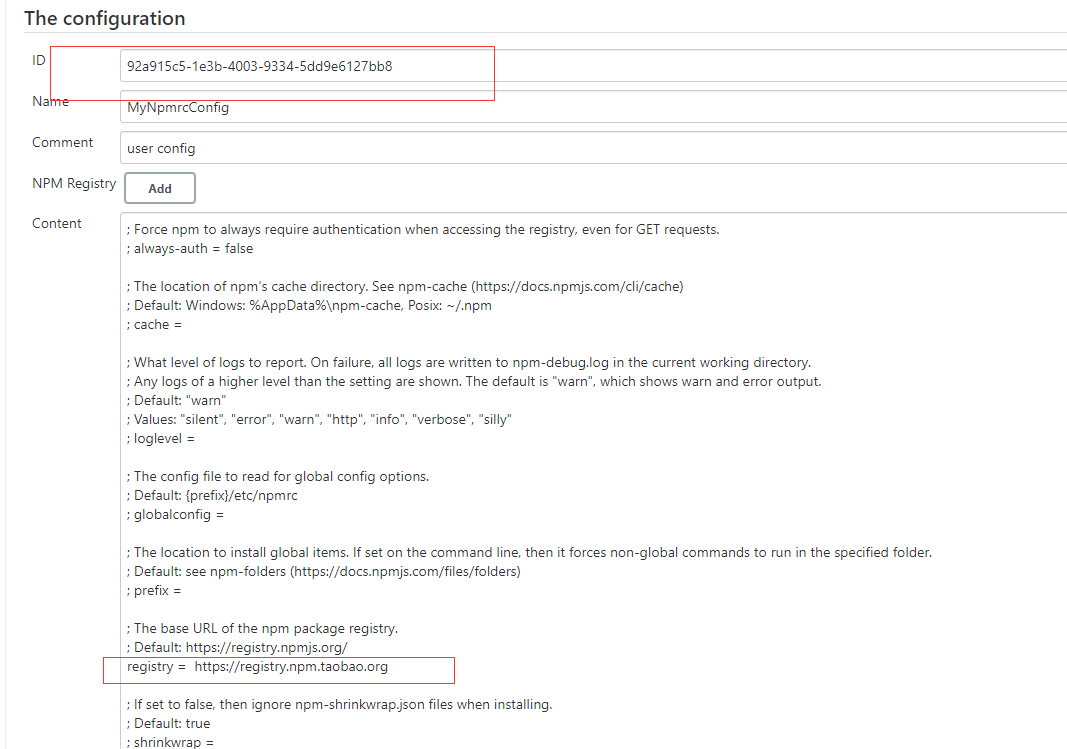
配置 npm 的源为国内淘宝的
"Manage Jenkins" -> "Managed files" -> "Add a new Config" -> 选择 "Npm config file" -> 提交
在 "Content" 处添加
registry = https://registry.npm.taobao.org

注意这里的 ID:92a915c5-1e3b-4003-9334-5dd9e6127bb8,在 Build 阶段会指定该 ID
创建 Pipeline 项目 klvchen_vue
在 "Pipeline Script" 中输入
pipeline {
    agent any

    parameters {
        // 选择分支发布
        gitParameter branchFilter: 'origin/(.*)', defaultValue: 'master', name: 'BRANCH', type: 'PT_BRANCH', listSize: '25'
    }

    stages {
        stage('Git pull') {
            steps {
                // 下载代码
                git credentialsId: '1639462c-7254-497a-b352-0fba485a0fcb', branch: "${params.BRANCH}", url: 'http://git.klvchen.com/klvchen/klvchen_vue.git'
            }
        }

        stage('Build') {
            steps {
                nodejs(nodeJSInstallationName: 'NodeJS 14.11.0', configId: '92a915c5-1e3b-4003-9334-5dd9e6127bb8') {
                    // npm 编译安装
                    sh 'npm install && npm run build'
                }
            }
        }

        stage('Deploy') {
            steps {
                // 把编译好的 dist 传输到 192.168.0.2 服务器上
                withCredentials([sshUserPrivateKey(credentialsId: 'cb9d8a50-0141-4316-97df-8da33e5a3ab0', keyFileVariable: 'pem')]) {
                    sh '''
                       scp -i ${pem} -o "StrictHostKeyChecking=no" -r dist root@192.168.0.2:/data/klvchen_project/
                    '''
                }
            }
        }
    }

}
npm 换成 yarn 命令
因为 npm 命令安装第三方包不稳定,可以使用 yarn 来管理

在构建的时候,把 npm 命令换成 yarn
sh '''
    yarn config set registry https://registry.npm.taobao.org/
    yarn install && yarn build
'''