spring中 @Scheduled & @EnableScheduling 这2个注解,可以用来快速开发定时器,使用特别的简单。
如何使用?
用法
1、需要定时执行的方法上加上@Scheduled注解,这个注解中可以指定定时执行的规则,稍后详细介绍。
2、Spring容器中使用@EnableScheduling开启定时任务的执行,此时spring容器才可以识别@Scheduled标注的方法,然后自动定时执行。
案例
db中有很多需要推送的任务,然后将其检索出来,推送到手机端,来个定时器,每秒一次从库中检测需要推送的消息,然后推送到手机端。
package com.javacode2018.scheduled.demo1;

import org.springframework.scheduling.annotation.Scheduled;
import org.springframework.stereotype.Component;

@Component
public class PushJob {

    //推送方法,每秒执行一次
    @Scheduled(fixedRate = 1000)
    public void push() throws InterruptedException {
        System.out.println("模拟推送消息," + System.currentTimeMillis());
    }

}
来个spring配置类,需要使用@EnableScheduling标注
package com.javacode2018.scheduled.demo1;

import org.springframework.context.annotation.Bean;
import org.springframework.context.annotation.ComponentScan;
import org.springframework.scheduling.annotation.EnableScheduling;

import java.util.concurrent.Executors;
import java.util.concurrent.ScheduledExecutorService;

@ComponentScan
@EnableScheduling //在spring容器中启用定时任务的执行
public class MainConfig1 {

    @Bean
    public ScheduledExecutorService scheduledExecutorService() {
        return Executors.newScheduledThreadPool(20);
    }
}
测试类
package com.javacode2018.scheduled;

import com.javacode2018.scheduled.demo1.MainConfig1;
import org.junit.Test;
import org.springframework.context.annotation.AnnotationConfigApplicationContext;

import java.util.concurrent.TimeUnit;

public class ScheduledTest {
    @Test
    public void test1() throws InterruptedException {
        AnnotationConfigApplicationContext context = new AnnotationConfigApplicationContext();
        context.register(MainConfig1.class);
        context.refresh();
        //休眠一段时间,房子junit自动退出
        TimeUnit.SECONDS.sleep(10000);
    }

}
运行输出,每秒会输出一次,如下:
模拟推送消息,1595840822998
模拟推送消息,1595840823998
模拟推送消息,1595840824998
模拟推送消息,1595840825998
模拟推送消息,1595840826998
模拟推送消息,1595840827998
模拟推送消息,1595840828998
@Scheduled配置定时规则
@Scheduled可以用来配置定时器的执行规则,非常强大,@Scheduled中主要有8个参数,我们一一来了解一下。
@Target({ElementType.METHOD, ElementType.ANNOTATION_TYPE})
@Retention(RetentionPolicy.RUNTIME)
@Documented
@Repeatable(Schedules.class)
public @interface Scheduled {

 String cron() default "";

 String zone() default "";

 long fixedDelay() default -1;

 String fixedDelayString() default "";

 long fixedRate() default -1;

 String fixedRateString() default "";

 long initialDelay() default -1;

 String initialDelayString() default "";

}
1. cron
该参数接收一个cron表达式,cron表达式是一个字符串,字符串以5或6个空格隔开,分开共6或7个域,每一个域代表一个含义。
cron表达式语法
[秒] [分] [小时] [日] [月] [周] [年]
“注:[年]不是必须的域,可以省略[年],则一共6个域
| 序号 | 说明 | 必填 | 允许填写的值 | 允许的通配符 |
|---|---|---|---|---|
| 1 | 秒 | 是 | 0-59 | , - * / |
| 2 | 分 | 是 | 0-59 | , - * / |
| 3 | 时 | 是 | 0-23 | , - * / |
| 4 | 日 | 是 | 1-31 | , - * ? / L W |
| 5 | 月 | 是 | 1-12 / JAN-DEC | , - * / |
| 6 | 周 | 是 | 1-7 or SUN-SAT | , - * ? / L # |
| 7 | 年 | 否 | 1970-2099 | , - * / |
通配符说明:
*表示所有值。例如:在分的字段上设置 *,表示每一分钟都会触发。
?表示不指定值。使用的场景为不需要关心当前设置这个字段的值。例如:要在每月的10号触发一个操作,但不关心是周几,所以需要周位置的那个字段设置为”?” 具体设置为 0 0 0 10 * ?
-表示区间。例如 在小时上设置 “10-12”,表示 10,11,12点都会触发。
,表示指定多个值,例如在周字段上设置 “MON,WED,FRI” 表示周一,周三和周五触发
/用于递增触发。如在秒上面设置”5/15” 表示从5秒开始,每增15秒触发(5,20,35,50)。在日字段上设置’1/3’所示每月1号开始,每隔三天触发一次。
L表示最后的意思。在日字段设置上,表示当月的最后一天(依据当前月份,如果是二月还会依据是否是润年[leap]), 在周字段上表示星期六,相当于”7”或”SAT”。如果在”L”前加上数字,则表示该数据的最后一个。例如在周字段上设置”6L”这样的格式,则表示“本月最后一个星期五”
W表示离指定日期的最近那个工作日(周一至周五). 例如在日字段上置”15W”,表示离每月15号最近的那个工作日触发。如果15号正好是周六,则找最近的周五(14号)触发, 如果15号是周未,则找最近的下周一(16号)触发.如果15号正好在工作日(周一至周五),则就在该天触发。如果指定格式为 “1W”,它则表示每月1号往后最近的工作日触发。如果1号正是周六,则将在3号下周一触发。(注,”W”前只能设置具体的数字,不允许区间”-“)。
#序号(表示每月的第几个周几),例如在周字段上设置”6#3”表示在每月的第三个周六.注意如果指定”#5”,正好第五周没有周六,则不会触发该配置(用在母亲节和父亲节再合适不过了) ;小提示:’L’和 ‘W’可以一组合使用。如果在日字段上设置”LW”,则表示在本月的最后一个工作日触发;周字段的设置,若使用英文字母是不区分大小写的,即MON与mon相同。
示例
每隔5秒执行一次:*/5 * * * * ?
每隔1分钟执行一次:0 */1 * * * ?
每天23点执行一次:0 0 23 * * ?
每天凌晨1点执行一次:0 0 1 * * ?
每月1号凌晨1点执行一次:0 0 1 1 * ?
每月最后一天23点执行一次:0 0 23 L * ?
每周星期六凌晨1点实行一次:0 0 1 ? * L
在26分、29分、33分执行一次:0 26,29,33 * * * ?
每天的0点、13点、18点、21点都执行一次:0 0 0,13,18,21 * * ?
cron表达式使用占位符
另外,cron属性接收的cron表达式支持占位符。
如:配置文件:
time:
  cron: */5 * * * * *
  interval: 5
每5秒执行一次:
@Scheduled(cron="${time.cron}")
void testPlaceholder1() {
    System.out.println("Execute at " + System.currentTimeMillis());
}

@Scheduled(cron="*/${time.interval} * * * * *")
void testPlaceholder2() {
    System.out.println("Execute at " + System.currentTimeMillis());
}
2. zone
时区,接收一个java.util.TimeZone#ID。cron表达式会基于该时区解析。默认是一个空字符串,即取服务器所在地的时区。比如我们一般使用的时区Asia/Shanghai。该字段我们一般留空。
3. fixedDelay
上一次执行完毕时间点之后多长时间再执行。
如:
@Scheduled(fixedDelay = 5000) //上一次执行完毕时间点之后5秒再执行
4. fixedDelayString
与 3. fixedDelay 意思相同,只是使用字符串的形式。唯一不同的是支持占位符。
如:
@Scheduled(fixedDelayString = "5000") //上一次执行完毕时间点之后5秒再执行
占位符的使用(配置文件中有配置:time.fixedDelay=5000)
@Scheduled(fixedDelayString = "${time.fixedDelay}")
void testFixedDelayString() {
    System.out.println("Execute at " + System.currentTimeMillis());
}
5. fixedRate
上一次开始执行时间点之后多长时间再执行。
如:
@Scheduled(fixedRate = 5000) //上一次开始执行时间点之后5秒再执行
6. fixedRateString
与 fixedRate 意思相同,只是使用字符串的形式,唯一不同的是支持占位符。
7. initialDelay
第一次延迟多长时间后再执行。
如:
@Scheduled(initialDelay=1000, fixedRate=5000) //第一次延迟1秒后执行,之后按fixedRate的规则每5秒执行一次
8. initialDelayString
与 initialDelay 意思相同,只是使用字符串的形式,唯一不同的是支持占位符。
@Schedules注解
这个注解不用多解释,看一下源码就知道作用了,当一个方法上面需要同时指定多个定时规则的时候,可以通过这个来配置
@Target({ElementType.METHOD, ElementType.ANNOTATION_TYPE})
@Retention(RetentionPolicy.RUNTIME)
@Documented
public @interface Schedules {
 Scheduled[] value();
}
如:
//2个定时器,500毫秒的,1000毫秒的
@Schedules({@Scheduled(fixedRate = 500), @Scheduled(fixedRate = 1000)})
public void push3() {
}
为定时器定义线程池
定时器默认情况下使用下面的线程池来执行定时任务的
new ScheduledThreadPoolExecutor(1)
只有一个线程,相当于只有一个干活的人,如果需要定时执行的任务太多,这些任务只能排队执行,会出现什么问题?
如果有些任务耗时比较长,导致其他任务排队时间比较长,不能有效的正常执行,直接影响到业务。
看下面代码,2个方法,都使用了@Scheduled(fixedRate = 1000),表示每秒执行一次,而push1方法中模拟耗时2秒,方法会中打印出线程名称、时间等信息,一会注意观察输出
package com.javacode2018.scheduled.demo2;

import org.springframework.scheduling.annotation.Scheduled;
import org.springframework.stereotype.Component;

import java.util.concurrent.TimeUnit;

@Component
public class PushJob {

    //推送方法,每秒执行一次
    @Scheduled(fixedRate = 1000)
    public void push1() throws InterruptedException {
        //休眠2秒,模拟耗时操作
        TimeUnit.SECONDS.sleep(2);
        System.out.println(Thread.currentThread().getName() + " push1 模拟推送消息," + System.currentTimeMillis());
    }

    //推送方法,每秒执行一次
    @Scheduled(fixedRate = 1000)
    public void push2() {
        System.out.println(Thread.currentThread().getName() + " push2 模拟推送消息," + System.currentTimeMillis());
    }

}
运行输出
pool-1-thread-1 push1 模拟推送消息,1595902615507
pool-1-thread-1 push2 模拟推送消息,1595902615507
pool-1-thread-1 push1 模拟推送消息,1595902617507
pool-1-thread-1 push2 模拟推送消息,1595902617507
pool-1-thread-1 push1 模拟推送消息,1595902619508
pool-1-thread-1 push2 模拟推送消息,1595902619508
注意上面的输出,线程名称都是pool-1-thread-1,并且有个问题,push2中2次输出时间间隔是2秒,这就是由于线程池中只有一个线程导致了排队执行而产生的问题。
可以通过自定义定时器中的线程池来解决这个问题,定义一个ScheduledExecutorService类型的bean,名称为taskScheduler
@Bean
public ScheduledExecutorService taskScheduler() {
    //设置需要并行执行的任务数量
    int corePoolSize = 20;
    return new ScheduledThreadPoolExecutor(corePoolSize);
}
此时问题就解决了,再次运行一下上面案例代码,结果如下,此时线程名称不一样了,且push2运行正常了
pool-1-thread-2 push2 模拟推送消息,1595903154636
pool-1-thread-2 push2 模拟推送消息,1595903155636
pool-1-thread-1 push1 模拟推送消息,1595903156636
pool-1-thread-3 push2 模拟推送消息,1595903156636
pool-1-thread-1 push2 模拟推送消息,1595903157636
源码 & 原理
从EnableScheduling注解开始看,这个注解会导入SchedulingConfiguration类
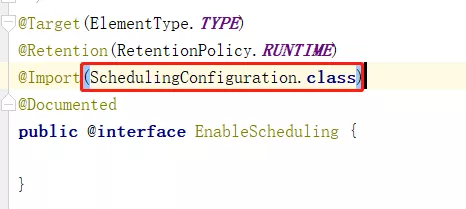
SchedulingConfiguration是一个配置类,内部定义了ScheduledAnnotationBeanPostProcessor类型的bean

ScheduledAnnotationBeanPostProcessor是一个bean后置处理器,内部有个postProcessAfterInitialization方法,spring中任何bean在初始化完毕之后,会自动调用postProcessAfterInitialization方法,而ScheduledAnnotationBeanPostProcessor在这个方法中会解析bean中标注有@Scheduled注解的方法,这些方法也就是需要定时执行的方法。
ScheduledAnnotationBeanPostProcessor还实现了一个接口:SmartInitializingSingleton,SmartInitializingSingleton中有个方法afterSingletonsInstantiated会在spring容器中所有单例bean初始化完毕之后调用,定期器的装配及启动都是在这个方法中进行的。
org.springframework.scheduling.annotation.ScheduledAnnotationBeanPostProcessor#afterSingletonsInstantiate
案例源码
https://gitee.com/javacode2018/spring-series
路人甲java所有案例代码以后都会放到这个上面,大家watch一下,可以持续关注动态。
来源:https://mp.weixin.qq.com/s?__biz=MzA5MTkxMDQ4MQ==&mid=2648935890&idx=2&sn=f8a8e01e7399161621152b2e4caa8128&scene=21#wechat_redirect