我们接着上一章,继续学习一些有关对齐、布局、导航栏的内容。
1.水平块对齐:
1.1 margin:把左和右外边距设置为 auto,规定的是均等地分配可用的外边距。结果就是居中的元素
.center {margin-left:auto;margin-right:auto;70%;background-color:red;}
1.2 position:使用 position 属性进行左和右对齐
.right {position:absolute;right:0px;300px;background-color:gray;}
1.3 float:使用 float 属性来进行左和右对齐
.right {float:right;300px;background-color:gray;}
浏览器兼容性问题:
当像这样对齐元素时,对 <body> 元素的外边距和内边距进行预定义是一个好主意,这样可以避免在不同的浏览器中出现可见的差异。
当使用 position / float 属性时,IE8 以及更早的版本存在一个问题。如果容器元素设置了指定的宽度,并且省略了 !DOCTYPE 声明,那么 IE8 以及更早的版本会在右侧增加 17px 的外边距。这似乎是为滚动条预留的空间。当使用 position / float 属性时,请始终设置 !DOCTYPE 声明。
2.尺寸
height width line-height(设置行高)
max-height max-width
min-height min-width
3.分类属性
clear: 清除元素侧面的浮动元素
display: inline block none
float: 浮动
position: static relative absolute fixed
visibility: visible hidden
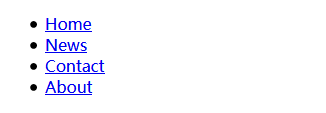
4.导航栏:导航栏是一个链接列表,因此需要使用<ul>与<a>元素
    <ul>
        <li><a herf="default.asp">Home</a></li>
        <li><a herf="news.asp">News</a></li>
        <li><a herf="contact.asp">Contact</a></li>
        <li><a herf="about.asp">About</a></li>
    </ul>

去掉圆点与外边距:
ul {list-style-type:none;margin:0;padding:0;}

垂直导航栏:
    a:link,    a:visited {display:block;  /*链接设置成块级,整个区域可点击 */
                        120px;  /*通常需要指定宽度。不然块级链接默认占用全部可用宽度 */
                        background-color:gray;
                        color:white;
                        padding:4px;
                        text-align:center;
                        font-weight:bold;
                        text-decoration:none;
                        }
    a:hover, a:active {background-color:red;}

水平导航栏(行内):除了上面的“标准”代码,构建水平导航栏的方法之一是将 <li> 元素规定为行内元素
    ul {list-style-type:none; margin:0; padding:0; padding-top:6px; padding-bottom:6px;}

    li {display:inline;}

    a:link,a:visited {padding:6px;
                      background-color:gray;
                      color:white;
                      text-align:center;
                      text-decoration:none;
                      font-weight:bold;
    }
    a:hover,a:active {background-color:red;}

水平导航栏(浮动):为了让所有链接拥有相等的宽度,浮动 <li> 元素并规定 <a> 元素的宽度
   ul {list-style-type:none;margin:0;padding:0;}
    li {float:left;}
    a:link, a:visited {display:block; 60px; padding:4px;
        background-color:gray; color:white;
        text-align:center;
        font-weight:bold;
        text-decoration:none;
        }
    a:hover, a:active {background-color:red;}

水平导航栏的设置,在基础导航栏的基础上有2种方法,一种是将<li>设置为行内元素,一种是浮动<li>元素。