COSBench安装
Cosbench是Intel的开源云存储性能测试软件,COSBench目前已经广泛使用与云存储测试,并作为云存储的基准测试工具使用
1 环境
1.1 操作系统
COSBench可在windows和linux两种系统中运行,而为了更好的发挥硬件和系统的能力,建议在使用COSBench进行测试时,选择linux系统,目前我使用的环境是:ubuntu 12.04系统版本;
1.2 运行环境
JRE 1.7+
CURL
2 安装
2.1 支持环境安装
2.1.1 JRE
JRE安装,请参考JDK安装相关教程,这里省略。
2.1.2 CURL安装
在ubuntu系统中,使用apt-get install 直接进行安装
1. 使用 apt-get update对源进行更新

2. 更新之后,使用apt-get install curl进行安装
![]()
3 COSBench安装
3.1 下载
COSBench开源软件地址:https://github.com/intel-cloud/cosbench 需要的软件和说明这里都有记录;目前最新的版本是v0.4.2.c4 进入tag下载地址,下载ZIP包即可:
网址 https://github.com/intel-cloud/cosbench/releases/tag/v0.4.2.c4

在ubuntu系统中,直接使用wget下载即可:
wget https://github.com/intel-cloud/cosbench/releases/download/v0.4.2.c4/0.4.2.c4.zip

3.2 安装
待软件下载完毕后,使用unzip进行文件解压。unzip 0.4.2.c4.zip
![]()
解压完毕后,如下
![]()
进入到COSBench目录,将脚本添加可执行权限:
![]()
目录中,主要脚本的功能如下:

3.3 启动
在启动COSBench之前,运行 unset htt_proxy
![]()
启动COSBench只需要直接运行启动脚本即可:./start-all.sh

当出现如下的信息时,表示启动成功

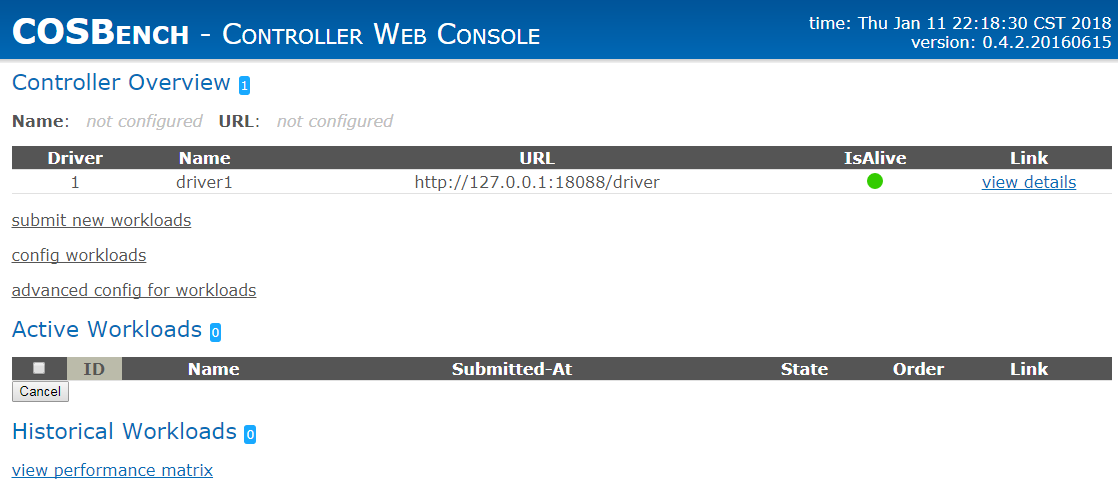
在浏览器里面,输入当前的地址,即可浏览COSBench工作界面
http://IP:端口/controller/
如:
http://192.168.59.20:19088/controller/

centOS7测试流程:
第一步:
wget https://github.com/intel-cloud/cosbench/releases/download/v0.4.2.c4/0.4.2.c4.zip #下载软件,下载速度会很慢
下载解压后给执行权限 chmod +x ./*.sh
第二步:
搭建java1.7的运行环境
第三步:
到项目文件夹里面 执行 sh start-all.sh
[root@admin-node 0.4.2.c4]# ./start-all.sh
Launching osgi framwork ...
Successfully launched osgi framework!
Booting cosbench driver ...
Starting    cosbench-log_0.4.2    [OK]
.
Starting    cosbench-tomcat_0.4.2    [OK]
Starting    cosbench-config_0.4.2    [OK]
Starting    cosbench-http_0.4.2    [OK]
Starting    cosbench-cdmi-util_0.4.2    [OK]
Starting    cosbench-core_0.4.2    [OK]
Starting    cosbench-core-web_0.4.2    [OK]
Starting    cosbench-api_0.4.2    [OK]
Starting    cosbench-mock_0.4.2    [OK]
Starting    cosbench-ampli_0.4.2    [OK]
Starting    cosbench-swift_0.4.2    [OK]
Starting    cosbench-keystone_0.4.2    [OK]
Starting    cosbench-httpauth_0.4.2    [OK]
Starting    cosbench-s3_0.4.2    [OK]
Starting    cosbench-librados_0.4.2    [OK]
Starting    cosbench-scality_0.4.2    [OK]
Starting    cosbench-cdmi-swift_0.4.2    [OK]
Starting    cosbench-cdmi-base_0.4.2    [OK]
Starting    cosbench-driver_0.4.2    [OK]
Starting    cosbench-driver-web_0.4.2    [OK]
Successfully started cosbench driver!
Listening on port 0.0.0.0/0.0.0.0:18089 ...
Persistence bundle starting...
Persistence bundle started.
----------------------------------------------
!!! Service will listen on web port: 18088 !!!
----------------------------------------------

======================================================

Launching osgi framwork ...
Successfully launched osgi framework!
Booting cosbench controller ...
Starting    cosbench-log_0.4.2    [OK]
.
Starting    cosbench-tomcat_0.4.2    [OK]
Starting    cosbench-config_0.4.2    [OK]
Starting    cosbench-core_0.4.2    [OK]
Starting    cosbench-core-web_0.4.2    [OK]
Starting    cosbench-controller_0.4.2    [OK]
Starting    cosbench-controller-web_0.4.2    [OK]
Successfully started cosbench controller!
Listening on port 0.0.0.0/0.0.0.0:19089 ...
Persistence bundle starting...
Persistence bundle started.
----------------------------------------------
!!! Service will listen on web port: 19088 !!!
----------------------------------------------
如果执行结构如以上说明软件运行没问题
可以登录http://xx.xx.xx.xx:19088/controller/index.html #查看是否运行正常
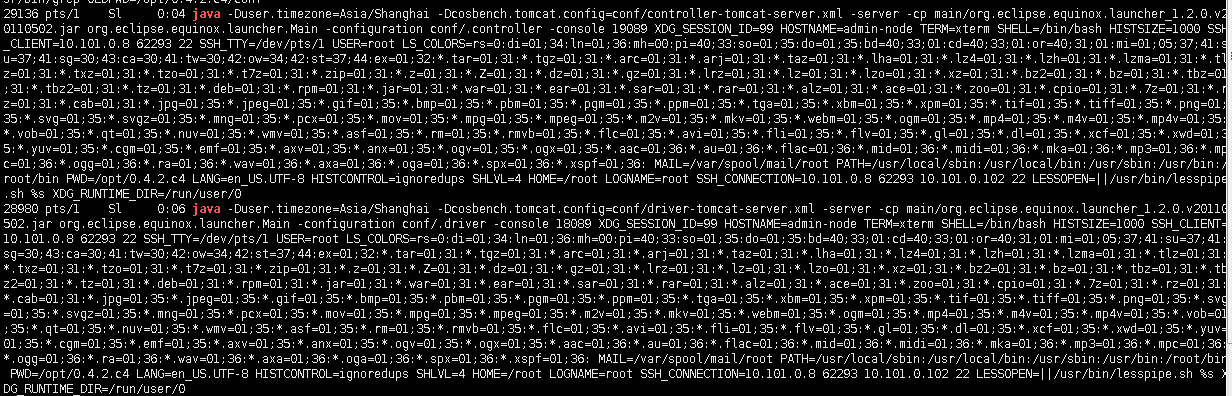
可以查看进程是否运行
ps aux |grep java 或者 netstat -ant
[root@admin-node 0.4.2.c4]# netstat -ant
Active Internet connections (servers and established)
Proto Recv-Q Send-Q Local Address           Foreign Address         State
tcp        0      0 0.0.0.0:80              0.0.0.0:*               LISTEN
tcp        0      0 0.0.0.0:22              0.0.0.0:*               LISTEN
tcp        0      0 127.0.0.1:25            0.0.0.0:*               LISTEN
tcp        0     52 10.101.0.102:22         10.101.0.8:62293        ESTABLISHED
tcp6       0      0 :::19088                :::*                    LISTEN
tcp6       0      0 :::80                   :::*                    LISTEN
tcp6       0      0 :::19089                :::*                    LISTEN
tcp6       0      0 :::22                   :::*                    LISTEN
tcp6       0      0 ::1:25                  :::*                    LISTEN
tcp6       0      0 :::18088                :::*                    LISTEN
tcp6       0      0 :::18089                :::*                    LISTEN
tcp6       0      0 127.0.0.1:36108         127.0.0.1:18088         TIME_WAIT
tcp6       0      0 127.0.0.1:36112         127.0.0.1:18088         TIME_WAIT
tcp6       0      0 127.0.0.1:36110         127.0.0.1:18088         TIME_WAIT
tcp6       0      0 10.101.0.102:19088      172.18.0.129:50836      TIME_WAIT
然后进入项目文件里面的conf文件夹:/opt/0.4.2.c4/conf
编辑s3-config-sample.xml
测试s3接口配置文件
<?xml version="1.0" encoding="UTF-8" ?>
<workload name="s3-sample" description="sample benchmark for s3">

  <storage type="s3" config="accesskey=<accesskey>;secretkey=<scretkey>;proxyhost=<proxyhost>;proxyport=<proxyport>;endpoint=<endpoint>" />

  <workflow>

    <workstage name="init">
      <work type="init" workers="1" config="cprefix=s3testqwer;containers=r(1,2)" />
    </workstage>

    <workstage name="prepare">
      <work type="prepare" workers="1" config="cprefix=s3testqwer;containers=r(1,2);objects=r(1,10);sizes=c(64)KB" />
    </workstage>

    <workstage name="main">
      <work name="main" workers="8" runtime="30">
        <operation type="read" ratio="80" config="cprefix=s3testqwer;containers=u(1,2);objects=u(1,10)" />
        <operation type="write" ratio="20" config="cprefix=s3testqwer;containers=u(1,2);objects=u(11,20);sizes=c(64)KB" />
      </work>
    </workstage>

    <workstage name="cleanup">
      <work type="cleanup" workers="1" config="cprefix=s3testqwer;containers=r(1,2);objects=r(1,20)" />
    </workstage>

    <workstage name="dispose">
      <work type="dispose" workers="1" config="cprefix=s3testqwer;containers=r(1,2)" />
    </workstage>

  </workflow>

</workload>
第四步:
执行项目文件下面:
./cli.sh submit conf/s3-config-sample.xml #执行一个测试
可以在http://xx.xx.xx.xx:19088/controller/index.html 查看详细测试结果