https://www.genuitec.com/docs/web-apps/modern-web/getting-started-with-python-in-eclipse/
An Introduction to CodeMix and Python Development
CodeMix is an Eclipse plugin that gives you direct access from Eclipse to a wide array of technologies from VS Code, and from add-on extensions built for Code OSS. When talking specifically about Python support, CodeMix gets fundamental Python support from the Python extension that is included in the CodeMix Python Extension Pack—this includes support for editing features like IntelliSense, formatting and refactoring, debugging, and executing unit tests.
This guide steps you through the required settings for every aspect of Python functionality with CodeMix, and we’re continuing to improve CodeMix to make some of these settings easier to configure. Each section includes links to external documentation that covers more advanced use cases.
Installing CodeMix and the Python Extension Pack
If you don’t already have CodeMix installed, please use the marketplace entry to install CodeMix into Eclipse (Neon or higher), MyEclipse 2017 or Angular IDE. On restart after installation, the Python Extension Pack is automatically installed. For more information, see Download CodeMix for Eclipse.
If you already have CodeMix installed and need to add Python support, go to Help>CodeMix Extensions and click Browse for Extensions, and install the Python Pack from the extension browser.
For more information, see Extensions in CodeMix.
Configuring CodeMix for Python Development
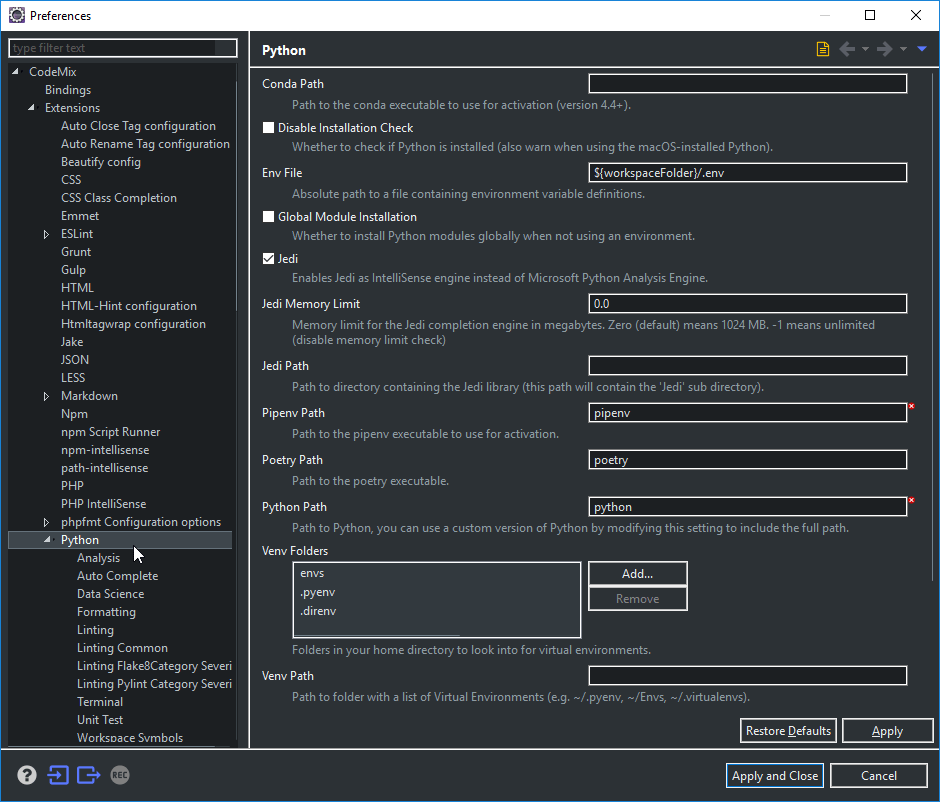
Before editing code, you might want to ensure you have your interpreter, linter, formatter and general editing preferences configured.
Preferences can be set at the workspace or project level. For more information on setting preferences, see Getting Started with CodeMix.
Selecting the Python Interpreter
In most cases, you may not need to take any action here, as the Python extension does a pretty good job of scanning your system for Python installations. However, if you open your Python file and see the notification below, you can either select an interpreter for the current project or globally. If you don’t have Python installed, please follow Appendix A: Installing Python before proceeding.

To fix this at the project level, open the command palette (Ctrl/Cmd+Shift+P) and type Python: Select Interpreter. You are asked to select a project, and then select from one of the interpreters detected on your system (scanning your system can take time).
If no interpreters are found, but you have Python installed, you can set the python.pythonPath value to the absolute location of your Python executable (for example, c:/python27/python.exe).
When working with a Python file, look at the status bar to check the interpreter being used.

Configuring Linting
Linting is enabled by default for Python projects, with Pylint being the default linter. Depending on your installation, you may need to install the linter first, but this is easily done using the Install button on the notification dialog that you see below. This installs Pylint into your chosen Python interpreter, which you can also do manually.

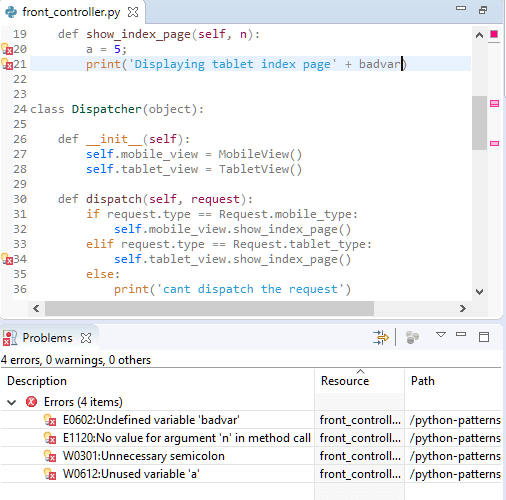
Besides Pylint, there are a number of additional linters that can be enabled, even simultaneously—this includes Flake8, Pylama, and Pep8. See Linting Python in VS Code for more information.
Configuring IntelliSense
Use the following settings on the Python>Auto Complete preference page to tweak IntelliSense.
| Setting | Sample Value | Notes |
|---|---|---|
| Extra Paths | [ “C:/Program Files (x86)/Google/google_appengine”, “C:/Program Files (x86)/Google/google_appengine/lib” ] | IntelliSense works for all files in the current working folder and Python packages that are installed in standard locations. If your libraries are in non standard locations, you can use this setting to reference them. |
| Add Brackets | true / false (default) | Will affect whether “()” are added automatically when autocompleting a function name. |
Selecting a Formatter
By default, the tooling is set to use the autopep8 formatter. You can switch to a different formatter (black or yapf) on the Python>Formatting preference page.
To format, use the context menu format action (with or without a selection) or use the Format Document/Selection commands. Again, if you see a message like the one below, simply use the Install button to install the formatter into your current Python environment.

For advanced formatting settings, read this document.
Working with Python
Projects
To create a new Python project, use File>New>Project>CodeMix>Python Project. This creates a simple Hello World project in your workspace.
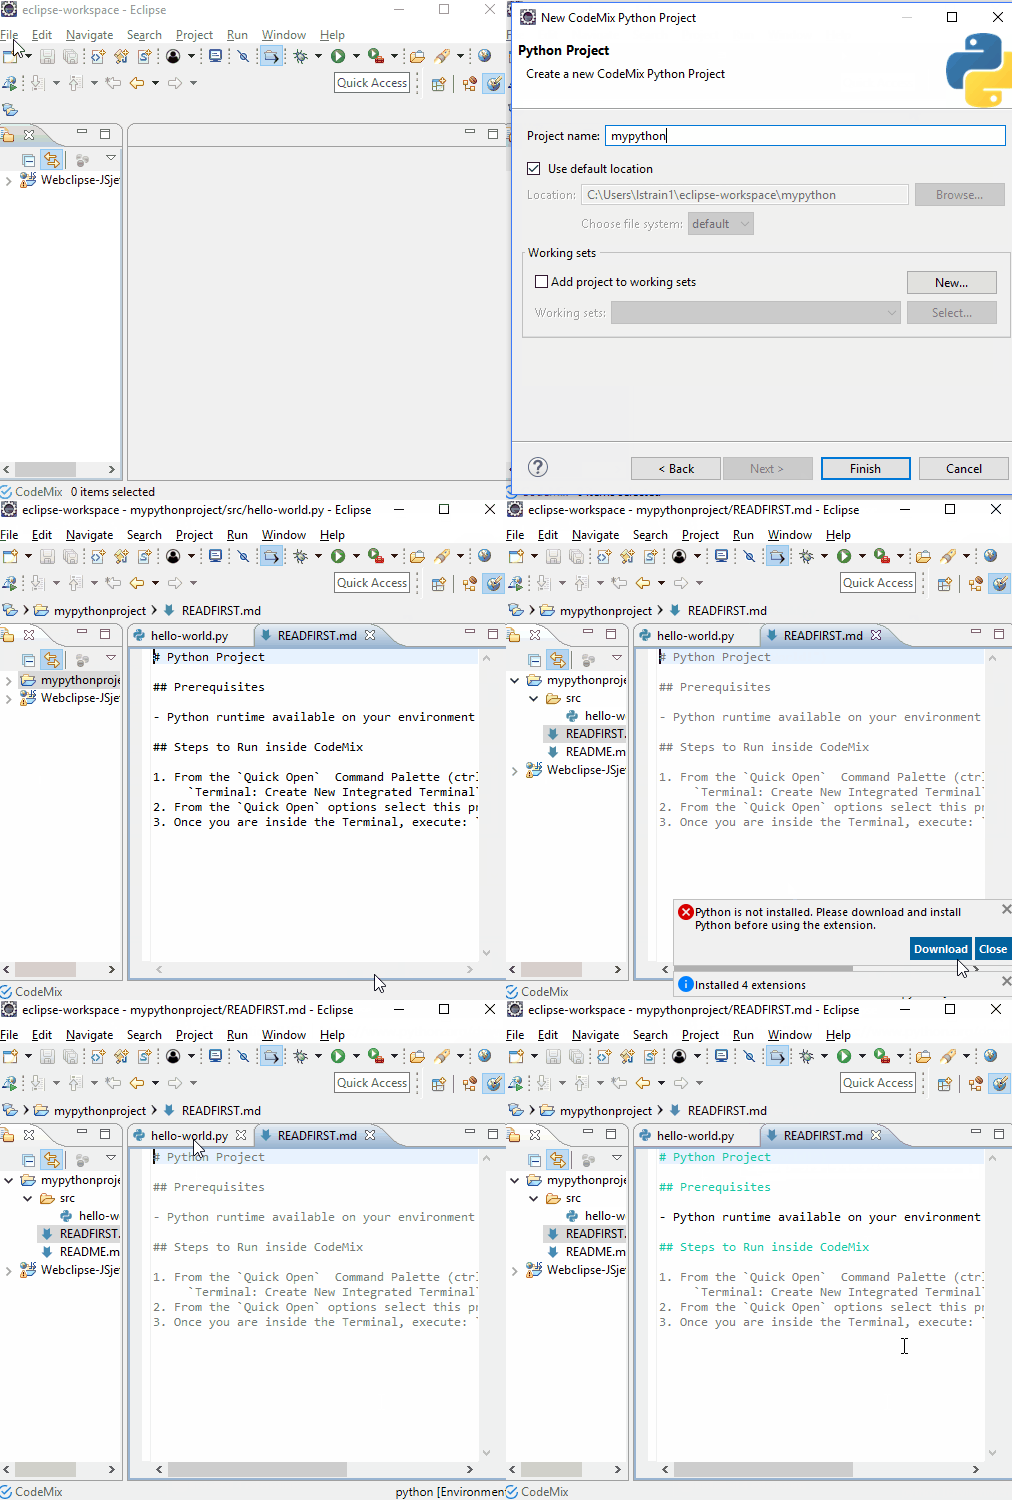
To import an existing project, use File>Open Projects from File System and point to the folder containing your project.
Python Source
You can create a new Python file, use the wizard at File>New>Other>CodeMix>Python File. You can simply create a regular file with py extension as well.
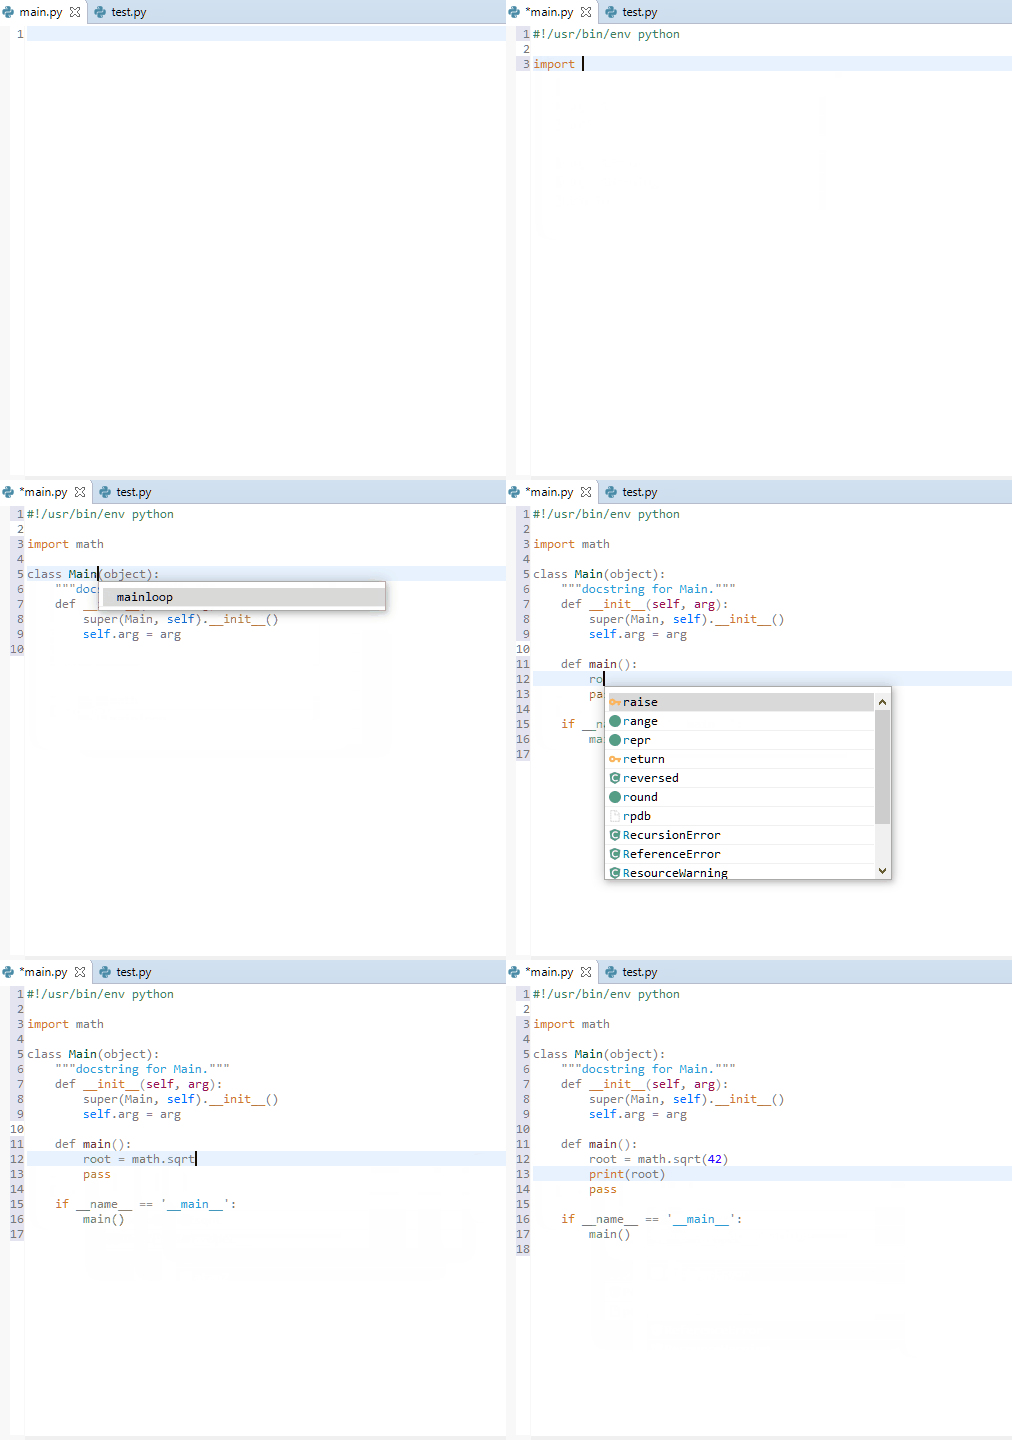
When editing a Python file, you will get content assist and validation. Press Ctrl/Cmd when hovering over variables and functions to see their definitions and implementations, you can always click to navigate to those locations too.
Use Ctrl/Cmd+O to bring up the quick outline to take a peek at the structure of your file, or use it to navigate through your source.
Key Commands
Access the command palette using Ctrl/Cmd+Shift+P.
Refactoring
The Extract Method, Extract Variable and Sort Import refactoring commands help keep your code organized.
Code Execution
Use the Python: Run Python File in Terminal / Run Selection/Line in Python Terminal commands to execute code in the active Python interpreter.
Debugging
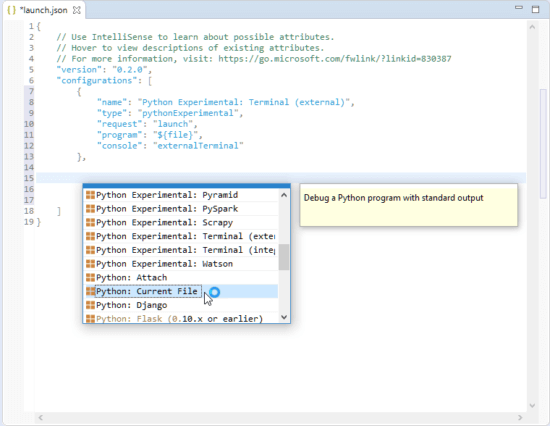
To debug a Python project, bring up the context menu on the project and choose Debug As>CodeMix launch. If a launch.json file doesn’t already exist in your project, one will be created for you, and on invoking content assist within the configurations element, you can choose one of several types of Python launches based on your needs.
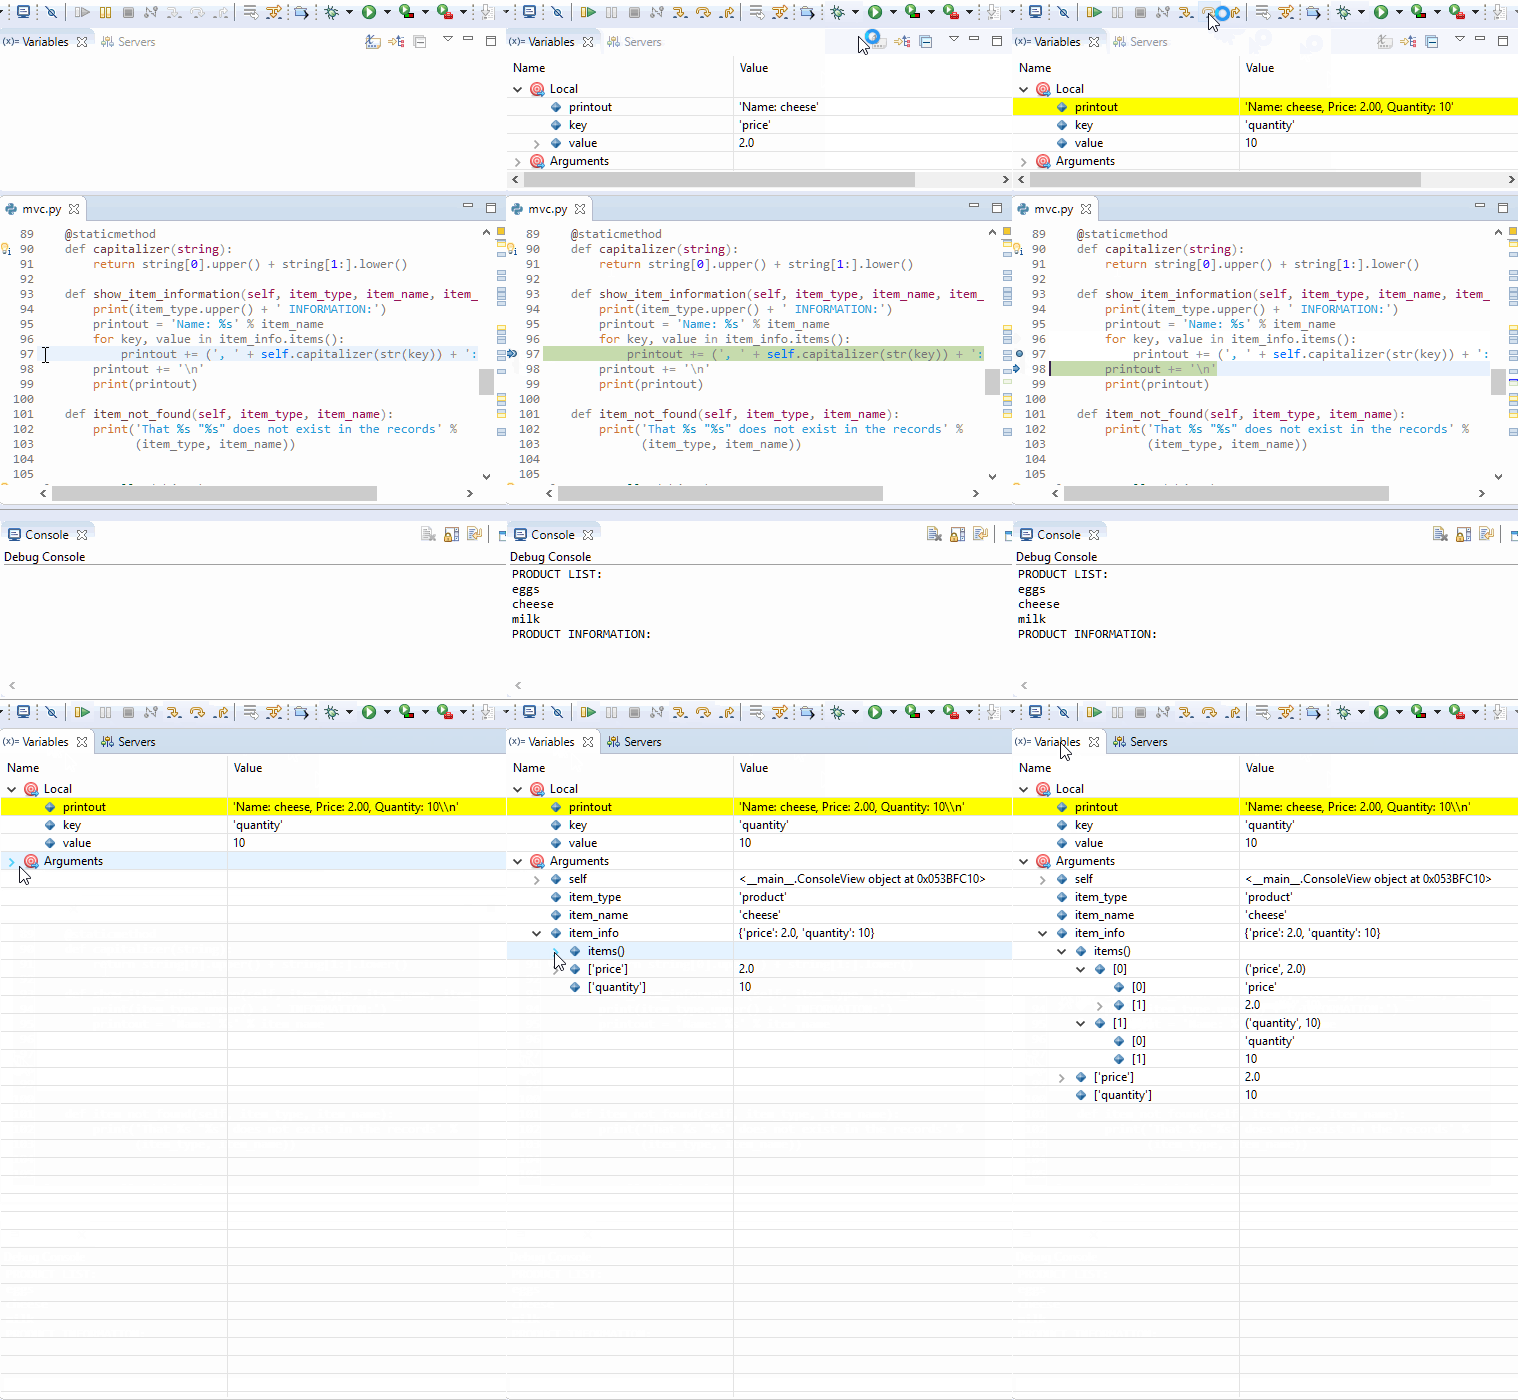
For more on debugging, see Debugging in CodeMix. We’re currently working on significant improvements to the debugging support in CodeMix stay tuned for updates to this document.
Running Unit Tests
There are several commands that can be used to run unit tests, some commands run all tests in the project, while others run all tests in a single file, and finally you can choose to execute a specific test. The commands are fairly obvious, bring up the command palette (Ctrl/Cmd+Shift+P) and type Python: unit to show only the unit test commands.

If you have not yet configured your project for unit testing, you may see the following notification, which walks you through choosing a unit test framework for your project, selecting the folder containing the tests, and finally, the naming pattern for the tests themselves. Following these instructions to configure your project for unit testing is straightforward.


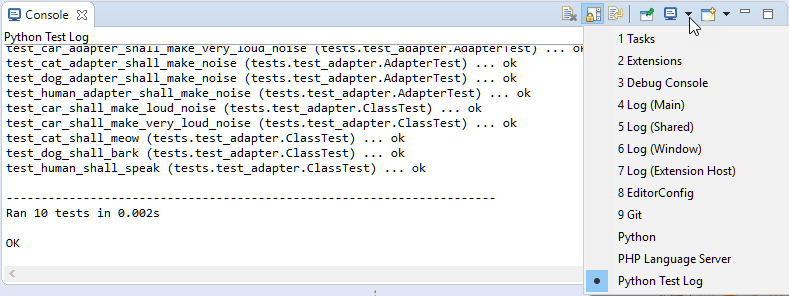
To see the unit test output, go to the Console view and select Python Test Log from the console list.
Reporting Issues
While there are certainly some exceptions, if you run into issues, like code being badly formatted, or missing content assist suggestions or simply bad validation, these problems are most likely caused by bugs in the Python extension, not in CodeMix. Regardless of this fact, do report these issues to us on our forums, and we’ll investigate them; realize that fixing some of these problems may be the responsibility of the corresponding extension developer.
Appendix A: Installing Python
To test if your system already has Python installed, get to a command prompt and type
python -V
If not already installed, you have several options when it comes to installing Python on your OS:
If you’re using Python for data science purposes, you may want an Anaconda Distribution which includes Python binaries for all OSes. Alternatively, the following options are available.
Windows
Python installers for Windows.
macOS
Use the Python installers for macOS, or use Homebrew to install Python with brew install python3.
Note: The default Python installation on macOS is not supported.
Linux
Most Linux distributions should now include Python, but you can manually install it using:
| Distribution | Command |
|---|---|
| Ubuntu / Mint / Debian | sudo apt-get install python3.6 |
| CentOS | sudo yum install python36u |
| Fedora | sudo dnf install python36 |