### 1、系统要求:
Oracle 数据库12c、Oracle 数据库由甲骨文公司出品,此处以部署Oracle 12C为例
官方网站:https://www.oracle.com/cn
Oracle 数据库一般用于大型企业,在稳定性、高性能、安全性能等方面优于其它数据库,一般用于政府企业----软件免费(服务收费)
> 安装centos7操作系统的要求
>
> 防火墙配置选项:禁用
>
> 默认安装:软件开发
>
> 内核版本:3.10.0.54.0.1.el7.x86及以上的版本
>
> 物理内存:不少于1G
>
> 交换分区:
>
> 1.物理内存为1~2G时,设置物理内存的1.5~2倍
>
> 2.物理内存为2~16G时,设置与物理内存大小相同
>
> 磁盘空间:不少于15G
>
> 拥有固定的FQDN名称,安装后不建议再修改
#### 基础服务器环境准备---->(必须)
```bash
#系统配置
[root@oracle ~]# systemctl stop firewalld
[root@oracle ~]# systemctl disable firewalld
Removed symlink /etc/systemd/system/multi-user.target.wants/firewalld.service.
Removed symlink /etc/systemd/system/dbus-org.fedoraproject.FirewallD1.service.
[root@oracle ~]# vim /etc/sysconfig/selinux
......
SELINUX=disabled
......
#查看物理内存大小
[root@oracle ~]# grep MemTotal /proc/meminfo
MemTotal: 4045920 kB
[root@oracle ~]# grep MemTotal /proc/meminfo |awk -F ":" '{print $2/1000/1000}'
4.04592
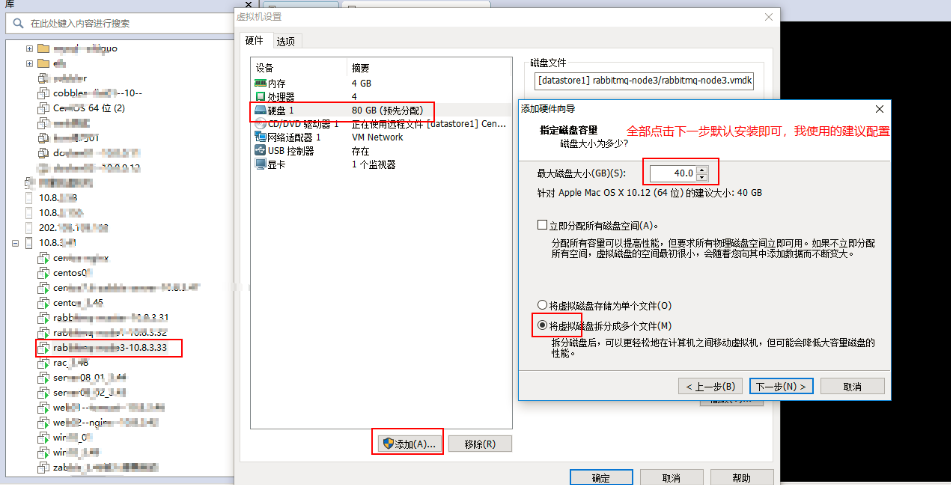
#查看虚拟内存
[root@oracle ~]# grep swapTotal /proc/meminfo
[root@oracle ~]#
#结果无数据,我们需要去添加一块硬盘,然后划分交换分区-----(划分方法如下)
```
### 1、查看是否硬盘是否添加成功

```bash
#进行服务器重启操作
[root@oracle ~]# reboot
等待服务器重启成功之后使用账号密码连接服务器
[root@oracle ~]# fdisk -l
Disk identifier: 0x000afc1e
Device Boot Start End Blocks Id System
/dev/sda1 * 2048 2099199 1048576 83 Linux
/dev/sda2 2099200 10487807 4194304 82 Linux swap / Solaris
/dev/sda3 10487808 167772159 78642176 83 Linux
#/dev/sd2 空闲时间为40G,与前面扩展的硬盘相符合
```
```bash
#创建交换分区
[root@oracle ~]# fdisk /dev/sdb
Welcome to fdisk (util-linux 2.23.2).
Changes will remain in memory only, until you decide to write them.
Be careful before using the write command.
Device does not contain a recognized partition table
Building a new DOS disklabel with disk identifier 0x0d4923cb.
Command (m for help): p
Disk /dev/sdb: 42.9 GB, 42949672960 bytes, 83886080 sectors
Units = sectors of 1 * 512 = 512 bytes
Sector size (logical/physical): 512 bytes / 512 bytes
I/O size (minimum/optimal): 512 bytes / 512 bytes
Disk label type: dos
Disk identifier: 0x0d4923cb
Device Boot Start End Blocks Id System
Command (m for help): n
Partition type:
p primary (0 primary, 0 extended, 4 free)
e extended
Select (default p): p
Partition number (1-4, default 1):
First sector (2048-83886079, default 2048):
Using default value 2048
Last sector, +sectors or +size{K,M,G} (2048-83886079, default 83886079): +4096M
Partition 1 of type Linux and of size 4 GiB is set
Command (m for help): p
Disk /dev/sdb: 42.9 GB, 42949672960 bytes, 83886080 sectors
Units = sectors of 1 * 512 = 512 bytes
Sector size (logical/physical): 512 bytes / 512 bytes
I/O size (minimum/optimal): 512 bytes / 512 bytes
Disk label type: dos
Disk identifier: 0x0d4923cb
Device Boot Start End Blocks Id System
/dev/sdb1 2048 8390655 4194304 83 Linux
Command (m for help): w
The partition table has been altered!
Calling ioctl() to re-read partition table.
Syncing disks.
#创建交换分区
[root@oracle ~]# mkswap /dev/sdb1
Setting up swapspace version 1, size = 4194300 KiB
no label, UUID=12e6bbea-be54-473f-89cb-d0c6285c9dde
[root@oracle ~]# swapon /dev/sdb1
[root@oracle ~]# grep SwapTotal /proc/meminfo
SwapTotal: 8388600 kB
#修改主机名称
[root@oracle ~]# vi /etc/sysconfig/network
[root@oracle ~]# cat /etc/sysconfig/network
# Created by anaconda
hostname oracle
[root@oracle ~]# vi /etc/hosts
[root@oracle ~]# cat /etc/hosts
......
10.8.3.33 oracle
```
### Oracle 基本配置环境(软件安装与内核配置)
```bash
#安装基本组件
[root@oracle ~]# yum -y install binutils compat-libcap1 gcc gcc-c++ glibc glibc-devel ksh libaio libaio-devel libgcc libstdc++-devel libXi libXtst make sysstat unixODBC unixODBC-devel
#修改内核参数,端口范围,I/O请求
[root@oracle ~]# vim /etc/sysctl.conf
[root@oracle ~]# grep "^[a-Z]" /etc/sysctl.conf
fs.aio-max-nr = 1048576
fs.file-max = 6815744
kernel.shmall = 2097152
kernel.shmmax = 4294967295
kernel.shmmni = 4096
kernel.sem = 250 32000 100 128
net.ipv4.ip_local_port_range = 9000 65500
net.core.rmem_default = 262144
net.core.rmem_max = 4194304
net.core.wmem_default = 262144
net.core.wmem_max = 1048586
#重新加载内核
[root@oracle ~]# sysctl -p
fs.aio-max-nr = 1048576
fs.file-max = 6815744
kernel.shmall = 2097152
kernel.shmmax = 4294967295
kernel.shmmni = 4096
kernel.sem = 250 32000 100 128
net.ipv4.ip_local_port_range = 9000 65500
net.core.rmem_default = 262144
net.core.rmem_max = 4194304
net.core.wmem_default = 262144
net.core.wmem_max = 1048586
```
#### Oracle用户环境要求
```bash
#安装软件包
[root@oracle ~]# cd /opt/
[root@oracle opt]# wget http://rpmfind.net/linux/centos/7.7.1908/os/x86_64/Packages/compat-libstdc++-33-3.2.3-72.el7.x86_64.rpm
[root@oracle opt]# rpm -ivh compat-libstdc++-33-3.2.3-72.el7.x86_64.rpm
```
#### 用户创建及其环境创建
```bash
#创建组账号oinstal、dba、用户账号Oracle
#创建oracle基本目录
#为Oracle用户设置环境变量,并允许使用X终端
[root@oracle opt]# cd
[root@oracle ~]# groupadd -g 500 oinstall
[root@oracle ~]# groupadd -g 501 dba
[root@oracle ~]# useradd -g oinstall -G dba oracle
[root@oracle ~]# echo "maslong.com" |passwd --stdin oracle
Changing password for user oracle.
passwd: all authentication tokens updated successfully.
[root@oracle ~]# mkdir -p /u01/app/oracle
[root@oracle ~]# chown -R oracle:oinstall /u01/app/
[root@oracle ~]# chmod -R 755 /u01/app/oracle/
#在/home/oracle/.bash_profile末尾export PATH加入如下变量
#[root@oracle ~]# vim /home/oracle/.bash_profile
umask=022
export ORACLE_BASE=/u01/app/oracle
export ORACLE_HOME=$ORACLE_BASE/product/12.2.0/dbhome_1
export ORACLE_SID=orcl
export NLS_LANG="SIMPLIFIED CHINESE_CHINA".UTF8
export PATH=$ORACLE_HOME/bin:$PATH
export LANG=zh_CN.UTF-8
export DISPLAY=:0.0
#使配置生效
[root@oracle ~]# source ~oracle/.bash_profile
```
#### 设置重启后或者重启终端需要加载的变量
```bash
#将以下内容加入~oracle/.bashrc下
[root@oracle ~]# vim ~oracle/.bashrc
......
umask=022
export ORACLE_BASE=/u01/app/oracle
export ORACLE_HOME=$ORACLE_BASE/product/12.2.0/dbhome_1
export ORACLE_SID=orcl
export NLS_LANG="SIMPLIFIED CHINESE_CHINA".UTF8
export PATH=$ORACLE_HOME/bin:$PATH
export LANG=zh_CN.UTF-8
export DISPLAY=:0.0
#使配置生效
[root@oracle ~]# source ~oracle/.bashrc
```
#### 进程会话要求
```bash
#增大用户Oracle的进程数、文件数限制(最末尾添加)
[root@oracle ~]# vim /etc/pam.d/login
......
session required /lib/security/pam_limits.so
session required pam_limits.so
[root@oracle ~]# vim /etc/security/limits.conf
oracle soft nproc 2047
oracle hard nproc 16384
oracle soft nofile 1024
oracle hard nofile 65536
oracle soft stack 10240
```
#### 配置全局变量进行引用
```bash
#配置全局变量在末尾添加
[root@oracle ~]# vim /etc/profile
......
if [ $USER = "oracle" ]; then
if [ $SHELL = "/bin/ksh" ]; then
ulimit -p 16384
ulimit -n 65535
else
ulimit -u 16384 -n 65536
fi
fi
#初始化
[root@oracle ~]# source /etc/profile
#注释
ulimit -p 设置管道缓冲区,k字节
ulimit -n 最大可打开文件数
ulimit -u 每个用户最大进程数
```
#### 重启操作
```bash
#使所有配置生效
[root@oracle ~]# reboot
```
#### Oracle安装
# 1.下载Oracle12c
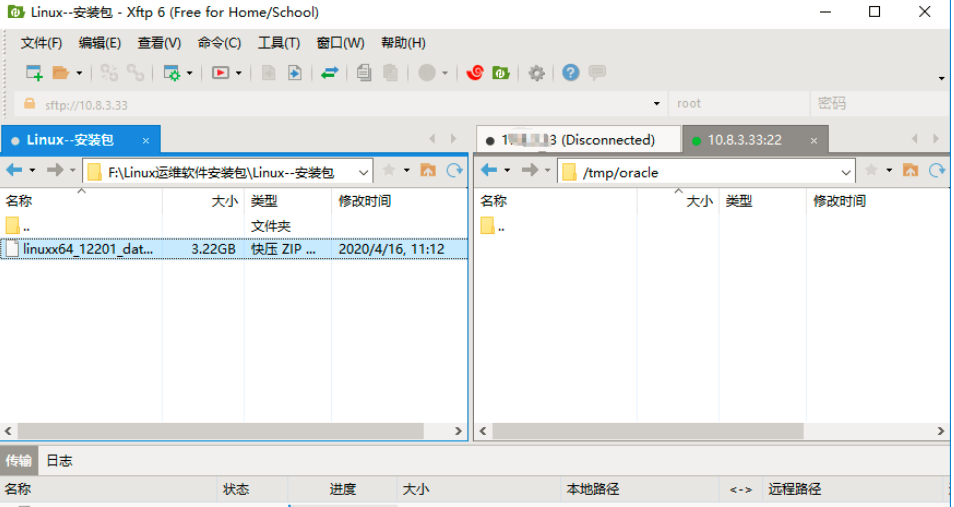
[下载Oracle](http://www.oracle.com/technetwork/database/enterprise-edition/downloads/index.html)12.2.0.1.0版本,选择[Linux x86-64](http://download.oracle.com/otn/linux/oracle12c/122010/linuxx64_12201_database.zip)安装包,使用xftp进行传输,如果直接拖到系统上面的话会损坏安装包。
```bash
#注意:使用xftp进行传输,如果直接拖进系统的话会显示包的容量不全
[root@oracle ~]# mkdir /tmp/oracle
[root@oracle ~]# cd /tmp/oracle/
[root@oracle oracle]# ls
linuxx64_12201_database.zip
[root@oracle oracle]# unzip linuxx64_12201_database.zip
[root@oracle oracle]# ls database/
install response rpm runInstaller sshsetup stage welcome.html
#安装xhost
[root@oracle ~]# yum whatprovides "*/xhost"
[root@oracle ~]# yum -y install xorg-x11-server-utils-7.7-2.el6.x86_64
[root@oracle ~]# export DISPLAY=localhost:1
[root@oracle ~]# xhost +
access control disabled, clients can connect from any host
```
#### 注意:Oracle安装必须借助图形化界面来解决
##### centos图形化界面安装
```bash
#centos图形化界面安装
1.在命令行下输入下面的命令来安装 Gnome 包
[root@oracle ~]# yum groupinstall "GNOME Desktop" "Graphical Administration Tools" -y
......等待半小时......
[root@oracle ~]# ln -sf /lib/systemd/system/runlevel5.target /etc/systemd/system/default.target
2.更新系统的运行级别
如果你想在系统下次启动的时候自动进入图形界面,那么我们需要更改系统的运行级别,输入下面的命令来启用图形界面。
复制: ln -sf /lib/systemd/system/runlevel5.target /etc/systemd/system/default.target
[root@oracle ~]# ln -sf /lib/systemd/system/runlevel5.target /etc/systemd/system/default.target
3.重启系统
[root@oracle ~]# reboot
Connection closing...Socket close.
#再次打开终端输入密码,图形界面安装成功
```
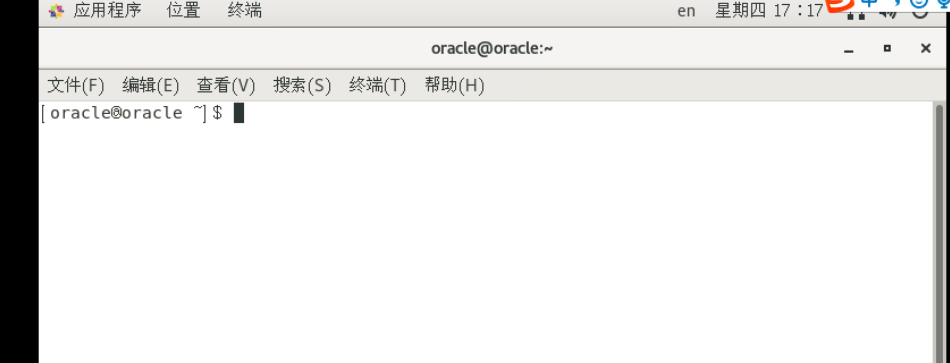
```bash
#在终端输入之前创建的Oracle的密码,输入如下命令
cd /tmp/oracle/database/
export DISPLAY=:0.0
xdpyinfo
./runInstaller
[oracle@oracle ~]# su oracle
[oracle@oracle root]$ cd /tmp/oracle/database/
[oracle@oracle database]$ export DISPLAY=:0.0
[oracle@oracle database]$ xdpyinfo
[oracle@oracle database]$ ./runInstaller
正在启动 Oracle Universal Installer...
检查临时空间: 必须大于 500 MB。 实际为 65637 MB 通过
检查交换空间: 必须大于 150 MB。 实际为 4095 MB 通过
检查监视器: 监视器配置至少必须显示 256 种颜色。 实际为 16777216 通过
准备从以下地址启动 Oracle Universal Installer /tmp/OraInstall2020-04-16_02-57-59PM. 请稍候...
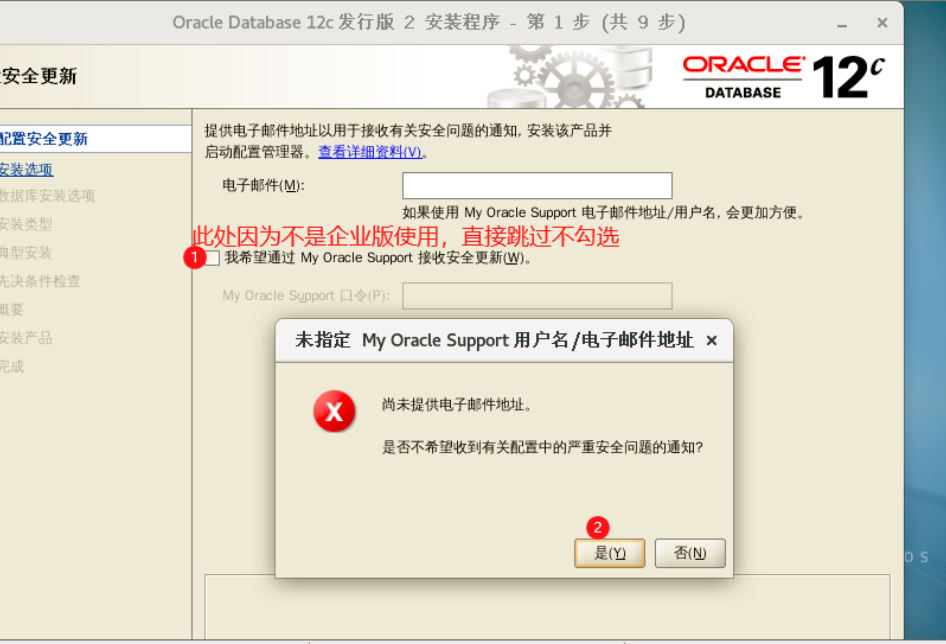
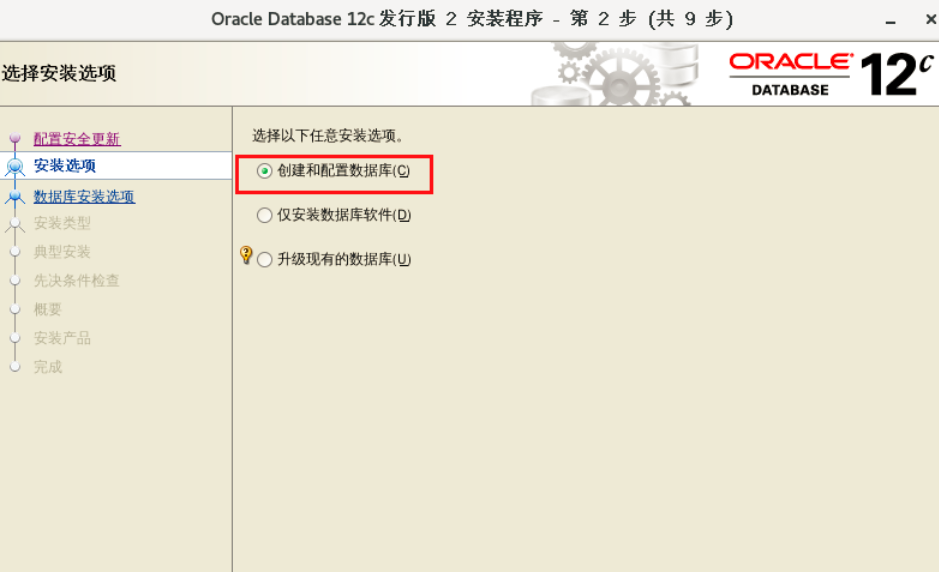
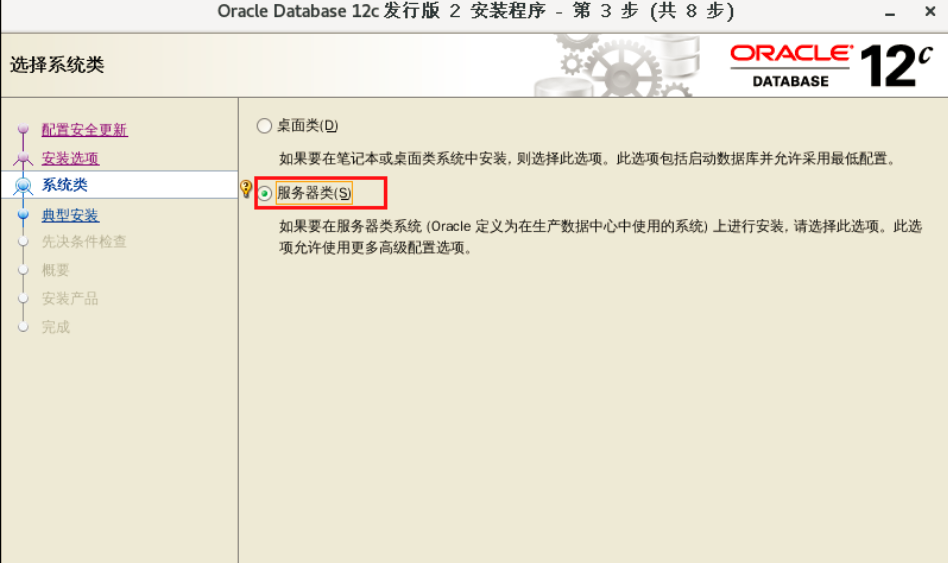
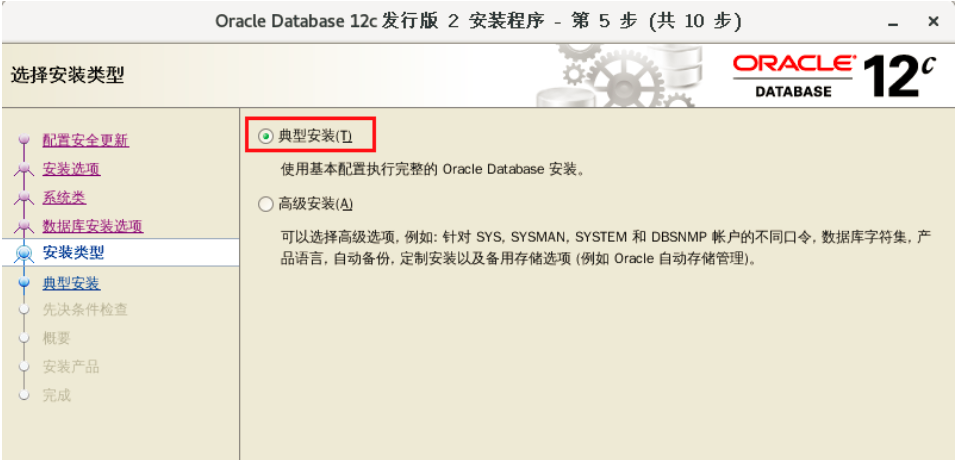
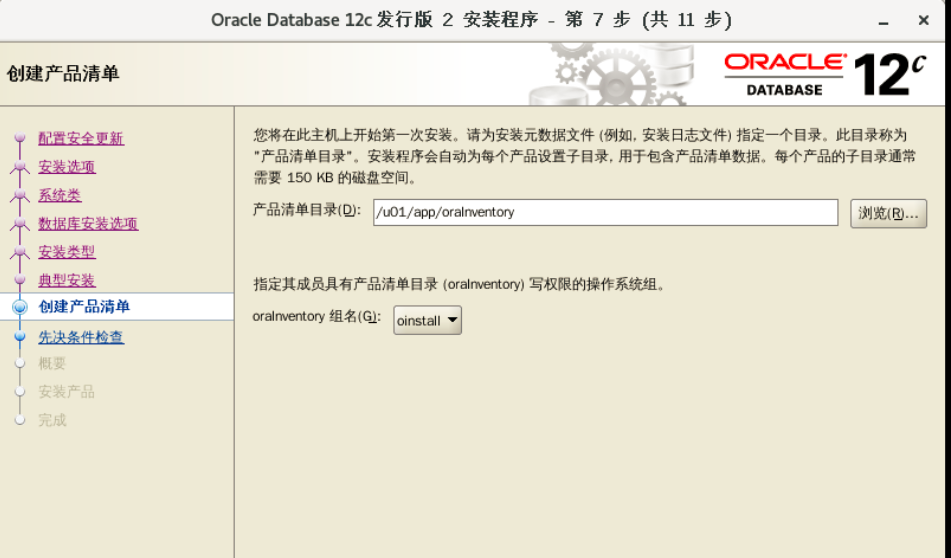
#稍等片刻跳出Oracle图形化界面
```

#### 注意:如果上述无法点击下一步与确定则登入root用户控制端键入如下命令
```bash
[root@oracle ~]# swapon /dev/sdb1
```
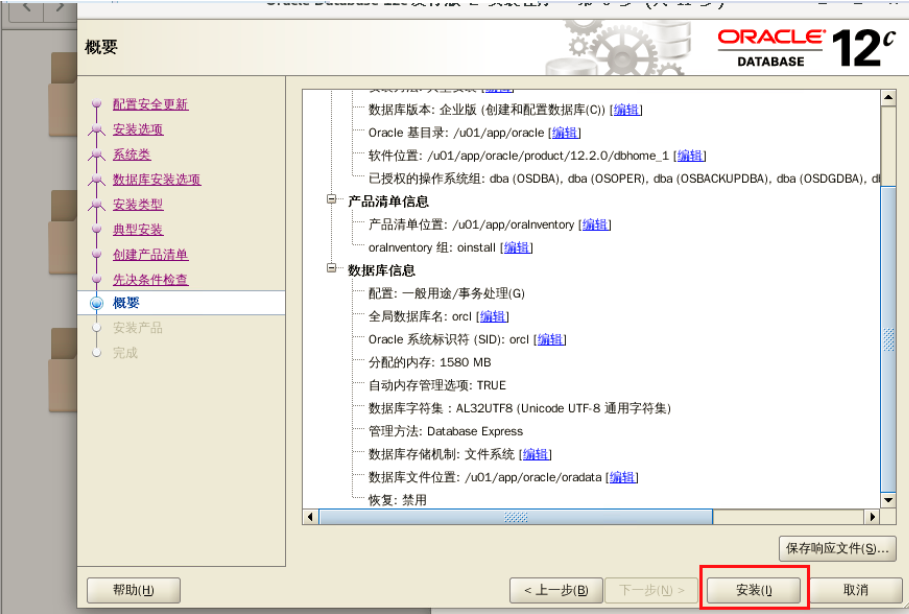
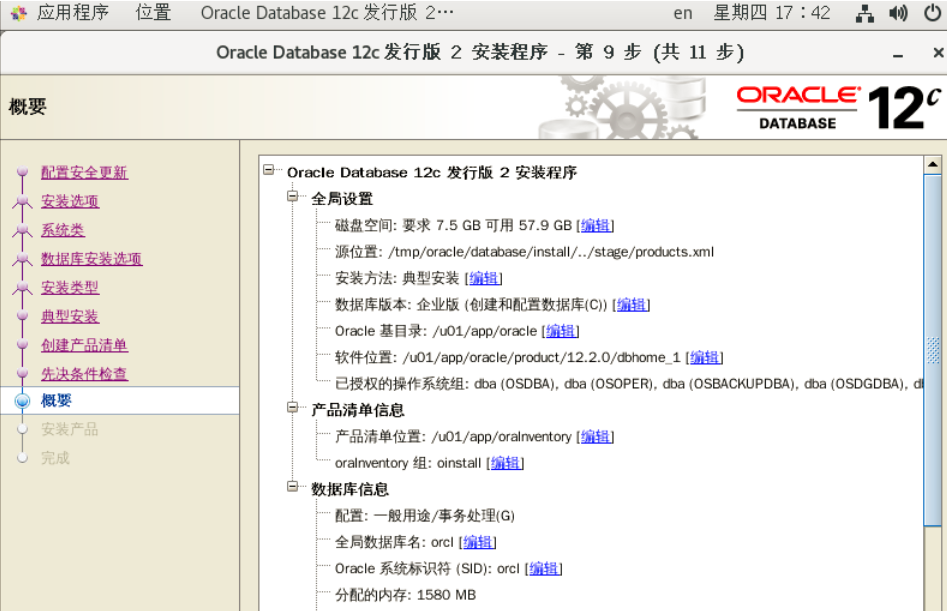
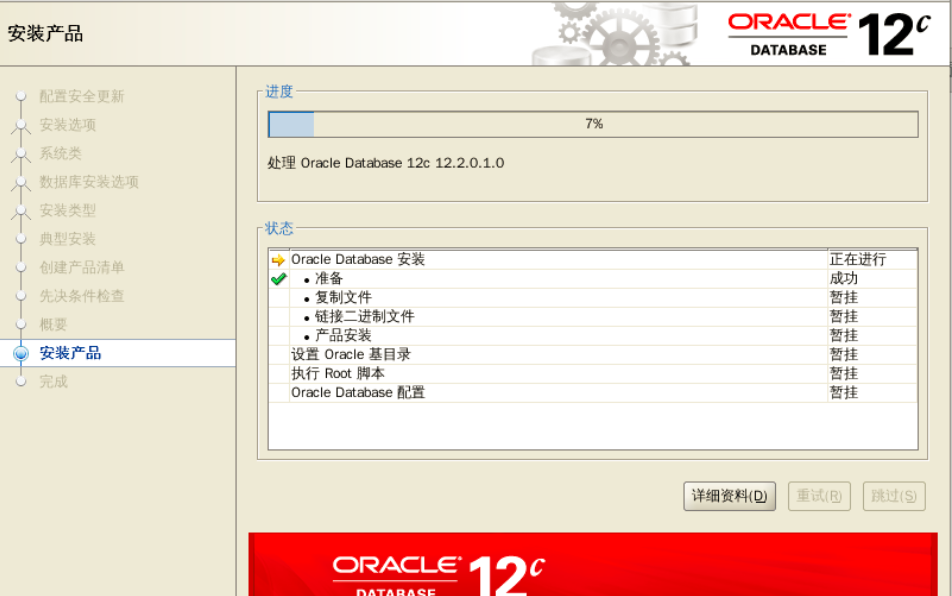
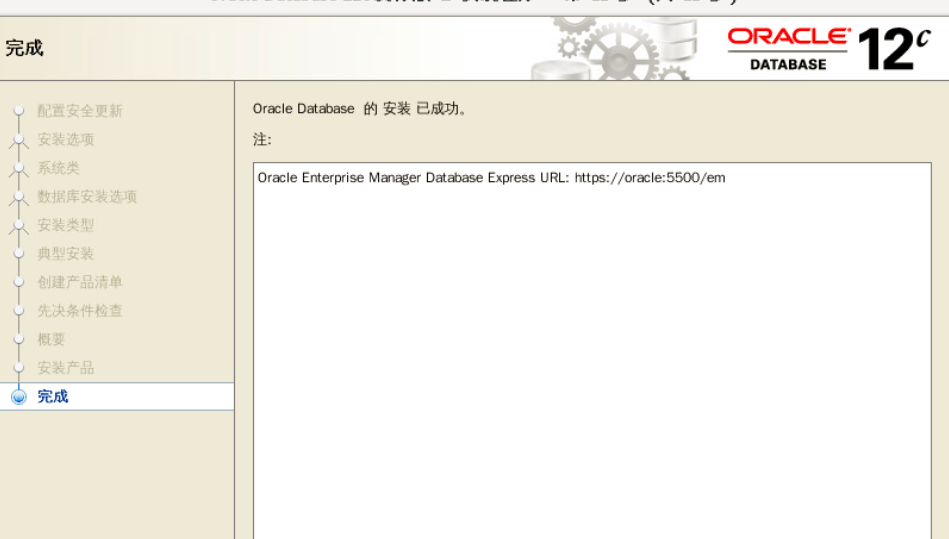
### 等待安装----20分钟左右-->出现其它界面点击确定或者下一步
#### 如需网页打开下载插件
```bash
[root@oracle ~]# cd /tmp/oracle/
[root@oracle oracle]# wget http://www0.crashrecovery.org/opera/RPMS/mdv2011/flash-player-ppapi-29.0.0.113-release.x86_64.rpm
[root@oracle oracle]# ls
database flash-player-ppapi-29.0.0.113-release.x86_64.rpm linuxx64_12201_database.zip
[root@oracle oracle]# rpm -ivh flash-player-ppapi-29.0.0.113-release.x86_64.rpm
```
#### 测试连接
```bash
#1.通过sqlplus 连接
[root@oracle oracle]# su oracle
[oracle@oracle oracle]$ sqlplus / as sysdba
SQL*Plus: Release 12.2.0.1.0 Production on 星期四 4月 16 18:50:08 2020
Copyright (c) 1982, 2016, Oracle. All rights reserved.
连接到:
Oracle Database 12c Enterprise Edition Release 12.2.0.1.0 - 64bit Production
SQL>
#2.通过sqlplus 连接
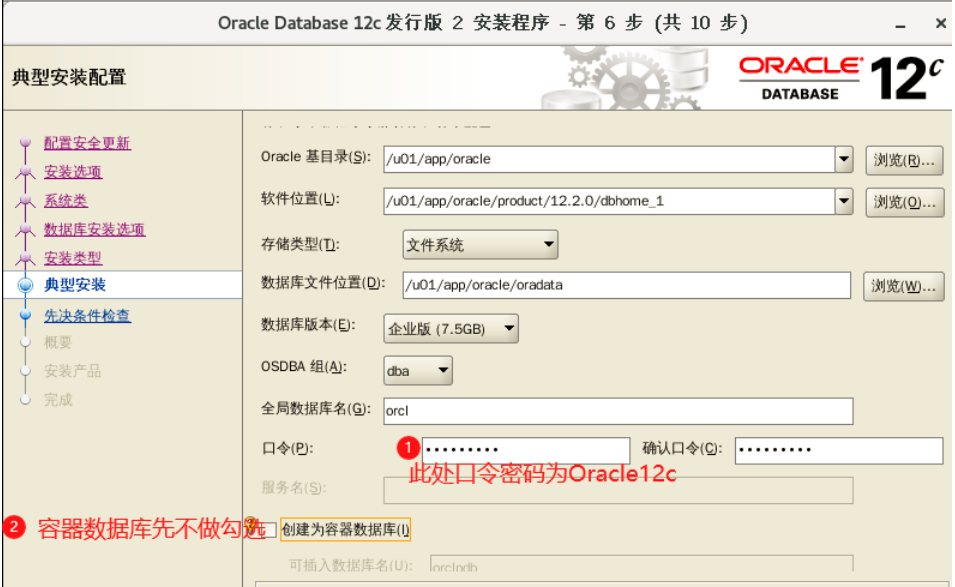
[oracle@oracle oracle]$ sqlplus system/Oracle12c
SQL*Plus: Release 12.2.0.1.0 Production on 星期四 4月 16 18:52:15 2020
Copyright (c) 1982, 2016, Oracle. All rights reserved.
上次成功登录时间: 星期四 4月 16 2020 18:44:40 +08:00
连接到:
Oracle Database 12c Enterprise Edition Release 12.2.0.1.0 - 64bit Production
SQL>
```