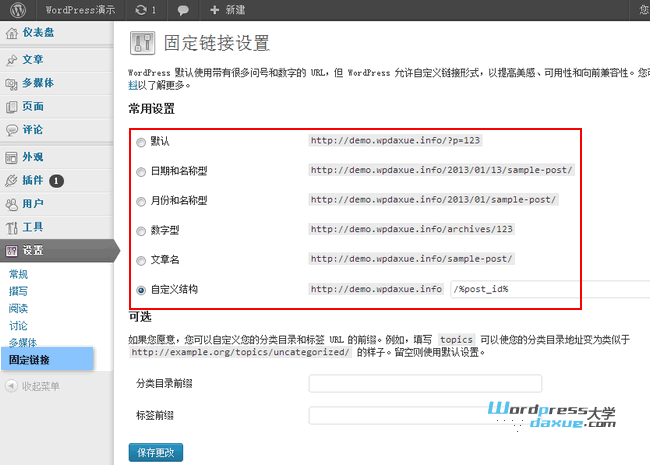
不少朋友总是询问 WordPress 如何添加伪静态规则,今天倡萌就总结一下 IIS/Apache/Nginx 三种环境下的伪静态规则,希望对大家有所帮助。
检测主机是否支持伪静态的方法:在WP后台 > 设置 > 固定链接,设置为 非默认带?的那种结构,然后访问任何一篇文章,如果出现 404 错误,说明你的主机当前不支持 WordPress 伪静态。

IIS伪静态规则
IIS 环境是 Windows 主机常用的服务器环境,新建一个 txt 文件,将下面的代码添加到文件中:
[ISAPI_Rewrite]
# Defend your computer from some worm attacks
#RewriteRule .*(?:global.asa|default\.ida|root\.exe|\.\.).* . [F,I,O]
# 3600 = 1 hour

CacheClockRate 3600
RepeatLimit 32

# Protect httpd.ini and httpd.parse.errors files
# from accessing through HTTP
# Rules to ensure that normal content gets through

RewriteRule /tag/(.*) /index\.php\?tag=$1
RewriteRule /software-files/(.*) /software-files/$1 [L]
RewriteRule /images/(.*) /images/$1 [L]
RewriteRule /sitemap.xml /sitemap.xml [L]
RewriteRule /favicon.ico /favicon.ico [L]
# For file-based wordpress content (i.e. theme), admin, etc.
RewriteRule /wp-(.*) /wp-$1 [L]
# For normal wordpress content, via index.php
RewriteRule ^/$ /index.php [L]
RewriteRule /(.*) /index.php/$1 [L]
然后另存为 httpd.ini 文件,上传到WordPress站点的根目录即可。
Apache伪静态规则
Apache是 Linux 主机下常见的环境,现在一般的 Linux 虚拟主机都采用这种环境。新建一个 htaccess.txt 文件,添加下面的代码:
<IfModule mod_rewrite.c>
RewriteEngine On
RewriteBase /
RewriteRule ^index\.php$ - [L]
RewriteCond %{REQUEST_FILENAME} !-f
RewriteCond %{REQUEST_FILENAME} !-d
RewriteRule . /index.php [L]
</IfModule>
然后上传到 WordPress 站点的根目录,重命名为 .htaccess 即可
Nginx伪静态规则
Nginx环境一般是Linux 主机 VPS或服务器用户用的比较多,这些用户一般都会自己配置Nginx,或者有专门的人帮你配置,打开 nginx.conf 或者某个站点的配置环境,比如 wpdaxue.com.conf(不同人配置的不一样),在 server { } 大括号里面添加下面的代码:
location / {
	try_files $uri $uri/ /index.php?$args;
}

# Add trailing slash to */wp-admin requests.
rewrite /wp-admin$ $scheme://$host$uri/ permanent;
保存,重启 Nginx 即可。