Spring AOP的主要功能相信大家都知道,日志记录、权限校验等等。
用法就是定义一个切入点(Pointcut),定义一个通知(Advice),然后设置通知在该切入点上执行的方式(前置、后置、环绕等)。
只不过一直没想过切入点还可以是注解。
下面直接进入节奏
1、打开STS,新建一个Spring Starter Project。如果不清楚STS是什么,可以参考我的 Spring Tools Suite (STS) 简介,几分钟的事。
Starter模块选择web、aop,其实我还选了一个Devtools模块,不过对这个示例来说没有区别。

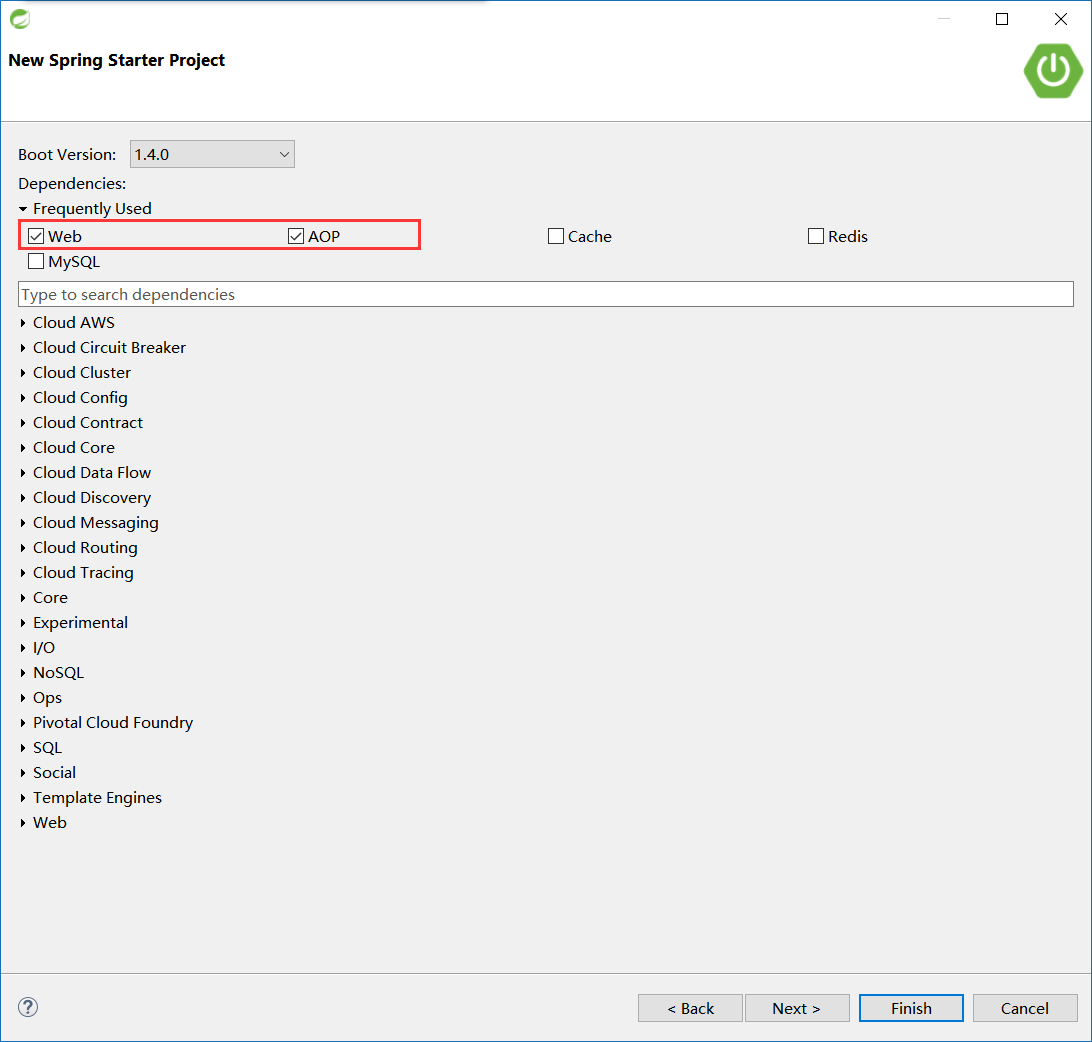
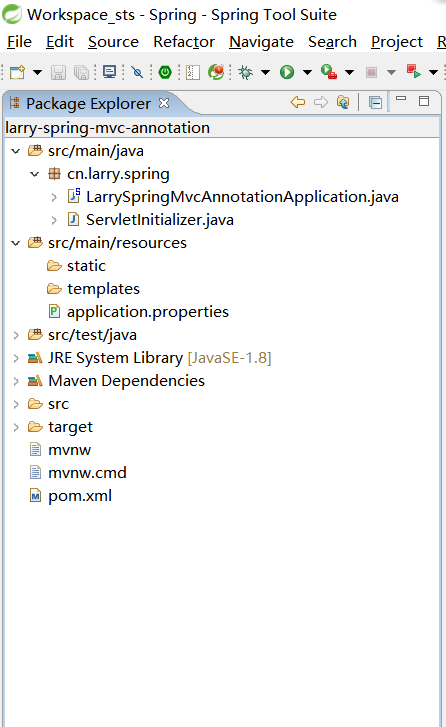
新建完成后,外观是这样的:
2、新建一个注解 cn.larry.spring.annotation.Log:
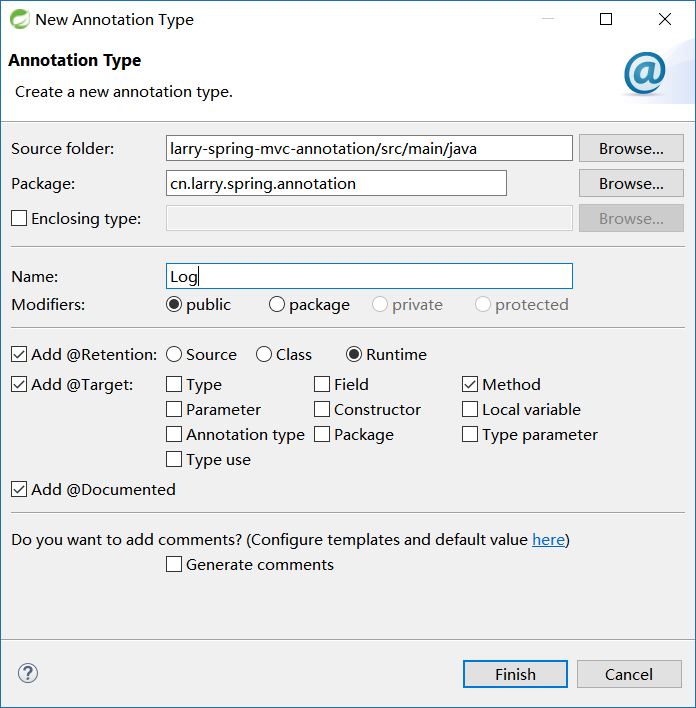
注意:STS有新建注解的选项(没注意过Eclipse有没有~~),可以直接选择保留策略和目标。当然也可以新建好空白注解之后添加。
新建的注解内容如下:
package cn.larry.spring.annotation;

import static java.lang.annotation.ElementType.METHOD;
import static java.lang.annotation.RetentionPolicy.RUNTIME;

import java.lang.annotation.Documented;
import java.lang.annotation.Retention;
import java.lang.annotation.Target;

@Documented
@Retention(RUNTIME)
@Target(METHOD)
public @interface Log {

}
由于只是案例示范,这里只添加一个注解参数 value 即可。如下:
package cn.larry.spring.annotation;

import static java.lang.annotation.ElementType.METHOD;
import static java.lang.annotation.RetentionPolicy.RUNTIME;

import java.lang.annotation.Documented;
import java.lang.annotation.Retention;
import java.lang.annotation.Target;

@Documented
@Retention(RUNTIME)
@Target(METHOD)
public @interface Log {
    String value() default "我是日志注解";
}
3、接下来就该AOP登场啦,新建一个类 cn.larry.spring.aspect.LogAspect。并添加@Component和@Aspect注解 -- 这是因为@Aspect只能作用在bean上。如下:
package cn.larry.spring.aspect;

import org.aspectj.lang.annotation.Aspect;
import org.springframework.stereotype.Component;

@Component
@Aspect
public class LogAspect {

}
然后定义一个Pointcut,如下:
@Pointcut("@annotation(cn.larry.spring.annotation.Log)")
private void cut() { }
再定义一个Advice,如下:
@Around("cut()")
public void advice(ProceedingJoinPoint joinPoint){
    System.out.println("环绕通知之开始");
    try {
        joinPoint.proceed();
    } catch (Throwable e) {
        e.printStackTrace();
    }
    System.out.println("环绕通知之结束");
}
至此,一个简单的Aspect就创建完毕。
注:本来我想直接使用 新建Aspect,不过提示本项目不是一个Aspect项目,遂放弃。想了一下,大概是因为Spring仅借用了注解的缘故。
下面就是该Aspect的使用了。
4、新建一个Service,并添加一个run方法(方法名随意),然后在该方法上使用注解@Log:
package cn.larry.spring.service;

import org.springframework.stereotype.Service;

import cn.larry.spring.annotation.Log;

@Service
public class DemoService {
    @Log
    public void run(){
        System.out.println("----我是cn.larry.spring.service.DemoService.run()----");
    }
}
5、有了方法,还需要调用,所以新建一个Controller,注入Service,并调用其方法:
package cn.larry.spring.web.controller;

import org.springframework.beans.factory.annotation.Autowired;
import org.springframework.web.bind.annotation.RequestMapping;
import org.springframework.web.bind.annotation.RestController;

import cn.larry.spring.service.DemoService;

@RestController
@RequestMapping("/aop")
public class AopController {
    @Autowired
    private DemoService demoService;
    @RequestMapping

    public String run(){
        demoService.run();
        return "Controller completed!";
    }
}
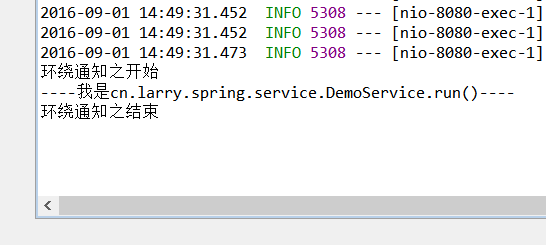
至此,一个简单的示例就完成了,以Spring Boot App启动,然后访问 http://localhost:8080/aop 即可。控制台内容如下:
当然,这是最简单的示例,实际需求通常比这个复杂,不过不外乎获取注解的参数,然后根据参数内容进行操作。甚至可以获取被注解的方法,再获取该方法的参数,然后根据参数再进行不同的操作。
如有意,欢迎探讨。
补充:
@AspectJ 是用被注解的Java类来声明切面的一种方式(另一种方式就是xml设置),但是Spring只是借用它的注解,本质还是Spring的东西。原文如下:
@AspectJ refers to a style of declaring aspects as regular Java classes annotated with annotations.
The @AspectJ style was introduced by the AspectJ project as part of the AspectJ 5 release.
Spring interprets the same annotations as AspectJ 5, using a library supplied by AspectJ for pointcut parsing and matching.
The AOP runtime is still pure Spring AOP though, and there is no dependency on the AspectJ compiler or weaver.