Centos7安装部署搭建gitlab平台、汉化
安装环境要求:内存不要小于4G,否则后期web界面可能会报错
一、准备工作
1.1 查看系统版本
首先查询系统版本,下载Gitlab的对应版本
[root@localhost gitlab]# cat /etc/redhat-release
CentOS Linux release 7.6.1810 (Core)
1.2 下载gitlab的rpm包
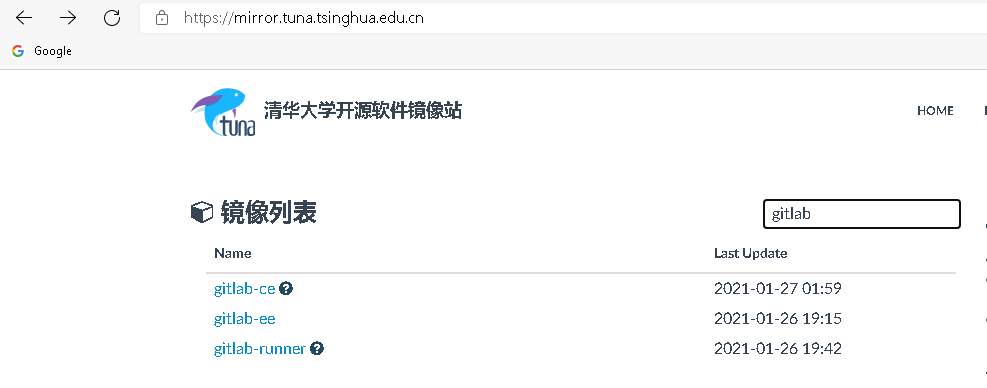
清华镜像源:https://mirror.tuna.tsinghua.edu.cn

gitlab-ce 社区版(免费) gitlab-ee是企业版(收费) 根据个人需求下载对应版本,我这里安装的是社区版gitlab-ce-12.3.0-ce.0.el7.x86_64.rpm
链接:https://pan.baidu.com/s/12o7QkSQzLMVoUTKvXEcDng
提取码:ujql
二、安装搭建gitlab平台
2.1 安装依赖包,关闭防火墙
# yum -y install curl policycoreutils openssh-server openssh-clients postfix
# systemctl enable postfix
# systemctl start postfix
# systemctl stop firewalld
# systemctl disable firewalld
2.2 上传rpm包、安装
上传rpm包到/opt目录
[root@localhost opt]# rpm -i gitlab-ce-12.3.0-ce.0.el7.x86_64.rpm
warning: gitlab-ce-12.3.0-ce.0.el7.x86_64.rpm: Header V4 RSA/SHA1 Signature, key ID f27eab47: NOKEY
error: Failed dependencies:
 policycoreutils-python is needed by gitlab-ce-12.3.0-ce.0.el7.x86_64
第一次安装出现上述报错,出现这个问题,应该是在安装gitlab时,gitlab的版本是centos7的,如果你确定你的centos版本是centos7
解决方法:yum install policycoreutils-python
如果这个方法无效,你的centos版本一定不是centos7
安装办成会出现如下图

2.3 简单配置gitlab
修改gitlab配置文件指定服务器ip和自定义端口,配置文件/etc/gitlab/gitlab.rb

2.4 加载配置文件并启动gitlab
# gitlab-ctl reconfigure   #需要一点时间,内心等待,我大约用了6min
# gitlab-ctl status
默认使用nginx做为web服务器,可以看到下图中的第二行是nginx的master进程
# netstat -antup| grep :80
三、登录web界面
3.1设置root用户密码
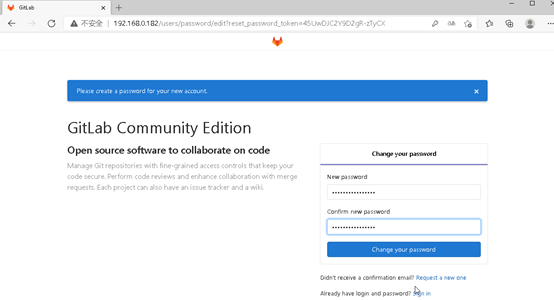
第一次登录 gitlab,需要为root 用户修改密码,root用户也是gitlab的超级管理员

修改密码之后, 登录 http://192.168.0.182【你的服务器的IP地址】,用户名root,密码是你上一步设置的密码

Gitlab搭建成功:
gitlab主配置文件:/etc/gitlab/gitlab.rb       # 可以自定义一些邮件服务等
日志目录:/var/log/gitlab/                    # 对应各服务
服务目录:/var/opt/gitlab/                    # 对应各服务的主目录
仓库目录:/var/opt/gitlab/git-data            # 记录项目仓库等提交信息
重启服务:gitlab-ctl  stop/start/restart      # 启动命令
四、汉化[非必须步骤]
centos7 部署汉化版gitlab
gitlab中文社区版的项目 :
v7-v8.8是由 Larry Li发起的“GitLab 中文社区版项目” (https://gitlab.com/larryli/gitlab)
从 v8.9 之后,@xhang 开始继续该汉化项目
(https://gitlab.com/xhang/gitlab)
4.1 下载对应版本的汉化包
本片博客安装的gitlab版本为gitlab-ce-12.3.0 这里下载对应的版本的汉化包
[root@localhost ~]# cd /opt
[root@localhost opt]#  git clone https://gitlab.com/xhang/gitlab.git -b v12.3.0-zh
如果你无法下载我这里提供我下载好的,你直接上传到你的服务器上即可
链接:https://pan.baidu.com/s/1GKdFbkqQ9CXD4ihvcyfi7A
提取码:0dti
4.1 执行汉化操作
上传汉化包到服务器的/opt目录
# 解压
[root@localhost opt]# tar xvf gitlab-12-3-0-stable-zh.tar.gz
[root@localhost opt]# cat gitlab-12-3-0-stable-zh/VERSION
12.3.0
解压之后的目录

其实汉化的方法就是把下载的汉化包替换现有的web页面, gitlab-rails下面存放的都是web 界面相关的文件
#为避免汉化失败后gitlab瘫痪,先备份
# cp -r /opt/gitlab/embedded/service/gitlab-rails{,.bak}
# cp -rf gitlab-12-3-0-stable-zh/* /opt/gitlab/embedded/service/gitlab-rails/
忽略以下2个提示
cp: cannot overwrite non-directory ‘/opt/gitlab/embedded/service/gitlab-rails/log’ with directory ‘gitlab-12-3-0-stable-zh /log’
cp: cannot overwrite non-directory ‘/opt/gitlab/embedded/service/gitlab-rails/tmp’ with directory ‘gitlab-12-3-0-stable-zh /tmp’
重新加载一下配置文件,然后重启
# gitlab-ctl reconfigure

# gitlab-ctl restart
重启之后,立马浏览器访问可能会看到502页面,不要着急倒杯茶等它一会……
汉化成功后的界面

