第一步,新建一个路由
urlpatterns = [
    path('getcode/', views.getcode, name="getcode"),
]
第二步,在views里建立视图函数
from io import BytesIO
import random
from PIL import Image, ImageFont
from PIL.ImageDraw import Draw, ImageDraw
from django.conf import settings
def get_color():
    return random.randrange(256)


def generate_code():
    source = 'qazwscedvcrfbtgyhnujmik,olp0987654321QAZWSXEDCRFVTGBYHNUJMIK,OLP'
    code = ""
    for i in range(4):
        code += random.choice(source)
    return code


def getcode(request):
    # 初始化画布,初始化画笔
    mode = "RGB"
    size = (200, 100)
    red = get_color()
    green = get_color()
    blue = get_color()
    color_bg = (red, green, blue)
    image = Image.new(mode=mode, size=size, color=color_bg)
    imagedraw = ImageDraw(image, mode=mode)
    imagefont = ImageFont.truetype(settings.FONT_PATH, 80)

    verify_code = generate_code()
    request.session['verify_code'] = verify_code

    for i in range(4):  # text的绘制
        fill = (get_color(), get_color(), get_color())
        imagedraw.text(xy=(50 * i, 0), text=verify_code[i], font=imagefont, fill=fill)

    for i in range(1000):  # 干扰点的绘制
        fill = (get_color(), get_color(), get_color())
        imagedraw.point(xy=(random.randrange(200), random.randrange(100)), fill=fill)
        # imagedraw.text(xy=(0, 0), text='Rock', font=imagefont)

    for i in range(10):  # 验证码中的干扰线
        fill = (get_color(), get_color(), get_color())
        imagedraw.line(xy=(random.randrange(200), random.randrange(100), random.randrange(200), random.randrange(100)),
                       fill=fill, width=random.randrange(5))
        # imagedraw.text(xy=(0, 0), text='Rock', font=imagefont)

    fp = BytesIO()

    image.save(fp, 'png')

    return HttpResponse(fp.getvalue(), content_type='image/png')  # 将图片返回到网页中
第三步,需要去seeting里去配置FONT_PATH,
FONT_PATH = "C:/Windows/Fonts/arialbd.ttf"
里面的地址任意写,可以在项目的static下建立一个font在这里引入
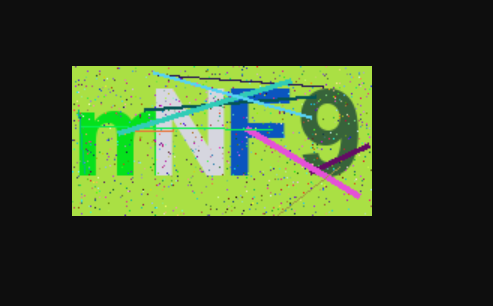
效果是


